scooters Posted October 30, 2011 Share Posted October 30, 2011 Brilliant stuff...you can't beat a trip round the highlands for chod spotting and for giving yours a run. What a great plucky wee car. Sorry to hear of your travails its always tough losing your folks. My old boy and I fought like tigers but I miss him like gell and its been 11 years. I think we should organise an autoshite tour of Scotland sometime. Could be fun. Link to comment Share on other sites More sharing options...
shaun1706 Posted October 30, 2011 Share Posted October 30, 2011 Good thread this My trusty F reg MK3 is still going strong and is a worthy backup for the Datsun Link to comment Share on other sites More sharing options...
mattblack Posted October 30, 2011 Share Posted October 30, 2011 Epic shite-age there! I've had a couple of MK2s, first one was a 1984 'A' reg 1600 L hatch in china blue, bought for £850 in 1991, it was my first 'modern' car. got fed up with people asking 'is it a deisel?' so fitted new piston rings, valve stem seals ect. Seem to remember fitting new rear shoes/drums/wheel cylinders as well. Sold it after about a year to a mate for what I paid, after he'd had it a while a rocker arm broke and it dropped a valve, I fitted a new cam kit for him. don't know what happened to it after he sold it, I presume it's lond since been scrapped. I've still got one of the old Sercks No. plates hanging up in the garage as I changed them for plastic ones... Second one was this... Another 1600 hatch, a 1985 'C' reg. May have been a GL, I can't remember. Bought for £150 IIRC, in around 2000 when I needed something to run while I did my Carlton pick-up project. The body was more patches 'n' pudding than metal. Replaced the knackered water pump and it proved reliable transport. I hadn't intended to get another MOT on it but the Carlton project took longer than expected so I ended up welding up the rear spring mounts and replacing a rear wheel bearing. I sold it to another mate's next door neighbor for £150 (I think) and it was later "stolen" and found burnt out... M'coli 1 Link to comment Share on other sites More sharing options...
dollywobbler Posted October 30, 2011 Share Posted October 30, 2011 Great stuff. I'm glad I'm not the only one who takes lots of photos of my own car on holidays and high days. I've got far more pictures of my cars than I have of my own wife... (mind you, the cars don't seem to mind having their photos taken!) Link to comment Share on other sites More sharing options...
M'coli Posted October 30, 2011 Author Share Posted October 30, 2011 I can't believe how many times I wrote "stunning" about the trip to Strontian - but it was an amazing afternoon/evening, one of those rare ones in the west of Scotland where the sun is shining and there is magic in the air (rather than water!). Link to comment Share on other sites More sharing options...
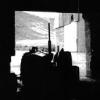
Guest Len H Posted October 30, 2011 Share Posted October 30, 2011 Great writings and photos, your fan switch maladies have reminded me to sort out the fan relays on the 405... Ardnamurchan and Morvern are lovely, and mercifully quiet even in holiday season. The weather's been fairly un-west Highlands like the few times I've been. IMGP5364 by zenithfivenine, on Flickr Link to comment Share on other sites More sharing options...
dollywobbler Posted October 30, 2011 Share Posted October 30, 2011 Stunning is such an apt word though! Here's my 2CV on Skye. A (ahem) stunning part of the world for sure. Link to comment Share on other sites More sharing options...
DSdriver Posted October 30, 2011 Share Posted October 30, 2011 I recon that God had in mind when he designed Western Scotland that he would put his money in Kodak shares, but he didn't forsee the advent of digital and is now in the same pension shit as the rest of us.Nice horizon DW Link to comment Share on other sites More sharing options...
HillmanImp Posted October 30, 2011 Share Posted October 30, 2011 I have the radiator for this that Cavette gave me BTW. Can keep it as long as required as its not in the way or owt, just reminding you if you need it. Link to comment Share on other sites More sharing options...
dollywobbler Posted October 30, 2011 Share Posted October 30, 2011 Yeah, I thought 'balls to the horizon' as otherwise the car was pointing nose down and looked wrong. Car first, scenery can come second. Sorry Scotland! Link to comment Share on other sites More sharing options...
M'coli Posted July 10, 2012 Author Share Posted July 10, 2012 Remember this that I "sorted" in 2007?I went out to throw some paint at it just before lunch on Sunday to "take the bad look off of it" as they say... 45 minutes later it looks like this:Just a bit of grot! by dtvacuums, on FlickrYou can see the bit on the door that looks well shonky, but check out the lack of metal on the wheelarch too! I realised that the whole bottom of the arch would have to come off:More revealed by dtvacuums, on FlickrJust as I went for lunch I left it like this.Back to good metal by dtvacuums, on FlickrA different view by dtvacuums, on FlickrAfter some Vactan action, the first zintec plate was offered up:Plating up by dtvacuums, on FlickrLuckily, 10 years or so ago I bought sills asnd arches for my first Cavalier; the left sill was used on here 5 years ago, and the right arch last year (more of which anon) so the left arch came into play - here it is being offered up so I can create other bespoke repair sections.Sizing up by dtvacuums, on FlickrMeasuring up by dtvacuums, on FlickrThe sill end plate tacked inTacked in by dtvacuums, on Flickrwith the outer arch tacked on tooOuter on! by dtvacuums, on FlickrMore welding by dtvacuums, on FlickrNote the repairs to the centre section, the sill stiffener. Oddly enough, this connects to the outer sill halfway across it, apart from at the jacking point where it extends down to the sill section.Tacking! by dtvacuums, on FlickrHurtling on without taking too many photos, this is what I finished with today as the rainstarted:Painted up! by dtvacuums, on FlickrArch! by dtvacuums, on FlickrYes, that paint is brushed on, and is blue Smootherite - a blind man running for a bus wouldn't notice the colour miss-match... michael t, Lacquer Peel, scruff and 1 other 4 Link to comment Share on other sites More sharing options...
Split_Pin Posted July 11, 2012 Share Posted July 11, 2012 I love looking at this sort of thing. Looks mega complex in the first pics bit then you've pulled it all together by the latter ones. Nice! Link to comment Share on other sites More sharing options...
RobT Posted July 11, 2012 Share Posted July 11, 2012 Yes, that paint is brushed on, and is blue Smootherite - a blind man running for a bus wouldn't notice the colour miss-match... I've done the same in the past using their BRG-ish one, does the job eh. If only they did one in Rover Oyster Beige Link to comment Share on other sites More sharing options...
M'coli Posted September 28, 2012 Author Share Posted September 28, 2012 There was a little bit of rot left in the left sill after the last lot of repairs - it's visible in the last photo above just underneath the door rubber - so with this morning being dry I decided to takle it prior to the MOT on Monday. I began by running over the rot with the wirebrush in the angle grinder, then cut it out with the thin cutting disc. I had a peer into the sill, clocking the waxoyl that I'd pumped into it previously. After cutting a patch to size, I cleaned it off with the rotary wire brush, sprayed it with weld-thru primer, let it dry and began to butt-weld it in. I had the welder set ot the lowest power setting, and there was a little bit of burning through, but nothing I couldn't deal with. Then I saw some flames inside the sill, which I blew out. Then there were some more flames, and I belw those out too. Then there were some more flames, and I tried to blow those out, but that didn't work. I grabbed the grinder, swapped the wire brush for a cutting disc, and began to slice open the sill - time was of the essence, so I didn't change the welding helmet for the grinding mask. The mask went dark as soon as the sparks appeared! Off with the mask, and risk it wearing the prescription saftey specs. Hole cut open I peeled the sill back and tried blowing the flames out - didn't work. Next was to try extinguishing them with the CO2 from the welder - didn't work. Water - try some water! Nope, not that either. The rear arch was getting hot by this point, and smoke was issuing from the vent above the arch.Panic.Into the house, grab the keys for the motorhome, intot the van, grab the fire extinguisher, back outside - by now the smoke's coming out fromn the loose trim in the boot - and point the fire extinguisher into the hole in the sill and squeeze...CHUUUFFFFTTT, and the fire is out. This is the scene immediately after: Nicely blistered paint on the wheelarch! The hero of the day: How it looks now - the welding was done very carefully. So, it's only an old car some might say, just let it burn and collect the insurance and you can buy something new - fair enough, but it was parked on the drive less than 2 foot from the motorhome, and if that were to go on fire it would cost way more. This afternoon, I'm hope to buy a new fire extinguisher for the motorhome... Link to comment Share on other sites More sharing options...
barefoot Posted September 28, 2012 Share Posted September 28, 2012 I would love another mk2 Cavalier. M'coli 1 Link to comment Share on other sites More sharing options...
Ian Nexus Posted September 28, 2012 Share Posted September 28, 2012 I used brush on Hammerite Smoothrite on my old W202 Mercedes estate, the silver matched the original silver really well, being a 1996 there was a fair bit of surface rust appearing! Link to comment Share on other sites More sharing options...
vulgalour Posted September 28, 2012 Share Posted September 28, 2012 You lucky, lucky bar steward! Great to see this old Cav being looked after, it's been years since I last saw one and that was a ropey old blue estate owned by a hippy. He also had a ropey old CF high-top camper that he accidentally set on fire. Link to comment Share on other sites More sharing options...
Bren Posted September 28, 2012 Share Posted September 28, 2012 My brother had a 1300 the same colour - bought off my best mate's dad. Cracking car, more powerful than a 1600 sierra, my brother got rid because I was selling my B reg SRi, and because the fusebox was melting. I bought my SRi in 1992 off my cousin, paid a tad under £2k for it with 76k on the clock. My brother bought it off me in 1995, sold it on in 1996 with 140k on the clock. It was still on it's original sills and camshaft. IIRC cavalier sills were a piece of piss and every MOT station could probably do them in their sleep such was their propensity to rust. Link to comment Share on other sites More sharing options...
M'coli Posted September 28, 2012 Author Share Posted September 28, 2012 ...and because the fusebox was melting.Heater fan fuse, perchance? The fuse won't blow, but if you stick it on max it does melt the fuse and the fusebox... Link to comment Share on other sites More sharing options...
stuboy Posted September 30, 2012 Share Posted September 30, 2012 bloody close with that fire Link to comment Share on other sites More sharing options...
M'coli Posted November 10, 2013 Author Share Posted November 10, 2013 Well, after this: Took the Cavalier for MOT today, joking that the test would take 1 hour but the write-out of the fail sheet would take longer - considering it was pushed into front-line duty during the worst of the winter weather tramping up and down the country to deal with family matters that arose in January and continued on for some time as well as communting 38 miles a day, icluding besting an Audi TT in 4-5 inch deep snow at half-6 in the morning, I expected it to be a steel doily underneath. I know it has a rotten sill - indeed the gaffer tape has kept the rain and salt out of it since January, but I was expecting lots wrong including front brake imbalance (it scraped through last year but has had new pads & discs )with it despite it feeling great to drive after the 205 (other than it's far slower in a straight line), but otherwise... O Hai Hillman Imp weldr part bak pleez K thx bai...!Then the kind words of others, I went onto this: Oh no? Thursday, I ripped into the sill stiffener and inner sill on the Cavalier with the plasma disc to expose the rear chassis rail completely: the verdict is, the chassis rail need a good clean-up, but is otherwise fine so I can weld in some Zintec and pop an outer on it and then get to work on the mechanical stuff. Considering that there was 3mm thick of rust between the rail and the inner sill at the bottom when I started it, I was not looking forward to finding out just how high that stuff went. That made me grin, I tell thee.After a bit of cleaing off and some Vactan action then so much rain and other stuff taking up my time (unsuccessful job interviews and the like) I went out to weld in some Zintec into the Cav, but first I did a bit more exploring, this is the seatbelt mount itself: Then I took the Saab pliers to the crack in the chassis leg: Ah, fuck. Not good. Especially as it crawls further up the leg than is visible here... Link to comment Share on other sites More sharing options...
cms206 Posted November 10, 2013 Share Posted November 10, 2013 My ex-Pete M Senator was a similar worm filled can. Still not finished. Need to learn welding. Link to comment Share on other sites More sharing options...
Angrydicky Posted November 10, 2013 Share Posted November 10, 2013 Great thread! I love these old Cavaliers, they used to be everywhere but all seemed to disappear overnight around 2002-3. Anyway, I repaired the same area on my A55 Cambridge (forward mounting of the rear leaf spring by the look of it?) and it wasn't that difficult. Although I had the car on its side which made it a lot easier, I was able to do it without removing the spring. I repaired the area to the front and about halfway along the spring mount first, then the other half. Looking at the picture I think you should be able to get reasonable access for the grinder and torch if you take the wheel off. Hopefully. Link to comment Share on other sites More sharing options...
RobT Posted November 10, 2013 Share Posted November 10, 2013 I spotted an SRi one of these local to me yesterday, will get a photo next time as it was dark. Green over grey with lots of dents. Link to comment Share on other sites More sharing options...
mouseflakes Posted November 10, 2013 Share Posted November 10, 2013 Oh cobblers. I think the same approach you've taken on the earlier work should see you through - nice, solid work. A bit less fire perhaps? Otherwise, just the same. Link to comment Share on other sites More sharing options...
M'coli Posted April 30, 2015 Author Share Posted April 30, 2015 Needed to get this moved today in its barn hidey-hole. The background engine is the Pug 205 still doing its thing of starting up on demand every couple of months thus providing the electricity to fire up the cavalier, and the jingling is a loose exhaust clamp. CortinaDave, Bucketeer and RobT 3 Link to comment Share on other sites More sharing options...
M'coli Posted May 11, 2015 Author Share Posted May 11, 2015 Ouch! I don't fancy the look of that floorpan either, the way the rust is crawling underneath the sill. Might it be time for its final journey? Link to comment Share on other sites More sharing options...
John F Posted May 11, 2015 Share Posted May 11, 2015 To Billy's gaff, you mean? If so, it won't be its final journey. He's sold A LOT worse than that. Link to comment Share on other sites More sharing options...
KruJoe Posted May 11, 2015 Share Posted May 11, 2015 Oof! You've gotta be mega-gentle with those slim slitting discs, and not go in too far.The offer of a BFO grinder is still available from our Malhamdale depot. Please don't let this be the end for the mighty Cav 1.3. Bucketeer 1 Link to comment Share on other sites More sharing options...
M'coli Posted May 11, 2015 Author Share Posted May 11, 2015 I was being gentle, I know what they do! The best thing about them is if they take a bite this happens, rather than the grinder jumping out of your hands in a confined space and taking a chunk out of your face! Much as I would like to see if it will fix, I think it'll be too much work. alf892 1 Link to comment Share on other sites More sharing options...

Recommended Posts
Create an account or sign in to comment
You need to be a member in order to leave a comment
Create an account
Sign up for a new account in our community. It's easy!
Register a new accountSign in
Already have an account? Sign in here.
Sign In Now