Jump to content

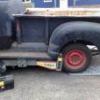
My 1978 Fiat 900T van. And the rest of my fleet...(3 years later!!! ...Updated 11/12/23)


Recommended Posts

Posted

Loving the facial hair, Vin!


Ditto.

Posted

The video of the driving experience kind of reminded me of that daft little Subaru van I had - slow but so comically low geared that it actually felt quite nippy off the line, and noisy despite the engine being at the far end.  Fiat is more stylish though.

  • Like 2
Posted

Only just seen this thread. Smashing bit of work that and well done on saving the old bird. 


There has been some discussion elsewhere about how dangerous old cars are but these vans serve to remind you just how small, light and efficient it is possible to make something if you don't fret at all about killing the occupants in a crash. All that space in something so tiny.

  • Like 2
  • 2 months later...
Posted

It was a nice day that, meeting up with Dollywobbler, doing the photoshoot for CV&PU. Great article too...


I thought I'd put a small update as I haven't added anything for ages...


Fiorino underside is all finished and painted in POR15. Also had to fabricate a couple of new brake hose mounts for the wheel arches. Exhaust all now fitted.


So, I put it back on its wheels and got round to actually try and start it. It's a replacement engine, although the original engine came with the van and as far as I remember being told, it hadn't been started...Whilst I was fitting the downpipe to the manifold I noticed a bit of brown staining on the front of the block, which made me wonder...


Anyway, my mate and I got it turning, got oil pressure and we got a good spark. There was no fuel connected, so put a bit of easy start down the carb and nowt happened. We tried a bit of petrol and turned it over. Nothing. It was hunting and seemed like something wanted to happen, but nothing...


So we took the rocker cover off...


Yeah that'll be it then... :? :?


post-47-0-02042800-1551908876_thumb.jpg

post-47-0-53797200-1551908732_thumb.jpg

Posted

Agreed that's a bit of a blow, what state is the original engine in?


Like for the 900T article though. Hopefully get to see it at a Auto Italia event if your attending with it this year.

Posted

Unlike for rusty mess under cam cover. You will overcome.........

Posted

Yeah, win some, you lose some...I've already made a start of hoiking it all out...


The original engine is in my lock-up, I'll retrieve it at the weekend...as to it's state, no idea. We shall see...


Hopefully, it's OK and a strip down and general refurb is the order of the day. Hopefully...


If not, then I'll have to see if there are enough good bits for two to become one, as per the 900T engine...

  • Like 2
Posted

is that water?! is it from a HGF or something?


sorry to see things broke, tis a nice van :)

Posted

Yeah, it's oil and water. I'll get the head off at the weekend...have a proper look...


Seems they fitted a replacement engine and did actually have it running. But not for very long by the look of it....

Posted

So, I retrieved the other engine from the lock up this morning. I also collected my engine stand at the same time, so I can strip it down.


I set it up on the stand and whipped the rocker cover off. It all looks OK. It all moves too, so it's not seized or anything...


It was strapped to this trolley, so it was fairly easy to lift it between two of us, into the back of the Marea.


post-47-0-45045500-1552244592_thumb.jpg


Got it on the stand.


post-47-0-01030100-1552244649_thumb.jpg


A lot prettier than the other camshaft...


post-47-0-67801600-1552244812_thumb.jpg


I then took the head off the engine in the van. I removed qite a few bits during the evenings last week and took the inlet and exhaust manifolds off yesterday. I also removed the radiator to give me more room.


Water in number 2 cylinder, although no obvious problem with the headgasket.


post-47-0-27428400-1552245004_thumb.jpg

post-47-0-09803800-1552245853_thumb.jpg

post-47-0-54979600-1552245887_thumb.jpg


  • Like 7
  • 1 month later...
Posted

Bit of an update...


Original engine is now stripped down into it's components...


The block and the gearbox have now been removed from the van...


Original engine...


post-47-0-11598500-1555181263_thumb.jpg

post-47-0-27988700-1555181229_thumb.jpg

post-47-0-03672300-1555181302_thumb.jpg


All bit's stripped off and cleaned. Block soaked in paraffin to remove congealed oil and gunge. I then jetwashed it and it is now sat in a dustbin of DEOX-C rust remover...


post-47-0-59980400-1555181659_thumb.jpg

post-47-0-88862900-1555181695_thumb.jpg

post-47-0-50435700-1555181732_thumb.jpg

post-47-0-54140200-1555181761_thumb.jpg


I've checked the cylinders with my dial bore gauge and the crankshaft and pistons with the calipers. Everything appears to be standard and also still within the specified tolerances. The plan is to hone the bores, fit new piston rings, crankshaft main bearings and con rod bearings...


Removing the box and block...


post-47-0-51676800-1555182079_thumb.jpg

post-47-0-60967800-1555182108_thumb.jpg

post-47-0-86046700-1555182140_thumb.jpg

post-47-0-00846900-1555182173_thumb.jpg


I put the 'failed' engine on the stand and started to strip that down as well...


post-47-0-67492600-1555182281_thumb.jpg

post-47-0-44097700-1555182317_thumb.jpg

post-47-0-33774800-1555182341_thumb.jpg

post-47-0-99295400-1555182378_thumb.jpg

post-47-0-80791700-1555182411_thumb.jpg


The dizzy was a right PITA to remove, stuck solid, I had to drift it out with a section of 15mm copper pipe...


Somebody couldn't fit the water pump gasket properly...


post-47-0-26448900-1555182441_thumb.jpg


post-47-0-66077700-1555182660_thumb.jpg


  • 3 weeks later...
Posted

Bit of an update. Original block has been degreased, soaked in Deox-C and then jetwashed. As I am fitting new piston rings I have honed the bores using a honing tool and a drill.

I then masked off the block and painted it grey. Grey is the correct colour as the cleaning and jetwashing revealed patches of the original grey. I used a VHT enamel from a rattle can.

I then put a cleaned up crankshaft back in. This had been cleaned up by submerging it in paraffin for a week and cleaning with a toothbrush. I fitted new big end bearings and thrust washers. I checked the end float using my dial gauge and all is OK...

IMG_0681.thumb.JPG.ae1fd6603d9c9144101212158acad332.JPG

IMG_0682.thumb.JPG.38f3086c398bcdcb214eb373169bd7a4.JPGIMG_0683.thumb.JPG.22a7ace752361b4bbcad3421ec59eeb1.JPGIMG_0684.thumb.JPG.cc1cc484f7caac13ad04ad6fa97eae3e.JPGIMG_0685.thumb.JPG.d389f785c6ceaab845921932f5857054.JPGIMG_0686.thumb.JPG.535e490e5a18d273d01e937aa125d72c.JPGIMG_0687.thumb.JPG.880b70fb76af433f64fcacdc6905ea38.JPGIMG_0688.thumb.JPG.7373071eacd509a81ea65bbb452a1c1a.JPGIMG_0689.thumb.JPG.bedf11b2f1ddcba731ffe1e840e8e61d.JPG

  • 4 weeks later...
Posted

I'm very impressed with this thread, it's a cracking looking van. Did you salvage a lot from the gravy engine?

  • 4 weeks later...
Posted

Bit of an update....

All quiet on the Fiorino front...I've put it on the back-burner for know on the basis it is in the garage, thus is not dependant on good weather conditions...

I have projects outside that will take precedence when the weather is better, namely the Fergie and now the Panda 750L...

The 750L was out of MOT last November. I thought I would leave it til the Spring/summer as I knew it would need a tickle with the MIG on the end of the sill. I did get hold of a pair of genuine sills from a lad in Halifax last summer and they have been in storage. I decided to bite the bullet and rather than patch the end sill, just cut the whole lot off and repair what was inevitably going to be there.

As expected, the inner sill and edge of the floor was crusty and needs repair sections letting in before I replace any outer panels. I have also been able to get an inner wheelarch panel, which means I don't have to do a load of awkward metal shaping and bashing. Obtaining this, prompted me to get a rear wing too, as there is a load of rot in the wheelarch...I will probably end up taking the rear window out and cutting accross and drilling out the spotwelds. Less visible weld area to clear up too...

242435193_IMG1.thumb.JPG.a609f988b5f2f8e32f4571a9f53e612e.JPG

1024392505_IMG2.thumb.JPG.8ebf4a645a5d4448a5008399ebad356c.JPG

2114953384_IMG3.thumb.JPG.ef380037a071224c7a444ed511525754.JPG

1853200468_IMG4.thumb.JPG.8c4140be4589d70922ce0750952d66aa.JPG

1190179095_IMG5.thumb.JPG.a64ea0d161edbf691aa0aed57059912b.JPG

321271926_IMG6.thumb.JPG.14c2e617bed1fe4faef20f2af7b3c5ee.JPG

547981743_IMG7.thumb.JPG.09997db7f0156802ba0cda31d54cf0fb.JPG

286146644_IMG8.thumb.JPG.75d8ce985289ecb6ba6539f18824624d.JPG

16763275_IMG10.thumb.JPG.144d6d97e706fe48c17b01fae071b189.JPG

2061550867_IMG9.thumb.JPG.6de9f4ed57278caf293ef93257aef625.JPG


Here it is when it appeared at Shitefest in 2012, when I kipped in it...

658123971_Pandatent.thumb.jpg.56081dea0cb95b0834ec509388c74a05.jpg

Also, in other Panda news I got the 45CL out of the lock-up where it has been for the past two years and got it MOT'd. I let the MOT lapse in 2017 as I had loads of other stuff on, but I started it regularly. It's now road legal again and I really do enjoy driving it. It's great.

Here are some pics, including the ICE..

152904019_IMG2.thumb.JPG.b56134fad5d6ba18bd14f488874b91ca.JPG

2103504449_IMG3.thumb.JPG.2eec8483f8728ce4824b1f5b41b8475a.JPG

1479344517_IMG1.thumb.JPG.3cc985c5cabc63bc69c001b21cc8fc51.JPG

1422499654_IMG4.thumb.JPG.6a3856a950a73bef8ec6f98d4256ee35.JPG

399237082_IMG5.thumb.JPG.dfa54266dbef8b16101f62d2bc19342b.JPG

1360905808_IMG6.thumb.JPG.c23612f9945b28c6c2d8dac6fed67f31.JPG

I've also got the cylinder head back for the Fergie, so I've been lapping the new valves in and have assembled them into the head...

That's all for now...

Posted

Great work. Like reading the Panda section on FF in days of yore. Tumbleweed over there now. 

Posted
On 6/27/2019 at 8:20 PM, Skut said:

Great work. Like reading the Panda section on FF in days of yore. Tumbleweed over there now. 

Yep it is, it's all on the Panda Classic Facebook page now....

Posted
On 6/27/2019 at 9:52 PM, sheffcortinacentre said:

Richard would be proud of you?

Cheers Craig...He certainly loved his Pandas and 126...I'm sure he's cheering me on in spirit...

On 6/27/2019 at 10:34 PM, Ben_O said:

Really intrigued to see inside the Panda/Tent combo

I haven't got any pics of the inside. I will be using it in middle of July, so I'll take some then...

Posted

Hottest day of the year, so I spend it outside welding. I am utterly fucked....??

Rear inner wheelarch arrived during the week too...

Floorpan and inner sill now repaired.


IMG_0754.thumb.JPG.f127628899ee2466189a73380faac538.JPG

IMG_0755.thumb.JPG.a5b00eade8a639f9cfd70c497e98e100.JPG

IMG_0756.thumb.JPG.3b809b139b7cd829950184e61f095901.JPG

IMG_0757.thumb.JPG.6a970cfd875968ec9ee6ddfa42d817e9.JPG

IMG_0759.thumb.JPG.1a5f72ece285c33b2a32eec54f9034de.JPG

IMG_0760.thumb.JPG.c1282046feeafb832d8970cec5af143d.JPG

IMG_0761.thumb.JPG.8829abb2bb93039f86361754c397dcaa.JPG

IMG_0762.thumb.JPG.2b14fe22db3329b91ab213959e85c8d0.JPG


IMG_0758.JPG

Posted

Love how it's coming on, hat truly doffed.

  • 2 months later...
Posted

I thought I'd update this thread with recent shenanigans, but realised I hadn't updated it for ages...

Panda bodywork...

| had lots of little repairs to do to all the common Panda grot spots, before I could even comtemplate replacing the outer panels...IMG_0791.thumb.JPG.66619fc9f22b6a042b5f906b45ec75c8.JPG

IMG_0792.thumb.JPG.95a3ae1b83953c27ae0469b42eac1097.JPG

IMG_0793.thumb.JPG.f348911c2ed285741e2e0b55c0b4a5e8.JPG

IMG_0794.thumb.JPG.ba9590d437e6dd524ae4f2d6d39c0d76.JPG

IMG_0795.thumb.JPG.cf6581a6515c1515d00ab0eb4e29b89b.JPG

IMG_0796.thumb.JPG.ff56866a747b80c18c56db559520e0f5.JPG

IMG_0797.thumb.JPG.4a021a511e338a3ed9c7b3fea354bf2b.JPG

IMG_0798.thumb.JPG.119585c9506c96fb634ef5ee6999222e.JPG

IMG_0800.thumb.JPG.e20a37277eda8062a4ef5b5d3f92d276.JPG

IMG_0886.thumb.JPG.6a7b2769c29b83cbf8e06e15e424c7a7.JPG

IMG_0887.thumb.JPG.4363444c42742948fb7414c6b26751ac.JPG

IMG_0894.thumb.JPG.515060648e2f4b12b7ccbb57845259ee.JPG

IMG_0895.thumb.JPG.f8ceed4b26e8fc7f2c008bc6021cf088.JPG

IMG_0898.thumb.JPG.23d3e172e9ec73419dde6274cccbeb26.JPG

IMG_0899.thumb.JPG.2e5a3206e5651da4e6f4bd4fc29212c0.JPG

IMG_0901.thumb.JPG.c88cf60f0a6bc2726dbfc30853fcab6b.JPG

IMG_0902.thumb.JPG.917f5111b8777acb861f7877bca95efd.JPG

IMG_0903.thumb.JPG.3291f7daf99858866213ac5b730869f2.JPG

IMG_0904.thumb.JPG.18860fbf642277eaecf371bb737a3d52.JPG

IMG_0900.JPG


IMG_0905.JPG

I've tried deleting the last picture (below) as it's out of sequence and doesn't add much, but it's not havin it...

IMG_0799.JPG

Posted

There is also a little update on the Fiorino engine...

I don't have any pictures, but the cleaned up pistons are now back in the block. They were fitted with new piston rings and new end bearings.

I also fitted the new crankshaft seals. I cleaned and refiited the oil pump and oil pick-up pipe.

Cleaned and painted the sump with POR-15 and assembled with a new gasket...IMG_0838.thumb.JPG.896bc824fe6308398428d7312dfcdb46.JPG

IMG_0839.thumb.JPG.7ff7b97694545f22fbd074579cd752ba.JPG

IMG_0840.thumb.JPG.c2db7d677481478db6133c88c052c38e.JPG

IMG_0888.thumb.JPG.d36ba9ca48d5307af7d5c6d81fe6929e.JPG

IMG_0889.thumb.JPG.86a8264a8fe87e52a401500e59ee59d7.JPG

IMG_0890.thumb.JPG.0635a9e89bc355e8419e37cb99ddd081.JPG

Create an account or sign in to comment

You need to be a member in order to leave a comment

Create an account

Sign up for a new account in our community. It's easy!

Register a new account

Sign in

Already have an account? Sign in here.

Sign In Now
×
×
  • Create New...