Jump to content

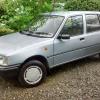
JYD's 1990 Mk2 Golf Gti.


junkyarddog

Recommended Posts

Some more progress has been made on this.

Waxoyl has been applied to the box sections and panels, trying to make sure any repairs were saturated to try and stave off the demon rust for another while.

Front wings and Bonnet all lined up and bolted into position.

Front inner Arch liners refitted and also the front outer wheel Arch trims.

20201107_161011.thumb.jpg.8c3839c12fa61d5274dbf99eb0d9aa28.jpg

20201107_161025.thumb.jpg.9c922b51ecb495caa74b12fdd3d0900e.jpg


Link to comment
Share on other sites

Rear bumper and tow bar refitted,new plug fitted for the electrics too.

Tail lamps washed and lens polished,then refitted.

Left side sill cover refitted too,this was a pain as it is a replacement item from another car and had warped slightly in storage.

Mudflaps all fitted now,along with all the newly refurbished wheels and new Avon tyres. 

20201113_163130.thumb.jpg.c08500b09f3bd26badc78ebaa3d752f6.jpg

20201113_163145.thumb.jpg.c10546925f809852b0b526953e37d8d2.jpg

Sunroof is next item to be fitted.

Link to comment
Share on other sites

38 minutes ago, Mr Laurence said:

This is really starting to come together now! Those wheels look brilliant, they suit the car much better than those BBSes IMO

Thanks,the BBS rims were just temporary for rolling it about on.

They may find their way onto something else.

  • Like 1
Link to comment
Share on other sites

Sunroof panel and mechanism is reinstalled, the sunroof seal was a bit tatty but a new one is hideously expensive €140!!!

I had two,both worn at the rear but in good shape at the front,so just used the best bits of them both

There is now a join either side,rather than just the one,I can live with that.

Bit of a pain to get it all set up correctly, but it appears to be working well.

Will make a start on fitting up the door glass next.

20201114_161406.thumb.jpg.92a0ce3a4c342602f00c1ed65d54fe9a.jpg

Link to comment
Share on other sites

More progress has been made on this, 

All the door check straps have been cleaned and greased then refitted,sealing gaskets refitted too,along with the courtesy light switches.

20201121_162132.thumb.jpg.84f4010ee23d6313571348f7c1939aae.jpg

Refitted all the door glass,window regulators and seals,front door mirrors too.

Also the trim/rain channel that covers the seams on the roof.

20201121_162114.thumb.jpg.02acc666381fa3254f0c21577da64ef6.jpg

20201121_162101.thumb.jpg.115bce12c306e2c691a951aa656e947c.jpg

Really starting to look more like a car again.

Also managed to chip it somehow,no idea how or when it happened but it's happened. 

20201121_162150.thumb.jpg.7646bc4c19862eaf186300cdff937fbf.jpg

I guess it's one of those things,still very annoying though.

Windscreen next. 

Link to comment
Share on other sites

Windscreen is now fitted. 

20201122_150611.thumb.jpg.2cae0fb1497b00eba10f6fc14fb311ea.jpg

So that's all the glazing refitted, I have to remove the rear screen again,as the rubber has a split/cut in it,only noticed it after it was put in.I have a decent replacement on my spares car.

A job for another day. 

Link to comment
Share on other sites

  • 2 weeks later...

Progress has been slow on this as of late,due to ancient Focus needing some attention. 

New radiator has been fitted,old one had started to leak,fitted a new header tank too,as the old one had become opaque. 

Tidied up some wiring under the bonnet too,as it was removed for work around the battery tray area.

20201205_151341.thumb.jpg.2d7c215466e1043fb125119562fbe385.jpg

Front bumper has been refitted too,along with two new indicator lamps,and also two new front fog lamps,the old ones were past their prime.

20201205_151138.thumb.jpg.adfc2d55bc286d20a42627abbf0d842a.jpg

20201205_151125.thumb.jpg.87ce1e019eaed78214ec7488b7d01aaf.jpg

New grille fitted too,so the old girl finally has her face back on.

Next job is to refurbish the heater box,the foam on the sealing flaps has disintegrated,and will also fit a new heater matrix too.

Then I can make a start on refitting the interior. 

Link to comment
Share on other sites

Work has been done on the heater box.

20201206_122924.thumb.jpg.9ca6c77780f4daed42ace7a4fcbc8875.jpg

You can see the non existent foam,it was totally disintegrated. 

20201206_124550.thumb.jpg.07dee2c97569b05d030cdb34374dfc99.jpg

Box split open and flaps removed.

Scraped the old foam and glue off with a blade,then gave them a rub of sandpaper. 

20201206_142752.thumb.jpg.aa92cbb72aaf853716d2129337f72e4b.jpg

Refoamed flaps refitted!

The foam I used was actually a sleeping mat for camping,it came from a cheap tat shop.

Cut to size then glued in place with an aerosol contact adhesive. 

Hopefully it will be ok.

20201206_145345.thumb.jpg.1a370383ebb4530151180519c25fd7ac.jpg

Box back together. 

20201206_150312.thumb.jpg.9d69c9f2c261c84a6e5ea57bd0f48a66.jpg

New heater matrix. 

This was a little bit different to the original, the pipes were a little bit shorter and didn't come through the bulkhead far enough to be able to refit the heater hoses easily.

So after a bit of head scratching I decided to try and fit the pipes first,then fit the heater box back into the car,thankfully that worked and I now have a new working heater.

20201207_153017.thumb.jpg.ffdaae6b01a1c6dbba512f9a4544f793.jpg

This car had the heater bypass mod done by VW as a recall sometime in the past,so the heater hoses are quite short.

Bled the system and everything seems to be ok at the moment, I'll flush it again,the refill it with coolant.

Then maybe make a start on refitting the interior. 


Link to comment
Share on other sites

  • 1 month later...

Work has been progressing slowly on this,sometimes it's been 1 step forward and 2 back,but I'll keep slogging away, the finish is in sight......hopefully.

New sound deadening pads have been slapped onto the front floorpans,plenty of heat from a hot air gun moulded them to shape nicely. 

20210114_155319.thumb.jpg.1db17cd03fd35513ca7dd7d8c0c955fb.jpg

The original sound insulation was beyond help,so 3 layers of alternative material was fitted,hopefully it will be ok.

20210114_155414.thumb.jpg.518983becae3b9bcdc098bedb06a1c20.jpg

Dashboard has been refitted too,lots of dicking about with wiring,switches and heating ducting but it's all in place now.

20210114_155423.thumb.jpg.3cf4a1e38cff4f053e1a9c0689720e0f.jpg

Replaced the airflow meter,as it didn't seem to be revving as good as it should,it had a slight misfire too,it runs better now.

20210114_155505.thumb.jpg.c9f10a94d352b18fa351a8f4b18f0b1d.jpg

Just when I had thought i had finished with the cooling system, this contorted sprig of metal pipe decided it wanted some attention too,so it started to leak!!

I had a replacement in the boot of my spares car,it's actually for a diesel and the route is slightly different, but fitted fine and more importantly leak free.The original was clearly past it's best 

20210114_155554.thumb.jpg.a28be7c727775e6271ac060240e2ff9e.jpg

20210114_155623(0).thumb.jpg.2d2bcbaaa6371fc5731584435d4e9d0d.jpg

Also fitted some new central locking solenoids to the doors,it had these when I bought it, plus its nice to able to lock/unlock all 4 doors with the touch of a button.

20210114_155718.thumb.jpg.276dc82aeb86a2ee0249428b1dfdacec.jpg

The car only had two speakers in the dash top,years ago I made some MDF pods to fit in the front door bins,but these had disintegrated a while ago,but a browse on AliExpress got me a pair of these to fit in the door pockets,fitted the Blaupunkt speakers I have a treat.These will look neat in the front door cards.

20210114_155903.thumb.jpg.b9a900401df5212ac50a1ce57952d986.jpg

20210114_155913.thumb.jpg.4517136054f060c370fe718e5a7badd0.jpg

New speaker cable routed into the doors.

20210114_160424.thumb.jpg.d010948cabe16962438b5ba43c4f9419.jpg

Also spent some time getting the courtesy light to work.

20210114_160443.thumb.jpg.4401a6e5e3e19915d85a2edc95d99529.jpg

Next job to make up some damp barriers for the doors,then clean and fit the door cards.


Link to comment
Share on other sites

The two rear door damp membranes were good enough to be reused. 

20210116_122819.thumb.jpg.edb372e67241f440686d49b502a76e01.jpg

I used this stuff to attach them to the door,I bought it at the local farm shop,I guess it's used to seal between roofing sheets or similar. 

Quite sticky,but the polythene membrane can be peeled off again if need be.(knowing my luck it'll be sooner rather than later)

20210116_122830.thumb.jpg.e304bb0c28f5fffc4f715463d3c817d7.jpg

20210116_122841.thumb.jpg.2c42139c2d6be107f5869f2fa6bdcdba.jpg

Finally got the two rear door cards fitted up.

20210116_130041.thumb.jpg.352a25798cdecfa6b44772f09038a0dd.jpg

20210116_160259.thumb.jpg.1eef83a03fd05c45fb78c0b7f2f0da0b.jpg

They scrubbed up quite good,will need another clean,but that can wait until it's  all back together completely. 

Link to comment
Share on other sites

Today's exciting* endeavour was fitting up the front door cards.

20210117_113915.thumb.jpg.298bf00587f1b4b8c39ab323fb7ec45d.jpg

First apply the black sealant, 

20210117_114735.thumb.jpg.191738b179979166d8bd26370bb0aaab.jpg

Cut a piece of polythene sheet to size and stick it on.

20210117_120210.thumb.jpg.c615aed773879e654e13359bdbf6e2dd.jpg

At this stage I decided to also fit the original one over the top.

20210117_125613.thumb.jpg.49ee133b302f8a6cd40424912e03b0bd.jpg

Patched up the damaged aera with some duct tape. 

20210117_145049.thumb.jpg.583faf86c4c8b03593c8bc6402543428.jpg

Fit up the door card.

20210117_145057.thumb.jpg.30590b2a896164a2a2a3175571965fe2.jpg

And finally connect up and fit the new speaker grille.

Happy with that.

Time to repeat it all again on the other side. 

20210117_163344.thumb.jpg.e93bd2e29fde3c0834b948f0da1c668c.jpg

That'll do for today.

Will try and get the carpet into it next.

Link to comment
Share on other sites

Today's thrilling* update, 

Fitted the sound deadening pads to the rear floorpans.

20210120_112950.thumb.jpg.db0b0e83f77006e9f1e526959fa77d64.jpg

Followed by some more insulation. 

20210120_113817.thumb.jpg.5401ecb24f1c9240a7fb78fc39cb9bf4.jpg

And then the carpets.

20210120_144943.thumb.jpg.75f27705adb454256b4f0adbc0d411cc.jpg

I also trial fitted a new gear knob,the original has lost its top,I bought this one from AliExpress, it's actually made of aluminium and the gearshift gaiter fits much nicer into it's extended base.

The lower half was silver which I wasn't that happy with,so a squirt of black paint later it looks much better

20210120_161557.thumb.jpg.7b7c571c04e526d1d59573bd47e43010.jpg

Seats next.


Link to comment
Share on other sites

That looks well. One of my older mates had a met grey mk2 big bumper gti back in '95. Had been lowered, bbs wheels, dtm exhaust, induction kit . How good it sounded compared to other mates XR2's and XR3's. Felt unbelievably fast to a 15 year old.

  • Like 1
Link to comment
Share on other sites

  • 1 month later...

Work has been progressing on this,the biggest elephant in the room was the roofliner. 

20210125_115458.thumb.jpg.b536226a70e2e3f8b187d2305625777a.jpg

Or lack thereof. 

20210125_120551.thumb.jpg.64dda40f86a5ec191b4c90aa9628bac5.jpg

This is the original one,a typical example of the Mk2 Golf headliner,the material has long since parted company, and the roofliner itself has the structural integrity of a packet of cream crackers. 

A look online suggested to repair the cracks on the roofliner with tape from the rear,and coat the other side with newspaper and PVA glue!

So that's what I did.

20210128_115904.thumb.jpg.a739d608163a508c901b184383aa169d.jpg

It actually made quite a difference,so I let it dry out for a few days before attempting to attach the original material back onto it,as it was still in good condition. 

Well,that didn't really work,the impact adhesive caused the original material to pickle up and wrinkle,and just not stick on very well.

So,in a fit of temper the whole lot got binned!

What the fuck to do now!!

They are not to be had anywhere,none really available second hand, and even then it will probably be a load of crap anyway.

A chance look on the web found a company selling reproduction ones made from fiberglass, one of those will do nicely thank you. 

20210209_104544.thumb.jpg.12e42663958ffe6e3e4fecf97178a57d.jpg

A large and battered box finally arrived,(a week late)thankfully the roofliner was ok,bar one small crack that wasn't really and issue.

20210209_105955.thumb.jpg.ea33213c09f30391b21df43a67d96b8c.jpg

Came with enough spare material to cover the sun visors, sunroof panel and console.

I just covered the sunroof,the visors and console were in good shape,and the colour is almost identical so I left well enough alone.

20210210_164933.thumb.jpg.10794b1e735fe3d10064dd92a9cda0f2.jpg

Finally in,was a bit fiddly around the sunroof and fitting the grab handles,but otherwise it was an excellent fit.

This actually worked out much better than trying to fuck about with the original so that burst of temper probably actually improved things.

A happy accident.

The delivery cost as much as the liner itself,but it's done now.


Link to comment
Share on other sites

9 minutes ago, junkyarddog said:

Work has been progressing on this,the biggest elephant in the room was the roofliner. 

20210125_115458.thumb.jpg.b536226a70e2e3f8b187d2305625777a.jpg

Or lack thereof. 

20210125_120551.thumb.jpg.64dda40f86a5ec191b4c90aa9628bac5.jpg

This is the original one,a typical example of the Mk2 Golf headliner,the material has long since parted company, and the roofliner itself has the structural integrity of a packet of cream crackers. 

A look online suggested to repair the cracks on the roofliner with tape from the rear,and coat the other side with newspaper and PVA glue!

So that's what I did.

20210128_115904.thumb.jpg.a739d608163a508c901b184383aa169d.jpg

It actually made quite a difference,so I let it dry out for a few days before attempting to attach the original material back onto it,as it was still in good condition. 

Well,that didn't really work,the impact adhesive caused the original material to pickle up and wrinkle,and just not stick on very well.

So,in a fit of temper the whole lot got binned!

What the fuck to do now!!

They are not to be had anywhere,none really available second hand, and even then it will probably be a load of crap anyway.

A chance look on the web found a company selling reproduction ones made from fiberglass, one of those will do nicely thank you. 

20210209_104544.thumb.jpg.12e42663958ffe6e3e4fecf97178a57d.jpg

A large and battered box finally arrived,(a week late)thankfully the roofliner was ok,bar one small crack that wasn't really and issue.

20210209_105955.thumb.jpg.ea33213c09f30391b21df43a67d96b8c.jpg

Came with enough spare material to cover the sun visors, sunroof panel and console.

I just covered the sunroof,the visors and console were in good shape,and the colour is almost identical so I left well enough alone.

20210210_164933.thumb.jpg.10794b1e735fe3d10064dd92a9cda0f2.jpg

Finally in,was a bit fiddly around the sunroof and fitting the grab handles,but otherwise it was an excellent fit.

This actually worked out much better than trying to fuck about with the original so that burst of temper probably actually improved things.

A happy accident.

The delivery cost as much as the liner itself,but it's done now.


Good find! I had staples holding the back end of my mk2 headlining up for three years, but I never bit the bullet and tried to sort it properly. The fibreglass solution looks great and should last longer than the original! I wonder if they're a recent creation? I certainly hadn't heard of them when I owned mine from 2012-2015. 

  • Like 1
Link to comment
Share on other sites

41 minutes ago, Dick Longbridge said:

Good find! I had staples holding the back end of my mk2 headlining up for three years, but I never bit the bullet and tried to sort it properly. The fibreglass solution looks great and should last longer than the original! I wonder if they're a recent creation? I certainly hadn't heard of them when I owned mine from 2012-2015. 

I've no idea how long they've been around,but I'm glad they are.

https://www.myrtleltd.com/product-page/vw-golf-mk2-5-door-with-sunroof-headlining-board

This is where I got it from.

  • Like 1
Link to comment
Share on other sites

Next up was to wire in the tow bar electrics,handily VW had already thought of this and provided spade terminals on the rear tail light circuit boards,so it was just a case of find the one you need,crimp an end onto the wire and plug it in!

20210216_154652.thumb.jpg.db0103bd54bacb52f179733e7fc7acfb.jpg

Also a box landed,

20210217_153828.thumb.jpg.5e31c01338c34a0e6760b6a837e1f898.jpg

Couldn't find any 6x4 rear speakers to fit in the original position at the rear,so bit the bullet(again)and bought a complete new set.

20210217_154023.thumb.jpg.00da58a40ccef21a0dfed3fec77ba3b2.jpg

They sound quite good with the Blaupunkt head unit,another job ticked off the list. 

I also decided to fit a high level rear brake light, I think it's almost a necessity nowadays. 

20210225_161122.thumb.jpg.0508044bf37655e95e4f719cdde5230b.jpg

Again I couldn't find one locally, so this arrived from AliExpress for €3.48 delivered!!,again just a case of thread the wiring,and plug it intothe rear cluster,although I did have to extend the wiring to reach.


Link to comment
Share on other sites

Create an account or sign in to comment

You need to be a member in order to leave a comment

Create an account

Sign up for a new account in our community. It's easy!

Register a new account

Sign in

Already have an account? Sign in here.

Sign In Now
×
×
  • Create New...