Jump to content

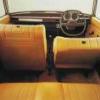
1972 Austin 1100 - SOLD


Recommended Posts

Posted

The skills you've acquired over the years, it's a pity you don't still have your old breadvan.

Posted

It is, I miss that dreadful little German biscuit tin.

Posted

OMFG, front end sorted already. Well done

Posted

It is, I miss that dreadful little German biscuit tin.


With its amazing air brake.*


* A rear hatch that opened fully by itself when accelerating too fast.

Posted

Those two penny-sized holes in the trumpets, are they closed off with grommets or just left open to enhance the rusting process?

  • Like 1
Posted

Can we guess, boys and girls?  I bet we can.

  • Like 1
Posted

Looking at the photos, I can't help but feel that the little car looks very pleased with itself now!

  • Like 3
Posted

They are strange little cars. Being surrounded with them in my yoof, I never gave a thought or any desire to own one. It was an old mans car from the start really.  You skimmed the head and fought the rust with them. Sitting on the floor, waiting on the guy from the local paper to come out and pump up your suspension. Good autoshite though :-D

Posted


At one point in the 1960s, 1 in every 6 cars sold in the UK was an ADO16. They outsold the Mini and the Cortina consistently. Even in 1972 they were still in the top 5.


Amazing to see such stats - I'd forgotten just how ubiquitous these were when I was a kid. It never occurred to me then that they would ever be scarce.


Heroic save, Vulg


Sent from my BV6000 using Tapatalk

Posted

How Many Left reckons 343* Austin 1100s are left.  That's more than I was expecting for how infrequently you see them.

Posted

Saw a red one the other day. Looked in rude health as it bombed along.

Posted

I see a few kicking about, possibly my most spotted classic after Minors, Minis and MGBs! Possibly because they had many features Scots like, namely that they're frugal and cheap to buy...

Posted

Who thinks Angyl should be named Shite Hero 2017?

  • Like 3
Posted


The headlight was reinstalled along with the sidelight unit with clear lens and the grille was refitted.  I need to get a couple of bulbs for the sidelight-indicator unit so it matches the other side and we can check all the lights work.


of course your little bostin being a "K" is old enough to get away with white front indicators- i even remember seeing mklll cortanas with white indicators

Posted

I'd been told indicators had to be orange post-1960, in line with the MoT coming in.  I'm pretty certain a tester would fail the car if the indicators were white.

Posted

Surely white is ok as long as the light emitted is yellow, as is the case with a lot of moderns?

Posted

Noel's talking about actual white light rather than coloured bulbs.  I'll be putting an orange bulb in, I don't want white indicators, just white lenses.


---

I was going to do some welding today until I got to the unit and I'm just not in the right headspace for it.  Maybe tomorrow.  Instead, Mike and I tried to get to the bottom of why the clutch isn't working as it should.  On isolating components we have found the arm is operating as it should as is the new slave cylinder.  We're not getting air coming into the system, once bled it stays bled.  The master cylinder appears to be working well too.  Checked the adjustment screw on the bellhousing and that too is doing what it should.  The problem is that when everything is together we're not getting much travel with the arm at all.  You can engage 1st with the engine off but not with the engine running, and we know the clutch isn't stuck on because you can start the car in both first and neutral with the expected results.


The plan is to buy a rebuild kit for the master cylinder even though the seals seemed okay, a new clutch hose because we wondered if that's collapsed internally given the exterior condition of it and generally just make sure everything is as clean and free moving as it can be where it needs to be.  Then we'll try again.  It's a little frustrating because it's the only thing preventing me from getting a drive of the car and that all important first-drive video.  The brake and clutch fluid reservoir lids don't seem in the first flush of youth either so I'm considering replacing these just so they're another item off the list of things-that-might-cause-an-issue-we're-not-sure.  I don't think it's the aforementioned clutch arm/fork wear, it's not that the clutch won't disengage, it won't engage.  Also pictured here is the clutch hose I need to replace, the outside casing has started to perish, as they do with age.
36381885386_baf97bc433_b.jpg20170807-08 by Angyl Roper, on Flickr
 
36290450631_6b596e42d1_b.jpg20170807-09 by Angyl Roper, on Flickr
 
What we did manage to do was bleed the brakes and those seem to work perfectly fine.  The handbrake needs some adjustment, it works but it is weak.  I'll be taking the drums apart to inspect the internals though I'm honestly not expecting to find anything amiss.
 
I did want to get the car on the lift but we have a bit of an odd problem; the car is the wrong size.  There are places you can put the lift pads but none of them are in reach of both arms and with the sills being incomplete and still in need of repair in places, they're not strong enough at present to lift the car with them... we tried and put the car down as soon as tyres left the floor because of the noises one tender corner
 
The boot floor to rear valance seam looks pretty dreadful inside while outside it's in pretty reasonable shape so that's quite reassuring.  I guess it's more water in the boot rotting down that's  caused the issues than road spray washing up.
36381886006_6e7ca6be54_b.jpg20170807-01 by Angyl Roper, on Flickr
 
The rear boot corner I was going to do today, and which is marked ready for cutting, is very easy to access with the rear wheel off.  This should be an easy repair.  The inner arch needs some attention too and is slightly more complicated, but nothing compared to the work at the front.
36427129415_e8bd442b3d_b.jpg20170807-02 by Angyl Roper, on Flickr
 
This is the end of the driver's side sill-to-floor join I haven't finished.  You can also see the holing in the front floor pan.  There's not actually as much to replace here as I was expecting so I might not have as large a job as I feared.  I'm not a fan of welding floors.  I'm not sure but the remains of sill closing panel looks more like the remains of a cover sill than a proper closing panel, it seems too big/wide to be the factory style panel.
36381885156_52440fdc37_b.jpg20170807-03 by Angyl Roper, on Flickr
 
The middle section of that sill.  You can see towards the front where there's daylight coming through one of the areas I need to do a small patch on the inner sill as mentioned on my To Do list.  I need to put some tabs back in to hold the wiring loom up too, they fell off when I knocked the rust out of here.
36381885796_79e2e61a50_b.jpg20170807-04 by Angyl Roper, on Flickr
 
The passenger side is remarkably tidy.  There is no closing sill panel at all but what metal is there is actually really good.
36427129055_51d5cca43d_b.jpg20170807-05 by Angyl Roper, on Flickr
 
The middle section with the clearly visible repair sections that are overlap-welded from inside.  I'm going to clean this up and may apply some welding from this side if it looks like it needs it, even though it looks quite solid inside the car.  You can see the work I need to do on the outer sill this side, it's a bit of a hotchpotch.
36381885596_bc3d569228_b.jpg20170807-06 by Angyl Roper, on Flickr
 
The repair towards the back too.  Again, nicely cut back to clean metal and overlap welded from inside and in need of a jolly good clean up and proper protection applying.  It's not pretty as repairs go but it is quite solid and will be a lot of work to improve for no real gain unless I want to baffle the MoT tester by showing him a seemingly un-welded ADO16 bottom.
36427128725_7eab49f69d_b.jpg20170807-07 by Angyl Roper, on Flickr
 
That's all the welding that's really needed at least, which is why I'm not so worried about it.  If anything, there's less to do than expected so I do have plenty of time to put it all right while I wait for the new sill closing panels to be made and delivered.  I ordered a pair from Earlpart because they come highly recommended by pretty much everyone that I can see reports of panel replacement listed.  Also the most expensive part of the car being nearly £200 delivered, but should save me bags of fabrication time by being an easy fit solution, so totally worth it.
 
Finally, I removed that chrome mirror (anybody want it?) and replaced it with a matching Reguvis.  I've got the old mirror hole to blank off in the wing which I'll either do with a spot of welding or a rubber grommet.  Then I went home because all I can do is welding and I didn't want to weld today.
35592249924_6eef68b624_b.jpg20170807-10 by Angyl Roper, on Flickr
 
35592249364_bc7047dd80_b.jpg20170807-11 by Angyl Roper, on Flickr
Posted

Regarding the clutch operation.

I have had a restricted hose, what tends to happen is the pedal pushes the fluid through, but return is slow.

Lots of pressure on your foot, limited pressure with return spring.

Some, all? slave cylinders have a circlip in the end to stop the piston coming out.

If yours has, it can be that travel is stopped by the circlip.

I have seen the operating arm heated up and bowed towards the slave cyl.

I have myself fitted an extended operating bar between slave cyl and lever, (pushes the piston further back into the slave cyl).


Am thinking the explanation for this is the bell housing end of the lever is very short from the pivot pin in relation to the upper length, the ball on the end wears, and bends thus losing leverage.

Posted

There's full travel on the arm, master and the slave, when separate from the system.  However, the pedal is variable in firmness and return speed and the pedal travel doesn't translate to the expected amount of arm/slave travel.  Does that point more at a restricted hose or an issue with the arm?  The arm appears to be unmolested and as BMC intended.

Posted

if fluid is slow coming back to the master once the pedal is up I would be looking at the hose.


the worn ball on the arm causes the clutch to drag when the pedal is down. thus crunchy gears at best. easy to diagnose by starting the car in gear with clutch down. if it does and runs but gears cannot be selected with engine running then hydraulics or warn ball on lever :D


However if I read correctly your clutch is not engaging? at all? 


disconnect the hydraulics and let the lever sit in its true home position. The clutch plate should now be engaged, you can tell by sticking it in gear and rocking the car back and forth, does the crank pully try to move? If not you may have an issue with the clutch plate stuck on the gearbox splines or a broken pressure plate


edited to add, grate progs on the front end :D

Posted

I didn't think to dip the clutch when trying to start in first, just started it in first and neutral. In neutral it's stationary as it ought to be, first it does a little jump as it ought to.  When running, if you try and select a gear dipping the clutch you can't get into gate 1 or 2 and trying to engage 3, 4 and reverse results in a not-quite-graunch.  When you depress the clutch pedal all the way to the floor you get barely any movement at the slave cylinder end, as though things can't move far enough.  We did think the arm might be stuck but you can move it much further independently of the pedal so it's perfectly free.


I'm thinking it's an adjustment issue with worn components rather than a failed component, like a worn slave cylinder pin and a collapsed hose sort of thing.

Posted

I read it as clutch driving all the time/insufficient release.

Do no harm to change the hose, if no different extend the operating rod temporarily with a longer piece of tube fitted over it.

Posted

I am back on with hydraulics and or ball.


when you bleed it does the fluid gush through?


check the hose for bulges, especially when you push the clutch down, a bulge in the hose would rob the slave of fluid.and the lever of movement.


the lever doesn't need to move that far. :D


the ball bit, the hydraulics pushes the lever away and the ball if worn will have slack before it starts to move the clutch plunger in


It hardly needs to move at all so if 1/8 of the ball is worn you will lose the movement needed. bear in mind that I was doing this shit 30 years ago so my mind may be foggy on the details


This piccy is for a mini clutch lever and it is still a series.


post-3439-0-78988500-1502131508_thumb.jpg


the ball on the lever wears on the right side as seen in the picture, the plunger can also wear but is more difficult to get to so we only ever replaced the lever.

Posted

If I can get the lever (5) off without disturbing the clutch it's worth me doing that to inspect it and rebuild/replace/repair as required.


Mike mentioned something just now that might shed some light.  He pushed the slave in with a blunt old screwdriver acting in place of the rod (**) and with me operating the pedal there was no noticeable resistance at his end of things with everything else connected, as though no (or very little) fluid was getting pushed through.  What we didn't do was look to see what the hose was up to at the same time, so if it was ballooning that would explain the issue.

Posted

I'd been told indicators had to be orange post-1960, in line with the MoT coming in.  I'm pretty certain a tester would fail the car if the indicators were white.

just checked its pre sept '65

Posted

SiC; don't think so, getting fluid through that bit no problem and it's coming out nice and clean when we do bleed it.


Noel:  Now we know :)  Orange bulbs are easy enough to do at any rate.

Posted

chrome blubs would look nicerer

  • Like 2
Posted

yes that lever will come out without disturbing the clutch, you may also find that the clevis pin has a ridge on it that will also rob some movement

Posted

Don't think you could hold a screwdriver enough to balloon the hose, maybe master cylinder rubbers have failed.

The Clevis pin may be stuck at first.

There will be wear on the pin, there will be wear on the ball.

The ball may well be bent but it's difficult to tell.

All this can often be compensated for (bodged) by extending the push rod  where the two blue stars are.

I promise not to mention this again.

Create an account or sign in to comment

You need to be a member in order to leave a comment

Create an account

Sign up for a new account in our community. It's easy!

Register a new account

Sign in

Already have an account? Sign in here.

Sign In Now
×
×
  • Create New...