Jump to content

205 GTi - repairs underway


Recommended Posts

Posted
1 minute ago, twosmoke300 said:

It’s no 305 KNOB VAN !

How did that work with the lifting collar? The knob in the express is cracked but there's a collar for reverse so I assume I'd need something proper.

Posted

Not sure how long this knob will last, so that link may be useful.

I brushed past the front number plate the other day and one end fell off, so I had a closer look and the fibreglass was a bit crumbly around the screw holes. I could have just drilled (yet) another hole, but instead used a couple of these.20240205_001540.thumb.jpg.8a25eabcb35abd644758c7bc4243bbd2.jpg

Once I had dug out my square 8mm drill bit they popped straight in.

20240204_004242.thumb.jpg.85a97c9e1b883908d7394485e304681c.jpg

20240205_000037.thumb.jpg.0ecc5ecd6a6ecf1d28d406eef9fc810c.jpg

Nice easy job; they expand like a rawlplug so should be more robust than screwing straight into the bumper.

20240204_004602.thumb.jpg.59f864af9469bf11eb08b410586deea3.jpg

I popped underneath to make a start on the next job which is replacing the handbrake cables and fuel hoses. Look at the rust bulge!

20240204_235814.thumb.jpg.3cb44929d2edce1f01150eaee2378282.jpg

20240204_235756.thumb.jpg.0f384b0f13d6360bcc06db2a0bcafa80.jpg

Looking at the top though, it's clear someone has been here before me as that doesn't look factory.

20240204_235919.thumb.jpg.1fee7a3ac148ed4b1ea0ee229f484cf5.jpg

One of the hoses looks like someone (for some reason) has just drilled the top of the tank insert and poked in the hose! The resulting kink hasn't done the hose much good.

20240204_235939.thumb.jpg.99f94c44d504b411e98acb871f55a5f8.jpg

It seems firmly attached however, so will have to remove the tank outlet and see what's going on.

For now I just busied myself replacing missing trim clips and a couple of rivets which stiffened up the rear valance.

20240204_235747.thumb.jpg.a9fc32221c9744bc8f044185248bd234.jpg

Posted

Fuel pipes are now replaced, and I've had to replicate the pipe sticking straight up out of the tank, as for some reason  it's been modified to clamp to the pipe inside the tank. I plan to fit a right angle coupling at the top however.

20240205_232310.thumb.jpg.3f97d866f53076744612285ca060519b.jpg

20240205_231838.thumb.jpg.59204bc3526b1bc69e92c68831292e30.jpg

There's a few bodges I'm finding on this, such as the battery clamp being a thin piece of bent metal, a penny washer and a UNF bolt in an M6 hole.

20240209_221247.thumb.jpg.8fe9e095e26d6e818bd6764b86c6645c.jpg

It was so flimsy the battery was flopping about all over the place! Now replaced with the proper clamp.

20240209_221610.thumb.jpg.dfc0629d220673e0411b39ab9f183eea.jpg

Next was the handbrake cables, should be a nice easy job until I noticed a drip from one of the rear drums.

20240209_145829.thumb.jpg.0f9950567879851b8046abef189a3d6f.jpg

Wait a minute...drums on a 1.9? Well yes, when she bought it the owner pointed out it was originally a 1.6, but they'd been gradually replacing all the bits to turn it into a 1.9. They'd bought the correct rear beam for it, complete with brake calipers although it looked like it'd been sitting at the bottom of the sea. So the plan was always to rebuild that at leisure, and swap it over at the same time as changing the front struts to restore the correct ride height.

20240202_181444.thumb.jpg.5b057cc5faeeacc6f5b497848d3f93e3.jpg

20240204_225315.thumb.jpg.2189c223494786b91e1ba1f4c5ef9420.jpg

So with the rear end, I'm just going to to the bare minimum to make it functional, and swap the whole thing over in the summer. I have to admit I sometimes reuse the staked nuts if the the groove falls in a different spot on the nut. But I think this one has been reused one too many times! Especially when I levered it away and it just crumbled off.

20240209_163707.thumb.jpg.9fa7392430ddca0d4690ae5d65d0efa1.jpg

Both new handbrake cables are now on, and I'm just waiting for a new cylinder...under £10 delivered so not a big problem.

20240209_194307.thumb.jpg.508f884811c97ac6b384892fd578ca62.jpg

While I was there I coated everything with Lanoguard, to keep moisture away. Really impressed with the overall condition, despite the bodges!

20240209_194316.thumb.jpg.b186300b1ac1d76d6b60a55bf8f7a480.jpg

20240209_194327.thumb.jpg.2013b2755a0bde462ac055b3119a3f79.jpg

Posted

I've had a go at the rear calipers, and unfortunately one is beyond repair. The bleed screw has seemingly been hammered into the body, and after a good while welding things to that and the remains of the flexi, they both came free (yay!) but the threads were non-existent (boo). I drilled out and re-tapped larger, but it turned out the body was cracked :-(

20240205_233541.thumb.jpg.fccbb7320af8540fd584f4e3b20391e7.jpg

20240205_233305.thumb.jpg.071efa3186f0c210dc05db3b36c83429.jpg

20240204_225315.thumb.jpg.37cbc8da5731d544c650c942b99d54ed.jpg

The better one of the two is pictured above, and that was savable. I dunked the steel part of the body in Deox C, along with various other brackets. 

20240203_111627.thumb.jpg.96e159845aaf71f3fb1c87fd0fed391f.jpg

It took several days to remove all the rust!

20240211_181347.thumb.jpg.31f6a34dc794bc4449e84ec6531d85e2.jpg

Before a coat of galvanising primer.

20240211_222020.thumb.jpg.2699e9f939c2a94e0259d0a2881f362e.jpg

I've never rebuilt a caliper with integral handbrake mechanism before, so had to make up a tool from an old socket to compress everything to reassemble.

20240212_002938.thumb.jpg.23d55a29b1c0cc9213359188e32c656b.jpg

The last part was fitting a new piston, which is where things went less well. It was the wrong size, and too small to seal in the bore. Double checking sizes and the 205 uses a 30mm piston, however the 206 uses a 32mm piston which looks to be what we have. I'd already bought another 205 caliper to replace the cracked one, but wouldn't match the one I was repairing.

Still, I thought I may as well finish the repair and see if I can sell to recoup the costs of the kit. New piston going in:

20240214_135550.thumb.jpg.e003502d45e41e11550836262815fb2b.jpg

And the finished job.

20240215_002541.thumb.jpg.124cf8f42bce6df6d1f33632494bfe97.jpg

Surely worth £30 to someone?

Posted

Really enjoying the updates and the love that you're putting in to this 👍.

  • Thanks 1
  • Agree 1
Posted

Thanks, it's kind of satisfying to work on it but can't wait until @Puglet can drive it! Just the rear wheel cylinder on the original axle to sort and maybe a coolant flush to go.

Posted

What's the intended use? Back into daily run around or kept for a bit of road rallying perhaps? 

Posted

Just really for fun. We don't have to use a car daily for work any more, but I'm sure this will get put to regular use when the weather is nicer.

Posted

I previously said that the plan was to rebuild the supplied 1.9 axle, that was until a rebuilt one (with receipt) came up on eBay for half what it would have cost to do!

20240204_011144.thumb.jpg.3948d6a31d564d2beae0c255436e9a42.jpg

This was just the bare axle, so stuff like the caliper mounts were bolted on.

20240211_231900.thumb.jpg.903c6bc2afdc233e6070b6c57123ffef.jpg

Then new bearings (integral with the hubs) and calipers.

20240212_181005.thumb.jpg.c6931ab2aae4e2d9615e2b71ac60a64d.jpg

You can actually buy brand new ones for little more than the price of a rebuild kit, but my experience with cheap calipers is that it's a false economy. Perishing rubber and unplated pistons meant they seized fairly quickly. Hopefully Febi calipers should be a little better, but time will tell. The rearmost brake hose brackets on the donor axle were beyond repair, but new still available.

Discs and pads were surprisingly cheap also, so duly fitted.

20240216_214224.thumb.jpg.03ec7969c64727333fecd03a6feeecdb.jpg

It's now ready for the dampers to be refitted, but I'm just cleaning them up and painting first. They appear in good order and are genuine Peugeot parts - I'm a bit wary of 'uprated' parts which swing the ride/handling compromise away from real-world usage.

20240216_214237.thumb.jpg.7ad0fa455fc4531ec5664fd0eaf60d04.jpg

The original axle now has a new wheel cylinder and the new handbrake cables adjusted, so as soon as it stops chucking it down it can be taken for a drive!

Posted

Just catching up on the thread. Great work on this project!

I only wish Mrs_bn and I could crack on with our projects as well as you guys do! 

  • 4 weeks later...
Posted
On 16/12/2023 at 16:03, mat_the_cat said:

It does mean though, that it'd be possible to recreate a similar photo to this one from 2001:

IMG_20140115_095251.thumb.JPG.7f596beed52b85bf6731662634415741.JPG

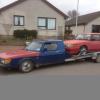
I know I suggested recreating the photo, but this wasn't what I had in mind!

20240310_132728.thumb.jpg.427d896f570a97f71dd650a660d2e1b9.jpg

(On the way back from a Cars & Coffee meet, on only its second trip out!)

Posted

Not quite so great work...what you might not see in the photo is the tow rope! Looks like fuel pump failure as when measuring the voltage it's down at 8-9V (with warm wiring!), and when fed directly from the battery, there's a clunk and a seemingly heavy current draw, but no whining and no pumping. So a 15 mile tow back home :-(

Looks like the early (black) fuel pumps are different to the white pumps you can buy nowadays. I've read conflicting information suggesting that they are either a straight swap, or foul the bottom of the earlier tanks and need a spacer to raise them a few mm...

Posted
1 hour ago, mat_the_cat said:

Not quite so great work...what you might not see in the photo is the tow rope! Looks like fuel pump failure as when measuring the voltage it's down at 8-9V (with warm wiring!), and when fed directly from the battery, there's a clunk and a seemingly heavy current draw, but no whining and no pumping. So a 15 mile tow back home :-(

Looks like the early (black) fuel pumps are different to the white pumps you can buy nowadays. I've read conflicting information suggesting that they are either a straight swap, or foul the bottom of the earlier tanks and need a spacer to raise them a few mm...

Still though, looking at that photo and wondering I'd I owned the pair which one I'd want to drive first. Nice problems to have!

  • Thanks 1
Posted
1 hour ago, mat_the_cat said:

Not quite so great work...what you might not see in the photo is the tow rope! Looks like fuel pump failure as when measuring the voltage it's down at 8-9V (with warm wiring!), and when fed directly from the battery, there's a clunk and a seemingly heavy current draw, but no whining and no pumping. So a 15 mile tow back home :-(

Looks like the early (black) fuel pumps are different to the white pumps you can buy nowadays. I've read conflicting information suggesting that they are either a straight swap, or foul the bottom of the earlier tanks and need a spacer to raise them a few mm...

Thats a bummer - You need to get a more vibrant coloured tow rope so I don't inadvertently 'like' in the wrong place. Hope its a straight forward fix getting it running again.

  • Haha 1
  • 2 weeks later...
Posted

This is the original fuel pump housing; as I mentioned earlier it has been modified so that the supply hose connects directly to the pump, although this means a tight bend leaving the housing.

20240205_232310.jpg.32368f255e93433c1b13a13b76f09cc6.jpg

The pre-filter had also been damaged (presumably when the housing had been previously taken apart) so although you can still buy the earlier bare pumps, we really needed the whole assembly which is no longer available.

At least not as a new part, but managed to find a reasonably priced used one, at £40 delivered. The filter was in great condition too, in fact the only downside was a slightly messy repair to the wiring where it enters the top of the housing.

20240319_103324.jpg.4defc9172eb133ba7bf31ce5f17b1bb3.jpg

It was easily fitted, and the hose routing is much improved.

20240324_162040.jpg.f39b72895de308862cd311fc9d71e71b.jpg

After @Puglet has been using it for a few trips it's obvious there is a problem with the idle speed. When hot it will rev at around 3k rpm, unless you blip the throttle in which case the idle settles down to around 1k rpm. Which tends to rule out a permanent air leak.

What it seems to be is that the throttle butterfly is not closing fully, unless you cause it to snap shut by blipping it. I wonder whether the throttle position switch is stiff and holding it open slightly, or perhaps the spring is weaker than it should be. The throttle body is new though, so a fault seems unlikely...

Posted

The idle speed problem was a really simple fix! The throttle return spring, for some reason, was pushing on the wrong part of the quadrant so minimal tension when shut.

post-21608-0-50824200-1364654854_thumb.jpg.b53c5497f5bf50784b4c2fc0b4acfedb.jpg

This is just an internet photo, but it was around 90° too slack, pushing on the circled moulding rather than where it should be.

To celebrate @Puglet took it out for a drive this evening, once the tourist traffic had died down.

20240330_183610.jpg.fb66070ce51033fa3da70b324961306f.jpg

Looking rather nice! (ATCNBE...)

20240330_183847.jpg.2faddd7e193d69219de07cf8fc340e4a.jpg

Another job off the list!

  • 2 months later...
Posted

Every time @Puglet drives this it's a reminder of how harsh the suspension is, so today I made a start on reverting it to standard. Peugeot have a classic parts branch, so the struts were ordered from them as it seems all the aftermarket ones are stiffer than the originals. Fortunately we've now 'taken back control' so we can enjoy the benefits of paying import duty on parts from France. Sorry, moan over....

Everything came undone without a fight, and the old struts were soon out. The sump has really suffered in the few months since it was bought though, especially considering it's never been driven or even out in the rain!

20240618_215106.jpg.1367db6d5687200a5d02984a148c3fd5.jpg

20240120_142941.jpg.c8f296f7120fe07706a3fa0b2d116ce8.jpg.bdaf735784963e3e14ff2f4999f6b4ec.jpg

Strut tops look great though at least.

20240618_174720.jpg.543e7e00b3e545593301541520f0662a.jpg

I've stripped down one strut and will leave the other as a reference. 

20240618_215136.jpg.eb447f040f73175c5e4f4a03bd2bfeb4.jpg

The strange thing is there seems to be nothing which acts as a bearing for the strut to rotate. The only movement possible is the rubber top bush against the metal 'top hat' pressing. I've ordered a bearing and rubber kit, so will see how that differs...

I also need a gaiter as one side is split, but hopefully they shouldn't be expensive or difficult to obtain.

20240618_215210.jpg.fb4eb822091c2679aa8b77f3cb5ed619.jpg

Posted

There was a bearing in the old struts, but somehow I missed it! Replaced with new anyway, as it sounded a little scratchy. Old versus new springs:

20240623_134504.jpg.9ee415eab1205ccc0be47070b17a9dae.jpg

Struts built up.

20240623_140131.jpg.9d762df6ef02ac6447ba26da16f7a9a9.jpg

And fitted!

20240624_200456.jpg.415cbeda5fc5c3e8ce31ff0105756157.jpg

I had a moment of panic at this point, before I remembered there was still an axle stand under the other side, although was still high after removing it. After a short drive it did settle a bit though.

20240625_171613.jpg.66a23a9d0939ca07f2c96ba637ca2aa2.jpg

Both ride and handling much improved - no longer is it upset by a bump mid-corner. Next job rear axle!

Posted

Ive always found French cars (ones with springs not Spheres) ride and handle best on standard suspension

Posted
6 hours ago, Stinkwheel said:

Ive always found French cars (ones with springs not Spheres) ride and handle best on standard suspension

It's almost as if the people designing it knew something about the subject, and chose the best compromise for real world situations!

I was able to do a bit of work on the rear end today.20240626_095235.jpg.59fd99b9b77301f0e1deea52b4ba1830.jpg

Lifted up the boot carpet, and there was one tiny, very localised rust hole just to the right of the spare wheel retainer screw. The simplest fix was to take a step drill to it, and pop a 30mm grommet into the hole!

A fairly simple job to drop the axle, and the new one is now ready to slot into place.

20240626_103649.jpg.1c1b9dcd975d28b7ee28fbf747574b09.jpg

image001.jpg.ecf33866d62356f459ea55f2bd23e0b2.jpg

But I'm learning as I go just how many subtle differences there are between the 1.6 and 1.9 models. Not just the engine and rear discs! The forward rear axle mounting brackets on the 1.6 are like this, and identical side to side.

20240626_171910.jpg.7f29d53698765b7e251eb5e5e2792f41.jpg

But the ones for the 1.9 are offset slightly, and hence handed Droit (right) and Gauche (left), giving a very slightly longer wheelbase.

20240626_171902.jpg.1bbe667f7731b722f7d39a2288f3d1e0.jpg

20240626_171856.jpg.f7ee06df438406a84a1e413673d98e49.jpg

These were quite heavily pitted and took a few days soaking in Deox C before the rust was dissolved and could be painted, before being covered in greasy fingerprints.

Posted

I had the familiar camber yo stance on our 1.9 and an owner prior to us had kindly* rounded off the bleed nipples on both calipers, so I did the right thing and swapped the drum beam over from the crashed '85 1.6 GTI I'd bought and broken for spares.

I don't recall there being any issues with lining up bolts, so perhaps that was an issue on later 1.6 mounting brackets? I do remember having to faff around with brake lines/unions, but nothing that wasn't easily fixable.

My Dad was over from the UK for a visit, and was helping me swap the axles over. At one point it wasn't lining up, so I got underneath and tried to rectify it with a bit of bashing about. Which then caused the axle to drop down on my head, causing me to panic slightly, grab hold of anything I could (the axle stands holding the car up...) to escape from beneath the car, which caused an ominous wobble.

A hospital visit to check up confirmed no damage, barring bruising around my eyes, which made me look like Ziggy Stardust. But I've never seen my Dad so panicked and drained of colour in all my life! And shaking, too.

Happy, carefree days!

Posted
7 hours ago, mat_the_cat said:

It's almost as if the people designing it knew something about the subject, and chose the best compromise for real world situations!

Yep, that. Not sure aftermarket companies have actual R&D or just happen to want to sell you some red springs 😂

  • Agree 1
Posted

When Peugeot made their reputation with tough, simple cars that rode exceptionally well and could cope with the worst of roads they (unusually) made their own dampers. 
I doubt they still do so. Neither ride comfort nor longevity seem to be valued in today’s marketplace.

Posted
22 hours ago, Jon said:

I don't recall there being any issues with lining up bolts, so perhaps that was an issue on later 1.6 mounting brackets? I do remember having to faff around with brake lines/unions, but nothing that wasn't easily fixable.

I don't think it will stop anything lining up, as the rear mounts are slotted. It will means the 1.9 axle assembly sits 10mm or so further back than the 1.6; why, I don't know. It seems a lot of trouble to go to!

15 hours ago, Stinkwheel said:

Yep, that. Not sure aftermarket companies have actual R&D or just happen to want to sell you some red springs 😂

They may well give better handling on perfectly smooth surfaces, but in the real world the only advantage is aesthetic. And that's a matter of opinion! Also, now I'm getting older then the idea of bending over that bit less to work on it is a bonus :lol:

Posted

Fitting the new axle was all pretty straightforward

20240628_172047.jpg.d9c2d202a22dd17e111ee0791ad67b76.jpg

20240628_191402.jpg.33c02d14d3c0935ab5f3bb24ba0447da.jpg

I needed to make up brake pipes to go between the two sets of flexi hoses, and for some reason they needed tightening more than I'd expect to stop leaking. Bit strange but all dry now although ran out of fluid to bleed fully.

Wheelarch gap looks a bit more like it now too!

20240628_182628.jpg.d76d9e269e87ddefe994a5027df426d3.jpg

Posted
On 27/06/2024 at 22:40, mat_the_cat said:

I don't think it will stop anything lining up, as the rear mounts are slotted. It will means the 1.9 axle assembly sits 10mm or so further back than the 1.6; why, I don't know. It seems a lot of trouble to go to!

Perhaps a token effort to reduce the propensity for lift off oversteer, I think increased wheelbase reduces it.

  • Thanks 1
Posted

Test drive today, and I think all is well. Comfort is certainly better. I can get the rear wheels to lock with the footbrake. But the handbrake, although better than before, will only just hold on a 1 in 4 hill if I really pull it hard, and push the brake pedal down beforehand. I think it may just be the pads bedding into the new discs, as the cables are obviously new and correctly adjusted.

One of the rear cylinders had previously leaked and contaminated the shoes, so although I had to replace the cylinder, drew the line at new brake shoes on an axle which was going to be replaced shortly.

It's going in for a rolling road session on Wednesday, to adjust the mixture and ignition timing for optimum power. I've no idea on how standard or not the engine is, so better to go on peak power than book settings.

  • Like 5
  • 3 weeks later...
Posted

Not sure if it looks a tiny bit high, but think it's probably down to the fact it has lower profile than standard tyres on it.

20240703_195447.jpg.7a87428c04f580db3dd7f04f4a752242.jpg

Anyway, off to get the engine checked out and set up if needed. I've used AB Garage before for tuning the Stellar, and it was markedly better afterwards.

20240703_135512.jpg.b4b059443ac3dee711f27a88ce818ec5.jpg

20240703_160016.jpg.b59a3e4cfd031737878d600aa86c8ea6.jpg

The rolling road only shows the power and torque at the wheels, so fairly useless as a comparison, but the real reason was for getting the best out of it as it stands. There was a few bhp to be gained by advancing the ignition timing, and was found to be running weak at idle and just off-idle, which I think had been masked by setting the idle speed a little too high - although it was still prone to stalling. This was corrected, and the exhaust smoke tested as I did wonder whether there was a tiny blow on the manifold. Think it's just normal rortiness though.

20240721_004557.jpg.45f3db1f6a979f27ec72c660bfa37859.jpg

It looks to have been built for torque and not outright power, and the torque curve compares pretty favourably with a graph I found for a standard 1.9

G931XRWMeirionRhys.gif.cc8634497501b96a0764e421902297c6.gif

The driving light bezels had just started to rust, so thought it best to catch them before it started to eat in properly. Before and after 2 hours in Deox 😄

20240716_005330.jpg.46a096c21dbfbdf68d95a079076344de.jpg

20240717_103848.jpg.c6bfb76b8c497729d1405c482f3b3f03.jpg

You'll have to imagine painting them in etch primer and then satin black, but here's a poor photo of the end result.

20240719_171319.jpg.ecc6f049369f5cb2ce7b503ba3055ba2.jpg

One more job (very important to @Puglet) which took longer than it should was fixing the horn which had stopped working. Checking the wiring at the horns themselves showed no voltage present, although earth and connections appeared good. Shorting the output from the stalk with a positive feed into the stalk had them working, so clearly the stalk at fault...

But no, after picking up a well-priced Valeo stalk from Autodoc (which turned out to have the wrong self-cancelling mechanism) the problem remained! I then did what I probably should have done earlier, and study the wiring diagram more thoroughly. Unfortunately the Haynes manual only shows the stalk as a 'box' with various inputs and outputs, so wasn't immediately clear that there were (at least) two permanently live feeds to it, and the one for the horn was dead. I'd obviously already checked the fuse, which was OK - plus the cigarette lighter which is on the same fuse, was working. But the heated rear window wasn't, which surely had to be more than a coincidence.

I worked out which of the several wires was the horn feed to the stalk (it's the grey one on the yellow connector on the RHS) and this was also dead.

20240720_113204.jpg.2197f55c3dfdb85b46532934e16a5780.jpg

So logically there must be a break inside the fusebox, after it splits to serve the different circuits. A bit of Googling suggested that there are two layers of tracks, and these circuits are linked at a point beneath the HRW relay. So, out with the fusebox...

20240720_114011.jpg.84383e28d0c15448015124217622bd5a.jpg

...and time to start drilling away the plastic. I could just about make out a hairline fracture in the solder on the lower joint, so I got a decent hot soldering iron, and resoldered both.

20240720_120645.jpg.9a95073d3c4327cebc75f98b573eccb5.jpg

Result. One working horn and HRW!

Create an account or sign in to comment

You need to be a member in order to leave a comment

Create an account

Sign up for a new account in our community. It's easy!

Register a new account

Sign in

Already have an account? Sign in here.

Sign In Now
×
×
  • Create New...