danthecapriman Posted January 11 Posted January 11 Great news! Although you must have balls of granite taking it out on salted roads😆 Ive never had the gearstick come off! I know that threaded collar and locking tab thing that holds it in can be a real pain sometimes though. It wasn’t together right on mine and kept making it hard to select reverse sometimes. Dick Cheeseburger 1
N19 Posted January 11 Author Posted January 11 4 minutes ago, Andrew353w said: Mays and Barnet Lane having been conquered my the Capri I'm only sorry I was in Watford all day and missed this major event! I waved at the DAF having used your street as a brake confidence test...!
N19 Posted January 11 Author Posted January 11 5 minutes ago, danthecapriman said: Great news! Although you must have balls of granite taking it out on salted roads😆 Ive never had the gearstick come off! I know that threaded collar and locking tab thing that holds it in can be a real pain sometimes though. It wasn’t together right on mine and kept making it hard to select reverse sometimes. The underside has been cleaned down and will be getting more attention soon to make sure everything is OK. And there wasn't that much. I took the risk! danthecapriman 1
Andrew353w Posted January 11 Posted January 11 6 minutes ago, N19 said: I waved at the DAF having used your street as a brake confidence test...! Going from my road onto Mays Lane with questionable brakes does take granite balls-it's quite steep at the junction! N19 1
Mally Posted January 11 Posted January 11 1 hour ago, N19 said: The only glitch occurred when I returned to the garage, and selecting reverse, the gearstick came off in my hand. I thought I'd got it sorted and in properly, as this happened a while ago. Some people have suggested aralditing it in, but I'm not sure if that is a wise idea! Very common., do not glue it in you will never get the threads clean again. You can get them but.. https://www.ebay.co.uk/itm/235824869563?_skw=capri+gearstick&itmmeta=01JHBJZC11QKHRD6J0DC5BKK73&hash=item36e841f0bb:g:oBAAAOSwWZFnMKMu&itmprp=enc%3AAQAJAAAA8HoV3kP08IDx%2BKZ9MfhVJKl%2FkoKaQRF6xRAKlPO5yRrXhh%2FzyAGhokSi%2FrMaWkEw1RORSNbjlWrkn%2B0PHcS%2BDZzOS5A55JO%2FlQ1VWZb%2FvkpamkfiS%2Bo6LApZujAMzy5iQBLddsRWVpFI8QlzFreVOt12%2FQFkdS7BqT0%2BY%2FwYo%2BpVRHSw76%2F2tn2LnmL570iPqWhd8q%2BQGr2SA4K51tsMcjpvCIOHdza%2FJMHhjs6Lv%2BG5OPMxoMll1Fd7AtcKShHQBdePJ5bE%2BX3hE4Z5vuVzZHq0G0Z7nRSLgmUWOUR6hzTopRKs38WenxlLkHcutDGrsA%3D%3D|tkp%3ABk9SR9jA_fKKZQ
N19 Posted January 11 Author Posted January 11 1 hour ago, Mally said: Very common., do not glue it in you will never get the threads clean again. You can get them but.. https://www.ebay.co.uk/itm/235824869563?_skw=capri+gearstick&itmmeta=01JHBJZC11QKHRD6J0DC5BKK73&hash=item36e841f0bb:g:oBAAAOSwWZFnMKMu&itmprp=enc%3AAQAJAAAA8HoV3kP08IDx%2BKZ9MfhVJKl%2FkoKaQRF6xRAKlPO5yRrXhh%2FzyAGhokSi%2FrMaWkEw1RORSNbjlWrkn%2B0PHcS%2BDZzOS5A55JO%2FlQ1VWZb%2FvkpamkfiS%2Bo6LApZujAMzy5iQBLddsRWVpFI8QlzFreVOt12%2FQFkdS7BqT0%2BY%2FwYo%2BpVRHSw76%2F2tn2LnmL570iPqWhd8q%2BQGr2SA4K51tsMcjpvCIOHdza%2FJMHhjs6Lv%2BG5OPMxoMll1Fd7AtcKShHQBdePJ5bE%2BX3hE4Z5vuVzZHq0G0Z7nRSLgmUWOUR6hzTopRKs38WenxlLkHcutDGrsA%3D%3D|tkp%3ABk9SR9jA_fKKZQ HFM!! I will talk to one of the parts suppliers. I was thinking to try blue threadlock. The issue that won't be helping is that the castellated surround is a bit knackered.
N19 Posted January 12 Author Posted January 12 Gear lever off, cleaned up, can see that the thread is slightly mullered. also fitted inline filter which seems to make starting easier but the acid test will be in the morning Wibble, Andrew353w, Shite Ron and 4 others 7
N19 Posted January 12 Author Posted January 12 Right, where were we. After fitting the fuel filter, I swopped the HT leads for a new set. No pictures, but I then re-connected the drivers door locking rods, stuck new inner lining plastic in, left the sealent to go off, fitted door card and accessories. This plastic strip at the front of the bonnet is cracked and one of the fixing slots was knackered. I've glued it back together from behind since they appear to be out of stock just now. For the benefit of future fault finding, I printed this off, laminated it, and stuck it to the underside of the spare wheel board. One day it'll come in handy although I have a copy of this in with the workshop manual too. Frustration abounded with the gear lever. Despite trying PTFE tape and threadlock, I couldn't get it to engage, and several of the locking tabs broke. This was given up as a bad job for discussion next week... Moving on to less frustrating things, because I knew that carrying on working on something that annoys you is a sure fire way to cause a problem... I finished off most of the interior trim, although there are some exterior window trim clips to be fitted later. The rear struts have been changed for the ball joint type, to make replacement easier. Back to the engine bay and the fuel filter was still full, about 4 hours after the engine last ran. And sure enough the starting was spot on. Going to try in the morning before I go to work and see what it's like. Lastly, I found and fitted the back bumper side mouldings, they do need some cosmetic improvement though. List for the next week - wire up radio, replace rad screws with the right ones, fit rubbing strips (if possible). List for when I next get some proper time to work on it... sort out the gearstick without killing anyone or anything, find out why the rear wiper blows the fuse when operated, check the vacuum system for integrity (engine struggles when you brake), fault find OSF headlamp, tweak window trims, adjust door shuts, refit speedo cable when new one arrives. Stinkwheel, stuboy, Dick Cheeseburger and 8 others 11
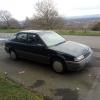
N19 Posted January 12 Author Posted January 12 Just so that it doesn't feel forgotten, here's what the Mondeo looked like when I came to it this morning... Its usefulness comes into play at times like this where the boot can happily swallow anything from a set of wheels, a windscreen, endless boxes of parts etc and yet still function as a car. There have been a lot of shuttles back and forth between the lockup and the garage where the capri is being reassembled. Tickman, Stinkwheel, Angrydicky and 2 others 5
N19 Posted January 14 Author Posted January 14 The ongoing gearstick hassle continued but may have been solved, if I'm lucky. Threads cleaned out and scribed(? is that the word - little tool for sorting out threads bigger than what a die goes up to) and one of the mechanics refitted it. Now feels very solid and safe and, crucially, has been tightened up with a plumbers spanner. (So naturally I'm going to still worry, but that's just me!) The fuel filter fitment has sorted all starting issues, it starts on the button each time with a bit of choke. although this photo does show one of the challenges of the pinto engine bay - the fuel line being routed over the HT coil and leads. Best make sure they are all done up tight... There is a fair bit of tidying up still to do in the engine bay, which I will do ad-hoc. This should be a nice rubber HT lead holder which sits in this clip. There are then clips along the side of the rocker cover. I spent a bit of time at the lockup, tidying up bits and pieces. The clutch was changed despite the old one only having 16000 miles use. It did make sense to do it while it was out, though, and gives me a used but good spare for the shelf. Still waiting for the speedo cable, but then that should be the dash back together. More time to spend resolving other issues (braking/vacuum system, a couple of electrical issues and so on). There's also some trim which needs sorting out as the clips are missing, once that all arrives it'll be in nicely and I can then get the interior back in - it makes sense to keep it out for now, whilst there are still things to round off. Meanwhile, the Focus has been clearly feeling bereft of attention. I started it up today and went to drive it to Costco, and the boot open switch seemed to be triggering every 10 seconds or so. Very odd. Multi plug disconnected. This means if you press the boot release button, the brake lights come on, and it also means that the 'door open' warning is on the dash, presumably because it can't prove that it's closed. Oh well, minor annoyance. Then just as I got back into my road the exhaust - previously slightly chuffing - blew a large hole, so driving it sounds like a bloody chav in a souped up fiesta with a 4" tailpile. Oh well, time to get my chequebook out again... uk_senator, Shite Ron, danthecapriman and 1 other 4
sierraman Posted January 14 Posted January 14 Probably frozen locks, a blast of WD40 usually sorts them out, if not the micro switch in the lock is goosed.
danthecapriman Posted January 14 Posted January 14 I’m always paranoid with Pinto in-line fuel filters, where the hose curves up from pump to carb where the filter pretty much has to go, it always looks like it bending the ends of the filters. It’s never happened to me yet, nut it’s always in my mind that one day the plastic end of the filter will snap or crack!
N19 Posted January 14 Author Posted January 14 14 minutes ago, sierraman said: Probably frozen locks, a blast of WD40 usually sorts them out, if not the micro switch in the lock is goosed. The lock itself is fine, and being disconnected from the loom works fine as an individual lock. Will have a looksee when it's less dark. 8 minutes ago, danthecapriman said: I’m always paranoid with Pinto in-line fuel filters, where the hose curves up from pump to carb where the filter pretty much has to go, it always looks like it bending the ends of the filters. It’s never happened to me yet, nut it’s always in my mind that one day the plastic end of the filter will snap or crack! The previous one was on the car for quite some time and seemed fine. Curved to shape but not cracked in any way. I would treat them as an annual service item anyway - only a couple of quid. Actually this one is an old one from a while ago that was in the toolbox as a spare - must buy a fresh one. danthecapriman 1
N19 Posted January 15 Author Posted January 15 Well that'd explain the noise from the manifold on the Focus... ... had a quick look at the vacuum system on the Capri, will need to check all this over to make sure there's no leakage.
N19 Posted January 16 Author Posted January 16 A little session after work today. The back wiper switch/contact was replaced which was causing the short, thus the wiper now works fine, and the boot trim could be reinstated. Also got some of the rubbing strips back on. It's not especially easy with clips in the rails, I used blu-tak blobs to stop them from flying around so much. The ends are screwed in. The smaller ones have two studs which go into holes in the bodywork. In a previous page I showed replacing these, which had knackered, with bolts set into tigerseal. This gives a little bit of leeway if things aren't perfect. A bit of acrobatics can then help fixing the M4 bolt from behind. As you can see there's no strip on the left of the door here yet. There is one of the holes through which the studs protrude, but the other one isn't there - as there was bodywork repairs in this area. This means that I've got to drill into the body which is mildly terrifying. The bonnet catch still doesn't engage, another thing to sort out. Current main to do list :- speedo cable - new one due to arrive, install, test box up dash (this has been waiting for a while for the speedo cable to arrive) clips for the side window trim arrive, install, line up (likely FIDDLY) wire in radio bumper corner brackets fault find servo/vacuum leak (suspected) - (brake efficiency reduced, plus stalling when braking hard) reinstall seats and remainder of interior trim other niggly bits and pieces finishing touches - new pedal rubbers, new wheelnuts, new numberplates, tax disc, clean & polish CaptainBoom, Marshall2810, puddlethumper and 9 others 12
Steviemillar Posted January 17 Posted January 17 11 hours ago, N19 said: The bonnet catch still doesn't engage, another thing to sort out. The cable may be sticking not allowing the catch to fully retract, worth checking and lubricating the mechanism first before dismantling it all. N19 and danthecapriman 1 1
danthecapriman Posted January 17 Posted January 17 6 minutes ago, Steviemillar said: The cable may be sticking not allowing the catch to fully retract, worth checking and lubricating the mechanism first before dismantling it all. When I refitted mine it was playing up. Took me ages to work out why… Turned out I was missing that little clamp that holds the cable to the slam panel! The one that bolts in at the front. There was just so much movement in the cable it couldn’t pull the latch properly. N19 and Wibble 2
tooSavvy Posted January 17 Posted January 17 @N19.. Shirley lots* of cars in breakers have plug lead guide grips? Less so with COP, agreed 🤔 🚙💨
N19 Posted January 17 Author Posted January 17 2 hours ago, danthecapriman said: When I refitted mine it was playing up. Took me ages to work out why… Turned out I was missing that little clamp that holds the cable to the slam panel! The one that bolts in at the front. There was just so much movement in the cable it couldn’t pull the latch properly. Interesting - will check - it seems to be that it doesn't engage at all and won't click down, so the bonnet is only sitting on the safety hook for now.
N19 Posted January 17 Author Posted January 17 1 hour ago, tooSavvy said: @N19.. Shirley lots* of cars in breakers have plug lead guide grips? Less so with COP, agreed 🤔 🚙💨 Sadly not many Capris in breakers! Somewhere will do the new rubber so I'll get one ordered. tooSavvy 1
tooSavvy Posted January 17 Posted January 17 7 minutes ago, N19 said: Sadly not many Capris in breakers! Somewhere will do the new rubber so I'll get one ordered. Ahh.... Factory only. I have *resolved plug lead issues in the past by drilling a set of suitable holes in rubber hose/slice a notch = press plugleads in ✔️ TightWad zme 🤣 Lovely rod M9 🚙💨 Marshall2810, N19 and mk2_craig 3
N19 Posted January 17 Author Posted January 17 Speedo cable arrived! So that just needs circlipping in and then the dash can go back together. Wibble, tooSavvy, LightBulbFun and 4 others 7
Shite Ron Posted January 17 Posted January 17 Not cheap but available: https://www.ebay.co.uk/itm/266060502767?_skw=ford+pinto+plug+lead&itmmeta=01JHV2KCKWRBVHE6RQB8Y8ASV4&hash=item3df27116ef:g:~AAAAOSwi5lkWjOa&itmprp=enc%3AAQAJAAAA8HoV3kP08IDx%2BKZ9MfhVJKkYU4XSAE1%2Fn2eCbW%2FfWGzVk18U4lyQ0gkNu6oGpvHjAzZlN3sFQ3Eed2IiH%2B100JF1ApOoyJib11li1mIwQwQtoBQqDo7ZFzR7ISHxJOnYStdhXKAYKof2Yj5c2tg%2B7fyg%2Fy6piwqJ1BH1%2BYdqo9A9WPCm0CvFDyNM6nQC%2BEWFpYL0EqaF5oDL%2Fz%2FWHLiyTMl0eM2YrvxhrLKLNBu9r0sv4vcDbbRuEmPs4O2BYwiq9IPqznGAp9LwLqCvjJJ%2FsnBXporHm1lp0nn25GFdNch02WyWSG7leHfD82OVBOCktA%3D%3D|tkp%3ABk9SR47KzeKOZQ
N19 Posted January 17 Author Posted January 17 Buttons do them, but I'll ask at the motorfactors too - there's a fair chance they'll have one kicking around. Cambelt cover. I wasn't going to repaint this, but it stood out like a sore thumb in the engine bay with scrapes and dings in it. It's sat in degreaser overnight and I'll strip it with a wire brush shortly. IronStar, Dick Cheeseburger, Wibble and 3 others 6
Bmwdumptruck Posted January 18 Posted January 18 And the Cam cover to match? You know spraying the belt cover will make the cam cover look naf once there back next to each other.
N19 Posted January 18 Author Posted January 18 5 hours ago, Bmwdumptruck said: And the Cam cover to match? You know spraying the belt cover will make the cam cover look naf once there back next to each other. I'm not sure, the cam cover was powdercoated and pretty so I might look at doing the belt cover, if I can find someone who does it.
N19 Posted January 19 Author Posted January 19 A new speedo cable had arrived, so lets see, hmm it looks a little differently dimensioned. and sure enough when put on the gearbox, the circlip to hold it won't go into the groove - although it would read. A little bit of grinding later, not perfect, but nearer. This would sort of sit in the hole, but not well enough for the circlip to sit nicely. Bearing in mind the time, and the light, and the other job I hoped to do, I left it for now - I will do a bit of filing to get it down to size and nicely flat. The next job was an enjoyable one, a nice 11-mile test run! In order to maintain legality, I downloaded a GPS speedo app on my phone. Summary of things to sort out, driveability wise :- speedo, see above timing probably needs doing/re-doing properly there's still some sort of vacuum leak somewhere. When you brake to a stop the car feels like it wants to stall. Back in the garage, with the car once again turned around, the glove box was next to go in. Radio-cassette tested and verified as working before I threaded everything through to the new location.... Now this might seem a bit odd, especially when you look at the original location for the cassette. The problem is that the original Capri radios were slotted into the dash in the location shown, but were smaller than a standard unit. As time went on and they were replaced for other units, due to failure or desired upgrade, the dash was cut to accommodate. Un-cut dashes like mine are therefore less common. This archive picture from 2019 shows the previous set-up, where I had the radio screwed to the underside of the ashtray panel. Although this worked fine, I didn't want to risk damage through putting force on the screws (eg when ejecting tapes), and it didn't look especially great. So I chose to reinstate the non-working radio, and secrete the functional one in the glovebox. The only disadvantage that I can see is having to reach over to adjust the volume or change tapes. I might see if I can put a hidden mute button somewhere easily accessible to the driver. Now 4 provided test music. Next, I turned to work on the side rubbing strips. This bit was utterly terrifying. Some of the mounting holes had been filled or covered when the bodywork and respray happened, so I needed to re-drill. Yes. Drill, into the beautifully repainted and long awaited car. Eek. I covered the target area with masking tape, got the part and located it properly using one fixing in the existing hole, then with the aid of a spirit level got it in the right place. Once done I pressed on to the masking tape to create a mark. This I then checked ensuring that the distance was roughly the same from the bottom, albeit there is some flex in the rubber sealant holding the fixings in, so nothing is exact - there's an element of adjustment when it comes to tightening them up. Hole drilled, bare metal protected with a dab of touch up paint, strip fed in and bolted up from behind. That's now 5/6 of them done. Left the last one for now as it needs both fixings doing, so a bit fiddlier, and I was getting tired. I am quite deliberately leaving the bottom dash panels until last. Sod's law dictates that I shall probably need to go in there again for something or other, so it seems illogical to box everything up and need to get back in there. Better to leave that for now. Next jobs :- passenger door lock mechanism - rod has fallen off - reinstate and clip on (I think I missed this, I corrected it on the drivers side door) fiddle around endlessly with the back window trims until they are on properly reinstate the rest of the interior - back seat top and bottom (I think the top bit/folding mechanism is going to be a right pain), parcel shelf, passenger seat - and then swop the drivers seat for the original ones put on new numberplates, back decals, polish glass, tax disc, etc Marshall2810, uk_senator, Wibble and 13 others 16
Wibble Posted January 19 Posted January 19 Excellent progress, it’s looking fantastic. I have a CD radio in the glovebox of my Mk4 Cortina for the same reasons you’ve stated. N19 1


Recommended Posts
Create an account or sign in to comment
You need to be a member in order to leave a comment
Create an account
Sign up for a new account in our community. It's easy!
Register a new accountSign in
Already have an account? Sign in here.
Sign In Now