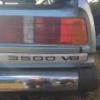
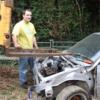
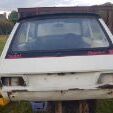
JuridicalGrunt Posted October 23, 2016 Posted October 23, 2016 Hi all i thought i would share this with everyone after my friend triplerich posted his granada coupe. i bought this about 2 years ago after selling my dolomite wanting something with a bigger engine. the person i bought this off collected various cars and had about 20 rover p6s on the same bit of land.when i first saw saw it looked bad it had been sat in grass up to the sills for about 4 years and had been of the road for 10. the drivers footwell was full of water and had moss growing on the carpet as well the in the boot. the headling was hanging down full of mold and mouse nests, but it started with a bit of petrol down the carbs and ran ok. so i went back about a week later bought it. the first pictures i took when it arrived home on trailer. it wasnt too bad the sills were soild and the floors looked good, it had some rust in the rear wheel tubs and the boot floor had some big holes in it but it was better than my dolomite. me and triplerich did some youtube videos of getting it ready for the road here is the link. it is now having a full restoration as my boss kindly let me have some space at work. thanks for looking Ryan. Skizzer, strangeangel, Dick Cheeseburger and 36 others 39
Uncle Jimmy Posted October 23, 2016 Posted October 23, 2016 A very daft thing to go and do. Well done on the purchase!
danthecapriman Posted October 23, 2016 Posted October 23, 2016 Looks a nice car, can't wait to see more.
Felly Magic Posted October 23, 2016 Posted October 23, 2016 Blimey, I saw the youtube vids of this a while back and was wondering what was happening. Welcome aboard, yet another old car resto thread is most clearly welcome here. Good luck with it
EssDeeWon Posted October 23, 2016 Posted October 23, 2016 A late series 1 car. These are for winners so well done mate. I am now going to watch the vid.
RoadworkUK Posted October 23, 2016 Posted October 23, 2016 What a survivor! I wonder how many more of these have sat for years, waiting to donate their V8s for a kit-car that never happens. Uncle Jimmy 1
Noel Tidybeard Posted October 24, 2016 Posted October 24, 2016 moonraker blue?? no, no, no that was series 2 and the M cars. its too light to be zircon as well
3VOM Posted October 24, 2016 Posted October 24, 2016 moonraker blue?? no, no, no that was series 2 and the M cars. its too light to be zircon as wellIt could be, he said it was a turquoise green originally but had been resprayed.
Bren Posted October 24, 2016 Posted October 24, 2016 Did you rebuild the motor? IIRC in your vid it was a bit tired.
Cleon-Fonte Posted October 24, 2016 Posted October 24, 2016 Given that the SD1 appeared to have a design life of two years/20,000 miles I reckon you'd have to be literally mad to own one now. Naturally I do, and applaud your bravery in doing the same. From the video it seems to be fundamentally sound where it matters. As for the colour, this is moonraker blue, so I definitely think yours is painted something else: strangeangel, danthecapriman, Uncle Jimmy and 1 other 4
Slartibartfast Posted October 24, 2016 Posted October 24, 2016 I've just started the "Update 2" video and am thoroughly enjoying the journey.
NorfolkNWeigh Posted October 24, 2016 Posted October 24, 2016 Great video, but your choke clothes peg appears to be missing.Those Alpinair controls are great , I'd forgotten that they did aftermarket aircon installations.
JuridicalGrunt Posted October 24, 2016 Author Posted October 24, 2016 Evening all The original colour should persian aqua blue it should look like this. It appers to have changed colour after a light knock on the drivers side front. the alpinair control wasnt conneced to anything they came in a box of bits with the car i put them in as someone had put two clocks in, i do have factory air con to install in it along with a brand new in box dashboard and factory curise control. It need a few bits for the mot, some small bits of welding at the lower edge of the front wings and ends of the rear sills. the screen had to come out as it was leaking and there was hole in the center of the scuttle. All in it wasnt too bad it passed its mot with only advisories on the rear brake flexi that was close to the exhaust on full travel. i believe about a month after its mot me triplerich and two other friends took it on hoilday to durdle door in dorset camping, i also choose not to buy breakdown cover as i was confidant it would be fine. it did the holiday without putting a foot wrong even being stuck in nearly 2hrs of stop start traffic with the only notable thing being the extremely heavy clutch which i found the cause of later on . the boot was tested to the limit along with the nivomat self leveling dampers, here is the link to the holiday video. more to come soon Ryan danthecapriman, Banger Kenny, mercedade and 8 others 11
TripleRich Posted October 24, 2016 Posted October 24, 2016 Its certainly a real survivor. Given the reputation these had its amazing how solid it is. I'm sure the previous owners waxoil obsession it what saved it. After Ryan finished recommissioning it we went on a 560 mile Holiday to Dorset. Averaged 23mpg and it didn't miss a beat. The engine was tired but that just gave you an excuse to rag the arse off it! Its had a few repaints but the original colour is Persian Aqua. As Ryan has said hes now restoring it so hurry up mate I wanna drive it again! danthecapriman, johngarty, Magnificent Rustbucket and 4 others 7
Rocket88 Posted October 25, 2016 Posted October 25, 2016 Blimey.....you just about passed my front door....................................
JuridicalGrunt Posted October 30, 2016 Author Posted October 30, 2016 helloBringing this up to date thanks to my boss letting me have some space allowed me to get it out the rain as the badly rotten tailgate was filling up the boot. i started stripping down the rear end as thats where it needs most of its work the boot floor is paper thin from years of water sitting in it and the lamp panel is crispy in the corners, i also wanted to check out a couple of privous repairs to the passanger rear quater and inner tub. The tailgate was the first thing that need to go it had got worse in 2 years and now the hinge plates were threatening to pull out the metal.i had been searching for last 2 years for a good used one but series 1 tailgates are super thin on the ground and of the two i had seen on ebay i was outbid each time. i spotted a post on the sd1 club about a company that was selling off a lot of the spares they had collected and in one of the pictures i spotted what looked like a brand new old stock tailgate. i jumped on the phone and was told that it was a brand new one the guy was relucatant to let anyone down to buy anything before he had sorted the parts out but i convinced him to let me take a look so i went down with a van. the guy was fantastic and had huge selection of parts after a couple of hours digging through boxes i came back with the brand new tailagte new old stock dashboard and a fair few nos parts. the first thing i did to the car was to get to get rid of the old tailate and put the new one straight on.I decided next would start digging on passanger rear wing and after a bit of wire wheeling i found the old repair. I decided at this point it would be worth replacing the quater panel i ordered a new panel and off came the old one. thankfuly most of the inner arch had survived needing just a new lip and replacing an old repair down by the sill and a replacement towing eye.With those done it was time to trim down the new outer panel and screw into placeTo be continued. Junkman, Dick Cheeseburger, UltraWomble and 9 others 12
Junkman Posted October 31, 2016 Posted October 31, 2016 That's bloody awesome. I have encountered several '57 - '63 Imperials back in the days, which were originally painted a similar colour, called 'Teal', that sort of light turquoiseish metallic.On all of them, it had faded to almost silver metallic, very uniformly. Apparently those blueish green pigments aren't very stable. Kind of a Pogweasel effect in blue.I called it the Turquoise Blues. The moniker never caught on.
TagoraSX Posted October 31, 2016 Posted October 31, 2016 Excellent work. I am envious of your S1 tailgate. Does that parts guy have an NOS S1 carpet sets?
JuridicalGrunt Posted October 31, 2016 Author Posted October 31, 2016 Excellent work. I am envious of your S1 tailgate. Does that parts guy have an NOS S1 carpet sets? Im not sure there was loads of boxes of random new and used all mixed together here is link to there site http://www.countryclassics-cars.com/condition/automobilia-collectables-parts/ his name is russell. TagoraSX 1
JuridicalGrunt Posted November 27, 2016 Author Posted November 27, 2016 Evening all Progress has been slow at the moment mainly due to this needing my attention. its a 92 celica gt4 bought a year ago as basket case loads of rot in the sills and floors a gearbox that on the way home tried selecting two gears at once the bang was vey impressive and couldnt hold its engine oil in. back to the sd1 i was at the point where the interior need to come out to stop any damage to it . i also need to look at the drivers floor pan as when it was outside it used to fill up with water. I have treated it mutiple times but so much water poured in it would rust just a quick as i could dry it out. after lifting the carpet up this was what greeted me. Not good i wasnt sure how many more times i would get away with it. after a go at it with a wire wheel i came up well i did find a few holes and one seam at the back witch has started to blow out. With that cleaned up i went to the passanger side witch thankfully never used to get wet. i did take out the large floor bungs and found they need repairing. i held off painting the floors as i plan to por 15 them when the repairs are done. next i moved back to the rear quarter and sill i need to replace the back section of the outer sill as it had been repaired before and want quite right so i ordered up a full sill i cut out section i needed and set to putting it in. All welded in and cleaned up i cleaned up the door shut and gave it a quick prime. next i did a bit more trimming on the quarter panel as need a little more tweaking to get it just where i wanted it i then tacked it in place ready to fully weld on. i adjusted the boot to get the the shut lines a bit more even and then just test fitted the bumper back on to see how it looked. Thanks for looking DeeJay, mat_the_cat, Skut and 21 others 24
Squire_Dawson Posted November 27, 2016 Posted November 27, 2016 I have encountered several '57 - '63 Imperials back in the days, Junkman, you must do a proper thread about your Imperials, stunning cars. My favourite are the '58 and '59 models, and a two-door for me, please. Junkman 1
JuridicalGrunt Posted December 23, 2016 Author Posted December 23, 2016 Evening all So after finishing up the rear quarter panel next up was what looked like a few small holes just below the gutter lip on the c pllier. After a small amount of diging i had rust flakes falling out the voild beetween the roof skin and gutter lip so i had to remove the gutter lip. Luckily the flakes of rust were just surface so was treated and the coated in por 15 . i made up the repair section out of the spare metal from the new quarter panel, it also gave me the repair section for the gutter lip i had to remove. With that sorted i next had a look at the top corners of the rear lamp panel, this panel has been replaced at some time in the past but where it was joined they had overlapped the old metal causing it to start rusting. it also had a fair bit of filler in to hide the join.on the driver side there is a few holes that were letting water in. I got as far as cutting it out so next i shall make the repair panels. Thanks for looking Banger Kenny, TagoraSX, worldofceri and 13 others 16
The Reverend Bluejeans Posted December 24, 2016 Posted December 24, 2016 Epic restoration! With regards to joins from inner to outer arch - I would use panel glue now. It's stronger that spot welding and you can etch prime the edges, glue it and the excess squeezes out. It's immensely strong and there is no air gap for moisture. Result - quicker repair and no chance of rusting again. Magnificent Rustbucket, Skizzer and spike60 3
The Reverend Bluejeans Posted December 24, 2016 Posted December 24, 2016 Here we go - 3M make it. https://www.youtube.com/watch?v=AXrGJ_D4CWg
JuridicalGrunt Posted December 27, 2016 Author Posted December 27, 2016 Epic restoration! With regards to joins from inner to outer arch - I would use panel glue now. It's stronger that spot welding and you can etch prime the edges, glue it and the excess squeezes out. It's immensely strong and there is no air gap for moisture. Result - quicker repair and no chance of rusting again. I have heard of that used in modern crash repair. i always wondered how long lasting it was before it debonded. i shall look into that if i change the other quarter panel i like idea of the join being completely sealed.
Dick Cheeseburger Posted December 27, 2016 Posted December 27, 2016 SD1's are such handsome looking things. Looks like this one has fallen into the right hands too - I love to see proper restoration skills being used. Good find with the NOS tailgate too! Skizzer 1
JuridicalGrunt Posted June 14, 2017 Author Posted June 14, 2017 Hi all long time no update i didn't realise how long it had been. picking from my last post i finished making up and repairing the passanger side lamp panel corner and gave it a coat of por 15. next up was to start sorting out the boot floor which is the worst part of the car. it sat with water in it for years and had some damage from what looked like a caravan hitch hitting it. first was remove all the remaing sound pad and wire wheel it to see how bad it was. to my amazement it was better than i expected. first up i started repairing were the floor meets the lamp panel. moving towards the center of the car it was patched 3 years ago to make it water tight, but wasnt the right shape so i decided to remake it. getting towards the drivers side was were the damage to floor was,it all needed cutting out and a new section making. more to come. thanks for looking. Banger Kenny, Sigmund Fraud, Grundig and 13 others 16
JuridicalGrunt Posted July 16, 2017 Author Posted July 16, 2017 Hello Continuing on with the boot floor i finished up the damaged section of floor and continued on making the lip. next up was contine fixing the the smaller holes in the rest of the of the floor. with that done most of the floor was done , next up was to fix the old tow bar mount holes i the lamp panel. with that done it got a coat of por 15, and next up was the drivers rear quarter panel this had rotted around the window and was repaired when i got the car but was starting to go again, the inner arch was looking a bit crusty so it was time for the quarter panel to come off. i was good job it came off as all the water that had been sitting in the boot over the years had caused it to start sweating most of the paint was just flaking off and was rusty underneath none of this could be seen inside the car. luckly most of the inner arch was good just needing the lower sections doing. thanks for looking. Dick Dastardly, johngarty, mat_the_cat and 11 others 14
Recommended Posts
Create an account or sign in to comment
You need to be a member in order to leave a comment
Create an account
Sign up for a new account in our community. It's easy!
Register a new accountSign in
Already have an account? Sign in here.
Sign In Now