Jump to content

Renault 6TL "Crapaud"


Recommended Posts

Posted

Good going Angyl, you're getting there.

That tyre size sounds rather exotic. I'd guess at 145 or 155(80)13 or summert. Edit - beaten to it.

Posted

Had a drag through the photos.  The ones on are 145 SR 13, so I remembered wrong.  I think 145 SR 13 translates to 145/80/13 doesn't it?

Posted

This needs to meet with my CX..


2 finer pieces of french engineering you'll never see

My CX met my Renault 6 for the first time last weekend.  They seemed to get on quite well.

  • Like 2
Posted

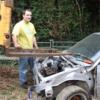
Today I was going to take the engine out to sort out the static timing issue.  Taking the engine out of this car is pretty involved and would take me quite a long time.  However, cutting an access hole in the bulkhead isn't and since this car is on a separate chassis it doesn't cause any structural issues, really.  I can always weld the metal back in too and with how long it was going to take me to pull the engine out that option is STILL preferable to me.  What I'll actually do is create a removable panel for this section with a seal to keep things where they need to be kept.


Previously, Scaryoldcortina had been and helped figure out what was going on so the engine looked like this.

20160807-01.jpg


With the access panel made inside the car, I could get to all the bolts that hold on the timing chain cover and remove it.  This is actually quite easy to deal with now, I can see what things are doing inside the car and don't have to find somewhere to put the engine while I work on it.

20160807-02.jpg


With the chain attached, the crankshaft and camshaft turn together with no problem on the key but you cannot turn the engine by hand.  I even tried using some force with a breaker bar on the sprocket nut but no go.  I didn't check the timing because I couldn't get things rotated to the point they need to be so moved on and removed the chain and tensioner to see if the crankshaft and camshaft would rotate freely.


The camshaft does turn very smoothly when the chain is not attached, both from the sprocket end and with the water pump pulley, which you can do by hand with no real effort.


The crankshaft won't turn by hand at all.  You can put a bolt in the end of the sprocket to turn it, but even with the breaker bar I wasn't getting any movement and didn't want to force it.  However, as soon as you flick the key in the ignition it rotates freely and without any horrible noises.  The starter motor does not struggle to turn the engine over.


I did try to rock the car in gear to rotate the crankshaft to the relevant timing position but just didn't have the strength to do it (not much sleep and hurting my arm this morning, probably not helping me there), even with Mike helping.  You can't get the timing mark in the right place with the starter because it always jumps just past where you need it, we did try that several times to no avail.


I don't know enough about this sort of work to diagnose the potential problem beyond suspecting it's something to do with the crankshaft being too tight even though that was done to the torque settings listed in the book for the 1181 engine, which this one is.  There's oil everywhere and the crankshaft and bearings were installed with assembly lube as directed by people who know better than me so I don't believe the crankshaft is stuck, just tight.  What's frustrating is that before putting the engine in the car you COULD turn the whole thing by hand from the crankshaft and the camshaft, that you now can't is baffling to me.

  • Like 3
Posted

Nice access hole! Like I said yesterday, we used to do a similar thing to pinto engined transits the first time they needed a cam fitting.


Tight engine is going to be one of the main or big end shells clamping, either because didn't go back in the order they came out or because a bit of loose muck from assembly has pushed up the oilway and is jamming one. Either way it's sump off time to find out so you probably still have to pull the engine. It would also rule out gearbox/clutch related wierdness causing it to stick as well.

Posted

You did not say whether you've tried turning the engine with the plugs removed.  If you haven't, it may be worth a try.  The fact that the starter seems to spin it without difficulty is a good sign.  Do you habitually press the clutch when starting?  If so, could be another clue there.

Posted

It is odd that the starter spins the engine ok though you can't turn it by hand. I have seen a newly rebuilt engine that was just the opposite: too stiff for the starter. ( A Viva. Bastard got tow started by a tractor)


If the starter pinion is for some reason stuck in engagement that would be a big lot of extra friction; I would have that starter motor off first and then see if you can turn by hand.


edit - Like the access hatch. Reminds me of the one in Triumph 1300 / 1500 for removing the clutch shaft.

Posted

*throws toys out of pram*


Hateful little French car, making me do all this work.  Rotten little thing.


*puts toys back in pram*


Suppose I'll see what I can do about fixing it though.

  • Like 2
Posted

Scaryoldcortina: as per PM, but for the benefit of everyone else, the sump can be drained and removed with the engine in situ, from memory, so I should be able to access, check, and possibly fix the bearings without having to pull the engine.  I really don't want to pull the engine, I don't know when I'll have that much block of time free to do it.


RayMK:  it's the same with or without plugs.


SornMe:  Mike suggested that too.  The starter is practically new, having been rebuilt very recently so I'd be surprised if it were broken already.

Posted

Had a few minutes while on errands so stopped in at the unit and removed the starter.  That's not what's jamming things so it was put back on.  I bet it's spun that bearing shell again.  Haven't the time to be draining the oil and removing the sump until the weekend but now I'm thinking it's going to be bearing shell shopping time which proved utterly fruitless last time so I hold out very little hope of sorting this out.  There's a very, very slim chance that the bearing shells are fine and it's just that things are a bit too tight and need slacking off to restore free rotation but I shan't pin any hopes on that until I've had a look.


Not angry or upset, just disappointed really.

  • Like 1
Posted

Aye, I'm sure we've all been there and can sympathise. Bloody annoying when you're at the 'start it up' phase and find some bloody issue - like when I rebuilt the Dyane's engine and it started hurling oil EVERYWHERE. You'll get there though. If it's doing your head in, just leave it for a bit. I've found this is often far better (and less damaging!) than piling on with it when you're in a bad mood. 

Posted

Not angry or upset, just disappointed really.

Your R6 is a Michael Bay film and you're Mark Kermode, AICMFP.

  • Like 2
Posted

If it's what I think it is then I'll be packing the Renault up and putting it in the garage at home and focusing my attentions on the Princess instead since she's running and doesn't really need much.

Posted

Happily, I can drop the sump without removing anything else.  I can probably even drop the oil and sump without even jacking the car up, so I'm not worried about the next bit.  Engine can stay in the car where it belongs that way.

  • Like 4
Posted

Did thre crank get reground or measured or anything?


I remember the spun shell now you mentioned it, it seemed odd at the time.


I ask as i wonder if youve got an oval journal or something funny with the crank causing this

  • 1 month later...
Posted

Today I finally got chance and was motivated enough to pull the engine out of the Renault and get to the bottom of this problem.  Originally I had wanted to get the sump off with the engine in the car, this was thwarted by the chassis blocking access to the sump bolts.  This engine is horrible to work on when it's in the car.  So I determined to haul it out, which is a big horrible job.


I just knuckled down and got on with it and, amazingly, just an hour and a half later I'd managed to do it completely solo.  I didn't even remove the face, but I will be when I put the engine back in because it's an absolute war getting the engine and box out with the face attached.

20160912-01.jpg


I found I could leave a lot of things attached which sped up the job quite a bit and will make reinstalling the engine and gearbox that much easier.  You can see the flange on the chassis rails which obscures access to the sump bolts here too.  The anti-roll bar also prevents you from dropping the sump that far even if you could unbolt it.  Horrible.

20160912-03.jpg


I cheated with the driveshafts.  I need to replace some of the balljoint bolts because, as highlighted previously, I'd put them in 'upside down'.  That meant that a couple of the lower ones got bent out of shape and were tricky to remove, unlike the top ones which were unaffected but could do with being flipped around.  Not a big deal.  So that I didn't have to disconnect and drain the brake system again I propped the hubs up on a pair of spare axle stands to take the stress off the flexible hose.

20160912-02.jpg


With the engine and gearbox wheeled indoors I just beat the weather turning.  I didn't have a huge amount of time, thankfully I did have a checklist of possible problem areas:


Starter motor - removed and found to be working perfectly fine, as well it ought considering it's only just been reconditioned.  This was not locking the flywheel and eliminated as a possible problem.


Gearbox - there was a concern the layshaft could have got stuck.  Happily this too was ruled out as it turns freely by hand.  I can't say anything about the condition of the gearbox beyond that as it's an unknown quantity.


Clutch - no problems apparent.  Clutch fork is still operating the release bearing.  None of the visible components have any problems apparent.


At each stage we tested to see if the crankshaft would turn and it wouldn't so we got to the point that the sump was removed for inspection.  First thing was to inspect the contents of the sump.  Unsurprisingly there's a little bit of sludge that must have been pumped out of the nooks I couldn't get into but no sparklies or chunks of metal or anything that might cause any alarm.  There was what looked like grit at first, you can see some in the reflection, but if you squidge it with your finger it's just little blobs of sludge.  The oil in the car, which is brand new, is still fairly opaque with just some discolouration from the muck that's still floating around.  Not a problem because this oil is only put in to flush the engine through anyway, it's just doing its job.

20160912-04.jpg


That only left one area, which was the bearings themselves.  Happily, access is really easy to all this.  I'm doing it laid on its side rather than on the engine stand as to get the engine to bolt on to the engine stand means removing the clutch and I don't want to do that.  This way works just fine.  I was very fortunate in that Accord83 on the Retro Rides forum very kindly provided a Renault 6 workshop manual which has all the information I'll ever need including the torque settings for the bearing caps.  Here's the thing, I'd set this and the timing according to the instructions in the Haynes manual and not only was the timing wrong but the bearing caps were all torqued up too tight.  Doing things by the book is fine, providing the book you're using is actually any good.

20160912-05.jpg


I'd already run out of time by this point but I hung on for a few minutes resetting the caps, checking the bearing shells and guess what?  Now the engine turns by hand, like it should.  Here's where I feel a bit unsure about putting the engine back in the car because last time it went in I as sure the engine turned over by hand, it was stiff but it turned, and then when all the oil got circulated it stopped being able to be turned by hand.  This time it turns very smoothly and very freely by hand, everything is well oiled and I'm hoping it doesn't tighten up on me when it goes back in the car.  If I can find some way of bench testing it before refitting it I will.


I'll set the timing and build everything up while it's out of the car, just like I did last time, but this time I'll refer to the new Workshop Manual and probably put the Haynes book in the bin where it belongs.

Posted

I would suggest referring solely to the factory manual,reassemble and if at all possible,run it out of the car.whip the rocker off too and check all is going up and down as it should be (insert innuendo here)

Posted

^Yes, all of the this.  Scary suggested much the same.

  • Like 1
Posted

I have a Haynes manual. It does a fine job of being a raiser for the computer screen.


All good stuff re: problem elimination. Hopefully referring to the proper manual will be a huge win.


Digits crossed!

  • Like 1
Posted

Phil:  several, as it happens, thanks to mechanic friend.


Since making the above post it's highlighted more potential problems than it's solved.  I had thought, in my innocence of engine work, that I'd magically fixed it and we could bolt it up and be on our way.  Unfortunately, those with loads more experience than me are all making ominous noises and remarks on the theme of "something's not right here".  I can't agree or disagree with them, I don't have the experience, so I have to trust their advice and do what I can to allay their fears that I'm setting myself up for disaster.


So instead of buttoning it all up and trying to get it running tomorrow, instead I'll be using the micrometers that mechanic friend sent me to measure ALL THE THINGS to find out just where the problem really is.  I understand that it's possible something is distorted or just the wrong size.  Something could be in the wrong order, or paired incorrectly and we need to find out.


I've invested a lot of time, effort and new parts in this car to get it this far.  I'm at a crossroads where I'm not sure if I want to carry on or call it quits if it turns out there is an expensive problem.  Hopefully it'll be something straightforward and affordable and not something horrible and wallet killing.

  • Like 3
Posted

There should be ovality maximums in the service manual for the crank. I usually measure 4 places on the bearing surfaces. Inner and outer at thrust and again at 90 degrees.


See what the book says. Nice and easy measurements to take, and quite telling. Engineer's blue will give witness to any bits that are binding.


Phil

Posted

Micrometers.................................on Autoshite...........................blimey. Impressed by your diligence

Posted

You are doing the right thing by being patient and methodical, will pay off in the long run. Picture of burning Haynes manual optional.

  • Like 2
Posted

We're all still rooting for you Vulg, so keep at it. The answer can't be far from being discovered.

  • Like 2

Create an account or sign in to comment

You need to be a member in order to leave a comment

Create an account

Sign up for a new account in our community. It's easy!

Register a new account

Sign in

Already have an account? Sign in here.

Sign In Now
×
×
  • Create New...