Jump to content

1982 Rover sd1 v8 Paintwork finished The reassembly begins


Recommended Posts

Posted

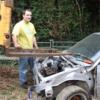
I managed an action shot last week!  Fabrication is certainly not a comfortable job...


post-20612-0-43101200-1500199103_thumb.jpg


  • Like 6
  • 2 weeks later...
Posted

Evening all


So with the quarter panel off the window frame was first up as most of this had disappeared, with the worst part being the lower section of the frame.


post-20639-0-00185600-1500919823_thumb.jpg

post-20639-0-84197000-1500919826_thumb.jpg

post-20639-0-79193700-1500919830_thumb.jpg

post-20639-0-63928100-1500919841_thumb.jpg

post-20639-0-57246400-1500919852_thumb.jpg


with it done it got a coat of por and the the rest of the lip dressed with a hammer and dolly. at this point i needed to order the inner arch panel as thats next up.


  • 4 months later...
Posted

Evening all


Long time no update  have been making some steady progress over the last few months though i lost some time after discovering accident damage to the drivers side rear  which showed up as some creases in the rear inner wheel tub, and some rot extending up the boot floor under the mount for the watts linkage.


post-20639-0-71117700-1511726475_thumb.jpg

post-20639-0-14030700-1511726508_thumb.jpg


this meant the rear axle needed to come out, so i managed to book some ramp space  and removed everything, engine gearbox subframe rear axle,once it was all out i got the measurements from the factory manual and measured it up with a colleague. it measured  within 1mm of the factory spec your allowed up to 2mm.so i was i good to go with cutting out and repairing the floor.


post-20639-0-63943100-1511726609_thumb.jpg

post-20639-0-99652900-1511726816_thumb.jpg

post-20639-0-88993400-1511726820_thumb.jpg

post-20639-0-25517000-1511726912_thumb.jpg


one thing me and a colleague discoverd while doing the measurements to the rear and  which i kind of had suspicions of is that the front has also taken a hit and the whole front is pushed over to passanger side so that will need to be delt with when i get to the front, but here is how it sits now.


post-20639-0-81765200-1511726824_thumb.jpg


thanks for looking


Posted

Holeeeeee Sheeeet - I hope to god I don't go down this rabbit hole with the one I've got sitting on a friends drive at the moment! The Granada and this thread are both great.

Can I ask - how long have you been fabricating your repair panels when required? Mine look like I let Giant Haystacks loose with a jack-hammer when I try to make any........


it depends on the repair panel im making the last piece i made for the boot floor took about 8 hours to make from cutting out the old piece to welding in the new piece. some of the more complex panels can take a long time to make, me and my colleague recentley remade a number plate and rear lamp panel for a 1946 austin 16 and that took over 3 weeks to make but was very complex and was a big learning curve for me . here is a picture of the finished panel.


post-20639-0-84358000-1511899591_thumb.jpg

  • Like 10
Posted

after seeing a few of these in the scrappers over the years, this is remarkably solid.....especially given its years out to pasture!!


Should be as-new when finished....sorry BETTER than new!!!

  • 2 months later...
Posted

evening all


been back at this lately continuing on from the boot floor repair, i cut out the towing eye section and inner wheel arch section from my repair panel and welded that in to the inner wheel tub, then it was back on with the with quarter panel for the last time got it gapping up nicely and then welded it on.


post-20639-0-92656600-1518119295_thumb.jpg

post-20639-0-04694100-1518119300_thumb.jpg

post-20639-0-93333700-1518119334_thumb.jpg

post-20639-0-83041400-1518119338_thumb.jpg


with the quarter panel on the back end is nearly finished, last repair to do was where that lamp panel lapped onto the quarter panel, the panel has been replaced sometime in the past and when they changed it they lapped the panel join the wrong way round,which meant water was able to creep between that panels and start rusting out, the only thing to do was to chop it out and start again.


post-20639-0-43065600-1518119636_thumb.jpg

post-20639-0-44867400-1518119639_thumb.jpg

post-20639-0-58035100-1518119642_thumb.jpg

post-20639-0-12421000-1518119753_thumb.jpg

post-20639-0-32152100-1518119757_thumb.jpg

post-20639-0-79621400-1518119817_thumb.jpg

post-20639-0-59888900-1518119821_thumb.jpg


with that done the back end is done it has taken alot more work than i expected but im glad its done, next up is to remove the entire front end as my panels have turned up.


post-20639-0-76962800-1518119985_thumb.jpg


thanks for looking


Posted

My first car was an SD1, and I have had a soft-spot for them ever since.  Lovely work you're doing on this one, looks like it will be one of the best left once it's all done.


It still pains me to remember how readily and easily these were scrapped 20 years ago.  I can remember seeing one driven in to a breakers, and they didn't even bother putting it on the pile. It was squashed and baled almost immediately.  Such a waste.

Posted

would love one if I ever got my 6 numbers..........V8 4.0 in Vittesse spec..mmmmm

Posted

In actual awe of your patience, fabrication, welding and just skills in general.


I generally look to move a car on the first time it fails an MOT on welding...

Posted

Started on the front end this weekend it was time for the front wings to come off and to see how bad the top scuttle panel and bulkhead are.


post-20639-0-64615000-1518381605_thumb.jpg

post-20639-0-44625400-1518381609_thumb.jpg

post-20639-0-33369500-1518381686_thumb.jpg


with the drivers wing off it isnt off to a good start, this is the side i believe was hit in the accident some of the damage has been rather crudely pulled out leaving this big sqaure hole , this has rusted out the splash panel behind it. the rest of the inner arch has damage and has suffered stress around the some of the spot welds causing rust between the welds.next off the passanger wing.


post-20639-0-16655800-1518382329_thumb.jpg


this side has less rust but has more signs of damage this side had the worst panel fit and with the wing off it shows a crease in the inner wing by where the bulkhead joins it just by the hole for the wiring bung, this side also the same problem as the other side with the rust between the spot welds in places, the passanger side appears to be pulled over towards drivers side , but before i take any more of the front panel work off im going so sort the rust in the scuttle and upper bulkhead , as the area where the bonnet relese cable goes has rusted away and been patched once before.  


post-20639-0-59548700-1518383321_thumb.jpg

post-20639-0-44171300-1518383017_thumb.jpg

post-20639-0-55752600-1518383020_thumb.jpg


so there's lot more work to do here than i thought but it shall be fixed.

Posted

More excellent fabrication work going on here; this'll be a stunner when it's finished that for sure.

Mutleys crashed the Double Zero; fancy having a crack at that??

  • 4 weeks later...
Posted

Afternoon all


continuing removing the scuttle panel so i could see the full extent of the rust underneath,and it wasnt as bad as i expected, the only drain hole is right in the center of the bulkhead so if water gets in and the car sits on an angle for a long time their is no way for the water to get out and this is the result.


post-20639-0-51492500-1520785060_thumb.jpg

post-20639-0-06625900-1520785201_thumb.jpg

post-20639-0-18581500-1520785204_thumb.jpg


on the underside of the scuttle panel pretty much all the paint had bubbled and flaked due to the water  thankfuly its mostly just surfce rust.


post-20639-0-06992200-1520785324_thumb.jpg


starting in the center just below the cutout for the heater box had a few holes and some nasty pitting so it was cut out an replaced aswell as the bady rusted area where the bonnet relese cable comes through, and a hole where  air conditioning was going to be fitted but isnt being fitted now.


post-20639-0-38825900-1520785623_thumb.jpg

post-20639-0-11112200-1520785632_thumb.jpg

post-20639-0-48416300-1520785639_thumb.jpg

post-20639-0-24003500-1520785643_thumb.jpg

post-20639-0-40883300-1520785647_thumb.jpg

post-20639-0-91641800-1520785656_thumb.jpg


annoyingly i seem to have forgotten to take a picture of it finished but with the bulkhead top done it was time to continue removing the front end. but before i cut it off i took measurements of how it was  before i cut the lamp panel out  as i expeted the chassis legs to move, and i wanted to know how far they moved.


post-20639-0-73975000-1520786571_thumb.jpg

post-20639-0-20385100-1520786580_thumb.jpg


i re did the  measurements and sure enough the passenger chassis leg had moved out 10mm .next was clean all the paint off the chassis legs to look for bends and ripples, this was where it stared showing that the damage was alot worse than expected i took out the subfame bolts as left them in to keep them safe and found the front two bolts are bent Which means the subfame now needs to be checked as the impact got that far, with paint off the passenger chassis leg showed a big crease in the leg just behind the front subframe bolt along with another smaller crease near bulkhead, the front of the leg where the bumper mounts is also bent.


post-20639-0-16922000-1520788101_thumb.jpg


the drives leg is better but has a smaller crease just behind the front subframe bolt and some damage at the front but is much better than the passenger leg, their is damage around the whole engine bay with both battery trays being bent and the inner wing on the drivers side where it meets the battery tray was also bent. i removed the drivers side battery tray and front section of the inner wing as they were damaged.


post-20639-0-97289400-1520786575_thumb.jpg

post-20639-0-62344300-1520787819_thumb.jpg

post-20639-0-67257800-1520787823_thumb.jpg

post-20639-0-69827900-1520787827_thumb.jpg


i temporarily cut and tacked in the new inner wing section as next up is a fit up of the new front panel work to give us an i idea of which way the chassis need moved and to mesure up from the demesions in the book.


thanks for looking

Posted

This is going to be a seriously epic car once complete, great work going on.I've always loved the SD1, aping the shape of a Ferrari Daytona was a pure masterstroke by BL, if they'd nailed them together properly, they would have been a world beater. 

  • 2 weeks later...
Posted

continuing on with the front end next up was to clean up the passanger inner wing which showed much the same problems as the driver side with rust blowing out the seam in a few places, aswell as more creases in the inner wing. the worst section being the very front of the inner wing so it was removed.


post-20639-0-23345400-1521971124_thumb.jpg


with it removed i could get better access to the battery tray area, i removed the support bracket for the tray as it needed cleaning up and their was a dent i wanted to dress out of the tray which is easier with it out of the way this is when i found this.


post-20639-0-15957500-1521971413_thumb.jpg


crap thats pretty mangled the front section of that plate is 2mm thick and has been totaly crumpled lucky i bought the tray for this side as well so time to remove it.


post-20639-0-24001700-1521971643_thumb.jpg


with it removed i trimmed up the replacement section of inner wing and trial fitted the new tray and started temporarily screwing the new outer panels on with everything fitted i centralised the bonnet to see what panel gaps we had.


post-20639-0-43081300-1521971905_thumb.jpg


driver side was pretty good needs to come in about 1mm but is pretty good.


post-20639-0-01483500-1521971909_thumb.jpg


passanger side.


post-20639-0-56453700-1521971912_thumb.jpg


oh dear thats a 30mm panel gap. so we can now see what side needs moving going by the measurements shows the chassis legs to be in the right place width wise but top of the strut is lent over. so with that its time to strengthen up the drivers side as we shall use this to pull the other side back in. so i replaced the wheel arch , end of the sill and a section behind the strut.


post-20639-0-99398800-1521973004_thumb.jpg

post-20639-0-84909400-1521973023_thumb.jpg

post-20639-0-34731900-1521973052_thumb.jpg

post-20639-0-13795100-1521973131_thumb.jpg

post-20639-0-53606200-1521973191_thumb.jpg

post-20639-0-72500700-1521973195_thumb.jpg


with that done i had spotted a couple of holes and an old repair in the chassis leg where it met the bulkhead so decided to do that while is was thier.


post-20639-0-67897600-1521973525_thumb.jpg


when i cut the the section out and turned it over it looked like this

post-20639-0-69807600-1521973658_thumb.jpg


crap and inside the leg was looking much better so this turned into a much bigger hole than i was expectng.


post-20639-0-04724800-1521973667_thumb.jpg

post-20639-0-77682200-1521973701_thumb.jpg

post-20639-0-42604100-1521973705_thumb.jpg

post-20639-0-01481900-1521973709_thumb.jpg


next up is to finish the closer for the chassis leg and move on to putting the battery tray in.


Thanks for looking


Posted

Skills, serious skills!


Great to see this being saved. I had an SD1 V8 as a field car many moons ago and it was seriously good fun. That was rotten 25 years ago so it's amazing to see this one in such "good" condition! They really are a fantastic looking car imo.


I've got a bit of a job to do on a mates ZX 16v soon and it looks like I'm going to be in need of a finger belt sander as access is going to be impossible with a grinder. Would you recommend a 10mm or 20 mm wide belt one? Any recommendations on what to use for paint removal and cleanup with an angled die grinder/sander too please?

Posted

Amazing work! scary to look at how bad yours is and it's only a year older than mine!

Posted

Great work, that's some proper effort going into that.

Also love the plate WAVSEX. You'll have no trouble selling that to someone with a surfing fetish, or particularly keen on uncompressed audio files.

  • Like 2
Posted

Skills, serious skills!


Great to see this being saved. I had an SD1 V8 as a field car many moons ago and it was seriously good fun. That was rotten 25 years ago so it's amazing to see this one in such "good" condition! They really are a fantastic looking car imo.


I've got a bit of a job to do on a mates ZX 16v soon and it looks like I'm going to be in need of a finger belt sander as access is going to be impossible with a grinder. Would you recommend a 10mm or 20 mm wide belt one? Any recommendations on what to use for paint removal and cleanup with an angled die grinder/sander too please?


10mm belt sanders are good if its a really tight space or corner but belts tend not to last too long when grinding welds down, id reccomend a 20mm i pretty much always use it all the time it tends to fit in most places and the paces it wont fit i use a 90 degree die grinder. thing to note is 20mm belt sanders are very air hungry so you would need a decient size compressor, also dont buy really cheap belts they fall apart in seconds and they can snap with some force and even with welding gloves on it really hurts if it hits your hand, Zirconium belts tend to be pretty good, 90 degree die grinders are very good in small spaces for grinding down and finishing welds up i use mine with roloc discs between 36 and 40 grit. for stripping paint i use poly strip wheels they dont damage the steel and they remove paint pretty quickly and dont tend to fly apart like big wire wheels just make sure they match the rpm of your grinder ive put some links to look at hope it helps.


https://www.ebay.co.uk/itm/ANS604-ACDELCO-20mm-belt-sander/292327527833?hash=item4410141599:g:mTwAAOSwdSRaCA5t


https://www.ebay.co.uk/itm/115mm-4-5-Poly-Strip-Wheel-Paint-Rust-Removal-Clean-Quality-Angle-Grinder-Disc/162103708044?epid=1288905225&hash=item25be22498c:g:sisAAOSwv0tVXbLR


https://www.ebay.co.uk/itm/Roloc-Type-Discs-50mm-10-off-Green-Zirconia-UK-supplier-for-faster-delivery/222829835529?hash=item33e1b17509:m:m5xZ2tDaDgydqfxau4vm-Ug


https://www.ebay.co.uk/itm/Draper-Storm-Force-90-Degrees-Mini-Air-Angle-Die-Grinder-Free-Adaptor-65137/162358210920?epid=1039317297&hash=item25cd4db168:g:0ZMAAOSw5cNYem4S


  • Like 6
Posted

We're big fans of the 20mm belt sander.  Takes the edge off the weld nice and quick while giving you much better control than a grinder.


post-20612-0-40793100-1522009276_thumb.jpg


The SD1 is looking quite sad at the moment.  We suspect it went into a ditch during the 90s which explains the damage to the legs.  Also explains it surviving as an impact with another car would have gone through the insurance and written it off.

  • Like 1
Posted


10mm belt sanders are good if its a really tight space or corner but belts tend not to last too long when grinding welds down, id reccomend a 20mm i pretty much always use it all the time it tends to fit in most places and the paces it wont fit i use a 90 degree die grinder. thing to note is 20mm belt sanders are very air hungry so you would need a decient size compressor, also dont buy really cheap belts they fall apart in seconds and they can snap with some force and even with welding gloves on it really hurts if it hits your hand, Zirconium belts tend to be pretty good, 90 degree die grinders are very good in small spaces for grinding down and finishing welds up i use mine with roloc discs between 36 and 40 grit. for stripping paint i use poly strip wheels they dont damage the steel and they remove paint pretty quickly and dont tend to fly apart like big wire wheels just make sure they match the rpm of your grinder ive put some links to look at hope it helps.


https://www.ebay.co.uk/itm/ANS604-ACDELCO-20mm-belt-sander/292327527833?hash=item4410141599:g:mTwAAOSwdSRaCA5t


https://www.ebay.co.uk/itm/115mm-4-5-Poly-Strip-Wheel-Paint-Rust-Removal-Clean-Quality-Angle-Grinder-Disc/162103708044?epid=1288905225&hash=item25be22498c:g:sisAAOSwv0tVXbLR


https://www.ebay.co.uk/itm/Roloc-Type-Discs-50mm-10-off-Green-Zirconia-UK-supplier-for-faster-delivery/222829835529?hash=item33e1b17509:m:m5xZ2tDaDgydqfxau4vm-Ug


https://www.ebay.co.uk/itm/Draper-Storm-Force-90-Degrees-Mini-Air-Angle-Die-Grinder-Free-Adaptor-65137/162358210920?epid=1039317297&hash=item25cd4db168:g:0ZMAAOSw5cNYem4S


Brilliant, thanks so, so much for taking the time to do that :mrgreen:


We're big fans of the 20mm belt sander.  Takes the edge off the weld nice and quick while giving you much better control than a grinder.


attachicon.gif20170408_104517.jpg


The SD1 is looking quite sad at the moment.  We suspect it went into a ditch during the 90s which explains the damage to the legs.  Also explains it surviving as an impact with another car would have gone through the insurance and written it off.


Looks like I know what I'll be buying now then! Thankyou.


Very probably the case with the SD1, plenty of cars go hedge hopping and get bodged back together if they live out in the sticks. Certainly still happens round here now.

  • 2 weeks later...
Posted

Afternoon all


continuing on with the chassis leg it was treated to a good coat of por-15 and i set to making a new outer closer for the leg.


post-20639-0-36442700-1523198677_thumb.jpg

post-20639-0-36463500-1523198690_thumb.jpg

post-20639-0-77885200-1523198716_thumb.jpg


with that done i could weld in the driver side battery tray.


post-20639-0-28907000-1523199162_thumb.jpg


thats as far as i can go at the moment with putting the front end together as i need to get a new subframe, so i moved on to repairing one of the radiator supports that was damaged.


post-20639-0-46729800-1523199301_thumb.jpg

post-20639-0-81612400-1523199305_thumb.jpg

post-20639-0-70828000-1523199309_thumb.jpg


in workshop news this cavalier 8v sri is just about to start its metal work next week it has some serious rust issues in the rear end due to an old crash repair but other wise is pretty solid.


post-20639-0-37071600-1523199665_thumb.jpg

post-20639-0-62603400-1523199669_thumb.jpg

post-20639-0-90839300-1523199672_thumb.jpg

post-20639-0-57701800-1523199676_thumb.jpg

post-20639-0-45514600-1523199680_thumb.jpg


Thanks for looking


  • Like 12
  • 1 month later...
Posted

afternoon all


my new subframe arrived so i could continue with straightening the front end, so after putting the new subframe in and pulling the passanger chassis leg and inner wing  over it was starting to line up.


post-20639-0-77087800-1527514531_thumb.jpg


a measure up of the strut tops showed it to be within 1mm of factory your alowed up to 2mm under or over. with that i could start finishing up the drivers side inner wing cleaning off the old underseal and painting it with por-15.


post-20639-0-28113600-1527514812_thumb.jpg

post-20639-0-75231800-1527514849_thumb.jpg

post-20639-0-44939500-1527514884_thumb.jpg

post-20639-0-07455100-1527514905_thumb.jpg


next up was to start on the passanger side repairing the inner arch down to the sill .


post-20639-0-75468000-1527515102_thumb.jpg

post-20639-0-07773700-1527515121_thumb.jpg

post-20639-0-56152700-1527517588_thumb.jpg


at the sill to inner wing join the rust had spead along the seam towards the apost.


post-20639-0-42376100-1527515624_thumb.jpg

post-20639-0-30430000-1527515671_thumb.jpg

post-20639-0-40226900-1527515697_thumb.jpg

post-20639-0-13293300-1527515797_thumb.jpg

post-20639-0-54493100-1527515812_thumb.jpg


with the inner done i cut out my repair section from my full sill ready to go in.


post-20639-0-97687300-1527515900_thumb.jpg

post-20639-0-55020300-1527516389_thumb.jpg


thanks for lookng


  • Like 15
  • 1 month later...
Posted

Evening all


i didnt realise how long its been since i last updated this progress is continuing, i managed to get a good amount done when i had a week off last month. i finished up repairing the passange side sill end but somehow forgot to take a picture of it. further up the inner wing was a seam that had blown out that was replaced.


post-20639-0-43072400-1532541395_thumb.jpg

post-20639-0-52530900-1532541407_thumb.jpg

post-20639-0-94352900-1532541476_thumb.jpg

post-20639-0-87010300-1532541480_thumb.jpg


with that sorted one small job was to the wiring grommet hole, someone in the past wanted an electric arieal so just hacked the hole open and pushed the jagged metal back up when they were done, it cut me so many times when working in that footwell it was time to fix it.


post-20639-0-08520600-1532541712_thumb.jpg

post-20639-0-69057300-1532541403_thumb.jpg

post-20639-0-87132600-1532541399_thumb.jpg


much bettter, next up was to start rebuliding the scuttle panel upper and lower section, the lower piece had sufferd quite badly in one corner and had rust holes were the water drain in the center is .


post-20639-0-34078200-1532542565_thumb.jpg

post-20639-0-96234300-1532542291_thumb.jpg

post-20639-0-14354300-1532542451_thumb.jpg

post-20639-0-10921600-1532542411_thumb.jpg

post-20639-0-70206700-1532542422_thumb.jpg

post-20639-0-13393300-1532542727_thumb.jpg

post-20639-0-82788900-1532542730_thumb.jpg


with that done i moved on to the upper section this had surface rust all over the underside with some holes in a few places, i fixed the few holes that were in it and gave a good coat of por-15 with a good coat of wax aswell it sould be good. 


post-20639-0-07758000-1532544567_thumb.jpg

post-20639-0-91416400-1532544570_thumb.jpg

post-20639-0-81082700-1532544623_thumb.jpg

post-20639-0-71982800-1532544644_thumb.jpg

post-20639-0-16620200-1532544648_thumb.jpg

post-20639-0-92515100-1532544651_thumb.jpg

post-20639-0-64056100-1532544655_thumb.jpg


with that done it was time it put it all back togeather on the car


post-20639-0-95204300-1532544968_thumb.jpg

post-20639-0-25248600-1532544972_thumb.jpg

post-20639-0-15141000-1532544976_thumb.jpg


its nice to see it back on the car it was alot of work to rebuild it,but that isnt the end of the bulkhead work next was to rebuild the inner wing to bulhead joins on both sides, sd1s really like to rot the bulkheads out.  this was the state of the passage side.


post-20639-0-39161900-1532545456_thumb.jpg


inevitably i had to replace quite alot.


post-20639-0-48992300-1532545791_thumb.jpg

post-20639-0-54787200-1532545795_thumb.jpg

post-20639-0-58392700-1532545799_thumb.jpg

post-20639-0-09856700-1532545804_thumb.jpg

post-20639-0-16024600-1532545808_thumb.jpg

post-20639-0-92430800-1532546004_thumb.jpg


i was hoping the end of the inner wing would be salvageable but it was too far gone so i made up a replacement


post-20639-0-40219900-1532546008_thumb.jpg

post-20639-0-77271100-1532546011_thumb.jpg

post-20639-0-14458800-1532546001_thumb.jpg


i hope this post isnt too long ,next up will be the other side.


many thanks


Ryan


Posted

A consistently superb thread! It is amazing how much rust a car can hide.

Posted

This sort of thread is invaluable really, highlighting where and how places rot and what you need to repair is really useful for anyone tackling an SD1 restoration.  I never have many comments to add because, well, you look like you know what you're doing there.

  • Like 3

Create an account or sign in to comment

You need to be a member in order to leave a comment

Create an account

Sign up for a new account in our community. It's easy!

Register a new account

Sign in

Already have an account? Sign in here.

Sign In Now
×
×
  • Create New...