Jump to content

Grace, Pace and Space ..even more so than the Jaguar.


Recommended Posts

Posted

20240226_102521as.thumb.jpg.e629fb9339cd812df3969dc0cdce6f1c.jpg

Yesterday I drove up to my friend and fellow Triumph enthusiast, Mathew, in Norfolk. Avoiding the A14 roadworks around Stowmarket I instead headed north across country to Diss and then Thetford, through parts of its namesake forest.  Aside from getting caught behind the occasional truck or tractor,  the roads up there can be remarkably clear.  And then across the fenlands remarkably wobbly where the roads have subsided.  Hey-up, the car is for cruising at a comfortable rather than fast pace, and I do enjoy driving this car in that vein. 

The purpose of my visit ..aside from to see a nice fella, drink tea and eat bacon sarnies, and help him unload yet another GT6 body shell and chassis he'd recently bought, was to chose a colour . . .


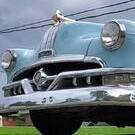
I'm a person who usually dresses in dark blue when I go out, and for the past 25 years drove a metallic blue Chrysler Voyager.  Jaguar-Daimler did a beautiful metallic cyan (little-boy) light blue metallic, and I was very tempted to go for that. However this car's seats are ox-blood red and I don't think the red and blue are a happy compliment. And then again that lovely light blue colour is as common among these Daimlers as Triumph TR4's are in red.  

I went back and forth with what colour to choose, I like the black but I wanted something that was not so dark ..as it shows every finger print and every splatter of dirt and speck of dust.  And not too grey (devoid of colour) and again common-place on the Jaguars.  In the end - I put aside my favourite colours and tried to choose one that would best suit this particular car ..with its range of tone highlighted or deepened in shadows of its curvy shape.   My decision, for good or for bad, was to look for a Terry Wogan beige ..metallic (aka gold).  This, to me, would go well with the red seats, and it is quite unusual nowadays to see a nice n' shiny gold car. 

The Mk.II Jaguars and Daimlers were offered in gold with red interior ..and so I'd not be drifting too far from standard colour schemes, but on the other hand I was quite certain that Jaguar's 'opalescent golden sand'  wasn't exactly what I sought.   I had a very similar experience with my 1950's sunbeam motorcycle, which was opalescent silver-grey.  But when I removed a rear lamp housing on that bike, to discover original un-bleached colour - I found it too bluish-grey   It looked very similar to light grey primer.  And yet the paint which had been exposed to the sunlight over many years had yellowed with age to become more of a nickel-silver.  The bluish silver looked too modern a colour for a 1950's motorcycle. So I had the respray paint matched to the sun tinged colour ..and it looks fabulous  ..and vintage.

That's what I'm hoping to achieve with this Daimler.  Not the paint maker's version of a standard gold, but my own mind's-eye version of what a 1960's Daimler ought to be.  To tie this down - I'd bought five different tints of gold (mixed samples, each of 100mg ), and I posted those up to Mathew to produce car panel samples from which I might make my final choice from.  He used Triumph Spitfire doors for those samples, which I could lean up against the car or lay flat on the floor.    

      20240226_123917as.thumb.jpg.9d79a4c3cccbadba50edacab2cac5985.jpg 

Of the five colours I had mixed ; two were Jaguar colours, another was from an American manufacturer, another from Daewoo, and then a custom colour (scanned from a sample card). The jaguar colours were the first I rejected. One was a tarnished-copper shade of gold, which I could well imagine an XK120 painted in.  In my mind there are some colours which just seem to cry "art deco / late 1940's".  The other Jaguar gold ..the 'opalescent golden sand, was almost silver but with a greenish-gold tinge.  I think it would look good on an XJ8 or F-type.  The three shortlisted you can see above in the sunshine, I turned at different angles to the sun, viewed again when it was cloudy, and yet again (below) placed in the shade of Mathew's dark grey Ford.. . .    

20240226_124336as.thumb.jpg.e9c481fe68159bd431944220e2c3644a.jpg

Of course the colours reflect some of their surroundings, and again look different under the LED strip lights in his garage.  They look different on the telephone or computer screen. 

This is why I wanted to see car panels sample painted.. It's going to cost a whole lot of money to have this car painted, inside and out, and I'd really like to choose the right colour ..for me and for the car.

I made my decision.  We then looked at the paint can, to see which I'd chosen, it was the the custom colour.  Mathew was not help because he likes the light blue metallic.  Possibly, as a designer, my eyes have been tuned to see more subtle variation than others, or perhaps I'm just old and going colour blind ..and what I'm seeing as gold is to anyone else florescent rotten-egg green !  :blink:

Anyway., job done ..and it was time for me to trundle home again.     

20240226_142818s.thumb.jpg.91ebc1bfb9eb968034582799b9dde9af.jpg

The Daimler's heater definitely needs some adjustment, but the engine's cooling system worked great ..as did the makeshift expansion tank.

It was a good day, and I can only hope the car comes out looking really nice  ..but only time will tell. 

Bidding you a good day

Pete

Posted

I spotted one of these at a smart car gathering at the weekend and immediately thought of you and this thread!

Here's some photos...

image.thumb.jpeg.2c757256a71cee00fb6dfeeddce4ad95.jpeg

image.thumb.jpeg.b2b336b33b0b2952a7e6c93d7d4dab7a.jpeg

image.thumb.jpeg.6920d1235ba07040e5a8c141734e5a74.jpeg

image.thumb.jpeg.e3b3bc54332e87620f0969d896ca8683.jpeg

image.thumb.jpeg.75e91a9f9013274c17aa9d0572695b68.jpeg

Keep up the good work, this is a fab thread!

Posted
On 27/02/2024 at 14:02, Bfg said:

20240226_102521as.thumb.jpg.e629fb9339cd812df3969dc0cdce6f1c.jpg

Yesterday I drove up to my friend and fellow Triumph enthusiast, Mathew, in Norfolk. Avoiding the A14 roadworks around Stowmarket I instead headed north across country to Diss and then Thetford, through parts of its namesake forest.  Aside from getting caught behind the occasional truck or tractor,  the roads up there can be remarkably clear.  And then across the fenlands remarkably wobbly where the roads have subsided.  Hey-up, the car is for cruising at a comfortable rather than fast pace, and I do enjoy driving this car in that vein. 

The purpose of my visit ..aside from to see a nice fella, drink tea and eat bacon sarnies, and help him unload yet another GT6 body shell and chassis he'd recently bought, was to chose a colour . . .


I'm a person who usually dresses in dark blue when I go out, and for the past 25 years drove a metallic blue Chrysler Voyager.  Jaguar-Daimler did a beautiful metallic cyan (little-boy) light blue metallic, and I was very tempted to go for that. However this car's seats are ox-blood red and I don't think the red and blue are a happy compliment. And then again that lovely light blue colour is as common among these Daimlers as Triumph TR4's are in red.  

I went back and forth with what colour to choose, I like the black but I wanted something that was not so dark ..as it shows every finger print and every splatter of dirt and speck of dust.  And not too grey (devoid of colour) and again common-place on the Jaguars.  In the end - I put aside my favourite colours and tried to choose one that would best suit this particular car ..with its range of tone highlighted or deepened in shadows of its curvy shape.   My decision, for good or for bad, was to look for a Terry Wogan beige ..metallic (aka gold).  This, to me, would go well with the red seats, and it is quite unusual nowadays to see a nice n' shiny gold car. 

The Mk.II Jaguars and Daimlers were offered in gold with red interior ..and so I'd not be drifting too far from standard colour schemes, but on the other hand I was quite certain that Jaguar's 'opalescent golden sand'  wasn't exactly what I sought.   I had a very similar experience with my 1950's sunbeam motorcycle, which was opalescent silver-grey.  But when I removed a rear lamp housing on that bike, to discover original un-bleached colour - I found it too bluish-grey   It looked very similar to light grey primer.  And yet the paint which had been exposed to the sunlight over many years had yellowed with age to become more of a nickel-silver.  The bluish silver looked too modern a colour for a 1950's motorcycle. So I had the respray paint matched to the sun tinged colour ..and it looks fabulous  ..and vintage.

That's what I'm hoping to achieve with this Daimler.  Not the paint maker's version of a standard gold, but my own mind's-eye version of what a 1960's Daimler ought to be.  To tie this down - I'd bought five different tints of gold (mixed samples, each of 100mg ), and I posted those up to Mathew to produce car panel samples from which I might make my final choice from.  He used Triumph Spitfire doors for those samples, which I could lean up against the car or lay flat on the floor.    

      20240226_123917as.thumb.jpg.9d79a4c3cccbadba50edacab2cac5985.jpg 

Of the five colours I had mixed ; two were Jaguar colours, another was from an American manufacturer, another from Daewoo, and then a custom colour (scanned from a sample card). The jaguar colours were the first I rejected. One was a tarnished-copper shade of gold, which I could well imagine an XK120 painted in.  In my mind there are some colours which just seem to cry "art deco / late 1940's".  The other Jaguar gold ..the 'opalescent golden sand, was almost silver but with a greenish-gold tinge.  I think it would look good on an XJ8 or F-type.  The three shortlisted you can see above in the sunshine, I turned at different angles to the sun, viewed again when it was cloudy, and yet again (below) placed in the shade of Mathew's dark grey Ford.. . .    

20240226_124336as.thumb.jpg.e9c481fe68159bd431944220e2c3644a.jpg

Of course the colours reflect some of their surroundings, and again look different under the LED strip lights in his garage.  They look different on the telephone or computer screen. 

This is why I wanted to see car panels sample painted.. It's going to cost a whole lot of money to have this car painted, inside and out, and I'd really like to choose the right colour ..for me and for the car.

I made my decision.  We then looked at the paint can, to see which I'd chosen, it was the the custom colour.  Mathew was not help because he likes the light blue metallic.  Possibly, as a designer, my eyes have been tuned to see more subtle variation than others, or perhaps I'm just old and going colour blind ..and what I'm seeing as gold is to anyone else florescent rotten-egg green !  :blink:

Anyway., job done ..and it was time for me to trundle home again.     

20240226_142818s.thumb.jpg.91ebc1bfb9eb968034582799b9dde9af.jpg

The Daimler's heater definitely needs some adjustment, but the engine's cooling system worked great ..as did the makeshift expansion tank.

It was a good day, and I can only hope the car comes out looking really nice  ..but only time will tell. 

Bidding you a good day

Pete

A very good idea to get the panels mocked up and under real world conditions. Make any decisions much better.

I'd recommend the Thetford area to anyone who like a place a bit off the beaten track - 'Breckland' and Thetford Forest are well worth a visit.

https://www.visitbreckland.org.uk/

Posted

Yesterday rain stopped play, so this afternoon I sought to find out why the Daimler's heater barely worked.  It was like that when I bought the car, and I hoped my replacing the heater matrix would have fixed it  ..which it didn't.  The workshop manual is very unclear as to how the control cables are meant to be connected, but does have a useful flow diagram to show how the heater box is supposed to work. Unfortunately it doesn't also show the control levers . . .

20240301_223306s.thumb.jpg.4a2167873397ee7c4b1d1481c3a46c16.jpg

^ This illustration is drawn with the bulkhead to the Left.  Top left indicates the fresh-air intake, via the scuttle top vent, in the same manner as on Katie my Triumph TR4.  This heater box then has a flap through the bottom (hinged at green dot)  ..which when opened lets the air flow into the footwells 'To CAR  INTERIOR ' .  If that is flap is closed ; the air instead goes to the screen demisters. 

This heater box also has a control flap in the centre.  It's hinge (purple dot) is just beside the bottom corner of the heater matrix.  When the flap is set to its horizontal position ; the air-intake flows through the matrix, picking up heat from the engine's coolant water.   And.. when the flap is levered 10-degrees passed the vertical ; the air-flow through the matrix is blocked (by the flap) and the cool fresh air (dotted line) is diverted straight into the car.  Again this is controlled by the bottom flap to direct the (cool) air to either screen demist or into the footwells.  A half-open position would of course allow some air into the vents and some in to footwells. 

OK, now let's see outside the box, to look at the control levers which courtesy of bowden cables operate those flaps . . .

  20240224_160232as.thumb.jpg.8d39e02ce7d7f7143e39f09ee35b9a73.jpg

^ using my phone as a camera = not a very good picture I'm afraid..  However you can see (bottom centre) the heater's water control valve. This is simply a tap which either allows engine coolant / hot water to flow through the heater matrix or not.  As with any tap, it can be set in a part open position ...to regulate the flow (of hot water).  

A bowden cable (seen curved) is from the car's dashboard. It operates / regulates this hot water-valve.  What looks to be a very straight cable (seen above the curved bowden cable) is actually a rod.  This simply links the lever on the the water-control-valve to the operating lever of that centre air-flow flap.

As it happens, I'd put this back as it was (yes, I'd photographed it before disassembly). And it didn't work because..  it's wrong.  :signs053:

Instead of that rod going to the lever arm sticking out of the top of the water-control-valve ..it should be going to the lever underneath (next to the bowden cable).   

As it was (with the rod linked to the lever at the top)... When the water control valve was opened (letting hot water into the matrix), the rod ..linking to the centre flap, closed off the air flow..  So, the water in the matrix was hot but the air-flow was diverted around it.  :wacko:    Conversely when the water valve was closed (no hot water in the matrix) the lever / link rod switched the centre air-flow flap - to direct the air through the matrix.  So, no hot water and cold air-flow :ph34r: going through it .. into the car's interior.   Half way open and there is a whiff of warmth but the cold air flow is predominate.

As I say,  the workshop manual is spectacularly unclear as to where the link rod should be attached, but through deductive reasoning etc..   I reconnected the link-rod to the water control valve's underneath lever.  Even more of a pain-in-the-twisted-wrist to get to,  but when so connected and tested - IT NOW WORKS !  :wub:

That'll teach me to (not ) put things back in the same place as I found them !        :huh:


That's All Folks..

                  ...for tonight.


Posted
On 28/02/2024 at 14:51, lesapandre said:

I'd recommend the Thetford area to anyone who like a place a bit off the beaten track - 'Breckland' and Thetford Forest are well worth a visit.

sshush..  Don't tell everyone. !  :bouncesmile:

Posted

I recall reading an article on these Daimlers in Thoroughbred & Classic Cars back in the early 1980's ( when these were cheapish bangers).

It said that the heaters were very poor on these & that it often appeared warmer outside the car than in it !

Always remember that magazine as it had a colour pic'  of a cool very pale grey one in it. 

  • Like 2
Posted

Your heater travails reminded me of Uncle John showing (10 year old) me how he had sorted the heater on his mk2 Jaguar*, a plumber’s stop cock in the hose where the valve should be.

*It was a 3.8. He had lots of them, all 3.8s, always manuals. 

  • Like 2
Posted


Nice little road test . . .


Posted


Tuning the twin SU carbs..  very easy when its explained . . .


  • Like 2
Posted

"As I say,  the workshop manual is spectacularly unclear as to where the link rod should be attached"

I think this is somewhat an illustration of just how small an operation Jaguar were - and to an extent how hand-to-mouth. 

Sir William Lyons as CEO ruled costs there with a rod of iron, and anything superfluous like a comprehensive workshop manual would have been equally carefully costed.

There must have been somebody in the Browns Lane factory writing these things.  They would have never foreseen  anyone using the manual 50 years after the car was sold!

Posted

if it's not too late may i suggest 2 BL/austin rover colours to look at

  • cashmere gold- almost B&H colour (1984ish)
  • shantung gold- slightly less gold than cashmere which it replaced
  • 3 weeks later...
Posted
On 29/12/2023 at 17:06, Bfg said:

Minor progress yesterday, just getting on with remaking the LHS valance.. trying to match it to the RHS  . . 

P1460259s.thumb.jpg.2d43e026cd932d8ec499b763ad2c628a.jpg   P1460268s.thumb.jpg.63156e365b6ea10f43c7a9af90dc250e.jpg

^  You can see how the MGB panel was a little too narrow, which after being cut in half, down the centre, and spreading it - I had the length to wrap further around the sides. The gap (yet to be joined) being neatly hidden under the number plate.

I like it !  

Even with the car up on ramps, the ugly chassis and suspension 'lumps' are neatly tucked away.  And I'm happy with its more discrete size and tighter shape now. 

Next I'll need to strip off its paint and get the welder set up. I've not used that in two years as I've given up paying BOC bottle rental, so I'm going to try Clark's small gas bottles together with a cheapo plastic regulator.  But even when welded up and beaten smooth shaped, the final flange fitting cannot happen until the underside of the body ..where this panel will be bolted onto, is repaired.


I've removed the horn grilles from under the headlamps - to see how the front of the car looks with less chrome.  I think, without them, the front of the car looks lighter, more sporty, wider and less cluttered. Of course, the mass of chrome will look very different when this car is repainted beige.

A few of you may also have noticed that I've swapped out the radiator grille for a Jaguar one, without the Daimler fluting across its top (..that being a stately radiator grille to vie with Rolls Royce ?).  I'm not intending to rebadge the car as a Jagwaar  but to my eyes the lighter grille header & its body colour surround is a better compliment to this car's slimline bumpers.   Is less, not sometimes more ! ?

P1450611b.thumb.JPG.ccee6651ecdec21d53362ce583a15e05.JPG     P1460257s.thumb.jpg.5c05afedee5ae6e04701438f1c66871a.jpg 

^ As she was, elegant but perhaps rather over-adorned with chrome.                            ^^ Conversely (..here & barn-photo above) the much slimmer rim of the Jaguar grille.

The horn grilles (see above) are 6" diameter, and the spot-lamps which otherwise fit in those recesses are even more oTT, but perhaps 4" diameter spots would be more in proportion to the rather confined space between the headlamps and the grille.    What do you think ? 

I'm just playing around, and everything is easily reversible. Even the radiator grilles are interchangeable. 

I'll keep the Daimler's bonnet-top D,  rather than using the much more interesting and attractive leaping cat mascot.  And in place of the Jaguar (2.4, 3.4, or 3.8) grille badges, I'm on the lookout for a nice condition D horn push button (below) to use as this car's grille badge.

Dhorn_s.jpg.e56cd20911ab35d9ce6af097d3e3c86b.jpg

I want to keep the unique character of the Daimler, but to me that lies with the V8 and the way she drives, rather than on badge-engineering and bling. Other than that I like an understated Jaguar.

Pete


Some of you may recall my thoughts that ..on the slim line bumper model of these cars, I prefer the Jaguar grille to the (imo) over-adorned-with-chrome flutted Daimler grille. 

So this afternoon, just in pottering around, I made moves to further that. . .

P1020440s.jpg.6bd7eceefe9c6b1b51bfcfeca0999f4f.jpg

The Jaguar grille I'd bought was damaged. insomuch as the round-holed badge surround of its centre vane had been dented and was oval (left).  Typically the e-bay seller hadn't declared this ..but that's part n' parcel of the price of buying over the internet, sight unseen  ..Every third person is a liar.  

The replacement vane I'd bought (above right) looked nice usable condition, and was bought from a museum, again via e-bay. That seller didn't declare that it was a repro part.  I can only hope it fits and looks okay when on the car. 

P1020427s.jpg.f077ea31360bbd2214e17558ab9ab08a.jpg   P1020428as.jpg.53e02fc78bb2613db118619d2bb22239.jpg

^  The horn-push badge I bought was also via ebay ..and was as described. . .

I think it reasonable that a horn push from a Daimler 2-1/2 isn't going to be a straight fit into a radiator grille from a Jaguar Mk2  ..but I'd estimated its size would be about right. 

P1020431s.jpg.334dc603986fab0001403180d0edd652.jpg    P1020430s.jpg.a877984178cc2283ee6a3126bebf8619.jpg

^ first cuts were to shape the horn push around the badge holder's screw bosses. 

P1020436as.jpg.39e40f5d7e1020af3754db10c2a42007.jpg

^ The objective of course was to get the badge a secure fit in its surround, and for the badge face to end up evenly flush with the chrome rim.   Not like this ! :blink:

Sometimes taking heart-in-hand you just needed to get on and take bigger cuts . . .

P1020434s.jpg.5bb83cbada6d7fffa07ed887062a3294.jpg   P1020439as.jpg.fd25cba60e78d83e77796a3f360c06d5.jpg

^ to cut a 4-hour story short ; I used junior hacksaw, angle grinder, cordless drill with router bit, and a hand file to reshape around the horn push badge.

Naturally, there's no 'undo' button if one cuts too far, or wrongly positions those cuts whereby the badge would end up lop-sided or twisted in its surround.  It was therefore a time consuming business.. akin to whittling.

A difficulty was seeing what was stopping it from sitting in place.  Imagine trying to see where a piece of translucent plastic is being held away from sitting down into a tapered chrome surround is a sort of paradox.  Even cutting it is interesting because you don't want to scratch its face with marked-out-geometry nor paint it.  Marker pens didn't work very well, against its black background.  So it was all done by eye. 

. . .

. .

.

     P1020444.JPG.7c5c53796d2ddd28a7b9a1b3177b0f9a.JPG

^ It's not too shabby for it being home made.

The Jaguar grille I have for the car is over the hill and in the barn, so my trying it on the Daimler will have to wait.,  but just holding it in rough place over the Daimler grille does give an impression.  I think I'm going to like having the Daimler scrolled 'D' badge on the front of my car.  

P1020443s.jpg.9f50a8bc7647b58f145c5a92aa09034a.jpg

Bidding you a good Easter weekend.

Pete


Posted

Saturday and today's pottering . . .

P1020450s.jpg.041b91b010bc5ec42a33ca69202273f9.jpg

I used the Daimler on Thursday evening (70 mile round trip) ..oddly enough to go to a TR Register club night at Eight Ash Green, Colchester.  The reason being is that although I've now repaired Katie's (my TR4) backlight frame ..that being the rear window frame for its Surrey top (above), I need to order a length of glazing-rubber chrome-insert, as that fitted has always been the wrong size.   Bottom line being that I didn't want to take Katie out, with the rear window uncertainty (possibility of it falling out) at night.   As it happens Thursday afternoon it pee'd with rain, and I really find the TR too low to be driven along motorways in the rain at night. Too much road spray seriously diminishes this aged-driver's visibility. Whereas the Daimler saloon (although still diminutive by today's standards) is a foot higher. 

Anyway, because the Daimler got mud splattered, I wanted first to give her a Saturday afternoon car wash.  That done I spent an hour or two a day doing jobs ..which on the whole are minor but useful improvements.  Doing a couple of hours a day should see them all done ..in let's say five hundred years ! :D

First up, was reversing the driver's-side wiper blade. For whatever reason the rubber has pimples on one side of it, and so the blade only wipes on the other side.  One way wiper blades I've not come across before, but with it reversed it wiped the windscreen 50 times better than it was.

Next up..

P1020457s.jpg.3d20c06962775f4df34f952daf2f8825.jpg

^ alongside the driver's seat you'll see a keeper plate whose trim is shredded. That's happened because the outside edge of the seat squab was sitting over that plate and so the driver's seat wobbled. Not seriously but a little uneasy.

You'll also note the position of the handbrake, low down beside / below the seat, on the floor and down the narrow gap between the door trim panel and the seat..  Honestly that would not be the most convenient position for it, especially when some plonker decides to position an arm rest directly above it on the door trim pad.   In my humble opinion this was not only dumb, but also because of the brake being difficult to reach easily - dangerous. 

So . . .

 P1020453s.jpg.6e308d62abf4cce247e193105510cc9c.jpg      P1020456s.jpg.8cb23e0fdd4c8d459124eccb5f059ea6.jpg

^ work  in process ; the arm-rest being removed.  You can see the brighter area of the door trim pad, indicating where it was, and can possibly relate that arm-rest protrusion to the handbrake when the door is shut.  As seen in the second photo, the gap down the side of the seat still isn't much, but now at least I can get my arm more or less straight down to reach the handbrake (only just visible).    As I say - minor jobs but useful.

P1020458s.jpg.087eb9f082dddae97bb7661c1f732c18.jpg 

^ On the passenger side .. the inertia reel of the seat belt was falling off.  Aside from it being insecure, the angle it tilted to meant that the passenger couldn't pull the belt out.   I might only guess it had been like this for years, but of course the car has rarely been used for the past four decades, and I'm sure very much less with a passenger.  It was an awkward sod to tighten up., as that bolt was to a ball joint which allows the inertia reel to be adjusted upright. And like many ball joints they turn when you try and do the nut up.   Never-the-less another little job done.

While trying to get to this, I realised the passenger seat wasn't adjusting fully.  Simply because its sliders were crudded up.  When cleaned and lubricated the seat now adjusts as it should ..Amazing !  

Another job I discovered needing doing on Thursday evening, was that the screen wash didn't work.

I looked into this, just before I was due to come home for the evening, and noted when the (electric) pump was switched - nothing happened (no sound either) but there was a slight draw of power registering on the ammeter.  This indicated that the power to the switch was fine, and that the switch was operating. So the likelihood was either the wiring connectors to the washer pumps were poor or more likely (because of the registered power draw) the pump itself wasn't working.  A quick visual check suggested the wiring was serviceable, and so I deduced it was the pump.  

This (Sunday) afternoon's task then was to look into that. . .

P1020461s.jpg.74765cf5fd0098b09d8fc6babf402508.jpg    P1020462s.jpg.3027a2c658c63a4b698efb9d52ae86f5.jpg

^ the washer motor pump. Seized ..until man handled (turning that spindle you see projecting from the underside).  Not familiar with these, but if I took it apart - what could possibly go wrong ?

P1020463s.jpg.b8df4603df9c5d83d9529ebe7d010043.jpg

^ interesting. I'd never seen an electric motor like this one before.   First impressions was that the windings looked okay, but the armature contacts and brushes were filthy. The spindle though the bottom cover plate was overly tight, but overall - there was only the lightest of corrosion. 

P1020469s.jpg.65fdea3a5f35607763ebe928dafbd04b.jpg     P1020473s.jpg.597e02bb311791bf5bd597f1fcf05fb1.jpg

^ After cleaning and a little lubrication, I reassembled it.  Albeit weird, it's a neat little motor.   While at it I cleaned up the top of the washer bottle, onto which the motor is screwed. In my fingers is the blade to blade adapter.  The first blade being on the bottom of the motor (see photo above ..before I cleaned it) and the second blade is on the end of the spindle which disappears into the plastic leg. At the bottom end of the leg is a gauze filter, behind which I might only assume is a centrifugal pump.

P1020476s.jpg.55ec31091d435db9ea0102ffcffcacaa.jpg    P1020477s.jpg.dec8b355d7b6c054e5882129abac906b.jpg

^ all back together and ..it works.  :happydance:

The windscreen washer's jet on the passenger side took three or four attempts to clean out, but we got there in the end.  Both jets were then adjusted to wash the screen rather than splash off the wiper arm.   Success.   I'm pleased with that as I'd much prefer original parts to after-market ones.        

So windscreen washers as well as wipers..  Is it the 21st century already ! ?

To close off, I adjusted the car's headlamps as well.  They were busily trying to illuminate down drain gratings at the side of the road.  Now perhaps they'll illuminate the road in front of me.  B)  Will Daimler wonders never cease ?

Bidding you a happy Easter,

Pete 


Posted

Yesterday afternoon I tackled the Daimler's scuttle vent which is all but seized solid.  However then a friend called me as i had everything in bits, and asked I was going to drop in and see him before we went on to the Triumph Sports Six Club meeting at the Sorrel Horse.  Bottom line I didn't get that job done (i'll report on that anon). So today I was going to tackle that again.  The issue I'm facing is how to get to the hinges of that inner flap, And to get to those I fear I'll need to pull some of the dashboard out. 

.. And to pull part of the dashboard out means I've got to jump around inside the car on the driver's seat. 

.... But the driver's seat is sagging, and I fear my gymnastics would do more damage. 

....... So instead of getting on with the scuttle flap (which is the air intake for fresh air and for the heater) I decided instead to tackle the driver's seat. . .

P1020507s.jpg.ae377dad09333612993e81b832932676.jpg

^ the squabs just lift out. Dead easy.  Even just with a hand pressure you can see how giving the seat was. 

I guessed what was happening.. The leather seats are wire-coli sprung, and inbetween those springs and the leather is a diaphragm and then latex foam rubber.  When the diaphragm fails - the wire springs cut into the foam rubber and that's a costly and troublesome business to repair.   In short, the diaphragm needed replacing before I used the car any more, or even just jumped around inside it when pulling the dashboard out.

It's always better to avoid damage than having to fix it . . .


P1020508s.jpg.da61b8a98f3ef2e21919289c0b296255.jpg    P1020511s.jpg.c79673454c173a47b55a201dab0ded9f.jpg

^ Inverted and looking from the back, the seat looked pretty good for 56 years old, but yes the diaphragm (which despite it being a Daimler is only sackcloth) had failed in many places. Just right of centre in the first photo you can just make out where the foam rubber was being cut into by the wire springs.  A couple of those springs were also broken.      ^^ I decided to tackle the diaphragm from the back and from the propshaft tunnel side (to the right in these photos), because I did not want to disturb the leather around the more visible front and outside faces of the seat.

There were three types of clip holding the springs, the fabric, and the torn sackcloth diaphragm to the wire frame. I guess I must have removed forty or fifty of them in total, as carefully as I could, so as to minimise damage to the fabric. 

P1020520s.jpg.df173332bf4fbed76d39a8bb68cddf4c.jpg    P1020524s.jpg.8b32c1c068a6416b0a576742eae4ca36.jpg

^ Aside from wire staples, the diaphragm was also stitched to the wire springs.   It took an hour and half before I could get my hand inbetween them.    Again in the second photo you can see the torn sackcloth. In places, the wire springs had cut right through the foam to the cloth facing on its other side. Had that been cut through the underside of the leather would have been damaged.

P1020529s.jpg.ffeebd7c0fee6b01406fee2381fe1d9e.jpg

^ the steel batten which follows around the back of the seat was snapped. It is there to stop the back edge of the squab from pushing down, away from the backrest, which it does ..resulting in a cold draught to the small of my back. 

P1020530s.jpg.00c80f437d224d85930e097569dfcbcd.jpg

^ this is a mat on the floor of the garage next to my car. :huh:   It's there to wipe my wet feet on.  However what is not so very clear to see is a replacement diaphragm about to happen ! :ph34r:

P1020533s.jpg.f973319218375145c99029a5dc9e3999.jpg

^ that floor mat measured and cut in half has a hessian underside face to it (visually quite similar to sackcloth).  Rather* awkward to get it into place mind you, between the wire springs and the damaged sackcloth.

P1020534s.jpg.fa113e24f8d3cb68e4be52916e1b160f.jpg

^ Even when there's little in the way of skill, I can always count on my stubbornness  :rolleyes:   1hr-7 minutes between these last two photographs !

That's the diaphragm replaced.

Next up is a little more padding, to compensate for the wire springs having cut through the original latex foam, and 56 years / 89,000 miles of 'settling'.

P1020536s.jpg.f752cf3532a06a54657cd999336ac9d2.jpg    P1020539s.jpg.f79f2102a00989235b0907610f3f6983.jpg

^ Always one to blow the budget to impress.  An old pillow with polyester filling, is no longer a pillow (..for under my head :lol: )

P1020540s.jpg.2becc3c5d45122b330ce97989a2d51d7.jpg

^  polyester filling, slipped inbetween the old and the 'additional' diaphragm.

P1020541s.jpg.454115fe5dc5deec2dbd1d41fd4b37c0.jpg     P1020542s.jpg.3795f3f99929cd6fb3a4beb7a0424331.jpg

^ Far left of the photo, you can see I've wired the broken rear batten in place. That's because my welder is a 20-mile round trip away.  Wire springs being reconnected to it. And I've used a foam sponge as spring to help hold that batten up ..in place.  Crude, but it actually works. . .

P1020543s.jpg.932bf1f14e90e9e18f369f577618c299.jpg

^ job done.  I'm not claiming to have restored it ..it's just a fix to keep it going ..and as importantly to prevent further damage from those wire springs to the leather seat covers.  I must say though - the hessian backed rug does look the part.  I wonder if it will last another 56 years ? 


P1020547s.jpg.a42198df6c1527f5dd3d44a789ae6995.jpg

^ Feels much better, and doesn't look over stuffed. 

Of course the proof of the pudding lies in how one's bottom feels about it a day later ! 

Bidding you, one and all, a good evening,

Pete


Posted

You clever bugger! Anyhow it's never a bodge if it works! Top job Pete 👍

  • Agree 2
Posted

'tis a bodge, in any other language but Autoshite !

Posted
On 09/11/2023 at 17:23, Bfg said:
 
P1450794.thumb.JPG.0da88c8a3a04e9280564223a08c396ff.JPG
 

I particularly enjoyed the Anker Bluetooth speaker on its own wooden mounting?

Posted

Loving this thread.  Going to have a look at your TR4 ? one now too.  I did something similar (but not nearly as well executed, with my Lotus seats too - used a horse matt rather than a hessian-backed mat but it achieved the exact same result.  Interested to see the heater machinations too.............I've got to sort my heater/fan on mine as well..............and have a feeling I wont be writing such a succinct update as yours when it comes to my trials and tribulations!  :)

Posted

Brilliant thread & the fix with the doormat is inspired.

By God though, seeing what you achieve does make me feel inadequate :oops:

Posted

Jaguar Brown's Lane had their own trim department - which I think after Jaguar purchased Daimler moved to the old Daimler Radford factory. Anyway wherever they were made the seats were made in house for both brands. I think in those far off days the trim department was mostly women's work.

The sacking is typically Jaguar - saving money were it would not be seen 

Nothing more annoying than a saggy seat - top bodging.

Incidentally there is an exhibition on at Gaydon - Women and Jaguar - "The Women Who Made Their Marque Exhibition".

https://www.jaguarheritage.com/the-women-who-made-their-marque-exhibition/

Posted
On 04/04/2024 at 09:52, Oi_Oi_Savaloy said:

Interested to see the heater machinations too.............I've got to sort my heater/fan on mine as well..............and have a feeling I wont be writing such a succinct update as yours when it comes to my trials and tribulations!  :)

Okay here we go.. a task which proves that cars were built for lack of maintenance 50+ years ago, and like modern cars were built where one thing needs to be dismantled to get to another. . .

P1020480s.jpg.51f5f8121781316e4d4459a09cd4a1e0.jpg

^ the scuttle vent, under the windscreen on quite a few cars of the era, took outside (supposedly fresh !) air into the car either directly (cool) or via the heater matrix (heated by engine coolant).  There's a lever under the dashboard which manually operates it.  And a spring under the vent which toggles to hold it either open or closed.  Never half way.!

Unbeknown to many.., there's another metal flap connected to this one, at approximately 135-degrees downward. That one opens, or closes-off, a hole through (the vertical face of) the bulkhead. 

When the scuttle vent is closed, the flap across the bulkhead is open.  That's for when the fan is used. Then air is drawn from the car's interior (from behind the central console) and ducted through the (closed) chamber below the scuttle vent flap, to the heater matrix, before being ducted back into the car.  This is the recirculating air flow circuit.  

Conversely when the lever is operated - whereby the scuttle vent opens ; then the recirculating air flap is closed  ..and outside air is used for fresh-air ventilation or heating, depending on separate heater controls.  What is important is that one flap is closed when the other is opened, and vice-versa.   Simple in't it. 


As it was (this car) ; the lever inside didn't work the flap, and my physically wrenching the scuttle vent up from the outside only ever got it half open.  And because the two flaps are bolted together - the scuttle vent being half open meant the bulkhead's recirculating-air flap was similarly half open.  With them both half open.. half of the (cold) outside being air taken in, via the scuttle vent, doesn't go down to the heater matrix ..but rather takes a short-cut straight into the car.  That's not so very cosy !

Nor is it good in the rain ..for example when trying to demist the screen., because rain and road spray is taken directly into the back of the central console ...with its array of switches, electrical connectors, and minor gauges. There is a baffle plate to stop driving rain getting straight in there, but with a coarse wire mesh on the underside of the vent.. driven rain gets 'meshed' into a fine spray.        

So, what is the problem when the bloody thing don't open or close fully ? 

Well, it could be the operating mechanism, something fouling, or perhaps the flaps hinge seized. Note ; plural flaps, single hinge.   I was to discover on this particular car, which sat around unused for donkeys years - it was the operating mechanism almost seized, the toggle spring almost seized, and the flap hinges a little bit more than almost seized.  The good news was ..well there wasn't much good news..,  save the fact that I'm now retired and can spend two days sorting the darn thing out.  :boomer:

P1020482s.jpg.cbd74fc5c5d371161e3e7e8cd564703a.jpg   P1020484s.jpg.ccf7c1d16f0b00be008d582bf6199e9e.jpg

^ With any car that sat around for 5+ decades, there's always going to be some screws and nuts and bolts that are seized.  It's just something you've got to deal with.  I forced the vent open and stuffed a block of wood in there to hold it open.  Starting off with cross-head set-screw holding the mesh in place.  However careful I was to get exactly the right size bit, a huge amount of force to hold that bit in its slot, without and then with penetrating oil ..it wouldn't shift.  There's x3 such screws holding the mesh in place and the other two gave in to my persuasiveness. This allowed me to tilt the mesh down so that I might get a spanner on the nut which holds the top scuttle cover in place.  The stubborn little thing* fought me to the last thread. . .

P1020487s.jpg.492814d9808936b750604a172d9a48c4.jpg    P1020490s.jpg.dc6075a7b7e7040a2c86f144d1a0fdaa.jpg

^ even with the scuttle vent lid removed, only my best vice-grips managed to get that screw to move.   ^^ not much to see but the wire spring, and the hinge brackets.  The black hole to the left side of the car (top of photo) is the trunking down to the fan and heater matrix.  58 minutes between the first and last of these four photos.

P1020497s.jpg.1edbef7bc6b90b8a4b69cbf65f54a3cf.jpg

^ The centre console hinges down for easy access to wiring connections. The feature is a carry-over from the Jaguar big saloons and XK models ..which also housed the fuse-box behind their console.   

 P1020491s.jpg.b2c4a85e843e62f76026294fa1edf22d.jpg   P1020501s.jpg.ea5e1bd68c2288bbfc3605ecf364ff96.jpg

^ with no sign of the scuttle vent's hinges, from either inside the car (behind the centre console) or from through the scuttle vent, I reckoned the baffle plate needed to be removed.  Seized nuts again..  A full hour of battle between these two photos.    And then.. still no sign of the vent's hinges.

      P1020502s.jpg.58f6a48c425d5552976ef0028efed1ed.jpg

^ I unclipped the spring-wire from the vent's (supposedly hinging) brackets, and found that it too was almost seized. 'Almost' meaning that I could force it to move but it needed several douses of lubrication and much working back n' forth before it moved as freely as it should.  

That's where I stopped work, to go out in the car ..with no scuttle vent fitted, on Tuesday evening.  4-3/4 hours into this five minute job.  :wacko:

Moving on to this afternoon  . . .


P1020550s.jpg.04b412b4f3b8aa81e84ee09ad301c2a7.jpg    P1020552s.jpg.eb78fdb9c8fd5ad1bc5f9ef9e78f8bc2.jpg

^ Having ascertained the flaps were seized at their hinge, but unable to find that.. I needed to dig deeper.  I opted out of removing the glove box and main-gauge instrument panels in favour of seeing what I might find if I just removed the dashboard top.  There's just two nuts to undo, noting the shims which level its height. But then to actually remove the panel I needed to also remove the timber capping up the A-post. I reckoned with care I could about get away with just removing the driver's side.  At its bottom of it is a simple screw from under the dashboard lid (first photo)    ^^ The top of the timber though is screw fastened behind the (glued-on) door's weather seal (2nd photo).

P1020554s.jpg.c956d8524ba69fdb6e31a3d1aa16b176.jpg   P1020551s.jpg.8d715ac97406e5b8b69cdd7ad946f786.jpg

^ It's an oddly shaped piece of timber.  I cannot imagine how Jaguar productionised it left and right handed.

Removing the dashboard's vinyl-covered lid would have been much easier if its sides were parallel ..so it could be slid straight back, without taking A-post timber off.  But.., it's ends are shaped around the A-post at the sides, wider towards the screen.  It cannot be slid straight out, nor lifted up.  Even with the A-post timber removed - the lid needed to be tilted and pulled down ..being careful to not scratch the dashboard with its fastening studs.  

It's tight.. but it does come out  (and later goes back in again !).   I think the later cars ..the XJ6 used skinny vinyl trim up the A-post.

P1020559s.jpg.535eeff6fb3c57f962919dfed064322e.jpg   P1020567s.jpg.ebe623abadcb05ee361eba88b4f34ea4.jpg

^ And still not sign of those flap's (top) hinges.   In the first photo you cannot see the scuttle vent's operating lever, because it's down below the centre console.  It seemed to move freely but., I wondered if it was moving freely for the full range ..which it couldn't yet do because the flaps were still seized.  I opted to remove the console's hinges - to drop it out of the way and to give me clear access to that operating-lever arm's hinges. Various electrical connections were released to give the console more travel, so that I could better see what i was doing.

P1020568s.jpg.5490648f0f33ed45f70115c148d878f0.jpg

^ On the left hand side a bent metal bar. That's the flaps operating arm, and it's supposed to be bent like that. I've released the bolts to its hinges so it can tilt, so I could see to lubricate them. But for just a little free movement - they were seized.  With penetrating oil and then 25w-50 and a fair amount of wiggling back n' forth the operating now move freely throughout its range. The flap though, now disconnected both from the inside and outside was still seized  ..and its hinge was still nowhere to be seen.  :(   I think only by pulling the whole dashboard out might I discover how it was built ?

P1020569s.jpg.52748de86f73ff74f1656ee4aac9d7d7.jpg    P1020570s.jpg.224fb5e653b1c492d3d6e3cdd85081a6.jpg

^ Still unable to see those hinges - I played a long ball. There are two holes into the windscreen frame which I sprayed with WD-40 using its extension pipe, and then using another brand of penetrating oil (with considerably more squirt) I flooded up either side of the bulkhead flap.  I did the same from the scuttle vent side, until it was literally dripping with the stuff.   Forcefully man handling the flap back n' forth dozens of times - I finally got it to move, and then some more, and then some more again.  :happydance:


P1020583s.jpg.02b4f2a6261959bf98d0da38e8e020eb.jpg

^ Finally... the flap opens and closes as it should.   2 hours today to get to this stage.   Here looking down into the scuttle vent trunking., you can see (because the baffle is still removed) the bulkhead's air-recirculation flap closed against its bulkhead seals. The scuttle vent's brackets / arms, bolted to that inner flap, bend from forward to upwards ..for its lid to be open by 45-degrees.

It works..   Now I just needed to put it all back together again. . .

P1020585s.jpg.611c1289a6543733db9d8ff30db4994c.jpg     P1020586s.jpg.2d9977f6d10c6360033f4a114c6e8c92.jpg

^ Work in progress..      ^^  Dashboard top is back in place, as is the centre console, but presently the switch label plate is yet to be refitted, also the A-post timber.    The splash baffle and scuttle vent's lid I hope to get back on tomorrow.

That's all for now.

Pete.


  • Like 12
Posted

You have triumphed again, this time over a Daimler.  Your levels of persistence, thoroughness and skill are impressive.  I would have looked at the sequence of tasks required to fix the vent flaps, had a cup of tea to gather my thoughts then decide to live with it all as is, maybe giving the car a polish to offset my defeatist attitude.  I love old cars but just can't cope with their demands any more, hence a still non-running Tipo and an ancient Reliant that hardly ever gets driven anywhere.  

Posted
18 hours ago, RayMK said:

had a cup of tea to gather my thoughts then decide to live with it all as is, maybe giving the car a polish to offset my defeatist attitude.

I guess it comes down to one's mindset and approach to the task. If you think of it as a job (unpaid and for an unappreciative boss - a grumpy yourself ! ) then it's a chore. Even more so when you see the bodges of prior owners and the 'mechanics' as x_ _ _s. 

But....  if you like old cars and you 'just potter around'  for an hour or two,  ..as n' when you choose to (mostly in the afternoons for me) without an impending deadline, ..and you take some sort of satisfaction out of loving / improving the old girl,  ..and you look on those bodges as quite funny reflections on humanity and our culture - then the tasks become a hobby.

Every part of the car becomes a little wonderment.  Fk me this part is 56 years old and I'm cleaning it and putting it back on.!    Lucas, Smiths, Lockhead, Girling, GKN, Triplex Dunlop, and every other sub-contractor's component takes on its own life.  Whether mechanical, electrical, a piece of wood, leather or fabric trim  ..whatever can be be saved and reused becomes a thank-you  to motor industry men and women whose names have long since been forgotten.     

Once done, most of these rectifications last for decades and don't need repeating.  With one task after another done n' dusted - in time the car become useable, reliable and a pleasure ...all for minimal running costs.  After major structural and major-mechancal and paint., with no road tax and cheap classic car insurance - it does, in the long-term, become inexpensive.


Personally I hate being in the limelight, so I don't tidy up the car to be admired.  I do it because I feel these old girls deserve a bit of loving care and attention ..after years of abuse, neglect and making do.. When I go somewhere ; I park the car and walk away. She's the centre of attention.  I can do that because I'm a sentimental old sod who loves her ..even her shortcomings.  I wouldn't want to swap her creaks & wrinkles for a soulless manikin or an electric car.  

I like my cars to be decent autoshiter drivers rather than a polished restorations, so originality is less important to me than function. Then, driving the 'maintained' rather than 'precious' car becomes a nostalgic pleasure ..as if I'm driving a ten-year-old car back in the 1970's.   And any other old fart who happens to see you driving down the road also derives pleasure from seeing her still being used. Not at necessarily to shows ..but just around around town and to the shops. 

I'm not interested in bodging the car to sell and make a profit.  Indeed I'm of an age where I know that anything i have will be dispersed within a month or two of my passing. However if I can get each car into a useable and reliable condition before I go, then I'll be gifting them to best friends.  For those friends to own and enjoy a nice TR4, or a Daimler 250, or a sailing boat ..even if just for a year or two (before they sell them on) then that's more a lovely gift than its monetary value.    

The other half of my hobby is to share what I've been doing. It's a therapy for me to see that I'm achieving something. That I'm not yet on the scrap pile. And through these forum blobs - I very much hope inspires and helps others.

win + win + win whichever way I look at this hobby.   B)

Pete


Posted

Quick conclusion to recommissioning the Daimler's ventilation . . .

P1020588s.jpg.f89ddc176228f533b87c8aa2a95b7301.jpg    P1020587s.jpg.e4e62ca5a8426c403d363611e31a844f.jpg

^ Silly little-too-short screws and 3/8" square nuts hold the baffle plate in place.  In the first photo you can see the scuttle vent cover's brackets are not evenly adjusted (height or angle). They are bolted to the recirculating-air / bulkhead flap and needed adjustment for the lid to close level. I managed that (with a hammer !) which slide the RH bracket down a bit.  next time i do it I'll know to adjust those more precisely before I put the baffle plate on.   I'll also find some longer screws.

P1020590s.jpg.5d8e7ae9651c694a497cc5b3ad65c4b5.jpg

^ Looks like it was meant to be like this !  B)

P1020592as.jpg.e2b150737dd8baecbf0783946f1cbc0b.jpg

^ all the screws were reassembled with CopaSlip and the right washers.  I've slotted the mesh so that when the screws are just loosened - the mesh can be dropped down for easier access to the cover's nuts.   The vent now works as it should, open or closes with a clunk. and the recirculating flap closes against its seal when the scuttle vent is opened.   Yeah  :happydance:    (..delighted by the prospect that this car's ventilation might now actually work !)

Well almost . . . 

P1020595s.jpg.ba240fbf62413f5175b50e9e7d44ca8f.jpg    P1020595a.JPG.82654b6f8df3c74a488670a60ba3c33f.JPG

^ with the heater's control cover removed, you can see the hot/cold control cable tightly bent routing ..and why it wasn't working very well.  There's also a plain washer missing where the end of the cable connector joins to the lever.  Without that the cable's pivot doesn't work very well.  

Part of the issue was the bowden cable's routing, and part of its problem was that the back end of the radio wasn't supported, so everything was being twisted more than it should have been. 

P1020601as.jpg.dc97128df13cd6c4e10ba48ecd8c54ad.jpg

^ It's amazing that it actually worked at all.    I made a bracket to support the back end of the radio, an inch higher, and dropped the bowden cable out from under the trim to ease its tight curvature. after straightening the inner wire, I liberally oiled it so it now works.       

P1020597as.jpg.a1c74d146d56f8bfd446988353acf2dc.jpg

^ The other side (footwell or screen demist control cable) had lost its nut, so the lever wasn't connected to the cable.  And odd size and very tiny nut took me ages to search for and find. 

P1020593s.jpg.022140baee5a442744909846dbf38852.jpg

I tried to clean the leather of the monstrously big and heavy cover, but to no avail. The black is staining that wouldn't wash off. 

P1020602s.jpg.ad97c543668cbd9fd98af74ca438e813.jpg

^ definitely in need of restoration, but that'll wait.  The live feed to the radio was just dangling, just waiting to short out, but with power to the radio - it did hum ...but nothing more.  

I've now put it back together, and took the car to the shops and then around the block to warm its engine.  Hey ho, the heater works. The heater (hot/cold) control works. the heat to car / to screen demist works well too !   Who knows perhaps this car will both be warm in winter, cool in summer, and demist when it's needed ! ?  All very useful rectifications.  I still need to replace the squirrel fan for one which isn't bent and out of balance. but we're very close to.. Job done.


   P1450581a.JPG.72d64ea1c4ab43b84ce691a914e13d4b.JPG

^ Of course for all that effort ; an onlooker, or even a buyer would notice nothing but the scruffy interior.  Indeed even as I drive the car ..now the weather has suddenly turned warmer, I have the heater control set to cold !  :rolleyes:

. . . yes, the speaker grille is original. It's big and bold, but there's only one.. for mono Radio 1 of the 1960's. 


I do look forward to a thoroughly good clean of the leather and trim, to re-lacquer the timber, and to replacing the carpets. but that'll happen after the car's resprayed. 

Bidding you all a good weekend, with sunshine and happy pottering around.

Pete


Posted
3 hours ago, Bfg said:

I guess it comes down to one's mindset and approach to the task. If you think of it as a job (unpaid and for an unappreciative boss - a grumpy yourself ! ) then it's a chore. Even more so when you see the bodges of prior owners and the 'mechanics' as x_ _ _s. 

But....  if you like old cars and you 'just potter around'  for an hour or two,  ..as n' when you choose to (mostly in the afternoons for me) without an impending deadline, ..and you take some sort of satisfaction out of loving / improving the old girl,  ..and you look on those bodges as quite funny reflections on humanity and our culture - then the tasks become a hobby.

Every part of the car becomes a little wonderment.  Fk me this part is 56 years old and I'm cleaning it and putting it back on.!    Lucas, Smiths, Lockhead, Girling, GKN, Triplex Dunlop, and every other sub-contractor's component takes on its own life.  Whether mechanical, electrical, a piece of wood, leather or fabric trim  ..whatever can be be saved and reused becomes a thank-you  to motor industry men and women whose names have long since been forgotten.     

Once done, most of these rectifications last for decades and don't need repeating.  With one task after another done n' dusted - in time the car become useable, reliable and a pleasure ...all for minimal running costs.  After major structural and major-mechancal and paint., with no road tax and cheap classic car insurance - it does, in the long-term, become inexpensive.


Personally I hate being in the limelight, so I don't tidy up the car to be admired.  I do it because I feel these old girls deserve a bit of loving care and attention ..after years of abuse, neglect and making do.. When I go somewhere ; I park the car and walk away. She's the centre of attention.  I can do that because I'm a sentimental old sod who loves her ..even her shortcomings.  I wouldn't want to swap her creaks & wrinkles for a soulless manikin or an electric car.  

I like my cars to be decent autoshiter drivers rather than a polished restorations, so originality is less important to me than function. Then, driving the 'maintained' rather than 'precious' car becomes a nostalgic pleasure ..as if I'm driving a ten-year-old car back in the 1970's.   And any other old fart who happens to see you driving down the road also derives pleasure from seeing her still being used. Not at necessarily to shows ..but just around around town and to the shops. 

I'm not interested in bodging the car to sell and make a profit.  Indeed I'm of an age where I know that anything i have will be dispersed within a month or two of my passing. However if I can get each car into a useable and reliable condition before I go, then I'll be gifting them to best friends.  For those friends to own and enjoy a nice TR4, or a Daimler 250, or a sailing boat ..even if just for a year or two (before they sell them on) then that's more a lovely gift than its monetary value.    

The other half of my hobby is to share what I've been doing. It's a therapy for me to see that I'm achieving something. That I'm not yet on the scrap pile. And through these forum blobs - I very much hope inspires and helps others.

win + win + win whichever way I look at this hobby.   B)

Pete


Bloody hell,Pete,that bought a tear to my glass eye!

Posted
6 hours ago, Dobloseven said:

Bloody hell,Pete,that bought a tear to my glass eye!

eye-jokes-1991465110.jpg.9890242a7ced83bb4c8fb81cda48ec51.jpg


  • Like 1
  • Haha 1
Posted

If the carpets were original I'd have a go at repair and re-backing and then dying them if they are saveable. Nothing like original carpets

Posted

Potential bargain to be had ...  BIN @ £3500 ono  .. like my own this is one of only 700 build with manual + overdrive.  Body panels / door shuts look straighter than mine which suggests the sills are original and it's unmolested.   Need recommissioning and frayed edges sorted but you can have that with a car costing three-times as much.

image.jpeg.9c17684b88125ba721fc76cc902ed610.jpeg

image.jpeg.553628693ddf8b2cde1d4ca58be3827a.jpeg

image.jpeg.6f139d92a96d22be3cd3456d04528cdd.jpeg

https://www.ebay.co.uk/itm/276414789371?itmmeta=01HTW4KBGYN6J2E88J4XAJW9WQ&hash=item405b9af6fb:g:W3gAAOSweoFmEab~&itmprp=enc%3AAQAJAAAAwFFUwr5i1sARc%2B3kxbjjA5GxNR%2BRh3LwMiA6WZAROu2MlIvVSTBA6NkC8TfiUXWBPewsUVuFcRxFj6EUxd1g%2BEROc4u4lT2HEGlEPufX%2FQaUoSIiegL9dnMT28KnNH5EMBI%2FVDQYM71A%2Fa2V5otGZhvcqoYwWq5FJGGRT3Fo5KjoYSQlO2umvs2%2BGLnZfnSYUNGmzocVvLpHaEOe64J6USTfVke4enx9T3%2Fj1mZGl%2B%2FcvZXLhEoA7FDdw2Dm5vFEkg%3D%3D|tkp%3ABk9SR8i4zYTXYw

  • Like 3
Posted

it's a light colour which you want

Create an account or sign in to comment

You need to be a member in order to leave a comment

Create an account

Sign up for a new account in our community. It's easy!

Register a new account

Sign in

Already have an account? Sign in here.

Sign In Now
×
×
  • Create New...