Jump to content

Andy's awful autos: VP1500 and Crinkled van


Recommended Posts

Posted

I always say welding is the easy bit as it's just following a process, but metal bashing is the real art. This lucky little car really has gone off to the best owner it needed.

Posted

Today i decided to start the final and harder part. Access is a pain and i ended up using a die grinder with a stone in it to wittle back the spot welds the drill couldnt get too. 

Here you can see i cut out a part of the front section, corrosion had caused swelling between the spot welds. Once that was removed i cut away the larger return, made a new one slightly oversized, zapped in with a few welds.  then thankfully i could clean up the outter part and zap that back in. Handy as i dont have any large sheet that thickness!

20250109_162527.thumb.jpg.29542b78300d139721b149d0947688b5.jpg

Not the neatest but its contaminated and i had the welder cranked up. 

20250110_143844.thumb.jpg.34d8d7b0902e29bb0da7823ce27de9db.jpg

While that was out i had also choosen to take advantage and remove the rusted section i need to remake. I ran a few welds over the back of the joints from the other side. 

20250110_143836.thumb.jpg.36203013a5ca4e286bdad4f836f0b13f.jpg

Hopefully have the new part finished and welded in tomorrow, getting there slowly. 

Posted

A bit bracing! 

Quickly knocked back the welds on the front panel. Just back till smooth ish, no point going back any further as its not seen and will have stonechip over it anyways. 

20250111_154839.thumb.jpg.f0488a29a3be96e29f299bdf330e4948.jpg

Finished off final tweaking and getting the panel i started yesterday ready to be fitted. 

20250111_150130.thumb.jpg.977c1d2f410fddf6628fbcbd6d293f69.jpg

And welded in, ran out of gas half way but had another bottle ready. 

20250111_154810.thumb.jpg.c91481981fe190a0c0652176325c2f95.jpg

Final step is to repair the bit in between, below the displacer. The sides have gone and i kept it in for reference for the bits mounting to it. Going to be a fiddle but that will be the final panel to make then its done. 

Posted

Weld-done, just needs dressing back and some holes drilling in, then its time for some rust converter and paint.  Im fairly happy with the results. 

20250113_163721.thumb.jpg.50a0ad7ad7e3cd38a0c050eac0c10476.jpg

20250113_172456.thumb.jpg.5937beea863a2e8c4363cd1a85a809b0.jpg

20250113_172514.thumb.jpg.5ca4cb5a92127bcae90596ea4ec5c1d0.jpg

20250113_172403.thumb.jpg.5bb760c2aa95ff684cbe06d240234049.jpg

Posted

Found the previous weld patches done by charles & wonders welding ltd

20250116_152726.thumb.jpg.1972b44c56725592bbd130533e8ee077.jpg

IMG-20250116-WA0001.thumb.jpeg.e9c86b293ca1cf5ff47a110f33efe0a8.jpeg

Ill drop the subframe off and correct this sometime in the future. Its wrong, ugly and plated over grot but its solid and isnt going anywhere for now. Im not worried as i want to drop the hydro lines off sometime in the future and either rust treat them or get new ones made up. 

Posted

Today i also managed to un seize the unioin on the nearside and clean up both so then can now spin freely. 

20250116_152735.jpg

Posted

stuffed right up its chuff.  Some bolt issues to rectify, short a few that had snapped, some wrong length. Plan was to get new but the local supplier i used to use closed and and one that another option is a let down. Will rummage through and sort but for now things can still progress. Will fit the brakes tonight to bleed tomorrow. 

20250117_150600.thumb.jpg.14ef1554c347c2bd50faf4bb4df3cf49.jpg

20250117_150610.thumb.jpg.cd0dc253fb57bb34d8e5e4d272c5a0b9.jpg

Posted

Brakes and drums back on, Brake lines and hand brake cables ran. Touched up any damaged bits on the paint. Dug out enough bolts so everything all nipped up and done. 

20250117_203532.thumb.jpg.d0368098f6012faa214d2b9b566f5d12.jpg

20250117_203521.thumb.jpg.0b4c3dcf31bb72fbe0ce0c644f302408.jpg

20250117_203447.thumb.jpg.fdb9224a942f352904562c5fd54120a1.jpg20250117_203459.thumb.jpg.28030f7ac809b6ca7c459fac1be6aeb0.jpg

Brake bleeding tomorrow, fuel tank with new soft and hard lines from front to back. Sundays plan is pump up suspension and fit exhaust. Then it can get the fuck off the lift!

Posted

Fuel tank back in, brakes bleed up kinda, suspension pumped back up.  Almost there! 

Exhaust to fit later on and button a few wee things up. 

  • 2 weeks later...
Posted

Long life oil

With the VP1300 all back together it was shoved outside with the punto while some stuff got sorted in the workshop. Workbench modfications and if you have looked in the for sale section ive been having a big life sort out so lots of stuff is to get to fuck.  

Cracked on with another car thats been untouched for far too long. Had a good few days on it. Had a day planned out then got a phone call from a friend about his partners car having an oil leak, big time. His suggestion that its not to be driven was ignored untill the car pinged up an oil pressure warning and he recieved a phone call to tell him it sounded a bit "rattley".

Handily the car was not far from the workshop and my mate swang by and grabbed an old bottle of oil that was close enough spec and off to go find the car.  Half hour later the car arrives at the workshop leaving a  trail of oil.  Didnt sound fucked now it has oil so hopefully its survived.

20250125_201855.thumb.jpg.a7ec53812a47371806d9dac5e6729fee.jpg

After a quick chat about servicing and Guessing the car hadnt been serviced in a long time my prediction of a rotten oil filter being the problem was spot on.

20250125_173329.thumb.jpg.b6231769291a5c0d518b93c3d8847783.jpg  

The whole underside of the car was dripping, even the back axle was coated. The car was purchased used at 8k miles and wouldnt have been due its first service then and hasnt been touched since. So that oil and filter had done 67k miles since 2017 when the car was new.

With no parts to hand the car was left on the lift for the night ready for parts the next day. New filter and fresh oil chucked in with the plan to change again in 1k miles ish. Sounded fine but i advised that fucking it off sooner rather than later wouldnt be a bad idea as id say thats shortened its life span by a few years. 


Posted

People are mad aren’t they?  Spending all that money on a newish car then nothing on maintenance.

Posted
2 hours ago, Andyrew said:

Long life oil

Any reference to the oil sold by Longlife Accessories?

Posted
7 hours ago, Andyrew said:

So that oil and filter had done 67k miles since 2017 when the car was new.

its a shame it all leaked out, out of morbid curiosity, I would of loved to have seen what it looked like, and similarly would of been fun to have it sent to have it tested to see whats floating around in it etc, like how that chap who runs the Project Farm youtube channel has motor oil tested...


Posted
7 hours ago, LightBulbFun said:

I would of loved to have seen what it looked like, and similarly would of been fun to have it sent to have it tested to see whats floating around in it etc, like how that chap who runs the Project Farm youtube channel has motor oil tested...


I've got some really crappy old oil if you'd like me post it to you?

Posted

Little n large

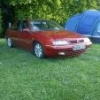
This weeks workshop tinkering has seen something thats been here for too long finally finished. The VP1500 that belongs to @Mrs6C  The welding needed was far more that we expected but its finally done. today while i had some old waxoyl to hand that wanted using up i wire brushed off some rust on the front chassis leg area. Which reavealed 3 holes  , the cars already had a patch or two put in years ago so i added 2 more,  I cleaned this back and put two  MOT style patches on both side. This week the interior went back in, fuel tank and exhaust back on, wheels given a light spruce and new tyres,  suspension pumped up and welding finished then painted. Its now ready to finally leave. 

20250201_182957.thumb.jpg.0b94b10556d0f4f7a77f12a1df348b00.jpg

I was asked by a friend about repairing a van for his friend thats a new soon to be camper project. It was a write off after clobbering something that wasnt going to move and purchase cheap. Ouch

Screenshot_20250201-200906.jpg.9510fba4dbab5d3427587a6100577110.jpg

I chopped out most of the main panel and with a come along winch hooked to the astra towbar as a ghetto puller i got some of the inner arch to come out. It was completely crushed flat in a z shape. Decided to drill out the spotwelds as it was thick metal and no way was i getting that back in situ.  

20250201_195547.thumb.jpg.fc83c67aeeb156ea2b60438437c06801.jpg

20250131_142526.thumb.jpg.58b768244bf78ac4409af375025cc350.jpg

Inner panel lower part removed and lip dressed slightly. Its mildly kinked so needs straighten out more. 

20250131_161115.thumb.jpg.b18c1ec396963a0159923366b523d491.jpg

Today with multiple hammers and a little heat ive got this plate back to roughly how it should look, will repair the torn out corner when i know its near the  final fettle

20250201_183856.thumb.jpg.40ec68bb1d24db800b76ab15d06b8b1a.jpg

More tomorrow.


  • Andyrew changed the title to Andy's awful autos: VP1500 and Crinkled van
Posted

polo not too far over then as 20k oil services on them 🙄

Posted

Tin bashing

Today i set about trying to make the inner wheel arch tub back into some sort of shap. Its torn in one area and was kinked upwards

20250131_161124.thumb.jpg.1316df6612f4b1206f2f6abe3cabcc17.jpg

It comes down the has a curve forward to meet the lower panel i straightened out (wrong) yesterday. A nosey and a measure of the otherside revealed i needed a much larger radius for the lower panel. Then i worked the upper panel to suit using torn out spotwelds id say its close enough. 

20250202_174901.thumb.jpg.aaeb6b79cc7c1adc948e7bfeb00a5de0.jpg

20250202_174847.thumb.jpg.95c24df0c84bd7640f632375b8a55b6a.jpg

After that was done a Friend popped down  for me to do an oil and filter on a freelander 2,  Such a wank location. Once that was done i worked on the replacement panels. The owner it seems could only get a rear panel for a different wheel base so i had to remove 8 or so inches, fold a return then use the shrinker to get the flange curved to the same radius as the mid panel.

Happy with that, will weld these together off the van

20250202_174735.thumb.jpg.34afced622d4d360ca6dea3f792911b6.jpg


Create an account or sign in to comment

You need to be a member in order to leave a comment

Create an account

Sign up for a new account in our community. It's easy!

Register a new account

Sign in

Already have an account? Sign in here.

Sign In Now
×
×
  • Create New...