Jump to content

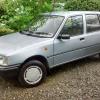
Lancia Y10 1.3 GTIe - Why will it not start?


Recommended Posts

Posted

img0432r.jpg

Inner sill now done, just requiring some rust protection and painting.

I have also straightened up the lip still there from the original outer sill where the new but will be welded to it. All that remains on this side it finishing cutting back and adding a little bit to the new outer sill and tidying up the rear outer arch followed by a couple of skims of filler over some joins of new and old metal and fitting the new door.


Then I can do it all again on the other side!

Posted

Sitting here with a drink in my hand, reading this epic thread, I keep thinking that I need to learn to weld someday.... :wink:

Posted
Sitting here with a drink in my hand, reading this epic thread, I keep thinking that I need to learn to weld someday.... :wink:


Yep, me too. I'm lucky enough that my Dad has Arc, Mig and Tig in his workshop and access to Oxy if he needs it. Despite this I've never really played with it much. He's welded so much zintek into Mums KA that it's practically been reshelled.

  • 3 months later...
Posted

For the first time in 4 months, it has not been snowing, raining or blowing a gale and no other cars have been requiring urgent attention, so there has been a small amount of progress on the Lancia.

I only had an hour or so on it, after mucking around trying to de-fuel the Orion so the progress isn't too vast. I have got the outer sill cut bacl and closer to being ready for fitting. This is the sill that was cut off the scrap Y10 in Wrexham and I have now got it cut, shaped and ready on the top edge for fitting and welding on. I just need to tidy and add the lower edge to spot weld it on and tidy up either end.


img0582ru.jpg

img0580mn.jpg


Once this is on, I will only have the lower front wing mount to finish, and the rear arch to tidy up and this side will be done. Ready for Shitefest 2013 we think?

  • 1 month later...
Posted

Some more significant progress today.

For the first time in a whole year, the Lancia has a drivers side sill.

wp20130518001.jpg

wp20130518002.jpg

It is completely welded on, front, back, top and bottom. It now needs some tidying up of the welds with the grinder (and some Isopon) but I didn't ant to do that today, firstly because all sparks would head straight for the caravan we are trying to sell and can't currently move and secondly because it was a lovely Saturday afternoon, and as pretty much everyone in the road was out enjoying the sun it didn't seem fair to make an utter fucking racket.


Today I also removed the raggedy sound proofing attached to the boot floor so I can paint underneath and replace it and began taking apart the rear suspension for a paint up, change of bushes and some welding to the drivers side bump stop.


Tomorrow I am going to begin on the passenger side. I still have the rear quarter to finish this side, but I may have sourced some new old stock rear quarters. I will see if this comes to fruition before starting cutting out metal from the current one as there is a little distortion in it from where I was welding up the fuel cap opening, so the ideal would be an entire new quarter.

Posted

Sunday wasn't as productive as I had hoped as there was a few other small odds and ends that needed doing so I only managed to get about an hour on the Lancia in the end.

I spent it poking about finding rust in the rear arch and painting the rear trailing arm.

After work and a bite to eat this evening I grabbed another half hour and went out with the angle grinder with a knot wheel attachment to see exactly how bad it is.

wp20130520001.jpg

wp20130520007.jpg

wp20130520003.jpg

wp20130520002.jpg

Not as bad as I thought.

Tomorrow evening, assuming the weather holds I will head out again and start on this construction at the back, grinding the rusty bits off and taking out the spot welds on the bottom section of the bracket so I can get to the metal work behind and then start rebuilding this corner. Sadly the edge of the inner arch is pretty ropey here, which was a miserable job to do on the other side, but at least it doesn't seem to be ropey all the way along the arch bottom.


Additionally the front of the arch, next to where the trailing arm attaches is looking distinctly worse for wear, where it was surprisingly solid on the other side. I imagine that it is going to be a right ball ache to get fixed, just due to the access.

Posted

When this gets finished, we'll have to organise a gathering just so we can worship both it and your efforts. Perhaps the Maser boys could get their projects sorted at the same time for a 'saving the Italian hopeless' celebration!

Posted

As predicted an hour was spent this evening taking apart the rear corner. I won't go into too much detail as you will have already seen it from the other side, and this is in fact the slightly better of the two sides. It hasn't half reminded me how I would dearly love a spot weld drill bit, and some cutting disks for my electric die grinder as using a shitty Homebase special drill with blunt drill bits, a full size grinder with knot wheel and a hammer and screwdriver to chisel bits off is not ideal. A shame really that I'm too much of tight bastard to actually go out and buy these items and struggle on, so I won't complain too much.


After a fair bit of drilling out spot welds and a quick attack with the grinder of doom, the top section of the bumper bracket came off quite easily.

wp20130521003.jpg

wp20130521002.jpg


Hmmm but whats this behind it? Maybe I'll give it a prod with this screwdriver, it can't be that bad as I can't see any rot on the other side.

wp20130521004.jpg


Bother.

wp20130521007.jpg

wp20130521005.jpg


And that is where I am up to. Stay tuned for more exciting* installments where I thrillingly* grind back the rest of the underseal and rusty edges and spend an incredible* four hours cutting off an awkward piece of inner structure off with a hack saw blade to reach the rusty metal behind.


*Actual adjetives may vary

Posted

Best of luck Phil, you'll get there in the end.


It's crap not having a garage isn't it :wink:

Posted

After seeing the amount of effort that you are putting into this little Italian rust box - there really wasn't that much welding required on my old VW camper after all..... :shock:

Posted

If you have access to a bench grinder tonybmw on the blue forum has a guide to making a spot weld drill bit from your knackered old bits. He also shows the best way of sharpening them.

Posted
If you have access to a bench grinder tonybmw on the blue forum has a guide to making a spot weld drill bit from your knackered old bits. He also shows the best way of sharpening them.


I have a bench and a grinder. Maybe I'll gaffa tape one to the other and I'll be away.


In other news; today it has been blowing a gale and I decided that if I took the cover off the Lancia I would end up on 'You've Been Framed' getting blown across the road, clinging to the cover and twatting into a telegraph pole. With this in mind I decided to stay inside and fit the new bushes to the rear trailing arms.


After some time I managed to find what Haynes would call 'a suitable drift' and I would call 'the end from the caliper piston re-wind tool' and bunged it in the vice with a short length of pipe on the other end to get one of the old bushes out. After a spot of fire to heat it up the old bush popped out quite happily and I set about getting the new on in.


This was also going very well when this happened:

wp20130523004.jpg

Completely sheared.


This was rather vexing so I thought bollocks to it and went in to write this, watch Parks and Recreation and play Team Fortress instead.

Posted

Who wants to see the progress so far this weekend?


Thought not, but you will be getting one anyway. So there, bollocks to the lot of you.


As can be seen from my previous post the rear corner was quite a state so as I have the extended weekend off, I set to work on it.


Saturday was entirely spent removing the rot and generally cleaning up. It took an entire day thanks to the lower section of the C pillar which I came across on the other side. It is situated in a clearly visible area, too small to get a grinder or tin snips into. A full size hacksaw also doesn't fit, where a junior hacksaw does fit, until you get to this point:

MQlUtEZh.jpg

Then you have to spend two further ours with a hacksaw blade, carefully cutting trough the two layers of the lower C pillar, being very careful not to get over-zealous and end up getting it jammed. After this you will have a hole and a piece of good metal, stuck to a piece of previously inaccessible bad, as per the following picture:

z64KgHBh.jpg

Whilst I was at it, I also removed a section of the inner arch outer arch and floor pan and removed as much old under seal, seam sealer and wax as possible.

aE0jN3hh.jpg

hWOTx1Ih.jpg


I was expecting a new vice to turn up, as amazingly I couldn't find anywhere local that sold a decent quality one and so ad to order one on Friday, paying extra for Saturday delivery. It is still yet to arrive which made today a little more difficult. I set myself the task of trying to get the floor pan, outer lower C Pillar/bumper bracket and inner arch made and welded back in. Last time I did this I had a vice to help shape the metal and it was still pretty awkward. This time I didn't.


With the help of a Wicks folding work bench, two concrete slabs, a g clamp, a block of wood, copious swearing and my favorite hammer I had these made shortly after lunch, all ready to weld in.

HR85CASh.jpg

This went splendidly, with everything going in very nicely.

r2B1S6Gh.jpg

OLvCz4sh.jpg

o47a3Xjh.jpg

Since those photos, I have added a little more weld around the bumper bracket and lower C pillar which, after the welder borked itself and needed fixing, also went well.


Hopefully tomorrow the weather will hold for long enough for me to get the inner rear quarter panel made up and welded back in and the section I spent so long hacksawing off, cleaned up and back in. With a vast amount of luck, I may even be able to get started on the outer arch.

Posted

This is what happened today before the welder broke again and the ran set in.


I made and welded in the two patches to fill the gaping void in the inner rear quarter.

685CaHfh.jpg

Ah, much better.


Then this section got welded back in.

F5WFkHhh.jpg

Which for some unknown reason, took a large amount of persuasion for any welds to penetrate. Got there in the end though and is now solid and after a quick grind back shoud look fine.


Then I started welding in these little side strengthening sections to the bumper mount at which point the welder decided it would rather not and then two minutes later it began raining. Still, at least I know what I will be doing with my evenings after work this week.

S80hzoph.jpg

Picture taken just after I put the cover back on, hence the large blue area.

Posted

This weekend I learned a very important lesson. Do not weld sat down with you legs crossed, no matter how little room you have. Having realised that the welding spatter had set fire to the crotch of my jeans as my bollocks were rather hotter than they had previously been, I leapt up and found myself repeatedly smacking myself in the balls to put the raging inferno out. No permanent damage, just very painful for about 10 minutes.


In news not involving self afflicted injury completed the rear bumber bracket:

Se3bqHH.jpg?1

And the inside:

kIMiauf.jpg?1

Ground back the sill and wanged some primer on it in the most lumpy and runny way possible. It needs some wob slapping on it to get it looking perfect which I will do when I can be arsed. Applying and sanding back isopon is one of my least favorite things in the world to do.

hxbiXk1.jpg?1

Finally I fixed the last two holes in the inner arch, one was larger than I expected about central in this picture and the other was a very localised hole just below the seat belt mount about the size of a 5p. Both now full of new metal.

8RJbmd9.jpg?1


I have now given up trying to fit the bush that broke my vice and will see if my friendly MOT garage has a hydraulic press that would do the job before I break my new vice as well.


Next up: whipping off the passenger side sill to find what crunchy horrors lie within.


EDIT: Fixed the MAHOOSIVE Pictures.

Posted

At that moment, you just knew that no vehicle is worth such severe pain in the bollox!

Phil, you're a mentalist. Keep it up.

Posted

Today I removed the other rear trailing arm. This effectively means undoing two bolts and pulling them out. A simple 20 minute job, you would think.

NOT ON THE LANCIA!

The rear bolt was a bit stuck and needed some 'persuasion' to move it, but was removed easily enough after the rubber bush inside has shreaded itself, leaving just the metal sheath behind.

The front bolt on the other hand would not budge. The nut came off easily but the bolt was utterly corroded into the metal sleeve and would not move no matter what.I heated it up until it was glowing and slightly on fire. I belted it with a hammer repeatedly and still no movement so I got the sledge hammer out the shed and smashed it as hard as I could and still no movement.

In the end and with a smashed left thumb from squashing it between a ratchet and the exhaust pipe when it slipped, the grinder was employed to cut the bolt into three to remove it.

R4al6RD.jpg?1

Well its now out and the ruined bush removed, ready to take to the garage so their hydraulic press can hopefully remove the rest of the bushes and pop in the new ones.

Two hours later I retired inside to nurse my wounds.

Posted

Today was going very nicely.

In a change to the schedule previously billed I got a good few areas painted up to stop the rot and while I was waiting for sections to dry I set about sorting out the passenger side rear arch. I had already cut this out when I was doing the inner arch so made up a patch, folded over the edge to make it easier to sort out the arch lip when it comes to it and after painting the metal behind, set about welding it in. And then I ran out of gas, so that was the end of that.


IEBHpjy.jpg?1


I'll nip into Halfrauds tomorrow after work to nab another bottle of gas at an extortionate price. and get the job finished.


Maybe then I'll finish grinding back the drivers side sill which I am really not looking forward to, partially because of the racket it makes and also because the vast amount of sparks will probably set me on fire at some point which is consistently irritating.

  • Like 1
Posted

I've said this before but WHAT A ROT BOX. I've real admiration for you plugging away at this I'd have give up a long time ago and taken up knitting or something.

How long until it see's the road do you recon?

Posted

If the current progress continues (so assuming the weather is fairly good through the summer, there is no massive and unexpected issues and I an get a partial respray quite promptly) then I am expecting this to be road worthy towards the end of August, maybe September. I'm sure there will be a few other bits that need doing before it can be put back into daily use as it has now been off the road over a year so I hope to have it road worthy, complete and reliable by mid to late October, ready to take over from the Peugeot 106 when its MOT runs out.

  • 3 weeks later...
Posted

Despite the lack of updates, there has been progress on the white hen.
For starters there has been grinding back of the welds in this area and a smear of wob on top to fill in the small gaps.
MEsxhIx.jpg?1
There has also been a wob applied to the join on the new sill. No sanding back on wither yet as it has been almost constantly drizzling with just a small gap to get the filler on and a splash of paint to stop the rot.
 
I have also cut this fucking massive hole in the front of the rear arch, which was rotten...
xeyy2BF.jpg?1
And smashed the shit out of this until it fell off, because it was rotten...
wgVXH4r.jpg?1
Today as the drizzle is still relentless it seemed like a plan to make a job that could be done in the garage, so the rear axle came off to be cleaned up, the bump stop to fixed, ll painted up and the rear brakes rebuilt. This meant putting the axle stands in a different position, as they were sat under the axle. The only place strong enough was the chassis member which is some what higher up, meaning it has been left on the sturdiest possible* footing.
Uebf1jY.jpg?1
And now the whole lot i sat in my garage awaiting further attention, although I have now taken off the brake pipes and stripped apart one drum for rebuilding.
Bz2WBhy.jpg?1
 
The following images are for my own reference when I put this back together, so I know where these pictures are. If I just leave them on my computer then I will completely forget which sub folder they are hidden in.
etpiiJR.jpg?1
ufeQcvR.jpg?1
uzE2BRl.jpg?1
C6SL9QF.jpg?1
NykODSS.jpg?1
I initially thought this drum set up was remarkably sensible and easy to take apart and put back together. Right up until I cam to removing the backing plate. I expect the planning meeting when this fucking brilliant idea was concocted.
 
Manager: Have you worked out how to attach the rear drum backing plate yet Jenkins?
Jenkins: Yes I have, I have thought that four normal bolts would do the trick nicely.
Manager: That's all very well Jenkins but won't that be a little too easy to remove so people will constantly be waking up to find that some little sod has removed the wheel, dismantled the drum and stolen the backing plate, only to frizbe it into the canal?
Jenkins: Well in that case we'll make two of them alan key headed bolts and do them up incredibly tightly. I can't see how that could be an inconvenience in any way and will solve the problem.
Manager: Good thinking Jenkins, you'll go far in this world. One day you may even find yourself in the product planning department of Austin Rover.
 
So anyway, I had to get my breaker bar (see metal pole I dug out of the ground) out onto an alan key that had been hammered into the bolt and with a good bit of difficulty, they came free.

ue5jcSU.jpg?1 
Well anyway, that's all for today folks, tune in soon to see me covered in red oxide and Hammerite as I paint all these bits up and attempt to bolt them back together in the right order.

  • Like 2
Posted

Stunning perseverance for what is an almost forgotten car ,

100 brownie points to you Sir .

Posted

Well impressed, you must be absolutely mental  8)


If it was mine I reckon I'd have used it for practising throwing hammers at before ringing the proprietor of a weighbridge so 1927346/10 for cracking on and turning it into a solid vehicle again.  

Posted

HOLY COW, you are persevering where I would have given up ages ago. More power to you!

Create an account or sign in to comment

You need to be a member in order to leave a comment

Create an account

Sign up for a new account in our community. It's easy!

Register a new account

Sign in

Already have an account? Sign in here.

Sign In Now
×
×
  • Create New...