Jump to content

Ford Cortina's Mk3 & 5


Recommended Posts

Posted

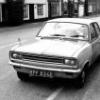
Here's the mk3 down Shotley way last year. Always liked the look of it when I used to see it parked down Bixley way


post-5211-0-55460800-1405883116_thumb.jpg

Posted

I see some gormless docker managed to photobomb you back Mike. Both your Tinas are very nice indeed

Add Acclaim bothering.

Posted

Cheers for the replys guys, yep he got me back still at least 5-1 on the photobomb lol, yesterday was far to much fun, even with the heat and the work we managed to keep laughing working and joking all the way, even more when I got in to test drive, car running, seat belt on, in gear and then realized I hadn't put the steering wheel back on lol. Trigger is just being pc I was doing at least 70 in a built up area aiming for every child, elderly person and fluffy thing I saw lol

Posted

I did laugh when I saw you running back into the house to get the steering wheel!

  • Like 2
Posted

Bloody great stuff!   I remember someone on our estate running round in a VX4/90 with no bonnet like that - only he had moleys on the end of the steering column!   Wish the world was still full of this.....

  • 10 months later...
Posted

Wow i have not been here in a long time, tbh its been a damn busy year, alot has changed including the MK3, i'll just leave this here


IMAG2019.jpg


Wanna see how we did it??

Posted

I'd love to. Been thinking of doing the same with mine.

Posted

Naah, have you got anything to say about politics, Audi drivers or insurance instead?


Of course we want to see!! :-D

Posted

Yes come on spill it . I'd be interested to see what's involved as a fellow cortina with a pinto that takes about 3 days to start .

If I do change the motor in mine I'm dead keen on putting an mx5 motor in it.

  • Like 2
Posted

Okie Dokie then i shall continue


i'll do this in stages as its easier and less time consuming than one whole post, plus i might actually remember what we did lol


So i left this just after we had fitted the rebuilt pinto, not much else happened after that except i had a new custome exhaust made, other than that it was just keep on driving it and finish running in the freshly rebuilt pinto, tax ran out at the end of December and with tax exemption pending in april i wasn't gonna re tax till then so 4 months in hibernation, 1st time in 5/6 years, so finally a chance to do all those little jobs yeah, well in practicality yes but in reality i'm not wired that way.


Basicley this is all my buds carls fault, if it wasn't for him and his orion i would still think I4 2.0/2.3 and 8v lumps were poo but no his rs2k orion and now 2.3 hybrid which we built gave a different view on the old lump and so the seed was sawn to build my own, seeing Steve taylors didn't help either lol


This conversion was always in the planning and i'd been researching it for ages but it wasn't suppose to happen for at least another year then i guess i got impatient, plus a friend had an 8V dohc lump with some of the main parts i needed and he wanted it gone so things just kind of fell into place and we started the project.


So one sunday the wife and the Bubba where dropped off so the wheelie bin engineering wags could gossip and shop lol and we went to my mates unit and collected the 1st puzzle piece


Car loaded, Engine cranes and buggeys


2014-12-14094712.jpg


Wagon Prepped for engine


2014-12-14114326.jpg


2014-12-14114330.jpg


Loaded


2014-12-14123117.jpg


Obligatory goon pic of Jono


2014-12-14114334.jpg


And unloaded


2014-12-14133933.jpg


Then came the strip down of the key bits we needed from this engine, Sump, bottom pully and cover, oil pump chain.


2014-12-18194953.jpg


2014-12-18195112.jpg


2014-12-18201020.jpg


2014-12-20114241.jpg


And that ends part 1


Next onto the build and modification of the 2.3


Cheers for following


Mike 

Posted

Part 2 Building up the 2.3

I brought and am using a 2.3 16v from a galaxy as i could'nt get a scorpio one, same lump, same mounting points just a few differances. 1 being the dipstick is located in a differant spot, also the thermostat housing is located on the gearbox end of the head. so we redrilled the dipstick hole and blocked the other one and made a blanking plate for the head.

We striped all we did'nt need off the engine and removed the balancer shafts, we also swapped the cams out for some rs2k ones just cause we could lol, we then rebuilt it back up so we could then start to get ready to drop it in and make some engine mounts.


2014-12-20114924.jpg


2014-12-20125315.jpg


2014-12-20141554.jpg


Brought in the muscle to help


2014-12-23184836.jpg


New Coaster


2014-12-23185122.jpg


2014-12-23191401.jpg


Balancer shafts removed, i should'nt but i think these look cool and may well turn them into some kind of statue lol


2014-12-23191407.jpg


2014-12-23210354.jpg


Carl was very proud of his gasket


2014-12-23210656.jpg


2014-12-23212933.jpg


2014-12-23220453.jpg


2015-01-02194159.jpg


When the balancer shafts are removed you need to make a fillet section for the block and sump


2015-01-02204710.jpg


2015-01-02211814.jpg


2015-01-03114625.jpg


2015-01-03120050.jpg


2015-01-03122525.jpg


2015-01-03124539.jpg


2015-01-03163216.jpg


Thats now got us up to fitting the engine in the car and fabricating the mounts.

Part 3 coming shortly 

Cheers for following

Mike 

  • Like 3
Posted

I wasn't paying attention I thought it was a zetec at first . Props for trying something different I guess this has a load of torque ?

Posted

I was contemplating doing a 2.3 8v for my saph, all them lovely torques, bet the Tina pulls well

Posted

I was contemplating doing a 2.3 8v for my saph, all them lovely torques, bet the Tina pulls well


I read alot about people doing that conversion with good results, there is a step by step on crust world for it


Why did you remove the balancer shafts?


Not needed dude, plus it frees up more power.

Posted

When do I get have a drive in this?!


Soon enough Triggs lol


Part 3 Fitting the bugger


Full team of wheelie bin engineering assembled, Carl, Trigger, Jono  And Andy, We cracked on getting the pinto out, while Carl cracked on making the mount plates from some templates and some free steel, once out we reassembled and man handled the new motor into position, fitted the flywheel and clutch, also remembered to put in a spigot bearing as well and the hoisted it in to position, once happy with angles and clearance Carl made the mounts permanent.

Perfect day for engine fitting 


2015-01-31%2008.57.13.jpg


2015-01-31%2010.21.17.jpg


IMG-20150131-WA0000.jpg


2015-01-31%2011.22.36.jpg


2015-01-31%2010.56.53.jpg


IMG-20150131-WA0014.jpg


2015-01-31%2012.26.51.jpg


2015-01-31%2012.27.00.jpg


Quick coffee break


IMG-20150131-WA0002.jpg


Andy and trigg trying to work out whats missing


IMG-20150131-WA0005.jpg


Jono's Vouge


2015-01-31%2012.33.56.jpg


2015-01-31%2013.41.20.jpg


2015-01-31%2014.21.51.jpg


2015-01-31%2016.10.37.jpg


2015-01-31%2015.55.23.jpg


2015-01-31%2015.55.37.jpg


2015-01-31%2016.26.59.jpg


And thats the end of that chapter lol


Part 4 coming soon 


Cheers for folowing 

Posted

Those fitting pictures, making mounts etc as you go remind me of me and my mates 30 odd years ago. Unfortunately we were ripping 2.0 Pintos out of mostly Mk3 Cortinas and bodging them into unsuspecting Escorts.

To make matters worse we also sacrificed Capris for their struts and discs and Corsairs for their gearboxes and diffs,I've just realised we were worse than banger racers.

  • Like 3
Posted

been running a couple of 8v twinks for about 5 years in mk3's & one with a bini supercharger for the last couple of years.

this one is soon to be replaced with a 2.3 8v (frankeneng) with blower from a merc 230 kompresser.


should be a right torque monster (if the 2.0 one is anything to go by).

Posted

You've inspired my to pull my thumb out........

Posted

Those fitting pictures, making mounts etc as you go remind me of me and my mates 30 odd years ago. Unfortunately we were ripping 2.0 Pintos out of mostly Mk3 Cortinas and bodging them into unsuspecting Escorts.

To make matters worse we also sacrificed Capris for their struts and discs and Corsairs for their gearboxes and diffs,I've just realised we were worse than banger racers.


I feel your pain. I have no idea of how many Mk2 escorts I bumraped for 1600 Xflows so I could put them into an Anglia.

Posted

been running a couple of 8v twinks for about 5 years in mk3's & one with a bini supercharger for the last couple of years.

this one is soon to be replaced with a 2.3 8v (frankeneng) with blower from a merc 230 kompresser.


should be a right torque monster (if the 2.0 one is anything to go by).


Didn't know you were on here fella, i must admit to thinking about supercharging this in the future so would be cool to pic your brains on that at some point 


You've inspired my to pull my thumb out........


Lol tbh i had a deadline i wanted to meet and as the car is pretty much my daily shared i did'nt want it to drag on all in it took about 4 months on and off at weekends and a few evenings, it was a team effort and BIG cred goes to my bud Carl as he really grafted on this and kept me going along with the rest of the boys.


Part 4 shiny new stuff


I decided early on to run carb for the time being to get up and running (also be a little differant) instead of injection, i probably will down the road go injection most likely using RS2K management but till then i'm running an IKE custom inlet manifold designed for using a 38 webber with an I4, this set up is very popular with our friends on the oval track and they have been really helpful with this side of my conversion, i Also brought a custom stripped down wiring loom ready to plug and play, once again this was purchased from a guy who builds them for racers and the work is really good, he put printed instructions in there for me which i thought was a nice touch and shows some pride.


Cooling was the next main issue as the I4 has its coolant pipes opposite sides to the pinto so we went with a London taxi rad and adapted the hose's, also as we had lost the stat housing as the galaxy one no longer fits on the back of the head and with going carb there isn't one like in the injection manifold so we used an inline stat that fits inside the top hose, it was a git to fit lol also had to fit an electric fan and fan switch.


The below pics are nice and shiny as they arrived as i've not had a chance to show all these fitted yet but bare with they will be in the next part smile.gif


10965669_10203112871935031_704823457_n.j


961766_10203112872255039_1457630377_n.jp


10967043_10203116689790475_658027161_n.j


2015-02-13%2015.56.23.jpg


2015-02-13%2017.48.08.jpg


2015-02-13%2019.14.40.jpg


2015-02-15%2011.13.29.jpg


2015-02-15%2014.27.44.jpg


IMAG1872.jpg


IMAG1881.jpg


IMAG1883.jpg


IMAG1908.jpg


The blanking plate we made to seal the galaxy stat hole


IMAG1830.jpg


IMAG1831.jpg


IMAG1879.jpg


And that concludes all this section and about as far as i can go at the mo, pictures get a little thin on the ground now as we were getting close to show season and the boys needed to get their own motors on the road so the remainder was mainly me and carl so pics weren't as important lol but i will take some ready for the next chapter, that is of course if you want to see what happens next??


Cheers for following


Mike 

Posted

no prob allways happy to help if I can , but as you know can't do pics.

Posted

no prob allways happy to help if I can , but as you know can't do pics.


I Know dude, always been one of the most helpful people i've come across on the forums :)


Right next up Part 5


We had a loverly pile of parts to fit to the new engine which was now in position, first up we bolted on the inlet manifold and carb, then plumbed in the fuel lines, we also fitted an electric fuel pump as well, this wasn't just choice but necessity as the I4 doesn't have a mechanical pump, after fitting that up we then moved on to cooling side, we are using a london taxi rad as recommended by a fellow member on here Dan Buckley, Carl and i (Mainly carl) made a cradle for this to sit in and bolt to, the cradle in turn bolts to the original rad screw hole, unfortunately i don't have any pics of it as like i mentioned by this point it was just 2 of us and i got slack on the pics, for the top we used so L brackets which we got all mad max on and bent them to shape, again these bolt to the rad mount hole and then to the rad, we fitted the electric fan to the rad before we put it in and then Carl wired in the fan and switch adding a relay and inline fuse for saftey, then we plumbed in the hose's, believe it or not the pinto bottom hose fitted upside down back to front, the top hose was kind a mix of hose's we had, we added genuine plastic t pieces so we could run the heater hoses, by this point the car had also been off to have the exhaust done, as you will have seen a page or so back i had a custom stainless made back in october which is awesome however the I4 has the exhaust manifold on the other side sad.gif so the company who made it made a new joining section for me, Sorted smile.gif Steph and i swapped the alternator pulleys over as now the car would run a modern v belt a trip to the scrappy resulted in a free alternator which we took the pulley off and the then a trip to the local parts shop saw a belt acquired, so all that really left was fire the beast up and see what happends, forgive some of the pics they have taken today to catch up lol


2015-04-12%2015.55.32.jpg


2015-04-12%2015.56.09.jpg


2015-04-12%2015.55.56.jpg


2015-04-12%2015.58.16.jpg


2015-04-12%2015.56.47.jpg


received_10155299331705268.jpeg


received_10155299331655268.jpeg


received_10203383983632654.jpeg


2015-04-12%2015.56.26.jpg


2015-04-12%2015.56.34.jpg


That ends this section, More to come soon smile.gif


Cheers for following


Mike 

  • Like 2
Posted

did your eng originally have the alt mounted to the cyl head?


as could do with the mounting bracket from one.

Posted

did your eng originally have the alt mounted to the cyl head?


as could do with the mounting bracket from one.


Not sure bud as it didn't have it when i brought it 

Create an account or sign in to comment

You need to be a member in order to leave a comment

Create an account

Sign up for a new account in our community. It's easy!

Register a new account

Sign in

Already have an account? Sign in here.

Sign In Now
×
×
  • Create New...