Jump to content

Delightfully Shambolic Jaguar XJ40 - Back to Magnificent


Recommended Posts

Posted

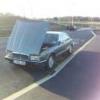
Mine (soz for the thread-jack)


4.0


jagug2_zps79pnwct1.jpg


3.2


adrians2ndjag2_zpsa4xwvhrk.jpg

  • Like 3
Posted

I've just got home to find a letter on my door mat.   A note saying 'sorry for the trouble with the Jag, here's something towards the repairs' and a cheque for £30.


What a nice bloke, although I feel guilty now and wish I'd thought to just say everything was fine when he rang while I was in the recovery truck, I wasn't expecting or wanting anything from him but it's a really nice gesture.


Amazing. There are some decent people left in the world.

Guest Lord Sward
Posted

Call it Luck Money.  What a nice bloke.

Posted

Luck money , haven't heard that since cattle markets in Scotland . 😄

  • Like 2
Posted

Nice to see another XJ40. That's a great colour for these barges. My V12 is still going I'm happy to say, although I wish it would fit in the garage though.


Bulkhead could be a major commitment - you may as well get the air-con sorted at the same time (assuming it doesn't work).

post-612-0-77028000-1454488240_thumb.jpg

  • Like 2
Posted

Damn you all, I now want a Jag ... and I'd just decided I was happy with my fleet.

  • Like 4
Posted

Looks like a clutch ? Hope you ordered a clutch ??

Posted

An old knackered alternator covered in satan black paint and sold as a recon ? 😢

  • Like 2
Posted

I certainly hope not!

No paint on it, they sent me photos before the sale and they have a good rep on eBay as a Jag parts supplier so fingers crossed.  Will be fitting it on Saturday so I'll find out then!

Posted

Do you have the workshop manual? The official Jaguar workshop manual DVD is really excellent, though maddeningly, they no longer sell it. Haynes is OK though. I can probably post up the relevant 'changing the alternator' page in the Jaguar DVD if you haven't got it - provided I can fire up the elderly Pentium it's got stuck in!

Posted

That's a kind offer, thanks.  I'm going to have a crack at it on Saturday morning, I've got a bid in on a Haynes on eBay at the moment as well but hopefully can wing it for now.

Posted

I love the Avatar picture!!  :-D


24471191389_569cabe5e5_k.jpgAlternator 1 by *D*B*, on Flickr


24720952312_e3ef03318e_k.jpgAlternator 2 by *D*B*, on Flickr


24471184299_cc213d3ce1_k.jpgAlternator 3 by *D*B*, on Flickr


24210627674_fc307a55b5_k.jpgTorque figures by *D*B*, on Flickr


The air pump detailed is only fitted to USA and Canada cars.


The workshop manual states the lower bolts should be accessed from below. IIRC, I found I could access them from above with the air filter, MAF and throttle bellows/elbow removed. Access was a little awkward, but perfectly manageable. I seem to remember I may have used a crow's foot spanner on one of the ends which made access fairly easy - but I may have done this because of the novelty of using it, rather than because it was necessary!


Hope this helps - and good luck with it!


I have put these on Flickr so they can be very large pictures. If you click on them you can download them and print them out, keeping the print clarity.

Posted

Top work, thanks!


Weather forecast for today looks awful so I hope I can get it done in between showers.

  • Like 1
Posted

bastard! surfing through XJ40s now and I have three bloody Range Rovers that need my attention first.


Top bombing though I say, XJ40s have definitely come of age. 


My boss had a 2.9 with cloth trim and hub caps back in the late 80s. It was shit but I loved the shape of it. He poured water into the fuel tank when it inevitably overheated.

  • Like 2
Posted

It lives!


Took a couple of hours in drizzly rain but the new alternator is in and works perfectly.


It just needed a little help for the first start.


post-5492-0-14300700-1454774338_thumb.jpg


Proof:


post-5492-0-45743200-1454774286_thumb.jpg


Just had it out for a spin round town, exhaust is noisy and brakes are sticking but eased off with use, they're the next job. It needs a damn good scrub inside and out but otherwise it's pretty sorted.


Oh, and a hairy moment on a wet roundabout showed up the perished Hero tyres on the back so they'll have to go at some point.


Bulkhead rot is quite nasty in one small area which will be a problem at some point but I cannot find much corrosion to write home about anywhere else so far.

Posted

Two nice motors there, a good old K Series jump start. Bet you felt like shuffling the Jag Reg about a bit when The alternator let go on you J807LOX

Posted

Increase the weigh in weight? 

  • Like 2
Posted

Excellent stuff - not the easiest or most pleasant weather for it today either!


If the bulkhead is the only real area of rust on the old beast, then you've got a good'un.  The bulkhead scares people because the dash needs to come out and the dismantling involved makes it expensive to weld if you don't do it yourself - or a bit daunting if you do. Taking the dash out isn't hard though - and more to the point is easy to put back in too!


If/when you decide to repair the bulkhead, I have removed the dash on my car - so can describe what is entailed.

Posted

I have just noticed - this topic has over 10,000 views now - and 170 replies!  :-D


*I'll gloss over that my XJ40 Rust and rehabilitation  thread has managed less than half that since 2012.... :oops:

  • Like 2
Posted

I love the Avatar picture!!  :-D


The air pump detailed is only fitted to USA and Canada cars.


The workshop manual states the lower bolts should be accessed from below. IIRC, I found I could access them from above with the air filter, MAF and throttle bellows/elbow removed. Access was a little awkward, but perfectly manageable. I seem to remember I may have used a crow's foot spanner on one of the ends which made access fairly easy - but I may have done this because of the novelty of using it, rather than because it was necessary!


Hope this helps - and good luck with it!


I have put these on Flickr so they can be very large pictures. If you click on them you can download them and print them out, keeping the print clarity.


I thought it might be useful for anyone who has to do this to clarify how I did it.  It's certainly not the way Jaguar say it should be done but it worked for me.  


I unbolted the tensioner arm from the top of the alternator (10mm), released the belt and then undid the 17mm nut on the long bottom bolt that runs through the base of the alternator, then sliding the bolt out (it barely clears a steel pipe behind it but does come out) whilst supporting the weight of the alternator.  Getting a socket wrench around the back to prevent the bolt turning with the nut on the front is a bit tricky but can be done, mostly by feel.


I then unbolted the two wires on the rear of the alternator (7mm and 13mm) and disconnected the round plastic plug.  The alternator could then be rotated so the rear of it was facing upwards and extracted through the gap behind the radiator.


As Mr Haynes says, refitting is the reverse of removal.  It's bit tricky getting the long bolt to line up with the base of the alternator whilst supporting its weight and taking care not to put any strain on the reconnected wires and the top bolt is also a bit difficult to line up as the belt will be under tension when it's lined up with the bracket but it can be done.


The end result was a couple of hours' work (I could do it in half the time now, especially if I hadn't dropped the long bolt onto the crossmember under the engine whilst refitting it where it took about 20 minutes to find and extract) with no need to retension the belt or remove any other components.


No photos unfortunately as it was wet and I just wanted to get the job done but MB's diagrams were helpful to know where everything was.

  • Like 2
Posted

Excellent stuff - not the easiest or most pleasant weather for it today either!


If the bulkhead is the only real area of rust on the old beast, then you've got a good'un.  The bulkhead scares people because the dash needs to come out and the dismantling involved makes it expensive to weld if you don't do it yourself - or a bit daunting if you do. Taking the dash out isn't hard though - and more to the point is easy to put back in too!


If/when you decide to repair the bulkhead, I have removed the dash on my car - so can describe what is entailed.


Thank you, I'll get some pictures at some point, it's very localised but pretty bad so will need doing at some point.


I'll bring it up to you to repair if you like, I'm impressed with your workmanship on yours and I'm sure you're keen to repeat the experience :).

  • Like 1
Posted

I only did the side strip myself!


After I've finished learning how to weld and paint on it your car will be a bodged horror - but with a very lovely side strip!! :D

  • Like 2
Posted

Hmm.  Just took this for an enthusiastic drive round some very wet and hilly roads around the edge of Exmoor and made the following discoveries:


- Rear tyres, as previously noted on a wet roundabout, are utterly terrifying.  The car wants to show me where we've just come from on every bend and roundabout.  They've got loads of tread but show signs of perishing and are branded 'Hero' so I would guess they are now as hard as nails.


- The exhaust is LOUD.  Next thing on the to-do list.  It is a tad conspicuous.


- Brakes much less wayward after a good workout but not quite perfect yet, however they do stop the car astonishingly well.


- Engine only running on 5 cylinders most of the time.  This is new today.  The 6th one came back briefly but changed its mind and went away again.


To resolve this, I've ordered a pair of part-worn Bridgestones off eBay to go on the back (the fronts are a budget brand but nearly brand new so can stay for now) and a new dizzy cap, rotor arm and spark plugs as the old cap looks ancient and I'm fairly certain that'll sort it out.  I don't think it's been serviced for years given the low mileage, the oil looks clean but I'll probably change it later in the year, ignition parts are more of a priority right now.  That and brakes are my next job.


My preferred local tyre centre couldn't find any obvious holes in the exhaust but it's blowing somewhere near the manifold so I think it might have to come off for investigation, likely a job for my tame mechanic.  On the plus side, with it up on the ramp I had a chance to see that the underside looks mega clean with just surface rust.  I'll get that smeared in plenty of oily black yuck when I can find the motivation.


On the plus side, I found the 'Sport' button on the auto box.  Even running badly, it took off in a very surprising manner when kickdown was used going up a steep hill and left a tailgating hot hatch falling back in a cloud of unburnt petrol vapour.  Classy stuff.

  • Like 8
Posted

I think the "Sport" button might be part of your problem with loss of traction on the bendy bits ?

Posted

Great progress so far. You can't beat owning and driving cars like this!

  • Like 2

Create an account or sign in to comment

You need to be a member in order to leave a comment

Create an account

Sign up for a new account in our community. It's easy!

Register a new account

Sign in

Already have an account? Sign in here.

Sign In Now
×
×
  • Create New...