Jump to content

Recommended Posts

Posted
17 hours ago, Rocket88 said:

A man of your fettleing inclinations needs a plasma cutter……

I would but I have nowhere to put it.

Posted

I welded the side panel in.

20230821_182957.thumb.jpg.01d103ee89222c193a046ba4ffe4f112.jpg

That's mostly secure, needs a little more work and the plug welds finishing up.

20230821_123210.thumb.jpg.96314de69bd2688c5d2a63d6fde5fbb7.jpg

It's also now a RACE CAR, because it has RACE CAR tires.

Yeah, I got bored and painted the letters on the tires.

Posted

Kudos on recreating the details on these panels. I would probably have just welded in a flat panel then hit it with a ball peen hammer a few times and called it strengthened. Yours is most definitely the better approach!


Posted
11 minutes ago, juular said:

Kudos on recreating the details on these panels. I would probably have just welded in a flat panel then hit it with a ball peen hammer a few times and called it strengthened. Yours is most definitely the better approach!


I'm kinda wanting it to look right if someone lifts the carpet up or jacks it up to look underneath.

Plus, it's such a large expanse of flat steel panel it needs as much help as it can get to stay in the right shape.

Phil

  • Like 3
Posted

20230822_165504.thumb.jpg.ecc0756326ac747e870613ff00bc1ebb.jpg

That'll be why I was getting bad welds then.

20230822_173359.thumb.jpg.422f05654201294f6c36ad98a6b14f8e.jpg

Improv. Should work better.

Posted

Made up a panel to attach the floor repair section to.

20230823_182135.thumb.jpg.4d6f2add6e8daacbe197ba3ee6fa36e7.jpg

The repair panel was cut a touch small by the previous body shop so it'll have something to connect to.

20230823_182201.thumb.jpg.4e3e8cc406b4a7683597635f4b88e3f4.jpg

It's all starting to come together; feels remarkably solid now, which is reassuring.

Phil

Posted

20230824_073103.thumb.jpg.6cce9c397a277a8243e9087b5436ef4e.jpg

Hm. Cranberry (frame) or Colonial Red (inner wing)?

  • Like 3
Posted
45 minutes ago, motorpunk said:

That red is too orange and the other red is too burgundy. 

Does that help? No? Sorry...

No porridge is good enough, either?

  • Haha 3
Posted

20230824_184007.thumb.jpg.a2980f3d936d68747e815445c07455a8.jpg

Got the correct shape of the first section of boot floor proper. Needs finalized and welding in.

Phil

Posted

Bought some more wire this morning. The Lincoln Electric stuff I had was not nice to weld with. Bought some more Forney and it's miles better.

20230826_133041.thumb.jpg.54a4759bc1c47f38b14bb3ffdcb04f33.jpg

All welded in.


Phil

Posted

Slight change of pace today.

20230827_161021.thumb.jpg.44ad715eceb78c1b590e1a9d55faa5d8.jpg

Bought a BATTREE.

  • Like 3
Posted

Recall way way way back I started looking at how to form the trunk floor, and I made a practice piece?

20230830_111502.thumb.jpg.32e570b783a0231af6857c8ca3a030b3.jpg

Turns out the positioning of the ribs was accurate and the metal large enough.

20230830_180727.thumb.jpg.8cb143e726222cdf842619212bac32a3.jpg

So, I bashed the stiffener ribs in properly and folded one lip down; it warped slightly so I need to fix that but overall that'll do. Saved some money and time on that one.

Also ran half a bottle of Berryman down the carburetor at high speed, that's seemingly cured the pops and bangs from the even bank so I'm happy with that.

Core plugs are leaking quite badly, not unexpected as they were all in need of replacement. That's really an engine out job, if I do that it'll also make fixing the firewall easier so there's that.

Phil

Posted

20230831_175128.thumb.jpg.11a5a11893e4240aa27ad516121ddd0a.jpg

Straightened out and folded down. Just right. 

That's all I had energy for, running on about 2h sleep since yesterday.

Posted

20230901_164647.thumb.jpg.e44a69b8037c78a9f642a3c6e3bc69f2.jpg

Yesterday afternoon after work I had an hour to mess about with the car so cut the remaining portion of floor out here. 

Also removed the remnants of the previous boot floor repair by twisting at it for three minutes with a pair of pliers. A lot of the welds cracked off immediately. Most weren't attached. 

20230901_171300.thumb.jpg.612c9ab777361182e8c4a643cdac5f3f.jpg

Cleaned it down. The floor panel on the left there is pretty grody, this side seems to have had a significant leak at some point (that's evident- I know it did, the drip rail had been, erm, replaced- that's on the to-do list of Things To Un-repair). Bottom of the wheel tub needs to be cut off and a new piece let in, then I can attach this section. I did have a cardboard cutout of the drop flitch panel but I'll be damned if I can find it. Bought some more steel last night so I can get on with some of that.

Forecast for today is rain. And tomorrow. And Monday. Tuesday onward is sunny. Typical, rain the days I'm off work.

Posted

Got rained on a whole bunch today.  Managed to clean off the old welds and random pieces of metal stuck to the wheel tub, also removed the remains of the old floor.

20230902_094250.thumb.jpg.942deaac8634ae6a80f58dc7a756a189.jpg

Most of the holes are actually from the bodyshop, cutting, grinding and welding. That needs a piece letting in, left of the reinforcement needs the rest readding, it's a bit thin as it approaches the arch.

20230902_162048.thumb.jpg.1036a1f5ba18cd376ab656cdde870387.jpg

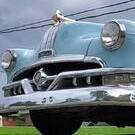
After the rain stopped I was in the midst of other things and ended up somehow polishing the brightwork on the front of the car.

More rain forecast tomorrow, great.


Phil

Posted

Couple hours with grinder and welder. Quit as the sun started getting too hot on my back and my welding mask decided to quit working.

20230903_154408.thumb.jpg.4ff642803e2eb9291ec71587cfd3f6fb.jpg

Bottom of the arch done, side panel in.


Phil

Posted

The day cooled off somewhat so I started a little side project.

20230903_185420.thumb.jpg.b0708a5efbb8d1b8380a748b77c95982.jpg

It started with an expertly crafted slice of metal, carefully contoured.

20230903_192352.thumb.jpg.e36bfe750967b6bacca10dd25fac203e.jpg

Then a second, which is currently a work in progress. Maybe more on this tomorrow.


Phil

Posted

Well, the pot metal of the emblem fractured and cracked away.

That didn't work. Back to square one.

Posted

Resuming things I can fix; template in CAD today for the driver's side lower quarter.

20230905_090755.thumb.jpg.f0c3164d0b5a324591399aea52d9a03a.jpg

Phil

  • Like 7
Posted

Channeling my inner Bob Ross at lunch time.

20230905_111954.thumb.jpg.66b8cfc98a685342bba6a80fd5b6c2b4.jpg

Touched up all the black paint on the front of the car.

  • Like 9
Posted

Only had time to weld the two repair sheets together.

20230905_172536.thumb.jpg.f614968387ccb85d7aad4feb63dd0d2c.jpg

I've made worse welds.

  • Like 3
Posted

20230905_192513.thumb.jpg.cf1cf5cffef8481da1f0447fc6083a44.jpg

Slice, slice, slice.

20230905_193730.thumb.jpg.eeed83fdd7964ce7cfd70d6bf26f4c51.jpg

Bend, bend, bend


Need to add the profile, but it's got the lip return on the bottom now. 

Posted

Bash bash bash bash bash

20230908_155748.thumb.jpg.e8bdbe22e236b2e90b7741883c17f4ff.jpg

Zort crackle pop spatter sonofabitch-that-was-hot zort crackle

20230908_175911.thumb.jpg.b8456348027f8a54d5e676a58c4a304d.jpg

Just tacked on for now because rain and it needs the profile amending.


Phil

Posted

Yup, I thought it looked wrong.

Just went and put the template to both sides, and realized for this one I used the wrong datum.

  • Sad 1

Create an account or sign in to comment

You need to be a member in order to leave a comment

Create an account

Sign up for a new account in our community. It's easy!

Register a new account

Sign in

Already have an account? Sign in here.

Sign In Now
×
×
  • Create New...