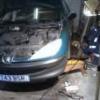
rainagain Posted October 15, 2019 Author Posted October 15, 2019 The DMF had completely broken up inside, however yet again the car decided to be a dick and one of the mounting bolts managed to get stuck inside the remains of the DMF as I removed it. You can see bits of the DMF through the bolt holes. Luckily whilst I was trying to cut a hole in the rear of the DMF to retrieve the bolt it worked its way round so I could extract it. Jim Bell 1
rainagain Posted October 15, 2019 Author Posted October 15, 2019 Now knowing that the crank, gearbox are ok I ordered some parts: LUK release bearing £13.41 Gearbox oil seal set £12.39 I'm not sure what to do about the N/S driver shaft inner CV joint, it's definitely got sticky bits in it's movement which I think has been causing the side to side vibration when I've been accelerating. I'm thinking of just getting a new one from Amazon for £28 but I'm worried about how I'm going to remove the driveshaft nut as the hub is not attached to the car. I can see a tie wrap on the inner joint so it looks like someone has been in it in the past, I wonder if I repack it with grease it would help or is it a lost cause?
Richard Posted October 15, 2019 Posted October 15, 2019 I've got a 400Nm Makita gun that should be able to shift the driveshaft nut. I'm away for the next couple of days but should be able to make it available if you want to pick it up after work one day. rainagain 1
Jimbob McGregor Posted October 15, 2019 Posted October 15, 2019 I’d replace the driveshaft if I were you. I recently changed one on a Partner Combi 2.0hdi which completely rid it of the vibes and shaking in low gears. This one really was sticky, making axle articulation difficult on the Offside out of and into bends. Can you get the hub into a big bench vice? That would help a lot with hub nut removal. On another matter I’ve got the same job to do on my 307SW that has been sitting around waiting for it’s solid flywheel conversion.
rainagain Posted October 15, 2019 Author Posted October 15, 2019 13 minutes ago, Richard said: I've got a 400Nm Makita gun that should be able to shift the driveshaft nut. I'm away for the next couple of days but should be able to make it available if you want to pick it up after work one day. Thanks for the offer, the £28 one on amazon has disappeared. I’ll need to get back in touch with Reb to see about the ones he kindly offered me.
rainagain Posted October 23, 2019 Author Posted October 23, 2019 Only got an hour on this at the weekend. I fitted the smf with the new bolts. Strange torque settings 25Nm then slacken then 20Nm then 22 degrees. I set the clutch up with my home made alignment tool Jim Bell 1
rainagain Posted October 29, 2019 Author Posted October 29, 2019 You can see bits of destroyed DMF lying all over the gearbox, I've got a new guide seal from when I changed the clutch on my 206 but I think I'll just leave it as it's not leaking right now.
rainagain Posted November 3, 2019 Author Posted November 3, 2019 I purchased a fantastic four tonne winch from carparts4less’s eBay store for just £20 delivered. I hung this from the garage roof and used it to lift the gearbox on to the cradle I made up and bolted to my trolley jack. Isaac Hunt, Joey spud and shedenvy 3
rainagain Posted November 3, 2019 Author Posted November 3, 2019 I cut the head off a long bolt, then cut a slot in it. This helped me to align the gearbox. It was a bit of a pain as you have to rotate it to clear the subframe then rotate it straight again. Remspoor, The Moog and Jim Bell 3
pauldoubleyou Posted November 3, 2019 Posted November 3, 2019 Holy shit as an owner of the same car I hope I never have to do one of these. The last clutch I did on the drive was a Vito and it was agricultural - dead easy. There’s a lot more electrics in these and it’s worrying. I only just found that the inner CVs aren’t usual boots so if you’re removing one don’t damage it. They are shaped in the inside to sit over the odd shaped joints. Mines sat at the moment without a front o/s hub in it as I wait for a boot to arrive. MOT retest is booked for tomorrow so fingers crossed it turns up soon. Secondly, how easy was the arms to get out of the subframe on the front? I have a new arm but am resisting fitting it due to it looking like an awful job. Sent from my iPhone using Tapatalk
rainagain Posted November 4, 2019 Author Posted November 4, 2019 I did my arms on the previous page to this one. I found getting them out ok (apart from splitting the lower ball joint), nothing like the hassle of changing them on a 206 I used to own. The n/s is a bit tricky as the driveshaft obscures the bolt head. I used a pair of mole grips to hold the head and this let me undo it. I did the same thing again for tightening it it up.
rainagain Posted November 4, 2019 Author Posted November 4, 2019 Next up was reattaching the n/s gearbox mount, this wasn't too bad I just jacked up the gearbox and wiggled it into position. The stud then had some loctite put on the threads before it was screwed in. The mount was then installed over the stud and the nuts torqued up.
rainagain Posted November 4, 2019 Author Posted November 4, 2019 I had shit tons of hassle with this stupid bracket again, in hind sight what I should have done was fit it before the gearbox mount as it would have let me pull the engine forward. Instead I struggled, as I rotated the engine to allow the bracket to slip on the studs pressed towards the subframe stopping it going on. I ended up grinding the end of one the studs and filling the other to get some clearance. You can see how it sits in a little recess of the subframe once installed. The Moog 1
Rocket88 Posted November 4, 2019 Posted November 4, 2019 Think I would have set fire to this about 4 pages back...................your patience is much to be admired........... shedenvy and The Moog 1 1
rainagain Posted December 3, 2019 Author Posted December 3, 2019 Next up I bolted the clutch salve cylinder on with some new bolts as the heads on the old ones were started to rust away Jim Bell 1
rainagain Posted December 3, 2019 Author Posted December 3, 2019 I bolted the starter motor and then tried to fit the plate that holds the vacuum solenoids, I initially thought this went under the one of the slave cylinder bolts and one of the starter motor bolts. After much faffing around I managed to get my phone up and took this picture showing it actually goes under two of the starter motor bolts. The pic shows how I thought it was supposed to go. I then loosened the starter motor bolts before slipping in. Then it was the joy of hooking up eight vacuum hoses and the four electrical connectors to all the solenoids as well as the vacuum reservoir. Later that night I was coloring in with one of my kids and drew this picture to express my feelings about this car Dan302, scdan4, beko1987 and 12 others 5 10
Remspoor Posted December 3, 2019 Posted December 3, 2019 Reading through this clutch change I am so glad I let the garage do the work. Well done that man.
drewd Posted December 3, 2019 Posted December 3, 2019 Our 307 doesn't have a DMF, so clutches are cheap. This job looks fairly horrendous and I'm not sure I want to attempt it if the clutch were to give up. Fair play for persevering with it.
rainagain Posted December 4, 2019 Author Posted December 4, 2019 This is the plate properly fitted Next up battery tray, this time I didn't fit the random bolt that needs to be screwed in from the wheel arch so if I ever need to take this out again I don't have to remove the wheel arch liner. Lacquer Peel 1
rainagain Posted December 4, 2019 Author Posted December 4, 2019 I had a problem with the car wobbling when you accelerated, which I suspect was caused by a worn inner CV joint. The O/S felt ok but the N/S felt a little tight in places so £12.50 later I had a second hand one from ebay. The only problem I had was how to remove the mega tight driveshaft nut when the hub wasn't on the car. Luckily I borrowed this 3/4" bad boy from someone at work. I stuck the driveshaft in the vice I braced myself, half expecting to end up spinning round cartoon style whilst the nut stayed still, but instead it zipped it off like it wasn't there. drewd, Tickman and theshadow 3
rainagain Posted December 4, 2019 Author Posted December 4, 2019 Whilst I had the struts out I took the opportunity to clean, de-rust and paint the inside of each strut tower. Tickman and sierraman 2
rainagain Posted December 4, 2019 Author Posted December 4, 2019 As everything was apart I thought I might as well fit the uprated shocks and springs I picked up from Gumtree for £40. 'Pleasure Unlimited' has to be a good thing surely? theshadow, Lacquer Peel and Jim Bell 2 1
rainagain Posted December 4, 2019 Author Posted December 4, 2019 Naturally to get to the top of the struts you have to remove the wipers and windscreen lower cowl I had to remember to be careful about the lower part of the windscreen, some poor guy on the Peugeot forum lend on this and as the windscreen is unsupported there it just cracked.
rainagain Posted December 4, 2019 Author Posted December 4, 2019 The new springs are just a wee bit shorter than the originals, I tried to paint them in insurance friendly black Once installed the lower coils are coil bound which looks a bit strange to me, maybe they'll spread out over time?
rainagain Posted December 4, 2019 Author Posted December 4, 2019 I then went to replace the worn trackrod end I'd noticed had a wee bit of play when taking everything apart. This one was listed on amazing as being for the right hand side but the amazon fitment guide said it would fit the left hand side of my car. I contacted the seller to ask about the conflicting information and told him it was for the right hand side/driver's side/off side just to be clear and he confirmed it would fit. Well guess what he sent me: That's right! One for the left hand side.
Snipes Posted December 4, 2019 Posted December 4, 2019 Not that's ok for aftermarket springs. Those coil bound springs are more like a spacer. You've probably altered the camber of the wheel as there's usually adjustment where the hub bolts to the strut.
pauldoubleyou Posted December 4, 2019 Posted December 4, 2019 I just changed the front spring on mine and was sprised at how massive they were. No way they were going on with household spring compressors - took them to the garage and he fitted it to the strut for a tenner. Even he commented on how much it needed compressing to get it on Ive got inner track rods to do this weekend if its not raining to chase the rattle.
rainagain Posted December 9, 2019 Author Posted December 9, 2019 I managed to get hold of the correct trackrod end from Eurocarparts, (I did visit the store to make sure!). Once this was fitted I stuck the wheels back on and bleed the clutch. I'm happy to say it drove ok. The next job was to change the rear springs, I couldn't manage this in the garage as space is tight against the wall and I needed access to both sides. Naturally it was pissing it down with rain but as I wanted to finally get the car finished I pressed on. The piece of cardboard I'd gotten to cleverly lie on lasted at least five minutes before it turned to mush. I got the car jacked up and both the strut bolts came out. Once I'd lowered the axle with a jack the springs popped ok. Strangely the lowering springs actually felt softer than the ones I removed and the coils were slightly thinner gauge. Nice new springs installed
rainagain Posted December 9, 2019 Author Posted December 9, 2019 It was whilst I was jacking the car up I heard not very nice noises from the sills, sure enough a light pressing resulted in more crunching noises, then I grabbed a screw driver and this happened. Annoyingly in the past some moron had glassed both the sills including their drain holes so they've been badly affected by tin worm due to an extended period of being filled with water. Further poking revealed a large section where the bottom has rotted out on one side and the rear of the other side. I think a whole lot of people would have cubed this car by now.... theshadow, Jim Bell, scdan4 and 1 other 2 2

Recommended Posts
Create an account or sign in to comment
You need to be a member in order to leave a comment
Create an account
Sign up for a new account in our community. It's easy!
Register a new accountSign in
Already have an account? Sign in here.
Sign In Now