twosmoke300 Posted March 12, 2019 Posted March 12, 2019 I say this every time there is a brake bleeding question on here but don’t get hung up on the abs thing . I’ve been in the trade 23 yrs and not once have I had to bleed abs systems any differently to any other car ( Honda alb excluded) And thus includes actuallly repairing abs modulators
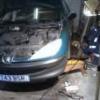
rainagain Posted May 10, 2019 Author Posted May 10, 2019 After trying Reb's donor 307 I've come to the conclusion that the brakes aren't that bad, I'm just comparing them to the over assisted modern brakes I experience when I get hire cars through work. This was the state the front discs were in
rainagain Posted May 10, 2019 Author Posted May 10, 2019 They were replaced with some nice Brembo grooved discs. All the sliders were lubricated with my life time supply sized tin of rubber grease Before refitting the calipers and the new pads I think they look quite good through the wheels Lacquer Peel and Dirk Diggler 2
rainagain Posted August 12, 2019 Author Posted August 12, 2019 The last couple of MOTs I've had advisories for both wishbones having degraded bushes. I recently (on a private road) drove constantly at 80mph for three hours. Since then I've noticed the car shaking from side to side if you accelerate hard at lower revs. A quick google suggests this could be either the wishbones, the drive shafts or an engine/gearbox mount. I've changed two out of the three mounts so I'm assuming they're ok. I also had a knock from the front so I decided to crack on changing the O/S wishbone and check the other parts whilst I was there. As soon as I disconnected the drag link I could tell it was knackered so this got swapped.
rainagain Posted August 12, 2019 Author Posted August 12, 2019 I had a lot problems splitting the lower ball joint, I tried smacking it either side with a large mallet and big chunk of steel but as always this method never worked for me. I ended up using an angle grinder to cut some slits in the bit of the wishbone round the ball joint taper. I then put a bottle jack under the lower ball joint threaded section (with the nut on) and jacked it up until the arm was ~horitzontal. I then placed a steel shaft against the wishbone and smacked it with a mallet until it eventually popped off. I borrowed the rattle gun you can see above and it's excellent much better than both my air rattle gun and my lidl electric impact driver.
rainagain Posted August 12, 2019 Author Posted August 12, 2019 It's safe to say the bushes are knackered I didn't take any more pics as following a roll of thunder the contents of many many clouds fell on my head and I raced to bolt it back together as fast as I could before I was drowned. I used it for the first time properly going to work this morning and the clonking is gone (drag link) but it still shakes when accelerating, although not as bad. I'm hoping when I get the other side done it will be fine.
rainagain Posted September 23, 2019 Author Posted September 23, 2019 I finally managed to get some time this weekend to start on the clutch change, first problem was removing the two bolts that hold in the intermediate bearing on the o/s driveshaft. The every helpful HBOL said just remove them, the bottom one was ok but I couldn't barely get my hand on the top on.
rainagain Posted September 23, 2019 Author Posted September 23, 2019 Luckily a quick google found someone on the Peugeot forum with the same problem, so I followed their advice. Firstly you have to remove a nearby bracket, which is tricky again due to crap access. I managed to squeeze a ratchet spanner onto the nuts and swing it back and forward just a few degrees at a time until the bracket was finally off. Then I used a combination of some extensions and a flexi joint to get the nut off
rainagain Posted September 23, 2019 Author Posted September 23, 2019 I unplugged the abs sensor and removed the brake caliper
rainagain Posted September 23, 2019 Author Posted September 23, 2019 I then unbolted the entire hub, this wasn't too bad as I had only recently renewed the wishbones
rainagain Posted September 23, 2019 Author Posted September 23, 2019 This left me with my prize, one down, one to go I tried to check the inner CV joint for wear as I think this is the source of my vibration when accelerating but apart from at the extremes of movement it felt nice and smooth. stephen01 1
rainagain Posted September 29, 2019 Author Posted September 29, 2019 I got some hours spent on this yesterday. I removed the n/s drive shaft and inner wheel arch liner. Naturally about half the plastic clips fell apart. The Moog 1
rainagain Posted September 29, 2019 Author Posted September 29, 2019 I could then remove the battery box, air filter box top and MAF sensor. Next up was the vacuum reservoir and starter motor. Naturally I couldn’t get anywhere near the wiring connections for the motor
rainagain Posted September 29, 2019 Author Posted September 29, 2019 To get to the connections I had to remove the fuel filter assembly. Once this was out of the way I finally undo the bolts securing the wiring. The Moog 1
rainagain Posted September 29, 2019 Author Posted September 29, 2019 To move the motor out of the way I then had to remove the two brackets holding all the vacuum solenoids.
rainagain Posted September 29, 2019 Author Posted September 29, 2019 I thought I was being quite careful with the vac pipework to make sure all the pipes locations were marked but as I pulled the octopus of pipes up to sit out of the way on top of the engine it sprang into a disorganised mess. This will be fun when it comes to hooking it all back up. The Moog 1
rainagain Posted September 29, 2019 Author Posted September 29, 2019 I did find one good thing, the n/s inner cv joint has tight spots in it when you move it. Unlike the o/s which is nice and smooth. I did note the cv boot has a tie wrap on it so maybe at some point in the past it fell off and the joint got contaminated. So far I’ve got the following solutions to this in mind. 1. remove the boot and regrease the joint 2. replace the shaft with a brand new one 3. fit a second hand shaft from reb. Although he did say these have been sitting outside so I’m not sure if they would be useable. I’m trying to keep costs down so far they stand as follows: £109 tow off motorway £5.45 track rod end £45 second hand solid flywheel and clutch. ( I’m tempted to use this clutch if it’s not badly worn to help save some money) Jazoli, drewd and Shirley Knott 3
Jazoli Posted September 29, 2019 Posted September 29, 2019 Looking good, although I don't know how anyone has the patience to do this stuff on the floor without a lift, I used to do all this when I was younger but now I'm older I end up paying a garage to do it then plead poverty to the missus and get her to pay for it! Wheelarch liner clips are about £4 for 10 on ebay as I've just had to replace the liner on our 307. Hopefully it'll drive ok with the solid flywheel, I've seen mixed results with them.
rainagain Posted September 29, 2019 Author Posted September 29, 2019 Tbh one of the reasons this is taking so long is I just can’t be bothered with it. If I had the money I’d just have sent it over the bridge. I’d like to replace it but I can’t seem to find something similar that will transport 6 people without being a people carrier, which I don’t want. In an ideal world I would get get a V70 with the seats in the boot but sadly funds won’t stretch to this. Also I really really hate the colour, especially the green dash! I almost recently bought a scrap one in a colour with the idea of swapping all the body panels and then getting the rear quarter sprayed to match. But again lack of cash prevented this.
rainagain Posted October 8, 2019 Author Posted October 8, 2019 Last weekend I got some more time spent on the clutch change, I would just like to say nothing is more soul destroying than spending a whole freaking hour just removing the gear change cables. These were horrible things, you had to slightly push the cable down and then push two tiny clips out of the way with a small screw driver and then push them out, before the clips could engage again. Of course access was crap as these are buried right down the back of the engine. First one off, the second one came off eventually as well. I watched one youtube video where the guy just burst these off with a crow bar, I was getting close to this with frustration but I didn't think the plastic holder would stand up very well to this.
rainagain Posted October 8, 2019 Author Posted October 8, 2019 Next up was removing the crank shaft sensor and reversing sensor wiring plugs, I found this great tip about using a loop of wire to pull them off as they are recessed, it works really well.
rainagain Posted October 8, 2019 Author Posted October 8, 2019 Then I went round and started to remove the lower bolts holding the gearbox to the engine, I numbered each one as I removed it and wrote the number next to bolt hole as they are different lengths. This one was a bugger to get to as access was so tight you could barely get one click on a ratchet handle.
DodgyBastard Posted October 8, 2019 Posted October 8, 2019 If you want me to drag it along to mine, you're welcome to use the ramp if it helps to get this finished. Sent from my G3121 using Tapatalk
rainagain Posted October 8, 2019 Author Posted October 8, 2019 I then removed the gearbox mount but I was stopped when I couldn't get the mounting stud out the top of the gearbox. It has some half arsed 16mm flats on it but a ring slips off. I tried double nutting the threaded part but due to crap access (can you see a pattern here) I can't tighten the two nuts against each other enough to stop them unwinding. None of my normal deep sockets are deep enough, it looks like I would need a socket at least 80mm long! I read some people simply removed the bracket the stud was attached to, but then others have said don't do this as one of the bolts apparently effects the preload on the diff??? Anyone know anything about this?
rainagain Posted October 8, 2019 Author Posted October 8, 2019 4 minutes ago, DodgyBastard said: If you want me to drag it along to mine, you're welcome to use the ramp if it helps to get this finished. Sent from my G3121 using Tapatalk Thanks for the kind offer but I think it would be more hassle sticking it all back together to shift it.
Richard Posted October 8, 2019 Posted October 8, 2019 I bought one of these gearless ratchets https://www.halfords.com/workshop-tools/tools/spanners-wrenches/halfords-gearless-ratchet-3-8 a couple of years ago and have never used it. It sounds as if it might help with this job, you're welcome to borrow or even keep it. A bit late I know, but it might help a bit with the reassembly. rainagain 1
rainagain Posted October 15, 2019 Author Posted October 15, 2019 Ah this car never fails to go the extra mile to piss me off, oh look all my spannering around the gearbox stud has induced a leak from the temp sensor, that'll be another £2.58 added to the cost of the clutch change
rainagain Posted October 15, 2019 Author Posted October 15, 2019 Someone mentioned the gearbox mounting stud was held in with loctite so I put some heat on it and out it came
rainagain Posted October 15, 2019 Author Posted October 15, 2019 I then removed the last of the bolts holding the gearbox to the engine but I couldn't get it to budge. Then I noticed a small bracket at the rear of the engine/gearbox that held them together. This wasn't mentioned at all in the ever helpful HBOL, as always access was crap so I could only just get a 16mm spanner in, which sadly wasn't a ratchet spanner. With this off I was finally able to split it. However as every the car fought me and one of the gear change cables I'd previously wasted an hour carefully removing managed to partially fall back into it's mount and cleverly ripped a piece off as the gearbox was removed, rendering the clip useless.
rainagain Posted October 15, 2019 Author Posted October 15, 2019 With the gearbox off lets have a look at the clutch. The fingers look ok That's not a good sign

Recommended Posts
Create an account or sign in to comment
You need to be a member in order to leave a comment
Create an account
Sign up for a new account in our community. It's easy!
Register a new accountSign in
Already have an account? Sign in here.
Sign In Now