Ronkey
-
Posts
35 -
Joined
-
Last visited
Ronkey's Achievements
Rank Morris Ital (3/12)
339
Reputation
-
 Ronkey reacted to a post in a topic:
Juular's Scandi Noir. Volvo C70, 240 &122. The 240 lives on.
Ronkey reacted to a post in a topic:
Juular's Scandi Noir. Volvo C70, 240 &122. The 240 lives on.
-
adw1977 reacted to a post in a topic:
Any interest in another Amazonian rescue? The welding continues
-
RayMK reacted to a post in a topic:
Any interest in another Amazonian rescue? The welding continues
-
RayMK reacted to a post in a topic:
Any interest in another Amazonian rescue? The welding continues
-
RayMK reacted to a post in a topic:
Any interest in another Amazonian rescue? The welding continues
-
RayMK reacted to a post in a topic:
Any interest in another Amazonian rescue? The welding continues
-
RayMK reacted to a post in a topic:
Any interest in another Amazonian rescue? The welding continues
-
RayMK reacted to a post in a topic:
Any interest in another Amazonian rescue? The welding continues
-
RayMK reacted to a post in a topic:
Any interest in another Amazonian rescue? The welding continues
-
RayMK reacted to a post in a topic:
Any interest in another Amazonian rescue? The welding continues
-
RayMK reacted to a post in a topic:
Any interest in another Amazonian rescue? The welding continues
-
 Ronkey reacted to a post in a topic:
Any interest in another Amazonian rescue? The welding continues
Ronkey reacted to a post in a topic:
Any interest in another Amazonian rescue? The welding continues
-
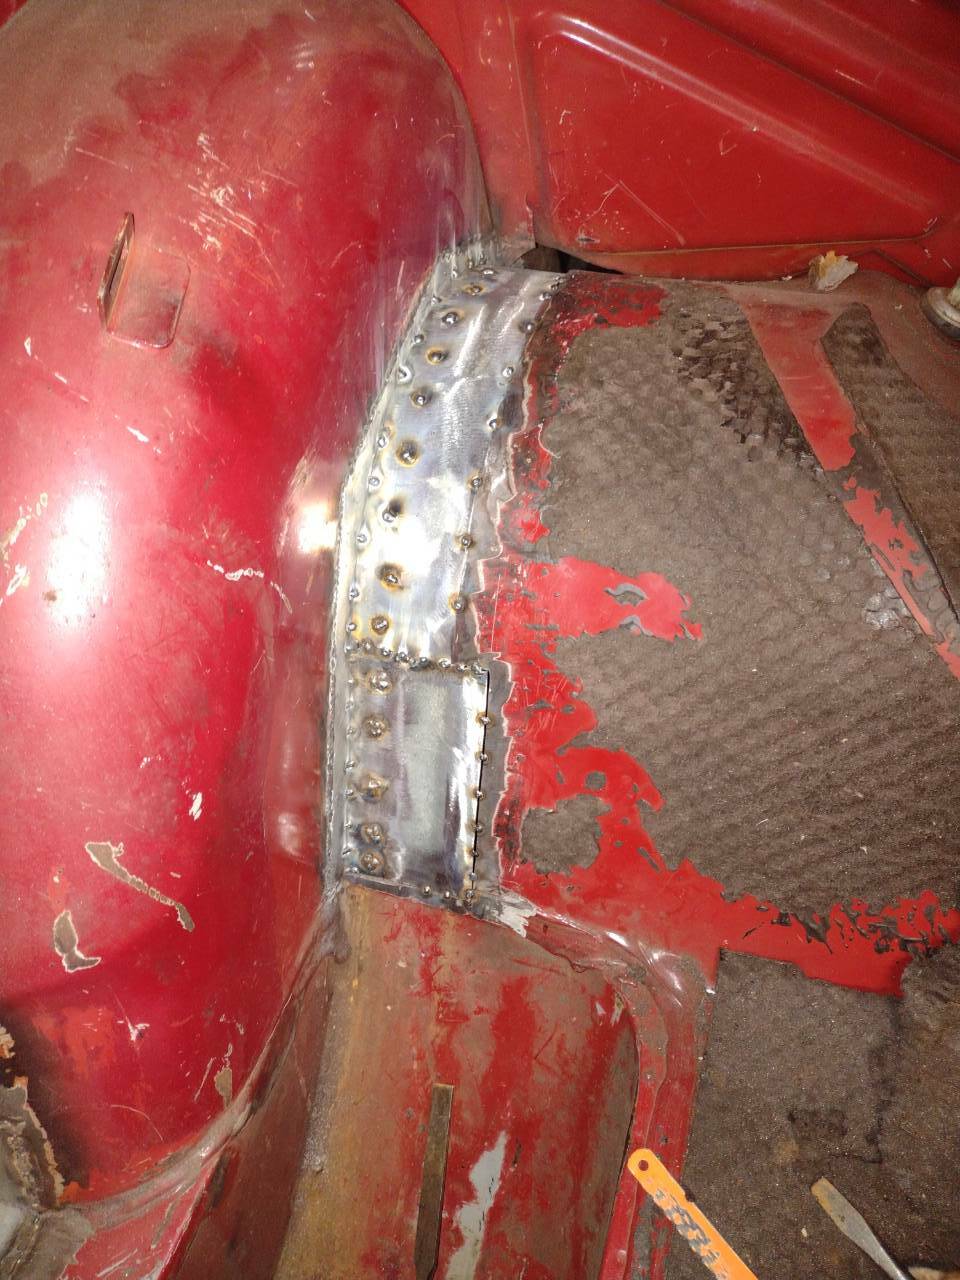
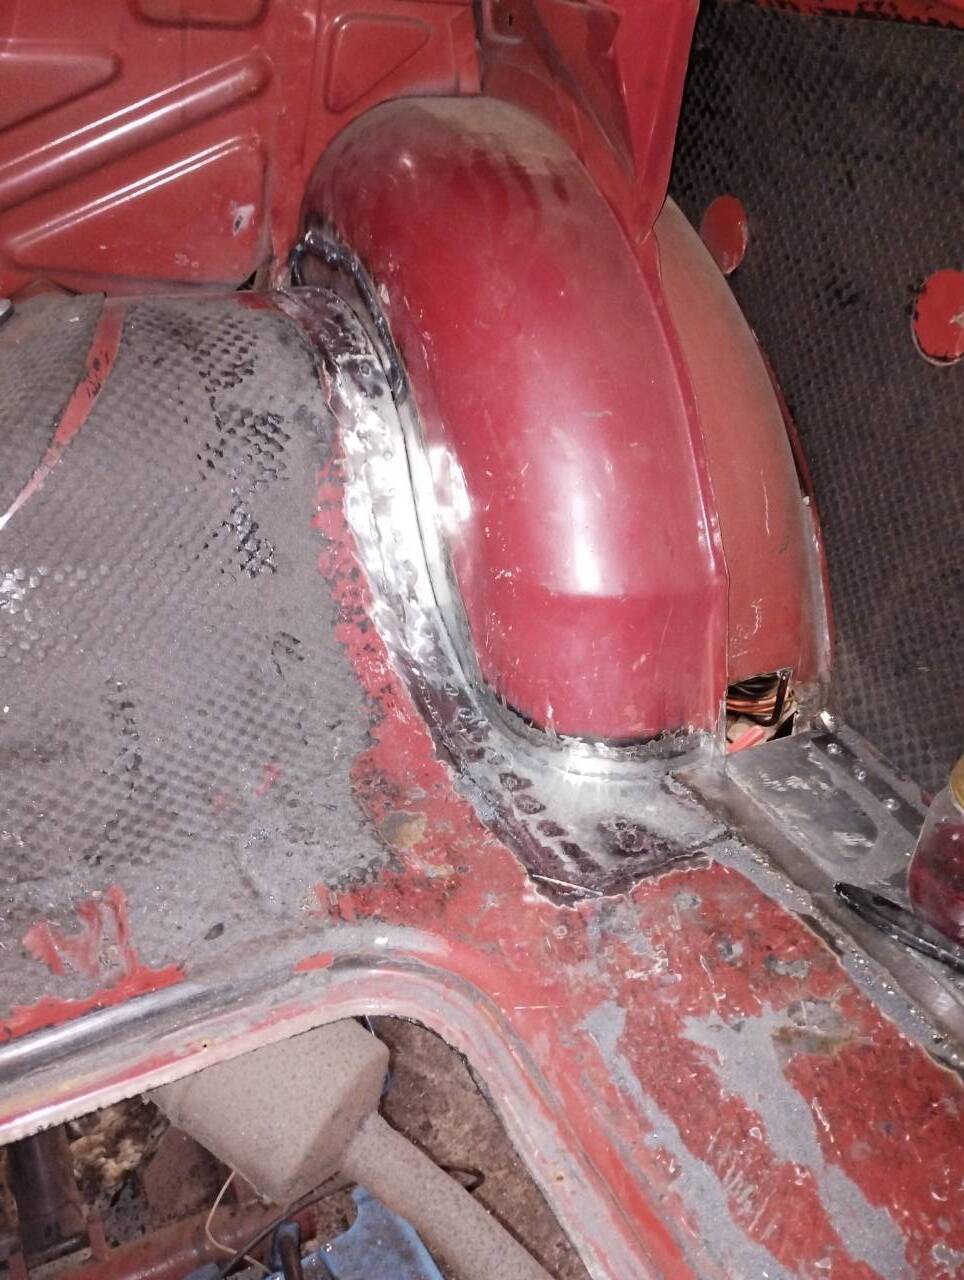
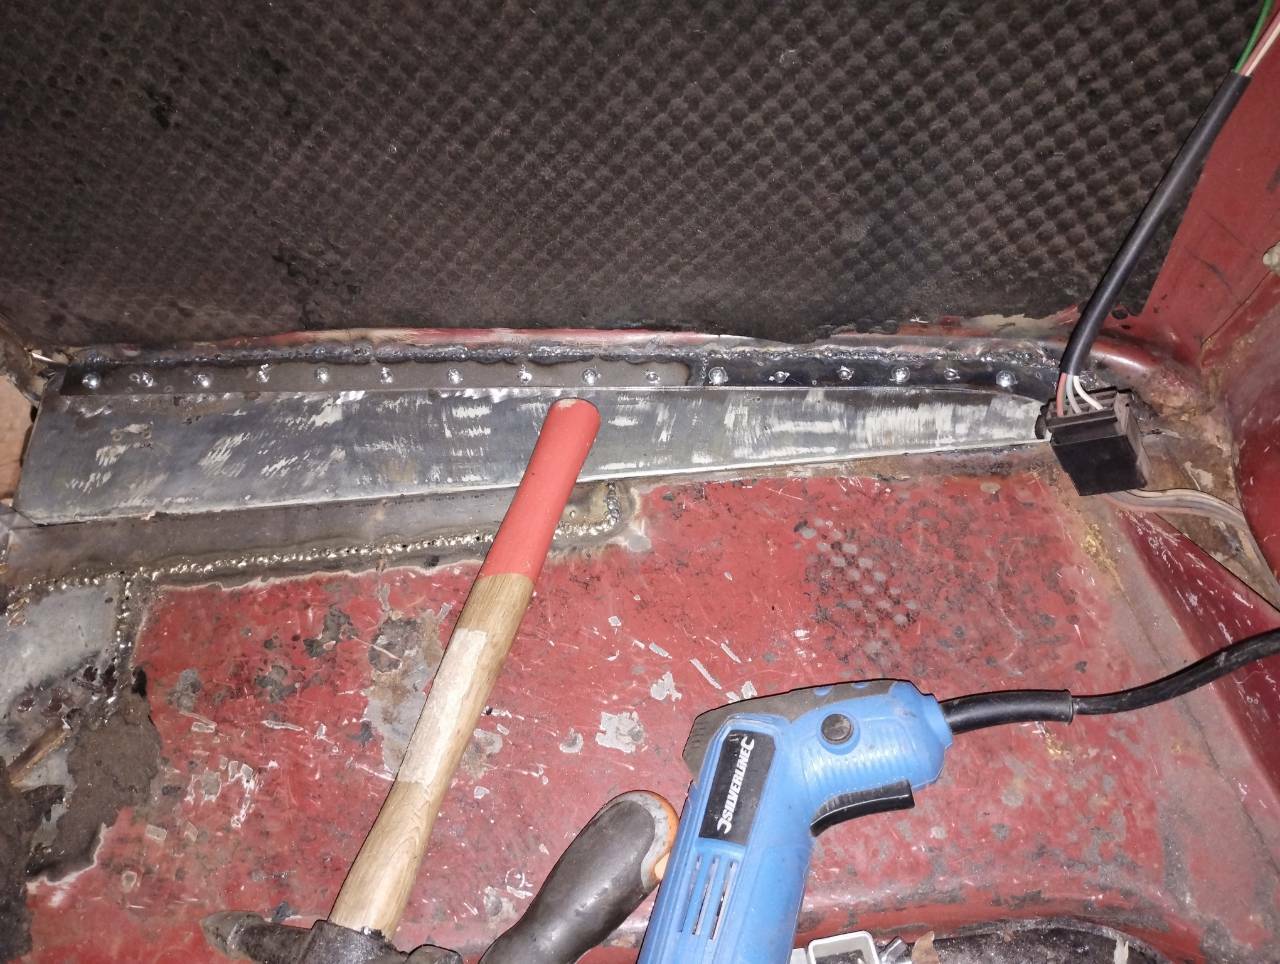
Whoomph! There it is. Inner arch now reconnected to the rest of the car: that feels like a massive milestone achieved. I made the lip continuous on floor repair by putting some copper behind and filling the gaps with mig wire and then grinding back. Gives a neat result. Getting nearer to the oily bits with every hour now

- 36 replies
-
- 18
-
-
Ronkey reacted to a post in a topic:
1964 Volvo 122S - Amazonian rustforest. Electroshite.
-
Ronkey reacted to a post in a topic:
Any interest in another Amazonian rescue? The welding continues
-
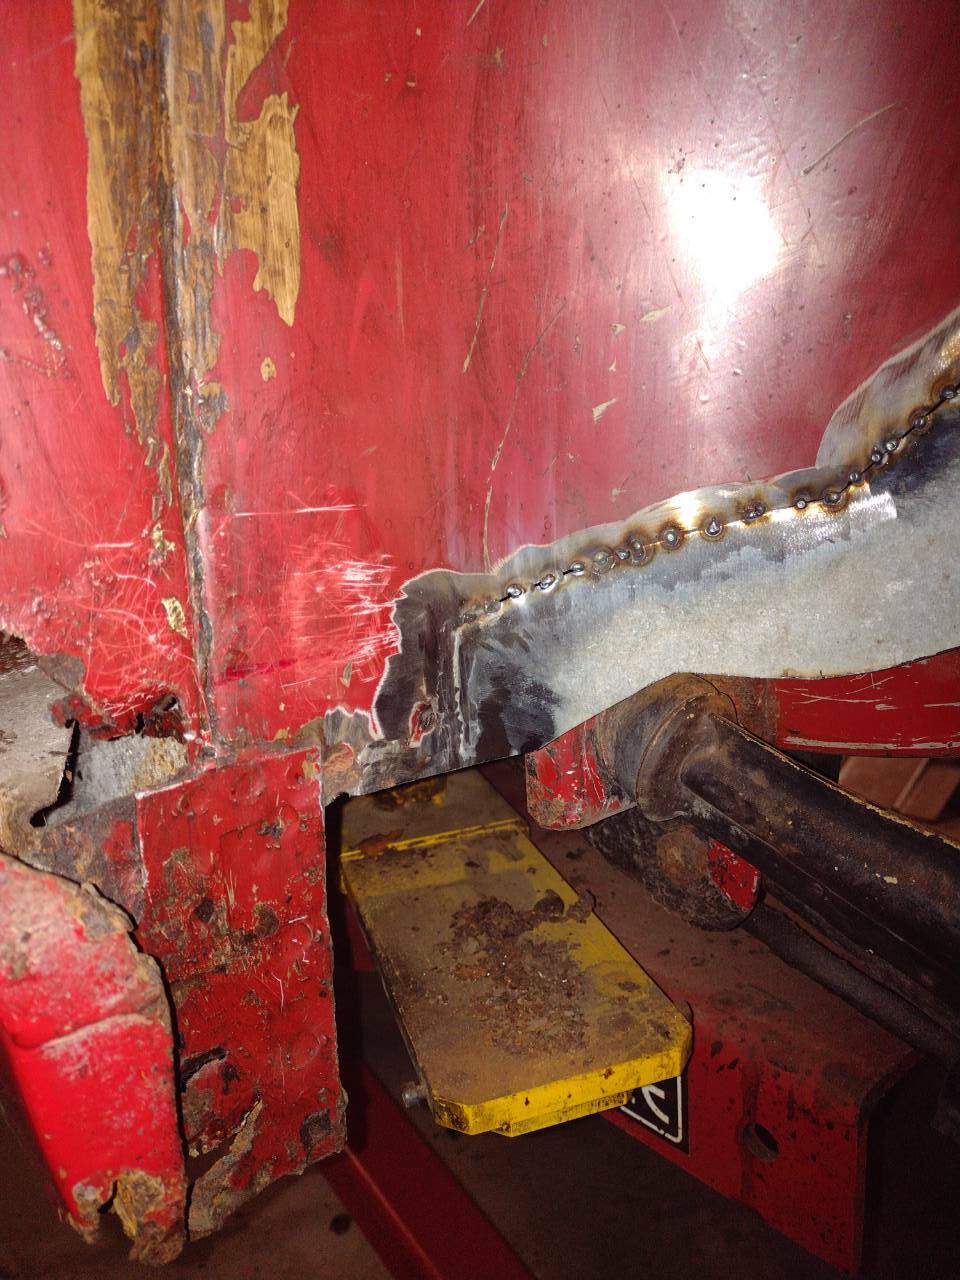
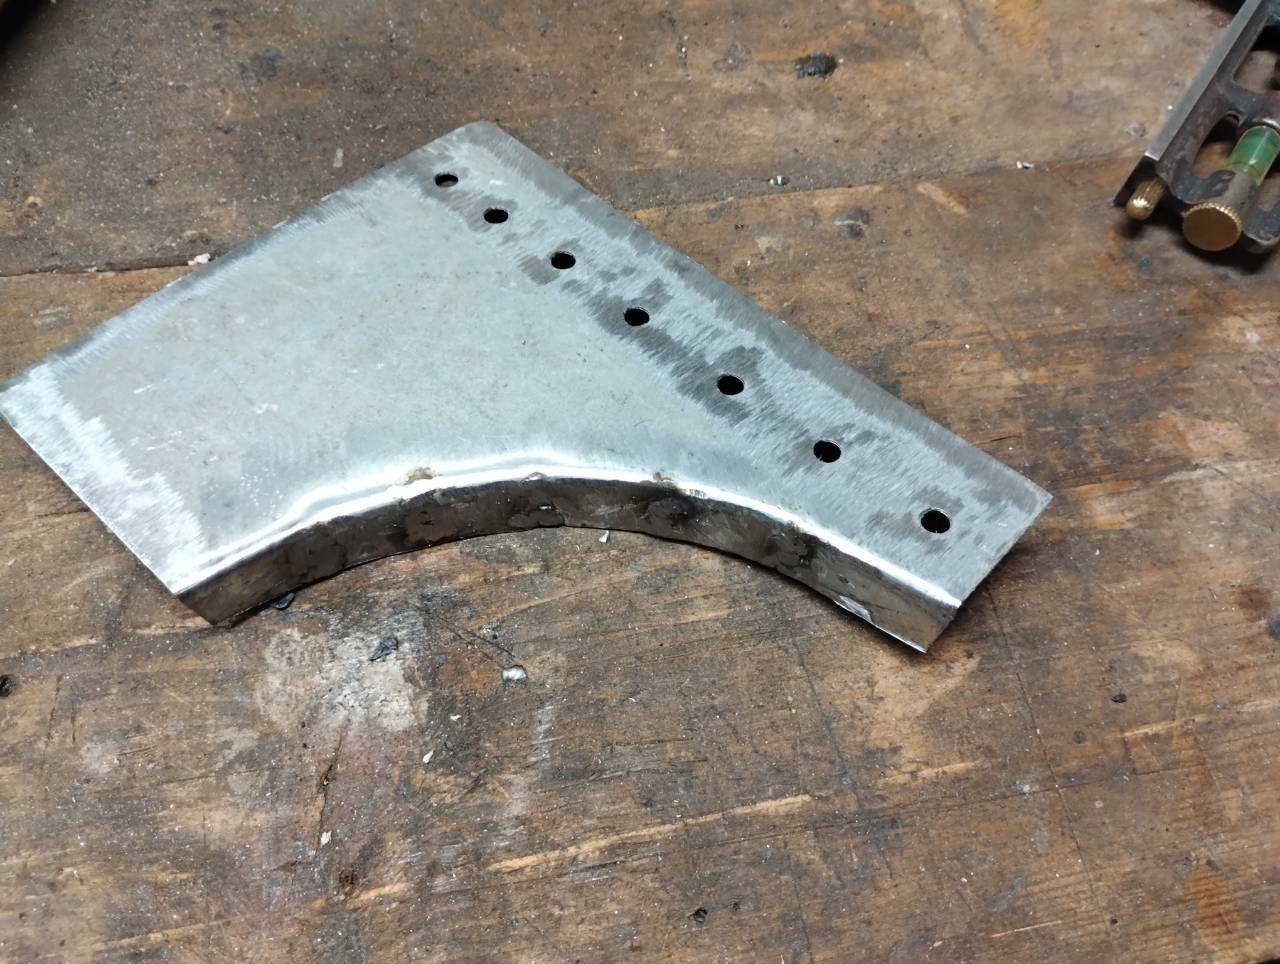
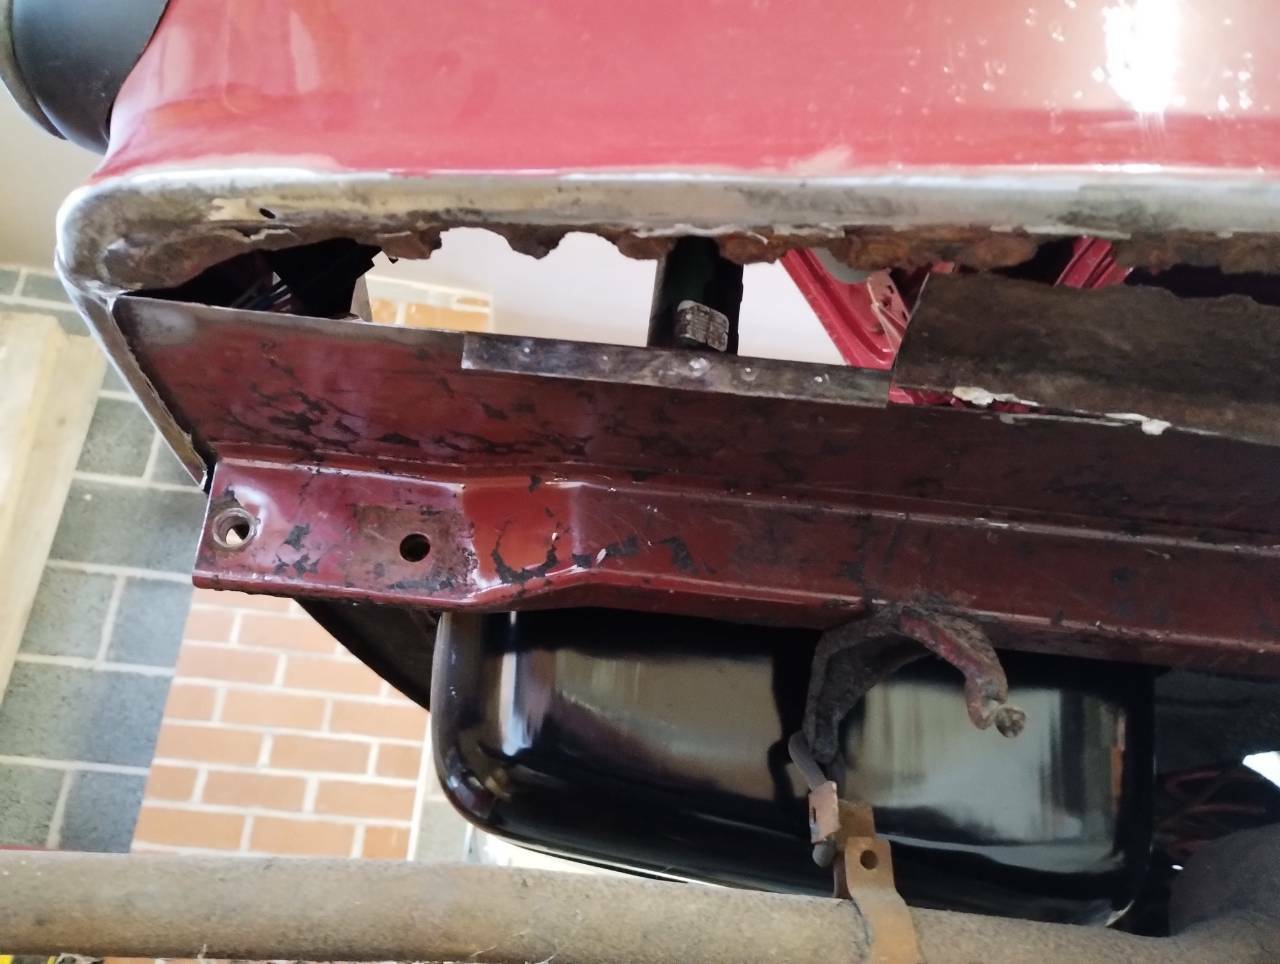
I'm definitely getting better at this. Although the welder does have a major splatter occasionally for no reason I can determine. I dropped on a broken Clarke 151 and have repaired it: the extra power makes a big difference when plug welding. I also find it is more controllable on the lower setting. Not bad for £50 and £25 of parts. This corner of the car is in by far the best condition. Which means it needs loads of welding. Lip to bottom of rear wing was shot, but only where out of sight. That means the rest is salvageable. The rear of the outer wing and the inner look manky, but nowhere near as bad as the other side. See for yourselves: On bit of luck: a lower valance repair panel had been spot welded on as a past repair. Wonder if it will clean up? Nice. After this photo was taken I attacked it with the phosphoric acid and a wire brush. Looked nearly new. New lip welded on and ground back. I hate welding upside down and it doesn't matter how well you protect yourself there is always a bit of splatter that find bare skin and leaves a crater. Well happy with this little fabrication. It is part of the boot floor and has a vertical curve in it with a lip. I cut the lip to suit and welded it back together to get this: And now with it in the car. That'll do. Started chopping out the inner wing and boot floor to repair that nightmare lip. Tell me to keep going: is there any end to the welding on this thing??
- 36 replies
-
- 13
-
-
 Ronkey reacted to a post in a topic:
83C's Shite-esque Fleet: Mundane Maintenance.
Ronkey reacted to a post in a topic:
83C's Shite-esque Fleet: Mundane Maintenance.
-
 Ronkey reacted to a post in a topic:
1964 Volvo 122S - Amazonian rustforest. Electroshite.
Ronkey reacted to a post in a topic:
1964 Volvo 122S - Amazonian rustforest. Electroshite.
-
Now this was fun. Don't worry: I haven't set fire to it. Yet. The sound deadening was not for moving heat wasn't working so I thought I try cold from a CO2 fire extinguisher. It worked a treat!!
-
They are fabulous. What colour code is that red?
-
Last panel at front done but it didn't half fight me until I worked out that the earth wasn't very good. Anyways, that'll do.
- 36 replies
-
- 12
-
-
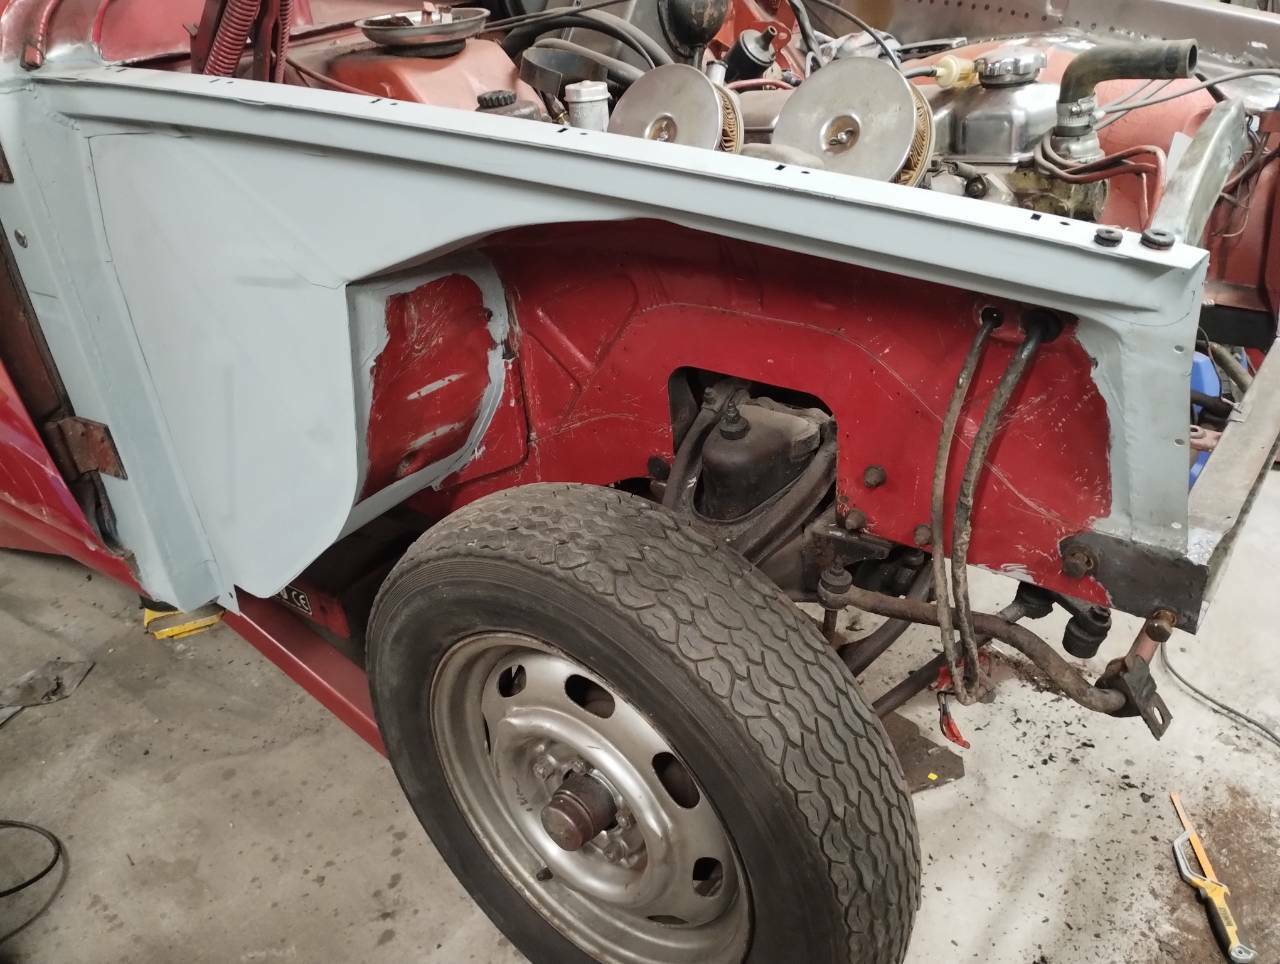
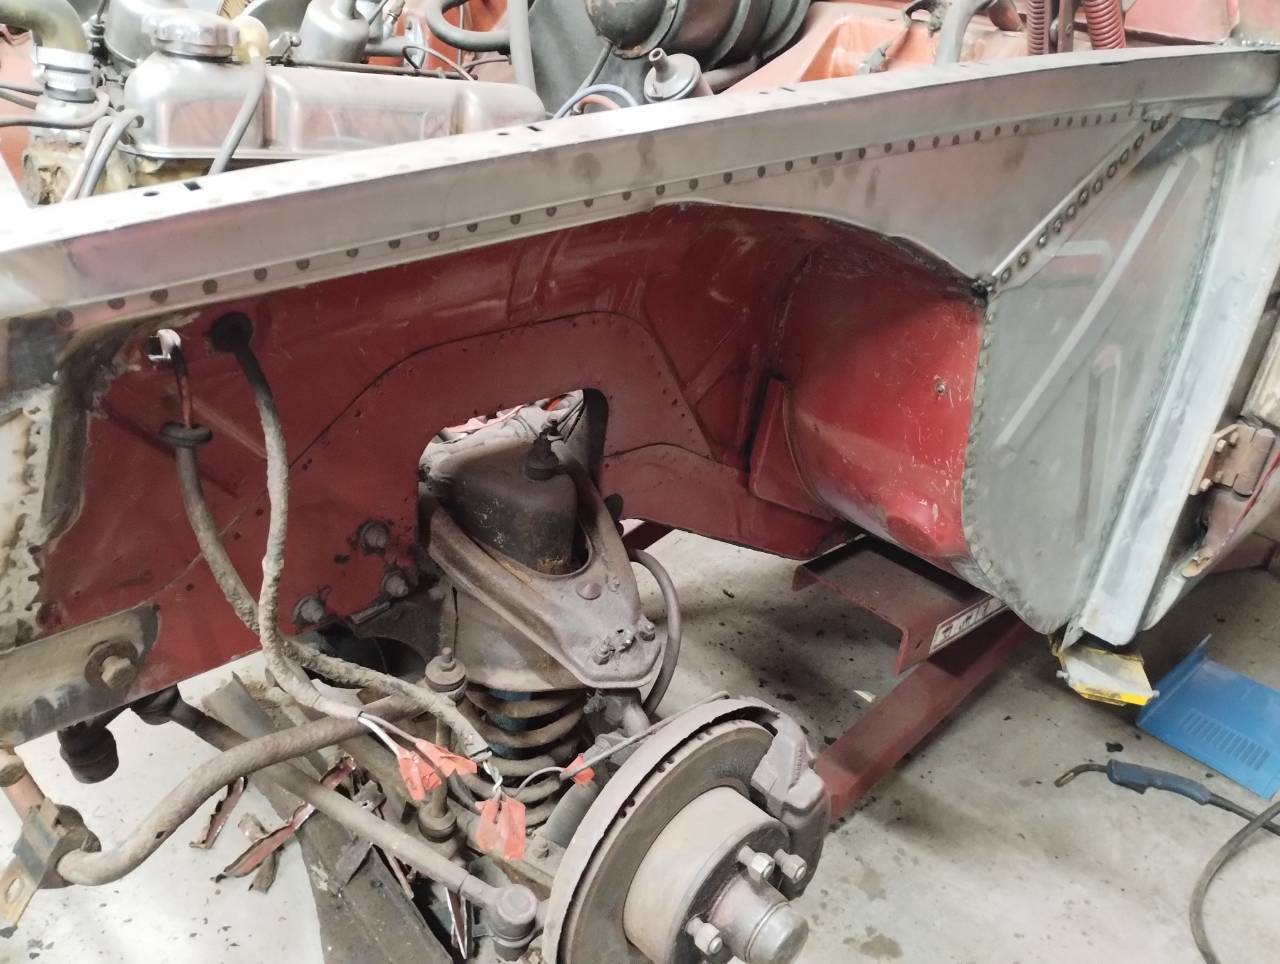
I've been a bit distracted by a misbehaving Honda but now that is (hopefully) sorted back to the Amazon. The end of this thread brings things bang up to date. Why is there always more rot than you first think? Good job you can get decent repair panels for the key bits. New inner wings needed very little trimming and have a hole at the front that aligned with an existing fixing hole: well thought out. The wings sit nicely now. There is so much of the original colour visible to the underside it seems a shame to cover it up. I was going to spray with stonechip but now I'm not sure. Perhaps I'm being a bit precious. When I started this lot had been covered up with large welded patches hiding the fact that the A pillars had gone on the front face together the the end of the intermediate sill on the drivers side. Just look at the state of it I'd welded in a patch repair to the floor under the pedals here before the photo was taken. Was very happy with my fabrication for the sill end The front of the car hasn't clean up too badly at all. I've used Milkstone remover to convert the rust and will overcoat with rust-anode. And just when I thought I had finished there is always more. A job for tomorrow I guess. And that Hammerite is everywhere. Great, just great. I'll strip that when the engine is out. I was very pleased with the condition of the radiator. The drain tap even opened! Would be nice to give it a clean inside - have I seen someone using cheap cola for this? Bet they are not still going.
- 36 replies
-
- 16
-
-
Need a bit of help here though. I dropped on some genuine Volvo mirrors cheap! When they arrived I've only got one wing fixing and it is bust. Arse. Reckon I can fix it though and the seller gave me some money back. Anyone got another base or can tell me where I might find another/matching pair?
-
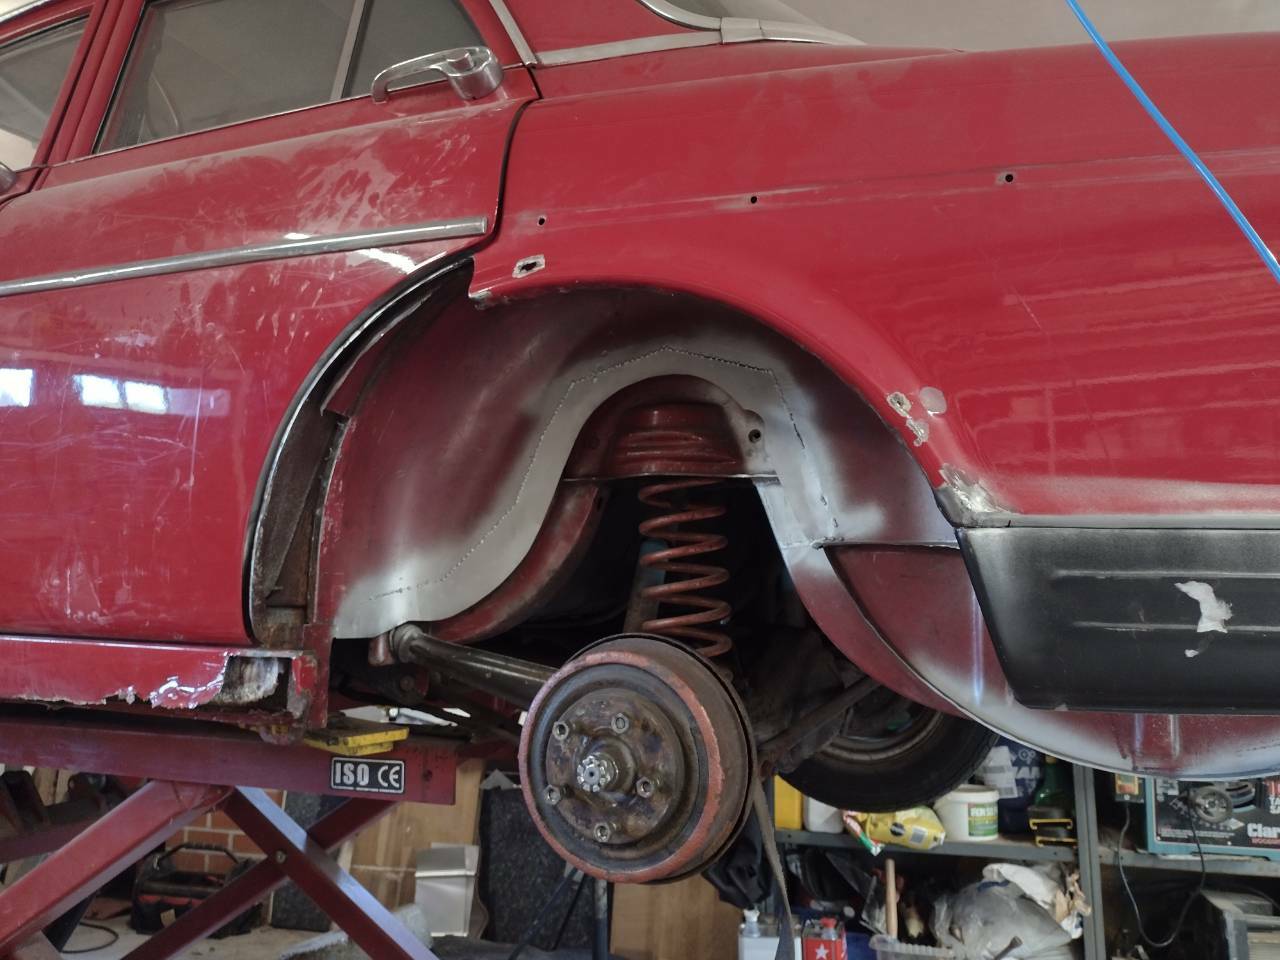
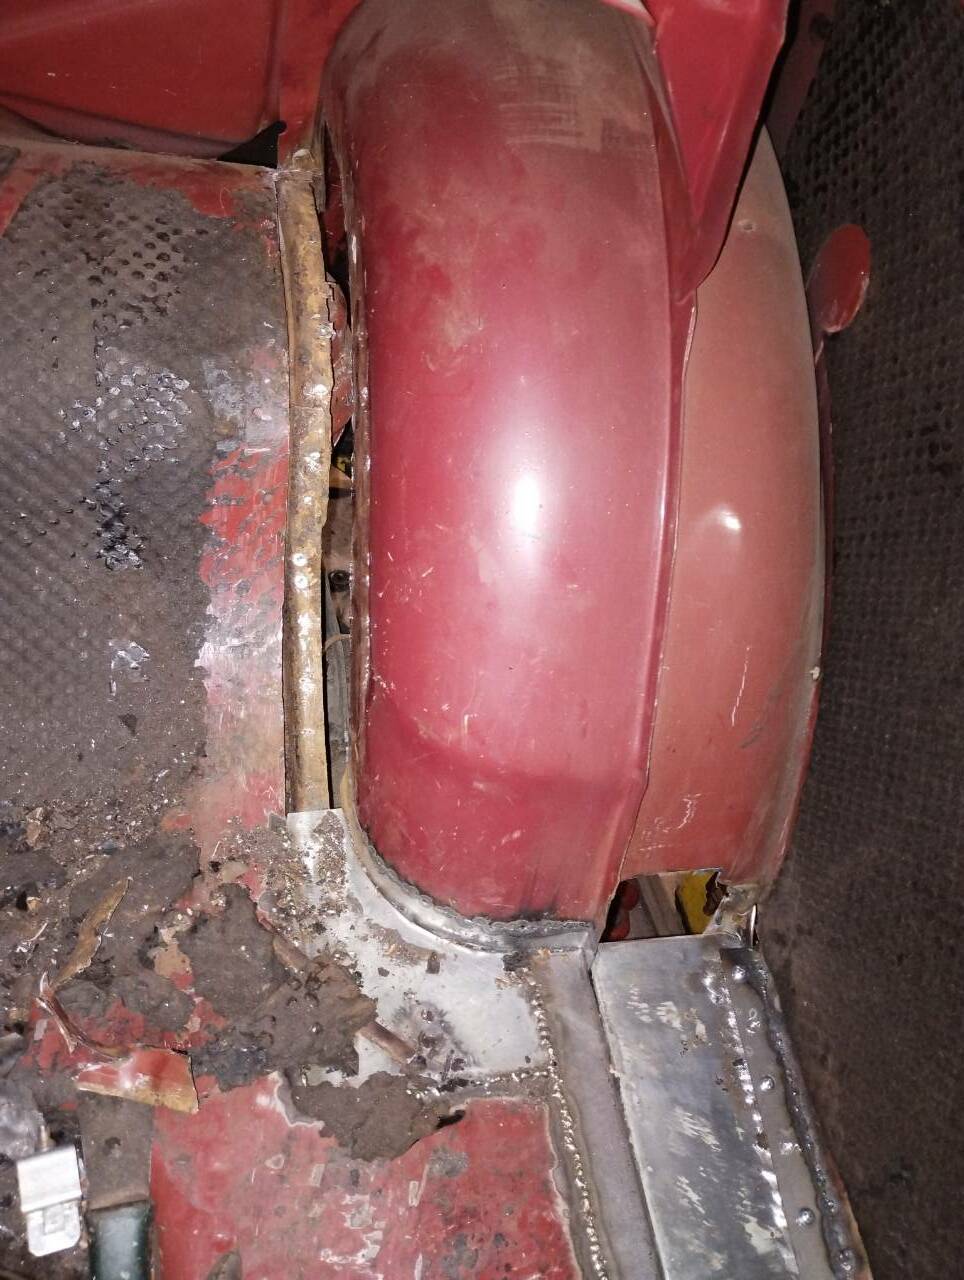
The rear wing comes in two sections. The front section fits quite easily, however I had to think hard about fitting the rear. I had a look at @juular's post and saw the fight he had. I decided to try another approach and trim the repair panels down, keeping as much of the original as I could. This is one benefit of a small welder: it is hard to get too much heat into it. The repair panel for the inner arch is flipping expensive if you can find one. So I decided to make it some from some cheaper rear wing panels. This were a pig as they are double curved and then I didn't take any photos of the panels I made!! You get the idea from the below though And the final result
- 36 replies
-
- 27
-
-
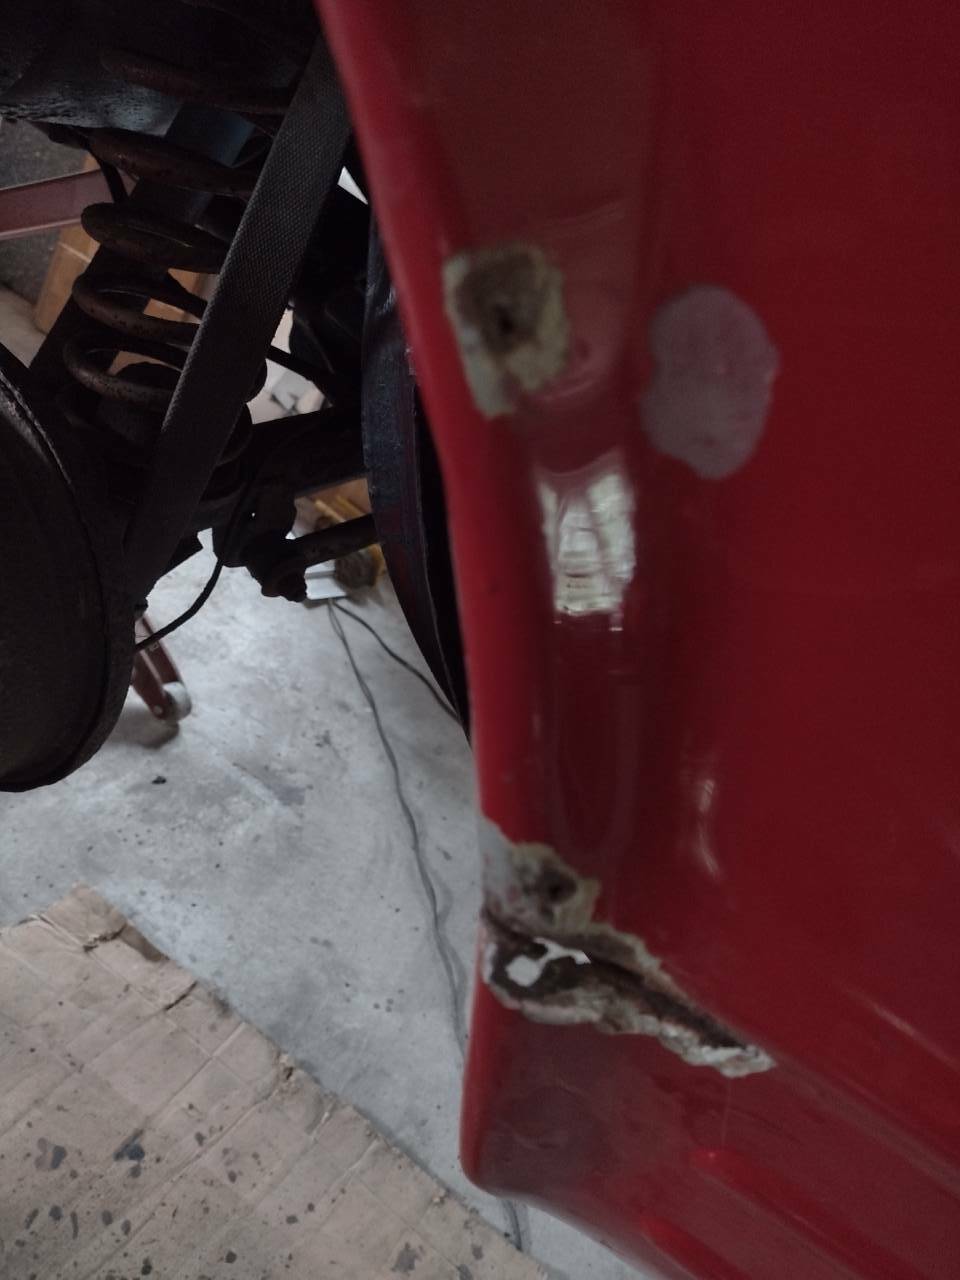
Let's keep going. I'm catching up now - this was about last November. I started to have a good look at the passenger outer arch. The corrosion noted to the inner wing and arch is down to a corroded inner arch. If only someone had dealt with that at the time eh? Repairing the inner wing is going to be a bit of a problem as the repair panels are not available. Best try and make one myself them. I read somewhere that you could use the outer arch and then shape to suit. This is going to be a nightmare. Best get the sill done first. Man, that is a bit of a mess. Maybes I can get away with cutting back part of the outer sill to start the repair. Nar - reckon that is scrap. Take the outer off then and order new :-(. The inner and intermediate are salvageable so decided to fix the intermediate/inner in a couple of stages. First bit: Now inner inner sill and jacking point. Bit tricky this as didn't have much to compare it too. Couple of gussets Then a little test (wheel was off the ground honest) Yay! That'll do. Finish the intermediate off: Weld up and outer on. This was a bugger. I struggled to get heat into the spot welds underneath with my little welder and had to redo a load. Why does this happen in the most difficult spot?? Anyway, end result is sound.
- 36 replies
-
- 23
-
-
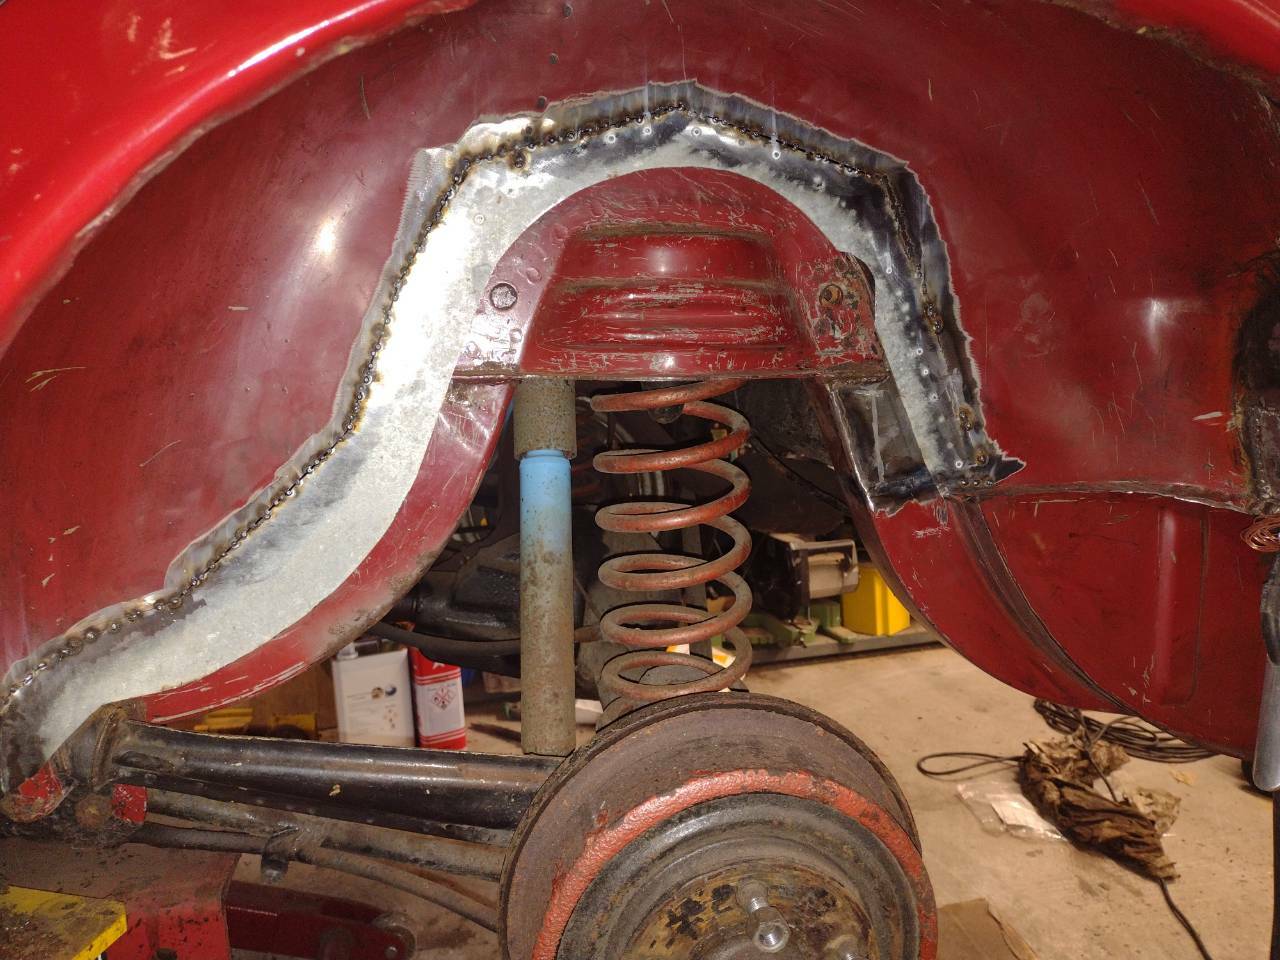
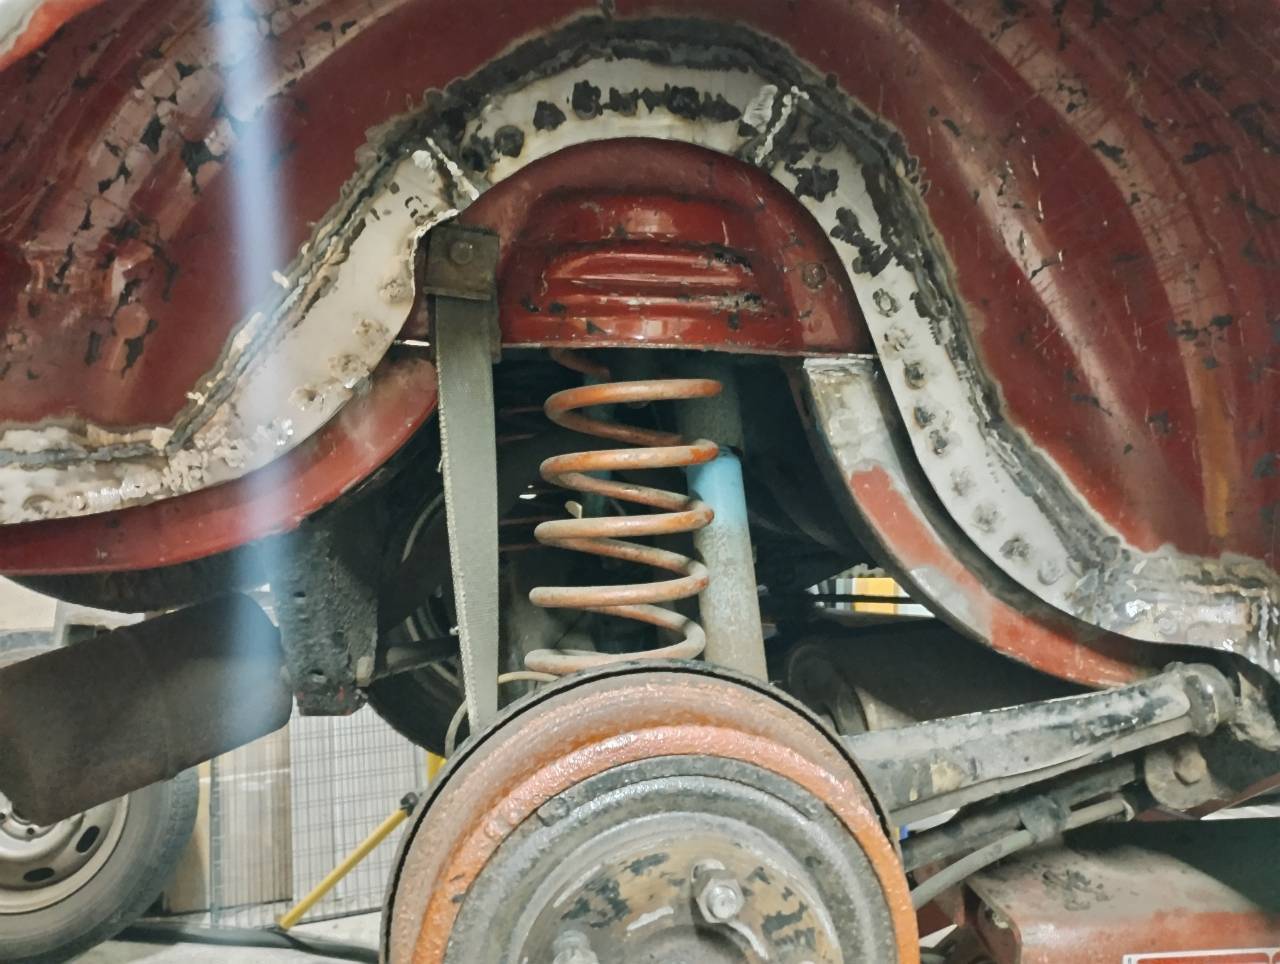
Time to cut out the rust above the rear shock. Hope my skills with a grinder match those with a welder: that is a lot of missing metal. Getting a bit worried here. What a crap detail Volvo - talk about a rust trap. Well pleased with my metal fab skills here - made the new inner wing in one piece . Didn't take one with the welding complete but you get the idea.
- 36 replies
-
- 31
-
-
Right, let's see if I can remember how to weld. My welder is a Clarker 100EN with 0.6mm wire and CO2 gas shield. The highest setting seems ok for plug welds with a setting down for an attempt at a run of spot welds. I picked up some pre-galv steel sheets locally and plan to use them, but getting the galv off prior to welding takes ages. Ah well, they were cheap. Well, it is a start. Welder is ok. The rear valance and the floor attached to the panel has had it. Add that to the list.
- 36 replies
-
- 16
-
-
Looks like you have the same welder as me. I'm having success with 0.6mm wire on setting 1 max with wire feed around 5.5 for thin stuff and 2 max with around 6.5 for thicker stuff. Using CO2. Need a reasonable gap between the two pieces (say thickness of metal) and I can't generate enough heat for a decent run so I join the dots using the heat of the previous weld. Method no good for visible bodywork though! Sorry if Granny and eggs but hope it helps 👍🏻
-
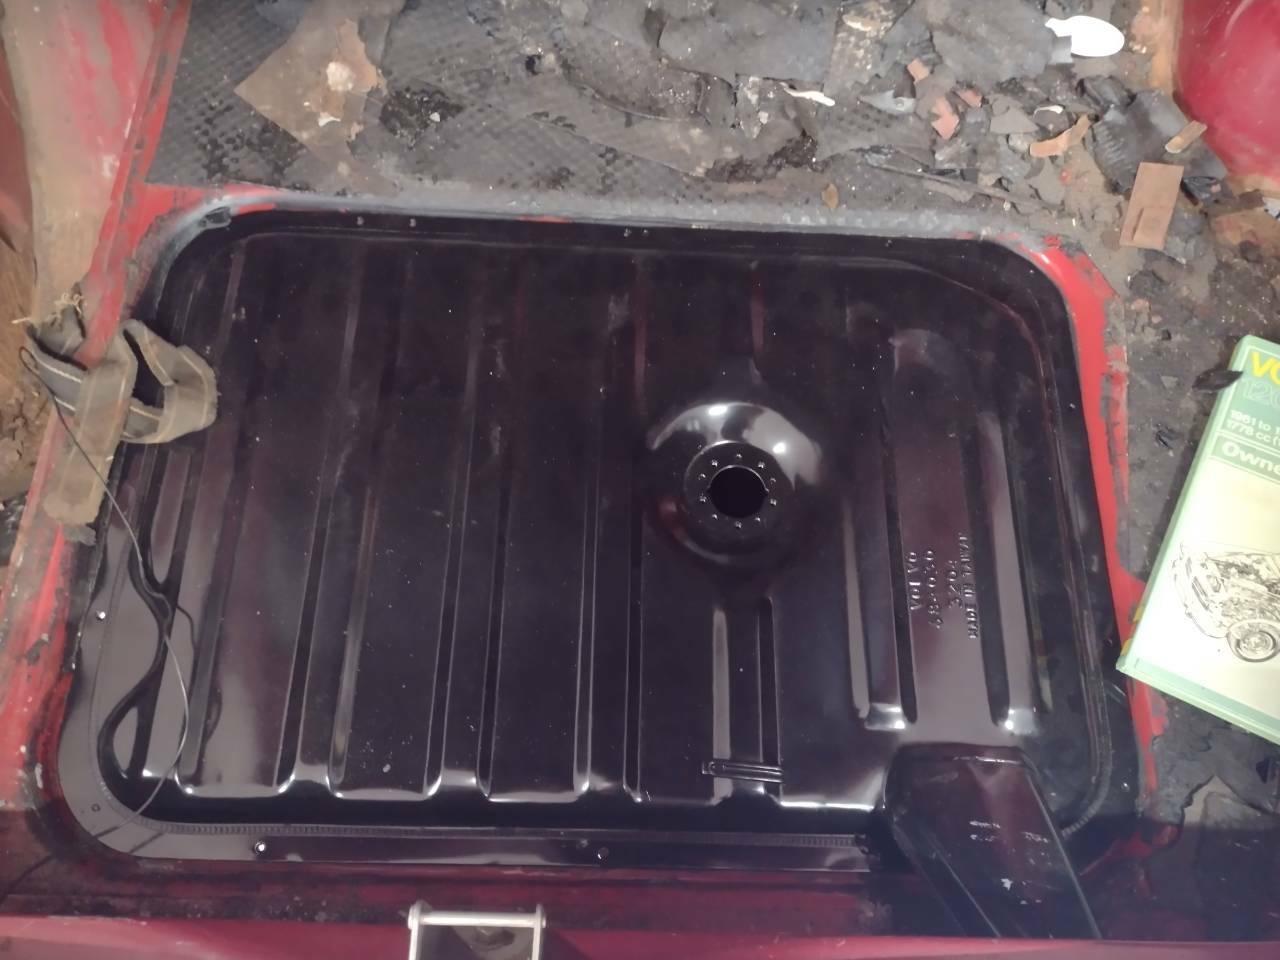
Bonus - genuine new fuel tank. That'll do. Spare wheel well doesn't look too bad but the inner wheel arch looks rough and so does the boot floor. We'll start here then.
- 36 replies
-
- 21
-
-
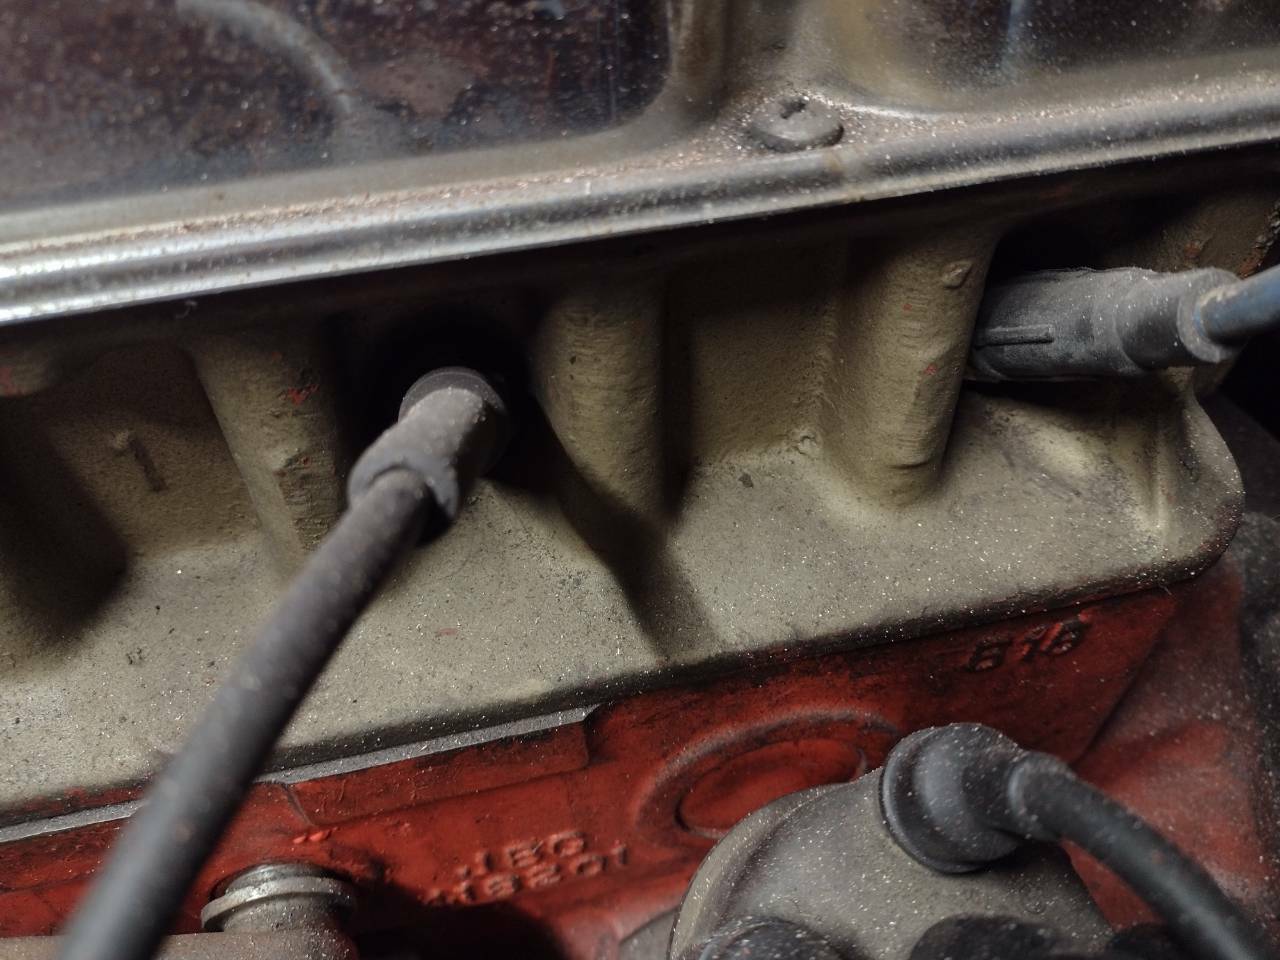
First puzzle - V5 says this is a 1.6. Errr - nope. That'll be a B18 in there mate. Not a clue what spec though. Right, best have a look at the bad bits. The passenger sill looks crusty and the rear arch not much better. The front inner wings have been replaced too. Badly. Shouldn't complain about the work though: it was good enough to keep an old car on the road. I bought this as a project to get better at welding. Not brave enough to take these repairs on yet. I'll start in the boot.
- 36 replies
-
- 12
-
-
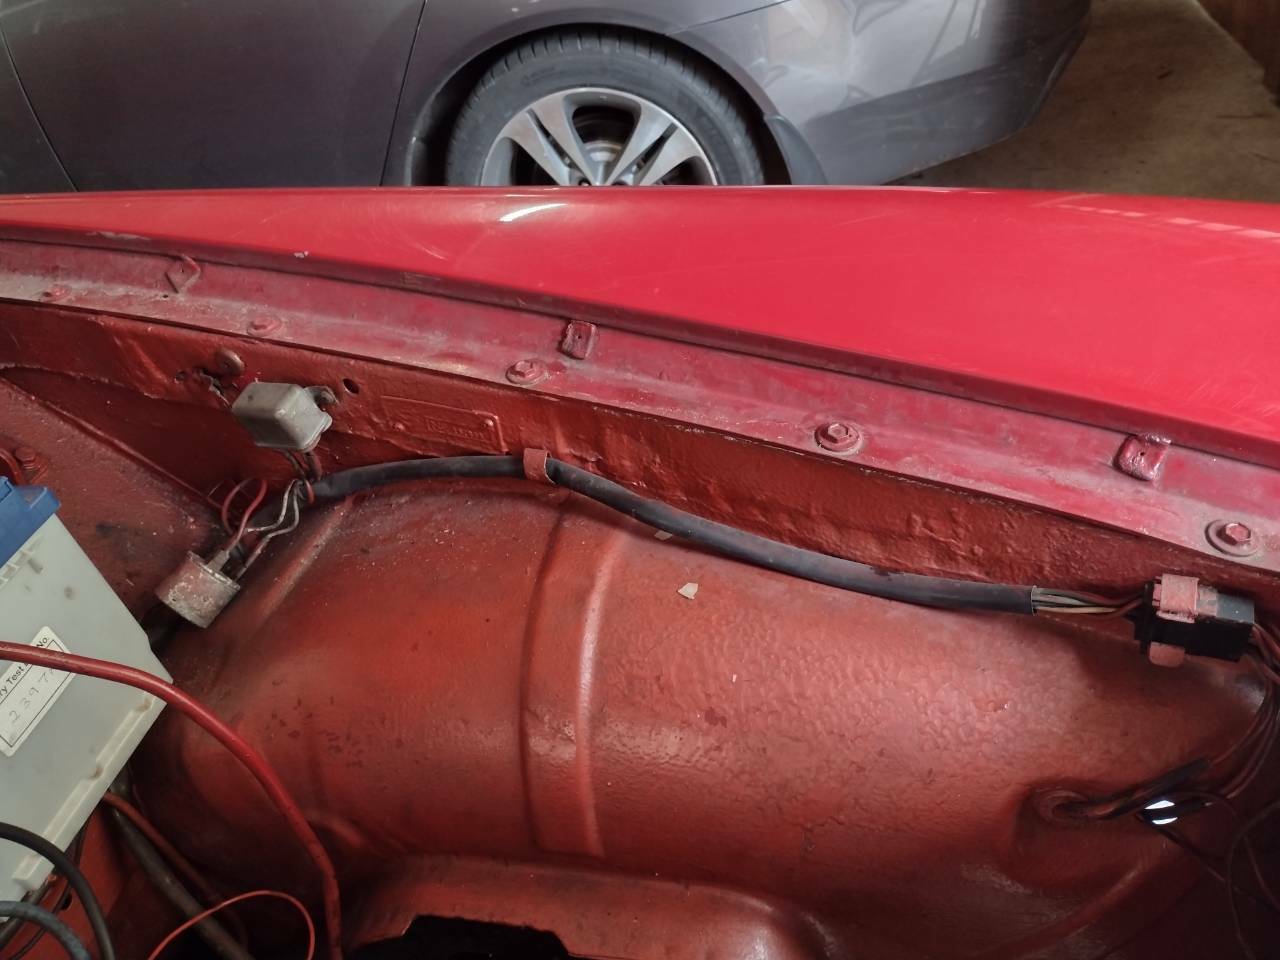
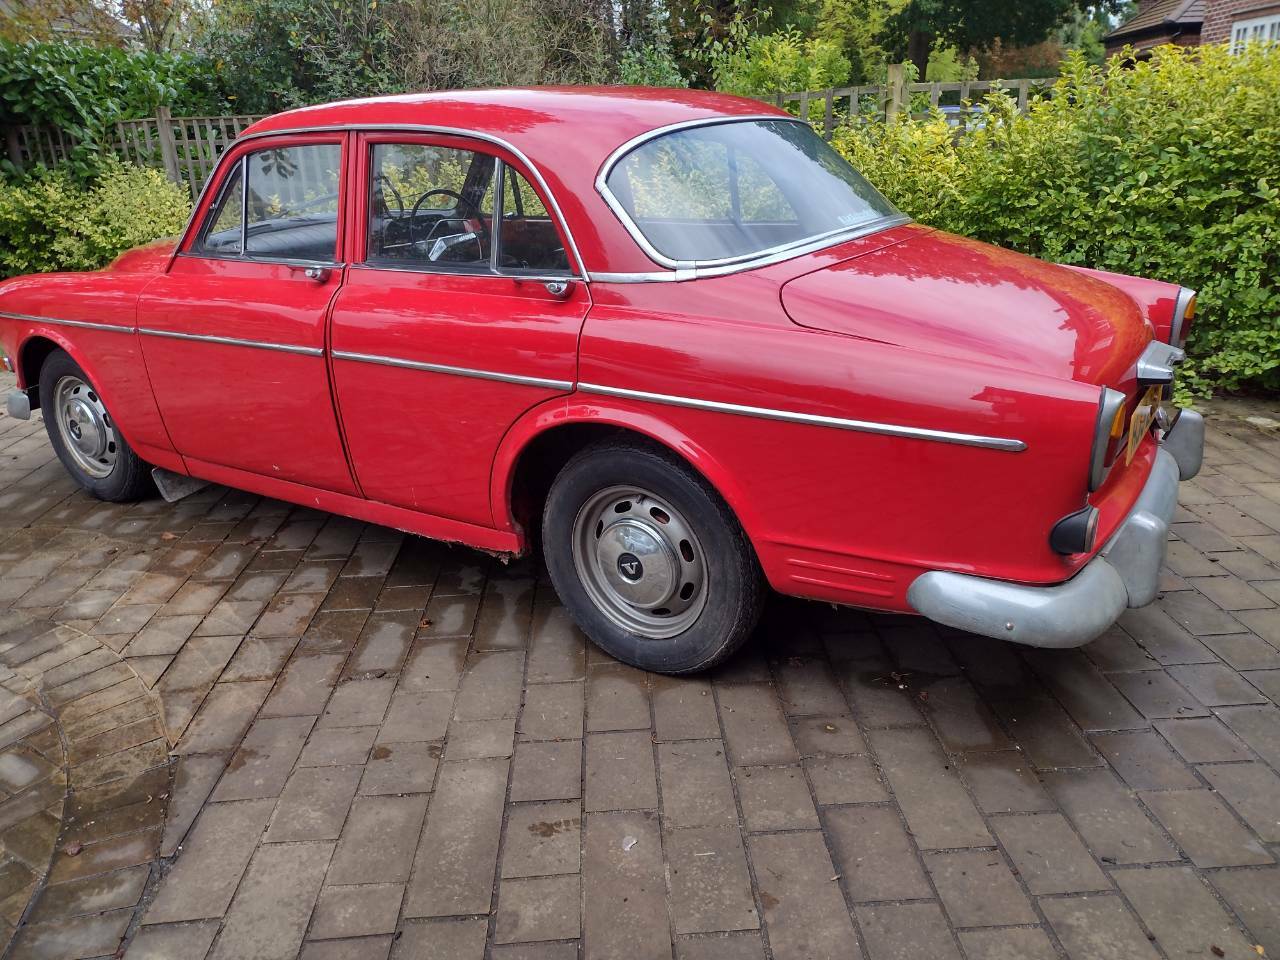
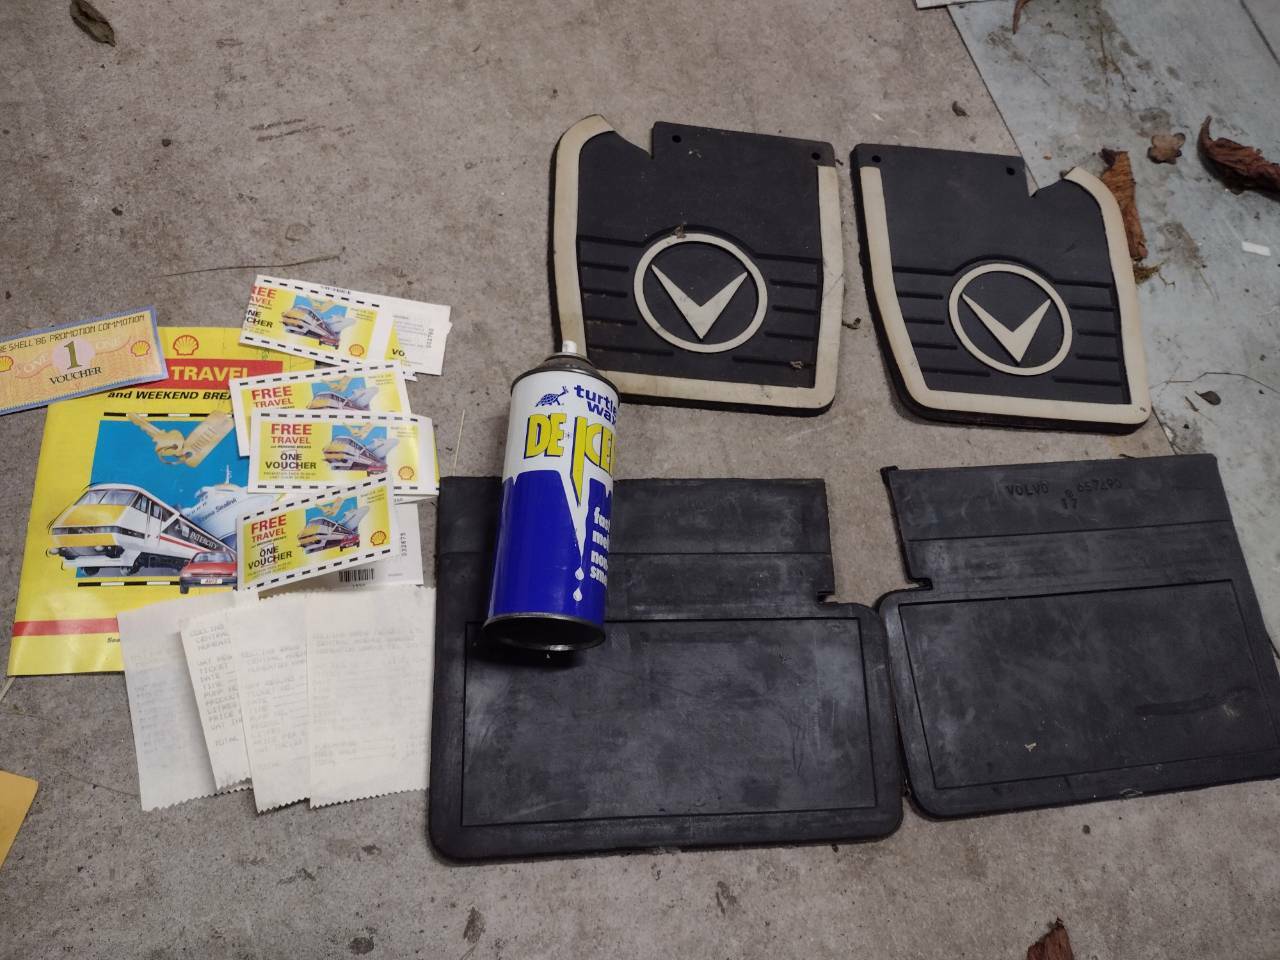
Righto - message received! Let's see what we have got then. A few general shots. They really are a smart looking beggar. The interior is very good and I even have the original radio blanking plate! I found some great stuff from when the car last put in the garage too: last fuel receipt dated Sept 1993. I can't figure out how to put text after photos so I'll carry on below.
- 36 replies
-
- 25
-


.jpg.23cd72dd86c9d6f79255cba0fde8c742.jpg)