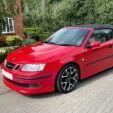
MAF260 Posted Tuesday at 21:43 Author Posted Tuesday at 21:43 Time for an update. The car is only used during the sunnier months and is laid up for more than half of each year to avoid salted roads and criminally high VED. It’s £760 this year, but as I only use it for summer fun it costs me less than half that. It had its first MOT in my ownership last year, passing with advisories for discs and pads all round and a mention of surface corrosion on the rear subframe. I’d been under the car to investigate as I had no intention or appetite to replace it. This year’s MOT was looming so I pulled it from its hibernation (first time start as always, I love this car!) and set to work. I have a big brake kit from a hotter-engined car and was going to refurb the big calipers, fit new pads and the bigger diameter discs. A bit of YouTube watching told me that I’d have to start taking the front suspension and hubs apart to fit bigger dust shields (which I don’t have) as the ones on the car would foul the new discs. The videos showed the job to be a bit of a bastard, so I’ve chickened out, The brakes have never felt lacking, so my thinking is that renewed standard brakes will be better than worn ones. A full set of replacement discs and pads of decent manufacturer were delivered for £110. Let’s get to work, then. Fronts first. A bit crusty and worn, not the worst I’ve ever removed from a car… Nice new hub on one side Sliding pins were really sticky and horrible, covered with nasty gunk. They were cleaned up and re-used. Whilst the pads weren’t overly-worn I discovered they were cracked through the middle All the hardware got a good wire brushing and bath of brake cleaner before fitting up the new stuff. Whike the wheels were off they received a deep clean. I ceramic coated them before fitting last year and it’s proven to be very worthwhile as they’re spotless front and back. Fronts done and back on its wheels. DVee8, Brigsy and Wibble 3
MAF260 Posted Tuesday at 21:56 Author Posted Tuesday at 21:56 Rears next, although I realised I took few photos. Similar condition to the fronts, so definitely worth changing. The sliding pins were even more gunked up and took a lot of persuasion to remove. I cleaned everything up and fitted the new discs and pads. The last job was to fit the sliding pins. Except they just wouldn’t go back in. I fought with them for a really long time. They were cleaned, recleaned, fresh brake grease applied and yet they still wouldn’t concede. I grumpily cleared up my tools and put them away as I wasn’t going to finish the job that day. Some internet searching took me to Bigg Red, who delivered a set of replacement pins and rubber shrouds for less than a tenner. As I pulled the old rubber shrouds out of the calipers I found a lot of white powdery oxidisation inside the holes they live in. I’m thinking this made the holes effectively smaller in diameter, thereby limiting the room for the pins to fit and move. Some gentle work with the Dremel-type tool saw the oxidised material off and I was left with clean, round, correct diameter holes. The new shrouds and pins went straight in, a successful fix! Wibble and Brigsy 2
MAF260 Posted Tuesday at 22:03 Author Posted Tuesday at 22:03 The next job was the rear subframe. I jacked the car up high, put it on stands, placed a very large piece of cardboard under the car and got to work with wire brushes, screwdrivers, picks and hooks to descale it as best I could. I checked thoroughly for any holes or signs of any risk of appearing and am pleased to say it’s been caught well in time. Everything received a good coat of Hydrate-80 to hopefully stall/stop any rust advancing. I decided not to paint over it at this stage as I was unsure if a MOT tester would be suspicious of bodgery with fresh new paint slathered over the subframe and also wanted to know if there were any holes or damage I’d missed. I didn’t take any photos of this horrible dirty work as I had safety goggles on and my eyes closed during most of the scraping. We will get to the paint shortly. Wibble, DVee8 and Vantman 3
MAF260 Posted Tuesday at 22:12 Author Posted Tuesday at 22:12 Last job for my pre-MOT list was the airbag light. It’s been on since last year and I didn’t get the time to investigate it, having not completed the front seat refurb and recolour I’d planned. I had a good look under the seats, checked for any broken wires, unplugged and replugged the wiring, to no avail. I’m no auto electrician, so decided to let the MOT garage fault find and fix it. Today was MOT day. The garage knew about the airbag light, but suggested testing the car regardless in case of any other issues. It was a clean pass aside from the known issue. The garage owner walked past and said ‘you don’t see many of these about any more’ and the tester commented on the overall great condition of the car, especially given its age - 20 this year. I left it with them and they sorted the light. The downside is they aren’t sure how! Diagnostics told them it’s a wire somewhere around the passenger seat and they must have moved something so that the light went out. I don’t see this as a permanent fix and was waiting for the light to reappear on the drive home. Nothing so far. I will be taking both seats out at some point, so will investigate further as I’d like to fix this properly. The car will be taxed from 1st June and put straight into service. I have a few more jobs to do and improvements to make, but am really looking forward to pedalling this old boat around again. DVee8, Brigsy, auntiemaryscanary and 1 other 4
MAF260 Posted yesterday at 13:09 Author Posted yesterday at 13:09 Insurance sorted for a couple of weeks time and it's less than last year - result! £238 with all mods declared, agreed value and low excesses for any claims. A big thank you again to whoever it was who put me on to the insurance company last year. Prepare for the weather to considerably worsen from 1st June when I'm back driving it!
DSdriver Posted yesterday at 15:28 Posted yesterday at 15:28 The Brakes on our 9-3 non-turbo cabrio have been top notch since it had all new discs a few years ago. The same cannot be said for the 9-5 aero HOT which has scared me once on Exmoor with brake fade and always seemed sub-par despite two companies telling me there is nothing wrong with them. I'll be upgrading them next time they need new pads. Being an old git and liking a bit of comfort I aquired a set of 14" NOS alloys and put higher profile tyres on as per the SAAB handbook, so if anyone wants to buy a set of 15" wheels with good tyres that are languishing in the back of the garage drop me a pm. Its still the hardest ride of our three cars with the usual scuttle shake though.


Recommended Posts
Create an account or sign in to comment
You need to be a member in order to leave a comment
Create an account
Sign up for a new account in our community. It's easy!
Register a new accountSign in
Already have an account? Sign in here.
Sign In Now