rainagain Posted May 17, 2023 Author Share Posted May 17, 2023 Before I went any further with the power steering pipe replacement I thought it would be best to sort the subframe bushes as if this went very badly wrong I wouldn’t have wasted time on the pipe. I had a bit of trouble getting the front of the car high enough, I could only see one video on YouTube where the guy changing them is doing it on the ground and not a ramp and he just jacked it up by sticking a trolley jack under the front of the subframe. My trolley jack doesn’t really go that high so I had to stick some bits of wood under it just to get it high enough to let me get my axles stands under the sills at their lowest setting. Where would be a safe place to jack to bring it up higher? I’ve got two trolley jacks so I can jack both sides at the same time. I was thinking of the chassis rails at the end toward the engine. It looks like it will be handy to be higher for cutting the old bushes out. I managed to get all the subframe bolts out even though some were very very I’m sure this is going to shear tight. The bushes at the back are absolutely wrecks, you can push them up and down with your finger I alway left at least two bolts in to stop the frame from dropping as I worked round the bolts. I’m planning on leaving the front ones in loose and levering the frame down as per what I’ve seen online and just changing the back and middle bushes. Split_Pin, AnnoyingPentium, mercedade and 3 others 6 Link to comment Share on other sites More sharing options...
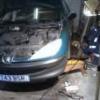
rainagain Posted May 17, 2023 Author Share Posted May 17, 2023 I also removed the front o/s wheel arch liner to get a better look at the union I need to undo to remove the power steering cooler. In this pic the RHS goes to the rack and the LHS goes to the cooler. From looking at the pipe it looks like I have to clamp the larger bit on the left and the undo the bit on the right, however I’m pretty sure that is just going to twist up the pipe I can’t really get any heat on it as it’s right next to the front sub frame bush and I don’t want to damage this. AnnoyingPentium and Split_Pin 2 Link to comment Share on other sites More sharing options...
mercedade Posted May 18, 2023 Share Posted May 18, 2023 18 hours ago, rainagain said: Before I went any further with the power steering pipe replacement I thought it would be best to sort the subframe bushes as if this went very badly wrong I wouldn’t have wasted time on the pipe. Watching this with extreme interest as I think, post MOT, I'll be doing this job on mine - and like you, it'll be on ramps on the driveway. Good luck man rainagain 1 Link to comment Share on other sites More sharing options...
rainagain Posted May 18, 2023 Author Share Posted May 18, 2023 36 minutes ago, mercedade said: Watching this with extreme interest as I think, post MOT, I'll be doing this job on mine - and like you, it'll be on ramps on the driveway. Good luck man The next step is cutting out the older bushes, I’m also toying with cutting the poly bushes in half to make them easier to fit. I’ve read quite a few people do this as it means you don’t need to push them in and also you don’t need to lower the subframe as much. Link to comment Share on other sites More sharing options...
rainagain Posted May 28, 2023 Author Share Posted May 28, 2023 I removed bushes on one side. The top one is the rear most bush inner that just fell out, the bits below are the middle bush. This actually felt ok but I thought I’d change it anyway. The middle bush has a plastic surround which popped out without too much trouble. The read bush has a metal surround as you can see below. I couldn’t get the car up high enough to get my air recip saw in place so used a dremel cutting disc to slice as much as I could then I used a stone in a drill to grind away the edge. I used a screwdriver to level the edge up and worked my way round. I also cut into it with a small cold chisel. Eventually it was loose enough to level out. I used this wire brush in the drill to clean out the holes. CreepingJesus, Shirley Knott, Saabnut and 2 others 5 Link to comment Share on other sites More sharing options...
rainagain Posted May 29, 2023 Author Share Posted May 29, 2023 The other side bushes were removed in the same manner Middle bush Rear bush outer theshadow 1 Link to comment Share on other sites More sharing options...
rainagain Posted May 29, 2023 Author Share Posted May 29, 2023 I levered the rear n/s of the subframe down and with the help of a lot of rubber grease I was able to fit the new bush in place then use a jack to pop it in place. All the how to videos I watched on YouTube were as far as I could tell petrol Saabs. I’m not sure if this makes a difference to the engine mounts but there was no way I could lever the subframe down enough to fit the other three bushes. Even with all the bolts off on the side I was working on and the strut top bolts loose the subframe wouldn’t come down enough. I resorted to using a tip I saw on a thread about bush replacement. That is to cut the bush in half and simply pop both bits in from each side and then stick in the crush tube to hold it together before you pass the bolt through it. Cutting the bushes was a bit of a nightmare, I read not to saw them as it removes material, I tried to use a sharp Stanley type knife but this wouldn’t touch them. In the end I found the best thing was to use my Leatherman’s serrated blade whilst pulling the bush apart as you cut. Although I managed to cut pretty square around the bush, to save having any problems I stuck a dot of paint on each end so I can align them how they were cut. I used one of the crush tubes to support the bush as I cut it. And installed I also took the opportunity to clean, vactan and then paint the inside of the arches and as much of the subframe as I could reach. Here’s the reinforcing panels waiting on a coat of black chassis paint having already been wire brushed and vactan’d Back_For_More, Popsicle, theshadow and 5 others 8 Link to comment Share on other sites More sharing options...
rainagain Posted June 8, 2023 Author Share Posted June 8, 2023 With the subframe done it was time to look at the power steering. I had cut the rusty section out leaving me with this. My plan was to insert a piece of high pressure pipe between the two ends and use heat shrink on the pipe on the left to build up its diameter so it matched the one on the right. This was a disaster as the pipe kept popping off as there was no ridge on the pipe for the clamps to grip on. I tried to use jubilee clips to hold the hose against the solid pipe to stop it popping off. This worked in a fashion as it it made the other end pop off. At this point it was back to the drawing board as they say. Link to comment Share on other sites More sharing options...
rainagain Posted June 8, 2023 Author Share Posted June 8, 2023 My next plan was to disconnect the very rusty union that sits on top of the subframe and have one of the welders at work weld a section of pipe in. I’d already checked with him and he said he could do that no problem if I brought the pipe in. However the rusty union had other ideas. I did manage to loosen it but I couldn’t unscrew as the male fitting on the right had rusted solid to the pipe. In the end I got it unscrewed by bending the remains of the cooler and unscrewing the whole thing. This is the end on the cooler pipe work. And I was stuck with this seized male fitting on the car’s pipe work grogee 1 Link to comment Share on other sites More sharing options...
rainagain Posted June 8, 2023 Author Share Posted June 8, 2023 I followed this pipe but it went to the top of the power steering rack at the rear of the subframe. I couldn’t see anyway to remove it without dropping the entire subframe. I didn’t fancy this so I had a chat with a local hydraulic hose company. I removed the hose from the top of the power steering pump and brought this metal part to them. I explained about the seized male end and they said I could use a ‘tube’ nut to connect onto it but they didn’t have anything the right thread. I remembered I had the petrol cooler that I’d bought and found it had a tube nut as part of it. They were able to take this and the metal pipe that connects to the power steering pump and make up this section of hose, all for a very cheap £41! I was able to run this under the radiator pack and on to the seized male end of the pipe. Although it uses small O rings to seal, I put Ptfe tape on all the threads just in case. I filled the system and whilst crossing every part of my body I started the engine. No leaks, I then pushed the wheel to both end stops and held it there for maximum pressure and again no leaks! It was quite a journey but I now have non leaking power steering. mercedade, beko1987, Saabnut and 8 others 11 Link to comment Share on other sites More sharing options...
rainagain Posted June 8, 2023 Author Share Posted June 8, 2023 Whilst I was carrying out these repairs I also treating a couple of bits of rust. I’m a bit disappointed how the vactan turned out. If you look closely the vactan has sort of cracked like old paint. And the rust is already coming through I rubbed it down and applied a high zinc content primer. Tickman, Shirley Knott and Saabnut 3 Link to comment Share on other sites More sharing options...
rainagain Posted June 8, 2023 Author Share Posted June 8, 2023 Next on the to do list is the hand brake. I was shocked to find that not only did the calliper come off on but so did the carrier. I was even more shocked when I was able to remove the retaining screw. Then I ran into problems as the adjuster was seized so I couldn’t back it off. The wear lip inside the drum was making it hard to get the disc off. I resorted to hammering it, then rotating it 180 and hammering it again. Eventually I was able to get a spanner behind the side I wasn’t hammering so I could pull it towards me to keep it reasonably square. Off it popped. Back_For_More and Split_Pin 2 Link to comment Share on other sites More sharing options...
rainagain Posted June 8, 2023 Author Share Posted June 8, 2023 It looks like the shoes are original. I was hoping to reuse them until I saw how little meat was left on them at the bottom. The adjuster was seized solid and the cable was seized on the adjuster, I am amazed how I had any hand brake action at all. By putting the adjuster in a vice and compressing it, I was able to get it moving so I could open it up and clean it. I made up this little tool by grinding a slot in an old screwdriver. It makes removing the brake springs slightly less sweary Popsicle, Split_Pin, Tickman and 1 other 4 Link to comment Share on other sites More sharing options...
rainagain Posted June 8, 2023 Author Share Posted June 8, 2023 The other side was a little easier to get apart as I was able to back off the adjuster. However the shoes fell apart, not too much of an issue as I’ve ordered new ones. Saabnut, Tickman, mercedade and 3 others 6 Link to comment Share on other sites More sharing options...
Split_Pin Posted June 8, 2023 Share Posted June 8, 2023 Good progress in spite of the car fighting you. I have back discs on order for the 75, hopefully they'll come off OK as the handbrake was recently freed off to get it through the MOT. rainagain 1 Link to comment Share on other sites More sharing options...
rainagain Posted June 12, 2023 Author Share Posted June 12, 2023 With everything removed, I cleaned the backplate and gave the dust shield a quick vactan. Then I fitted the lower mech, both shoes and lower spring. This was a moment requiring great patience not to scream too loud when the whole load fell on the ground for the umpteenth time. But eventually it was together. I’m glad I bought the brake spring kit as the retaining pins were well past their best. After reading many horror stories about rebuilding these on the net I picked up a tip of putting the retaining springs in a vice and wiring them compressed. Then you slide them over the pins and cut the wire. I thought I’d give it a try. I had a problem where the back pin having nothing to hold it would fall out the back making it hard to get the cup on. I used an old hard disk magnet with a couple of washer to push against the back of the pin, the magnet held the whole lot snuggly against the back plate. Back_For_More, Popsicle, CreepingJesus and 1 other 4 Link to comment Share on other sites More sharing options...
rainagain Posted June 12, 2023 Author Share Posted June 12, 2023 I had to take a short break when I managed to get the first cup on, only for it to ping off whilst I was moving the spring around after cutting the wire. Eventually it was all together. I used these funky pliers to pull the top spring on. I’m not entirely sure how they’re supposed to work but the hook part is perfect for grabbing the spring. Edit: I watched a YouTube video and I now know how to use these. One side done, one to go. mercedade, Split_Pin, Saabnut and 2 others 5 Link to comment Share on other sites More sharing options...
rainagain Posted June 17, 2023 Author Share Posted June 17, 2023 All done i also slapped in some waxoyl mixed with a smidge of old engine oil to make it look less like the titanic. AnnoyingPentium and Cookiesouwest 2 Link to comment Share on other sites More sharing options...
rainagain Posted June 17, 2023 Author Share Posted June 17, 2023 And…bugger The smoke plate says 0.5 and they failed it at 0.51. The tyres are annoying as I only put them on last year after the first mot test. I was a bit paranoid it was going to shit itself with a major fault so I put part worns on. They have plenty of tread but the tread is starting to break up. They said they could do the joint for £100 and as I don’t have the tool to remove it I let them do this. I’ve ordered some Radar Dimax R8+ from round trip tyres. They are supposedly A rated for wet grip so I’m hoping they’re not completely shite. I’ve got a tame fitter who will pop them on for me. Cookiesouwest, Tickman, Lanciaman and 2 others 5 Link to comment Share on other sites More sharing options...
rainagain Posted June 25, 2023 Author Share Posted June 25, 2023 I took the front wheels off and following an excellent tip off here I cleaned them with cillit bang burnt on degreaser. This took all the crap off both sides with hardly any scrubbing required. My friendly fitter then popped my new tyres on. I was only able to collected the wheels the night before the test was due, I put them back on and went to give the car a blast as recommended by the tester. Of course the car had other ideas and the battery has gone flat in the week since the fail. I’m not sure if it has a fault somewhere causing an excessive current draw or the battery is just terrible. I only bought the battery over a year ago but it was literally the cheapest new battery I could find. Supposedly it has a four year warranty but how exactly I’m supposed to show it’s faulty and do without a car when I send it back I don’t know. Luckily I had a charger in my basement so I was able to charge it over night. The morning of the test I got up even earlier than I normally do (4:30 for the win!) and gave it a good blast round where I stay. Well worth it as I got this later in the day: AnnoyingPentium, Back_For_More, Tickman and 8 others 11 Link to comment Share on other sites More sharing options...
grogee Posted June 25, 2023 Share Posted June 25, 2023 Well done on the pass, that must be satisfying. I didn't know about the Cilit Bang wheel clean tip, but I did find some (or something like it) randomly in my garage so that must be the universe's way of telling me to try it. rainagain 1 Link to comment Share on other sites More sharing options...
Tickman Posted June 25, 2023 Share Posted June 25, 2023 Congratulations. Couldn't be more deserved with the amount of effort you have put in. rainagain 1 Link to comment Share on other sites More sharing options...
Saabnut Posted June 25, 2023 Share Posted June 25, 2023 Delighted to see this live on another year! It definitely went to the right home, as there is no way I would have done all the work you have, as much as I liked the car! rainagain 1 Link to comment Share on other sites More sharing options...
rainagain Posted July 23, 2023 Author Share Posted July 23, 2023 I noticed I was leaving James Bond levels of black smoke when I pushed the accelerator down more than half way. I had the window open and I could hear a whooshing noise. Boost leak I thought, I was worried I was going to have to take the bumper off again. I popped open the bonnet and found my top hose had split. It had made a nice mess of the sound proofing with oil spray. I’m away from home right now so I only a socket set for tools. I wrapped some gaffer tape round the hose and found a cider can was the perfect size to hold it all together. Hopefully this should get me home later today. N Dentressangle, Vantman, Tickman and 7 others 10 Link to comment Share on other sites More sharing options...
grogee Posted July 23, 2023 Share Posted July 23, 2023 On 6/12/2023 at 11:03 PM, rainagain said: With everything removed, I cleaned the backplate and gave the dust shield a quick vactan. Then I fitted the lower mech, both shoes and lower spring. This was a moment requiring great patience not to scream too loud when the whole load fell on the ground for the umpteenth time. But eventually it was together. I’m glad I bought the brake spring kit as the retaining pins were well past their best. After reading many horror stories about rebuilding these on the net I picked up a tip of putting the retaining springs in a vice and wiring them compressed. Then you slide them over the pins and cut the wire. I thought I’d give it a try. I had a problem where the back pin having nothing to hold it would fall out the back making it hard to get the cup on. I used an old hard disk magnet with a couple of washer to push against the back of the pin, the magnet held the whole lot snuggly against the back plate. I played this game with mine but I could see what a ballache it was going to be so I unbolted the hubs. Probably ended up similar to you in terms of time taken / swears uttered. Link to comment Share on other sites More sharing options...
rainagain Posted July 26, 2023 Author Share Posted July 26, 2023 I was down at upullit Inverkeithing (or Edinburgh as they call it). I managed to get a boost hose, a rear washer pump and an alarm siren for the grand total of £12. I noticed this Volvo that might of use to someone for parts. @captain_70s? There was also this poor Saab 9-3 that looks like it had just had a full brake service with new discs and callipers before someone gave up on it. captain_70s 1 Link to comment Share on other sites More sharing options...
captain_70s Posted July 26, 2023 Share Posted July 26, 2023 1 hour ago, rainagain said: I was down at upullit Inverkeithing (or Edinburgh as they call it). I managed to get a boost hose, a rear washer pump and an alarm siren for the grand total of £12. I noticed this Volvo that might of use to someone for parts. @captain_70s? @rml2345actually raided this a couple of weeks ago and got some bits for me! At least the bits that weren't rusted to oblivion... Link to comment Share on other sites More sharing options...
Split_Pin Posted July 26, 2023 Share Posted July 26, 2023 3 hours ago, rainagain said: I was down at upullit Inverkeithing (or Edinburgh as they call it). I managed to get a boost hose, a rear washer pump and an alarm siren for the grand total of £12. I noticed this Volvo that might of use to someone for parts. @captain_70s? There was also this poor Saab 9-3 that looks like it had just had a full brake service with new discs and callipers before someone gave up on it. That was for sale by them a few months ago but it's hopelessly rotten. I was up there about a month ago when that 740 had just come in, it looked not too bad but I only gave it a cursory glance and took a snap. Are there any more 93 new generations in? The ones that were there were well picked over when I was up. Link to comment Share on other sites More sharing options...
rainagain Posted July 26, 2023 Author Share Posted July 26, 2023 36 minutes ago, Split_Pin said: That was for sale by them a few months ago but it's hopelessly rotten. I was up there about a month ago when that 740 had just come in, it looked not too bad but I only gave it a cursory glance and took a snap. Are there any more 93 new generations in? The ones that were there were well picked over when I was up. Possibly, I’m sorry but I wasn’t really looking for them. Their website is good with regards to what they have. That’s how I knew they have a TiD 9-5 in. Worth a check if you’re after something. Split_Pin 1 Link to comment Share on other sites More sharing options...
rainagain Posted July 26, 2023 Author Share Posted July 26, 2023 Just to add for anyone thinking of going to upullit, their website says they shut at five apart from a Sunday. I went on a Monday and a man started sounding ‘time!’ at me whilst pointing to his watch at 4:15. I eventually figured out he wanted me to leave as they were shutting. When I went to pay I asked the guy if the website was right as it said they shut at five, he just added to the confusion by replying “last entry is half four”. Link to comment Share on other sites More sharing options...

Recommended Posts
Create an account or sign in to comment
You need to be a member in order to leave a comment
Create an account
Sign up for a new account in our community. It's easy!
Register a new accountSign in
Already have an account? Sign in here.
Sign In Now