Saabnut Posted March 4, 2022 Share Posted March 4, 2022 I have a scrap 9-5 bonnet, not sure if it has jets on it. Will check tomorrow but may not be able to let you know until Tuesday as that is when BT should fix my line. Currently very intermittent and download of 8KB when working! Link to comment Share on other sites More sharing options...
rainagain Posted March 4, 2022 Author Share Posted March 4, 2022 6 minutes ago, Saabnut said: I have a scrap 9-5 bonnet, not sure if it has jets on it. Will check tomorrow but may not be able to let you know until Tuesday as that is when BT should fix my line. Currently very intermittent and download of 8KB when working! Thanks for the kind offer but I was able to grab a full working set from the local upullit this afternoon. I now have working washers! JMotor 1 Link to comment Share on other sites More sharing options...
rainagain Posted March 5, 2022 Author Share Posted March 5, 2022 Whilst I was at upullit I also picked up this bit of trim. Before: After: I found a dog guard in the same car, I’m not sure if it’s a Saab one but it fits perfectly. For the washer jets, bit of trim, dog guard and a 15” Pug steel wheel and tyre it cost me £30. JMotor, Tickman and grogee 3 Link to comment Share on other sites More sharing options...
Mally Posted March 5, 2022 Share Posted March 5, 2022 On 3/3/2022 at 6:44 PM, rainagain said: I pulled the material off the bonnet (finding evidence of nest at the same time!) and had a look at the nozzles. I’d initially thought the nozzles were blocked and tried my nozzle cleaning kit Despite it’s lovely wooden case cleaning the nozzles had no effect. I took one of the nozzles off and found the right angle part of it appeared to be blocked. I took one apart and it appears to be a one way valve (there is a rubber disc in the bottom part). However whenever I put it together it seems to stop all flow. It’s almost like the spring is too strong. If I remove the black plastic cup (the item second from the bottom in the pic) it lessens the tension and it allows some flow whilst still functioning as a one way valve. I looked on eBay and found people selling these washer jets but they want £8 each! Which seems a bit steep to me. I’m not sure what I can do with these, the middle washer jets has lots it’s cover as well. I’m wondering if I should just gut them all and make a cover for the one that’s missing it. Or I could nip down the scrappies and grab another set. I had 1 non working jet on my 9-3. Think it's only a single squirt. Anyway I chucked the spring and plastic away and it works fine*. rainagain 1 Link to comment Share on other sites More sharing options...
rainagain Posted March 5, 2022 Author Share Posted March 5, 2022 I had a look at the key, I changed the battery in but it still only works intermittently. You have to press the unlock button several times before unlocks and the same with locking. I took it apart and used contact cleaner to clean everything up. However it’s still the same Link to comment Share on other sites More sharing options...
rainagain Posted March 12, 2022 Author Share Posted March 12, 2022 First off a massive thanks to @gadgetgricey for sending me a battery cover. Once I’ve finished my other work on the car I’ll get it installed. I don’t want to do it yet as it’s likely I’ll have to give the battery a charge due to the car not being driven. I’ve only been able to grab the odd hour here and there with this trying to get it finished. This has prevented me getting stuck into the bigger jobs. I had an hour recently so I decided I’d give the inside a bit of a clean up. A mouse had made its home behind the passenger seat and left a right mess on the mat. Underneath it wasn’t much better. I gave it a good Hoover before hitting it with one of those spray car carpet shampoo bottles with a built in brush. It’s by no means perfect but it looks (and smells!) a hell of a lot better. grogee and Tickman 2 Link to comment Share on other sites More sharing options...
rainagain Posted March 12, 2022 Author Share Posted March 12, 2022 The next night I had another hour and I decided to tackle both these trim prices next to the front lights. They hadn’t been inserted properly and we’re sticking out at the front. It was making my teeth itch every time I saw them. However one of the screws holding the left one had lost its head. Using a little metal cut off wheel I was able to cut a slot in it that allowed me to unscrew it, however there was casualties and the securing screw sheered off the cutting wheel just as I was finishing cutting the slot. With the trim off I saw this grot, which I knew I couldn’t leave under the trim as it would only get worse. I gave it quick clean with a wire wheel before sticking on some of Hammerite’s finest silver. The is some of the newer stuff so I fully expect the rust to come back pretty quickly But for now it looks a lot better Saabnut and grogee 2 Link to comment Share on other sites More sharing options...
rainagain Posted March 12, 2022 Author Share Posted March 12, 2022 Going back to the ecu light coming on due to it thinking there was water in the fuel filter due to the lack of the water sensor. I first removed the rather rusty filter. I then fitted my new filter complete with new water sensor. There’s suppose to be a cover over this lot but it was missing. Having no more sealant left I put some UHU glue round the wiring leaving the new sensor, in the hope of giving it some protection. I also tie-wrapped the wires in place to stop them flapping around. grogee, Vantman, Tickman and 1 other 4 Link to comment Share on other sites More sharing options...
rainagain Posted March 12, 2022 Author Share Posted March 12, 2022 I had a few hours on Friday and really annoyed myself by wasting them. I wanted to change the O/S front drop link. I had already changed the N/S and it wasn’t too bad. This one was a right bastard, the top nut was not for coming off, even with a impact wrench on it. I couldn’t stop the ball joint spinning despite me trying to hold it with a spanner before moving onto a pair of mole grips. I wasted hours trying to grind the nut down with a stone in a drill as I’d left my angle grinder at my house. I should have stopped when I realised the drill was a waste of time. This technique did work on the other side, but even after grinding off almost one side of the nut it wouldn’t shift. I left it and stuck the wheel back on, more angry at myself for the wasted time than the seized nut. Saabnut and grogee 2 Link to comment Share on other sites More sharing options...
rainagain Posted March 15, 2022 Author Share Posted March 15, 2022 Slightly more successful Sunday as I had my angle grinder with me. I chopped chunks out the nut but it still wouldn’t budge so I went round the other side of the strut and just cut the whole lot off. It was very satisfying after the previous wasted time. I didn’t even bother trying to undo the bottom one I just chopped it off as well. One freshly chopped drag link. The new one was popped in and I chucked some Vactan on the inner arch. Another job off the list, I’m slowly making my way to the job I’m not looking forward to, crawling under the car to change the brake pipes. grogee and Tickman 2 Link to comment Share on other sites More sharing options...
chodweaver Posted March 15, 2022 Share Posted March 15, 2022 Good progress and great to see it happening, warts 'n' all. Keep at it. rainagain 1 Link to comment Share on other sites More sharing options...
grogee Posted March 16, 2022 Share Posted March 16, 2022 It's funny, you and I both are finding jobs and then finding more jobs on our 9-5s! Mine had a little rusty scabby bit on the front of the rear wheelarch, picking at this has ended up with me welding and all sorts! Think the brake pipes have been done on mine in the past which is nice, I don't envy you that task. Next for mine is put the rear hubs/brakes back together then try and suss out the HVAC sticky flaps. I tried to buy the Saab-prescribed bush for this but it's NLA in UK so I'm going to have to get creative I think. Best of luck with yours, they are nice cars. Kind of wishing mine was a diesel with current fuel prices! rainagain 1 Link to comment Share on other sites More sharing options...
Vantman Posted March 16, 2022 Share Posted March 16, 2022 22 minutes ago, grogee said: try and suss out the HVAC sticky flaps. I tried to buy the Saab-prescribed bush for this but it's NLA in UK so I'm going to have to get creative I think. @grogee Is this what you need?--- grogee 1 Link to comment Share on other sites More sharing options...
grogee Posted March 16, 2022 Share Posted March 16, 2022 14 minutes ago, Vantman said: @grogee Is this what you need?--- I don't know yet. The Saab bulletin talks about replacing a bush in the HVAC air distribution flap. That's different to those actuator arms you've shown, but they may well be broken too. I need to pull driver's side lower trim off as I've only seen passenger side so far and that was inconclusive Vantman 1 Link to comment Share on other sites More sharing options...
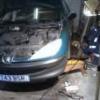
rainagain Posted April 9, 2022 Author Share Posted April 9, 2022 Bit more work carried out on the Saab. I can’t connect the rear wash pump as the plug and pump are different. I think this so why the loom to the front washer pump was butchered. Does anyone know what could be going on here? I’m wondering if it’s had a snack to the front and they fitted a washer bottle of another Saab 9-5 but one with different pump connectors? excuse the terrible picture but the pump has rounded edges whilst the plug has straight edges. Link to comment Share on other sites More sharing options...
rainagain Posted April 9, 2022 Author Share Posted April 9, 2022 The upper mounting points on the bumper have been snapped off. Someone has drilled new holes to replace them and I fitted some new bolts to hold it on. However the bumper seems to be pointing towards the ground compared to where it should be sitting. You can see it at the side and when the bonnet is shut. I’m thinking if I either re-drill those new holes or perhaps make them slots it will let me pull the bumper up more. Does this sound like it would work? Link to comment Share on other sites More sharing options...
gadgetgricey Posted April 9, 2022 Share Posted April 9, 2022 Just from side shot is there any adjustment left for bonnet. Gap above wing also seems quite large. (This is where you say bonnet was not closed ) Re bumper, you could always try some cable ties as a temp fix to pull up bumper. That would tell you if redrilling new holes would work or not. rainagain 1 Link to comment Share on other sites More sharing options...
grogee Posted April 9, 2022 Share Posted April 9, 2022 16 minutes ago, rainagain said: The upper mounting points on the bumper have been snapped off. Someone has drilled new holes to replace them and I fitted some new bolts to hold it on. However the bumper seems to be pointing towards the ground compared to where it should be sitting. You can see it at the side and when the bonnet is shut. I’m thinking if I either re-drill those new holes or perhaps make them slots it will let me pull the bumper up more. Does this sound like it would work? Worth a try. Most of my cars have had fucked bumper mounts and you just have to make a workaround like your solution. My front bumper will be coming off in the summer while I attempt to repair/fill the scrapes and respray rainagain and Longbridge Apologist 2 Link to comment Share on other sites More sharing options...
dozeydustman Posted April 9, 2022 Share Posted April 9, 2022 Before you bin the old washer jets soak them in something acidic, might give them a good clean out and you’ll have a spare set rainagain 1 Link to comment Share on other sites More sharing options...
rainagain Posted April 11, 2022 Author Share Posted April 11, 2022 I could put it off no longer it was time to tackle the brake pipes. Starting with the N/S rear. That'll be humped then: The removal process wasn't too bad, I tried my 11mm brake spanner but either these unions were 11mm and the corrosion reduced them or they were 10mm from the factory. I suspect corrosion. I ended up chopping the brake pipe and just using a six sided socket. One of the unions was stuck fast and just rounded off, I had set of the rounded nut sockets and it did a great job removing it. Link to comment Share on other sites More sharing options...
rainagain Posted April 11, 2022 Author Share Posted April 11, 2022 New brake pipe made up And fitted, mmm shiny Saabnut and Tickman 2 Link to comment Share on other sites More sharing options...
rainagain Posted April 11, 2022 Author Share Posted April 11, 2022 The other side looked even worse I tried the same method as before but even mole grips wouldn't shift the union, it was never coming out. Link to comment Share on other sites More sharing options...
rainagain Posted April 11, 2022 Author Share Posted April 11, 2022 I decided the best course of action was to remove the flexi and then apply some heat to the union with it off the car. Flexi off The remains of the union Into the vice with a little bit of heat Success Tickman and Saabnut 2 Link to comment Share on other sites More sharing options...
rainagain Posted April 11, 2022 Author Share Posted April 11, 2022 The union rounded on the other side so I again tried my rounded nut socket, however this broke up I again thought I would remove the flexi, this one was attached to the caliper so rather than try and unscrew it from the caliper it was easier to just remove the caliper, however to do this I had to smash this clip off as I couldn't undo the union, I need of new ones of these what are they actually called? It holds the flex in place as you screw in the union. Caliper off Do you remember at school when in chemistry you made a custard tin explode? Well it turns out the same thing happens with brake fluid if you heat it too much. I did get a bit of a shock when it exploded right in front of me as I sat there wondering where the smoke was coming from. Luckily I didn't suffer any injuries and the end of the flexi didn't try and take my eye out. Ironically I then had to undo the flexi from the caliper as I now needed to replace it, I also took the chance to stick a bit of heat on the bleed screw which came out ok, much to my relief. mercedade, Saabnut and Tickman 3 Link to comment Share on other sites More sharing options...
rainagain Posted April 11, 2022 Author Share Posted April 11, 2022 The rear part of the brake pipes from the ABS pump block to the read axle are rotten. My initiial plan was to join on a new piece of pipe onto the steel pipes under the car. My flaring tool does a great job on copper type pipes but is useless on steel. I think I'm now going to have to bite the bullet and just run an entirely new set of pipes from the front to the rear. If anyone has a diagram showing which of the two pipes on the abs pump I need to remove it would be helpful as they all just disappear behind the engine. I would like to remove them and screw in my blanking plugs as this will stop the pump running dry and make it easier for me to take my time routing the new pipes. Saabnut 1 Link to comment Share on other sites More sharing options...
Ged Posted April 11, 2022 Share Posted April 11, 2022 Here's the EPC for it, 9 and 10 on the back are what you want. rainagain 1 Link to comment Share on other sites More sharing options...
rainagain Posted April 14, 2022 Author Share Posted April 14, 2022 I had another crack at getting the brake pipes changed tonight. I started removing the rotten ones working towards the front. They are certainly due a replacement one fractured as I was in clipping it. Link to comment Share on other sites More sharing options...
rainagain Posted April 14, 2022 Author Share Posted April 14, 2022 Annoyingly enough my abs unit looked nothing like what I’d seen online. I could see the one nearest the top of the pic went to the front right and it looked like the one next to it went to the front left, so I disconnected these two bottom pipes and screwed in my plugs. What I just found though is this pic on eBay much easier to make out when not at the back of the engine bay. This means I’ve disconnected the front right, something else I’ll have to bleed once I get it all back together! I also found I’ll need a new union as the rear left one uses a larger union than standard ones I have. Presumably to make it impossible to mix the pipes up during production. Saabnut and Coprolalia 2 Link to comment Share on other sites More sharing options...
Ged Posted April 14, 2022 Share Posted April 14, 2022 I thought the green stuff they used on these pipes worked quite well looking at my car, guess its just because it had an easier life down south in Brighton. Link to comment Share on other sites More sharing options...
jonathan_dyane Posted April 15, 2022 Share Posted April 15, 2022 Can't you just reuse the old union? I always do this anyway if they come off without rounding but I am tight... Link to comment Share on other sites More sharing options...

Recommended Posts
Create an account or sign in to comment
You need to be a member in order to leave a comment
Create an account
Sign up for a new account in our community. It's easy!
Register a new accountSign in
Already have an account? Sign in here.
Sign In Now