Split_Pin Posted January 20, 2023 Share Posted January 20, 2023 I would need to get the connectors that actually go onto the loom as well. It's made by Laserline sonics already a cheap aftermarket kit. Too much hassle for something that isn't a non driving issue, although they'd be nice to have! Link to comment Share on other sites More sharing options...
grogee Posted January 21, 2023 Share Posted January 21, 2023 On 1/20/2023 at 1:57 PM, Split_Pin said: I would need to get the connectors that actually go onto the loom as well. It's made by Laserline sonics already a cheap aftermarket kit. Too much hassle for something that isn't a non driving issue, although they'd be nice to have! Naa, just rip out the old kit and put a new one in. An afternoon with a drill and some cable ties. It's nice* outside too. Split_Pin 1 Link to comment Share on other sites More sharing options...
Split_Pin Posted January 21, 2023 Share Posted January 21, 2023 Unfortunately I don't have an afternoon these days! Link to comment Share on other sites More sharing options...
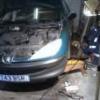
rainagain Posted January 25, 2023 Author Share Posted January 25, 2023 Naturally now the suspension was fixed the Saab had to develop another fault. I was driving home and found I had lost main beam on the n/s and had a front lamp failure message on the dash. I tried to change the bulb, but access was terrible so I ended up removing the battery. I fitted a nice new 130% brightness bulb I had from a box that had been lying around the garage looking for a home for a few years now. I refitted the battery tried the lights and it was still broken. I then thought it could be the multi plug that the headlamp connects to so I again whipped out the battery removed the plug, cleaned it with electrical cleaner and put it all back together again. Still no joy and I wasn’t getting 12V at the bulb socket so it was time to break out google. Link to comment Share on other sites More sharing options...
rainagain Posted January 25, 2023 Author Share Posted January 25, 2023 One clue I had was the blue tell tail in the dash wasn’t coming on when I turned on full beam. From google this pointed to the large orange lamp monitor located inside the engine bay fuse box being faulty. I removed this, cleaned all its pins and the swapped the n/s and o/s fuses. The fault didn’t move and it stayed the same. I removed the unit and managed to pry the sides off to have a look inside. Link to comment Share on other sites More sharing options...
rainagain Posted January 25, 2023 Author Share Posted January 25, 2023 Google suggested this could be suffering with dry joints, using a magnifier I checked it all over and it all looked good. Link to comment Share on other sites More sharing options...
Split_Pin Posted January 25, 2023 Share Posted January 25, 2023 I had to change the NS sidelight bulb in the 93 at the weekend and the battery plus a load of other stuff had to come put! Re the light, is anything else randomly not working? Sometimes one fuse can control things that don't appear to be related. rainagain 1 Link to comment Share on other sites More sharing options...
Ged Posted January 25, 2023 Share Posted January 25, 2023 Mine looked perfect too even tried reflowing but another unit fixed my high beam issue. Wonder if its the same as the NG900 one im sure I have a spare aswell. Split_Pin 1 Link to comment Share on other sites More sharing options...
Ged Posted January 25, 2023 Share Posted January 25, 2023 Would appear to be the same you are welcome to borrow the one from my NG900 to try, I have a spare one in my garage but cant remember if thats the broken or one I pulled from a breaker. Split_Pin and rainagain 1 1 Link to comment Share on other sites More sharing options...
rainagain Posted January 26, 2023 Author Share Posted January 26, 2023 I put the lamp unit back in and the problem was still there. Looking at the wiring diagram I could see that two of the pins coming out of the lamp unit feed each side of the car’s full beam. I put a thin loop of wire around each of these pins in turn and checked the voltage whilst the unit was plugged in, I was getting 12V for the o/s but nothing for the n/s. 12V for full beam entered the unit via the larger pin between the two circled above. As it was coming out on one pin the fault must lie within the unit. Split_Pin 1 Link to comment Share on other sites More sharing options...
rainagain Posted January 26, 2023 Author Share Posted January 26, 2023 I again took it apart, despite this being called a lamp control ‘relay’ by many people online looking at the components inside it there was nothing there that looked like it could handle 55W so the components must be passive. I forgot to take a picture, but this shot from a YouTube video sort of lets you see what’s in it. I again checked it for dry joints and couldn’t see anything. The guy from the video above had an easy to see dry joint. I had a summer job doing PCB repairs so I have spotted a few dry joints in my time. Doing the old Sherlock Holmes I knew the fault must be a dry joint even though I couldn’t see it, so I reflowed all the pins and also the larger wires that must be carrying the current near the pins, circled below. I reassembled and installed it and tried full beam, success I now had the blue full beam tell tale but then the lamp failure message popped back up. I checked the lamp connector and I had 12V at it. Bugger I thought, I must have lost the earth. I checked the other side of the bulb holder and got 0V, if I’d lost an earth I would expect there to be 12V here as well, since there was no current draw there would be no voltage drop across the bulb. Very strange until I checked the ‘brand new and just removed from packet’ bulb. It was open circuit! Despite the filament showing zero signs of use the bulb was broken, I can only assume there was a fault in the wiring from the moulded connector at the bottom of the bulb to the filament. This is the second time I can remember I’ve had a faulty new bulb, being a Ring I would have expected better. I refitted the original bulb and let there be light, it worked! I now had full beam again and no skin on my right hand from jamming it between the battery and the head lamp. There’s some sort of lesson here about following a wiring diagrams in a logical manner and not trusting new parts! Ted Eggs, Saabnut, CreepingJesus and 5 others 8 Link to comment Share on other sites More sharing options...
Split_Pin Posted January 26, 2023 Share Posted January 26, 2023 Great sleuthing man! rainagain 1 Link to comment Share on other sites More sharing options...
grogee Posted January 26, 2023 Share Posted January 26, 2023 Top PCB action, hats off rainagain and tommytwo 2 Link to comment Share on other sites More sharing options...
mercedade Posted January 26, 2023 Share Posted January 26, 2023 10 hours ago, rainagain said: I had lost main beam on the n/s and had a front lamp failure message on the dash. Great investigation work - mine used to belong to my dad and he was never able to get to the bottom of an intermittent bulb failure warning. It only ever comes on when using main beam, and then only rarely, but there is no failed bulb and no end of changing bulb and bulb brands have ever resolved it. This is good work. I won't ever look at it, but it's good to know there are people who can. rainagain 1 Link to comment Share on other sites More sharing options...
rainagain Posted February 12, 2023 Author Share Posted February 12, 2023 Went up to Inverness yesterday, stuck to 60 and got an indicated 56mpg although I think the computer is ever the optimist! They still have yellow sodium lights in parts of Inverness I forgot how good an even light the give out compared to the current pin point LEDs our local council are installing. Saabnut, CaptainBoom, 320touring and 3 others 6 Link to comment Share on other sites More sharing options...
rainagain Posted April 27, 2023 Author Share Posted April 27, 2023 It’s that time of year again the dreaded mot. I have a few things to sort/check Fix horn Fix power steering leak Top up gearbox Wash down engine Fix boost pipe Change subframe bushes Check/paint/change front brake pipes Check front brake flexis (Advisory on last mot) I thought I’d start with the none working horn. The horn has always sounded a bit weedy but it’s now completely dead. I found 12v and ground at each connector, the connections themselves were nice and clean. New horn time, let’s check eBay. How fucking much m8? Forget that, much better I then removed the connectors from the original horns, I’ll either solder them directly to the new horns or use them to make an adapter. This will let me fit the new none OEM horns without butchering the original wiring. AnnoyingPentium and Tickman 2 Link to comment Share on other sites More sharing options...
rainagain Posted April 27, 2023 Author Share Posted April 27, 2023 Next onto the power steering leak, this is coming from the cooler at the front. I bought a petrol cooler as a diesel one is ££££. I’ve seen someone bending it to fit as they’re pretty similar, however on closer inspection the unions it connects to are solid lumps of rust deep in the inner wing and trying to undo them would just result in a world of pain. As this is the low pressure side my solution is to cut out the rotten section and fit in a nice new piece of oil safe hose I got from a local hydraulic supplier. As there’s always howevers with this car I found the leak is coming from right next to the union circled below I want to make these cuts into nice none rusted piping The problem is the pipe on the left has an o/d of 10mm and the one on the right has an o/d of 12mm. My repair hose has an internal diameter of 12mm I’m hoping I can make up the difference by shrinking some heat shrink onto the smaller pipe and again hoping the low pressure means it won’t leak. AnnoyingPentium 1 Link to comment Share on other sites More sharing options...
AnnoyingPentium Posted April 27, 2023 Share Posted April 27, 2023 1 hour ago, rainagain said: These are whit yer wanting... Scare the living shit out of crap drivers... rainagain 1 Link to comment Share on other sites More sharing options...
rainagain Posted April 27, 2023 Author Share Posted April 27, 2023 3 minutes ago, AnnoyingPentium said: These are whit yer wanting... Scare the living shit out of crap drivers... being honest I did see the air horn kits for a wee bit more than the horns I ordered and I was really really tempted. If I had more time I would have ordered them and taken the time to install the kit. AnnoyingPentium 1 Link to comment Share on other sites More sharing options...
AnnoyingPentium Posted April 27, 2023 Share Posted April 27, 2023 2 minutes ago, rainagain said: being honest I did see the air horn kits for a wee bit more than the horns I ordered and I was really really tempted. If I had more time I would have ordered them and taken the time to install the kit. Aye mine required a wee bit of messing about as we made up some brackets for the horns to hang at the back of the engine bay from the strut mountings. Worth it though, I even have the original horn still wired in so if the air horns fail the original will still work, and it sounds when you fire the air horns. Triple tones, dims the lights at night too. rainagain 1 Link to comment Share on other sites More sharing options...
rainagain Posted May 15, 2023 Author Share Posted May 15, 2023 Time to install my new horns after all they are for: And I know they’re going to be good as it says so on the box I cut down the existing connectors I’d removed off the original horns, used a blob of silicone to secure them to the horns and then soldered the connections. I then spread silicone around the exposed metal to help prevent corrosion. They work great and it means I didn’t butcher the existing car wiring. The cable on the right isn’t actually under tension it’s just the shroud that makes it look like it. Split_Pin and mk2_craig 2 Link to comment Share on other sites More sharing options...
rainagain Posted May 15, 2023 Author Share Posted May 15, 2023 I also spread some silicone round the tired seal on the shark fin. Before After I’m hoping this is going to solve the water ingress I found in the boot. Does anyone know what this aerial actually does? I read the car uses the heated rear windscreen for the radio so what’s the shark fin for? DSdriver 1 Link to comment Share on other sites More sharing options...
rainagain Posted May 15, 2023 Author Share Posted May 15, 2023 I had a wee bit of time tonight, not enough to get stuck into any of the the proper jobs so I looked at some rust. These were areas I had vactan’d last year. The rust had come through already. I gently took an angle grinder to them with a sanding disc. I realise now looking at these pics I should have removed more paint on the part shown above. All I could think of was vactan’ing them again which I did I’m not sure what to do next, either another coat of vactan or just sand and stick some high zinc content primer on. Also what do I do about using body filler to smooth it out? I know you’re supposed to apply filler straight to bare metal but in that case what do I do for rust proofing? Popsicle 1 Link to comment Share on other sites More sharing options...
Spiny Norman Posted May 15, 2023 Share Posted May 15, 2023 Roof aerial's for the GPS if your car has it. The rubber on mine disintegrated completely and I got a cheapo eBay Sharkfin to replace it. DSdriver and rainagain 1 1 Link to comment Share on other sites More sharing options...
Wgl2019 Posted May 16, 2023 Share Posted May 16, 2023 6 hours ago, rainagain said: I had a wee bit of time tonight, not enough to get stuck into any of the the proper jobs so I looked at some rust. These were areas I had vactan’d last year. The rust had come through already. I gently took an angle grinder to them with a sanding disc. I realise now looking at these pics I should have removed more paint on the part shown above. All I could think of was vactan’ing them again which I did I’m not sure what to do next, either another coat of vactan or just sand and stick some high zinc content primer on. Also what do I do about using body filler to smooth it out? I know you’re supposed to apply filler straight to bare metal but in that case what do I do for rust proofing? If you can, I would suggest taking the skirt off to get access to more of the lower panel. Acts as a bit of a dirt and moisture trap. Just be careful with the fasteners as they are quite easy to snap..... rainagain 1 Link to comment Share on other sites More sharing options...
rainagain Posted May 16, 2023 Author Share Posted May 16, 2023 Ffs what an awful afternoon I had with this. I thought I’d tackle the power steering leak as it should be a relatively easy job. I started off cutting out the rotten section. I then shrunk heat shrink over the pipe on the left to make it the same diameter as the one in the right. I fitted my piece of high pressure hose and used my circular clips to secure it. I filled the system and started the engine, I wondered why the wheel wouldn’t turn, so I cut the engine and found that the pipe had popped off and dumped all my lovely and expensive fluid on my dad’s drive. This is quite impressive as that hose is not really flexible. I came up with the idea of using a jubilee clip to hold it against the other pipe so it couldn’t snake off. It worked a bit longer this time and I cleverly had a tub ready to collect the fluid. Again it fell off. I repeated the above but used three junkies clips to hold it hard against the other pipe, this kinda worked as instead the other one popped off. Obviously my tub wasn’t under here so it pissed out the fluid, again. At this point I walked away and resisted the urge to reach for the petrol and matches and called a friend. I have a petrol cooler as I couldn’t find a diesel one, my friend thinks he can chop up the new cooler and weld the bits into the old one. However to do this I’ll need to remove the cooler which means trying to tackle this union that sits on top of the subframe, which I was trying to avoid. I look forward to this. In hindsight I should have just cleaned up the hole and chucked some chemical metal on it with a jubilee clip but I didn’t think this would work as the pipe was rotten. I’ve spliced a piece of hose like this into the cooler on my OH’s Tucson years ago and it worked perfectly I can only think this system must operate at a higher pressure. CreepingJesus, Saabnut and Split_Pin 3 Link to comment Share on other sites More sharing options...
Split_Pin Posted May 17, 2023 Share Posted May 17, 2023 Aye solid lines indicate this is the HP side of the system and rubber pipe is not up to the job. Can't you get a new line or one made up by Pirtek? Link to comment Share on other sites More sharing options...
rainagain Posted May 17, 2023 Author Share Posted May 17, 2023 22 minutes ago, Split_Pin said: Aye solid lines indicate this is the HP side of the system and rubber pipe is not up to the job. Can't you get a new line or one made up by Pirtek? The rubber pipe is rated 2000psi if I could just get it to not to pop off! I found a guy on eBay making them up for various Saabs, however I asked him about mine and got this reply: Link to comment Share on other sites More sharing options...
Split_Pin Posted May 17, 2023 Share Posted May 17, 2023 Try Bill at Saabits in Perth or RonSaabLeeds. rainagain 1 Link to comment Share on other sites More sharing options...
rainagain Posted May 17, 2023 Author Share Posted May 17, 2023 Oh dear made a bit of a mess of my dad’s driveway and path Any ideas what take steering fluid off concrete and tarmac? Link to comment Share on other sites More sharing options...

Recommended Posts
Create an account or sign in to comment
You need to be a member in order to leave a comment
Create an account
Sign up for a new account in our community. It's easy!
Register a new accountSign in
Already have an account? Sign in here.
Sign In Now