purplebargeken Posted June 15, 2019 Share Posted June 15, 2019 Ok, alternator and brackets/mounts off, carb off, manifolds off, water pump off, exhaust disconnected, rocker shaft off, cylinder head off. Dizzy and petrol pump are next. As you can imagine, all of the hoses were comically fooked, they were on the replace list anywayafter all of this time. Stainless hose clamps will be used. Stainless fasteners will be used where appropriate and safe. Head parted company with the block easily enough after a few blows with the rubber mallet. Cylinder number 4 had water in it, the rest were dry as a bone. The engine will be a big paperweight anyway so it didn't do any harm to have a peek. The engine, gearbox and subframe combo will be here in a few weeks, so I will crack on with doing a little bit more dismantling and then start tackling the surface rust underneath and so on. It will be an ideal opportunity to tidy and paint the engine bay I guess. I will need a hand to get the poor knackered OHV lump out though, not sure which way is best, out through the top or seeing as it is all going to get replaced, just let it drop out the bottom. Tamworthbay, danthecapriman, scdan4 and 1 other 4 Link to comment Share on other sites More sharing options...
Andyrew Posted June 15, 2019 Share Posted June 15, 2019 I have a engine crane if you want to borrow it, located in Dunstable, it's a folding sealey one. purplebargeken 1 Link to comment Share on other sites More sharing options...
johngarty Posted June 15, 2019 Share Posted June 15, 2019 Bookmarked ? purplebargeken 1 Link to comment Share on other sites More sharing options...
purplebargeken Posted June 15, 2019 Share Posted June 15, 2019 Thanks for that!! I still need to work out if I will lift the engine out via the top or drop everything through the bottom, I need to look at what needs to be undone from the subframe other than the 4 mounting bolts to enable it to be dropped out. The engine is two mounts and a gearbox lol. Link to comment Share on other sites More sharing options...
Brodders Posted June 15, 2019 Share Posted June 15, 2019 I will be up for lending a hand with this too. When you know which weekend will be best, let me know and I will try to pop down. Link to comment Share on other sites More sharing options...
purplebargeken Posted June 15, 2019 Share Posted June 15, 2019 Cheers mate. Appreciated. Link to comment Share on other sites More sharing options...
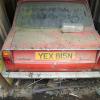
purplebargeken Posted June 21, 2019 Share Posted June 21, 2019 The engine has had most of the nuts and bolts fastening it to the gearbox removed with the help of Brodders. I will leave some still attached as I don't want the engine laying on the steering rack! It looks like the gearbox is not attached to the mount. The number plate from the front has been removed! The front bumper will need to be cut off as all of the nuts and bolts are seized and just spinning. I have replacements anyway. The underside was checked and looks solid as anything but is just covered in surface rust. Sills look lovely and solid. I removed the massive lump of filler that was pretending to be steel by the N/S headlight. I will fabricate a panel, it a flat piece so will be easy. I have ordered a repair section for the headlight mounting point, I will get the other side in a month or two. Hmm, I could just fabricate one for the other side, hmmmm. I would like to have removed the exhaust but that will be easier when the car is jacked up and put on axle stands at the back as well. It looks almost like new which is ace. I actually think it might be easier to fit the replacement engine, gear box and subframe as one unit and secure it all from underneath. Maybe. Link to comment Share on other sites More sharing options...
purplebargeken Posted July 3, 2019 Share Posted July 3, 2019 Repair panel for the N/S headlight mounting is now on it's way to me. The witches brew that I added to the stripped block has all soaked in but the engine remains firmly stuck. When the replacement is all cleaned, painted and fitted, I might drain the old oil out of this one and put it to one side whilst I save up to get it rebuilt, I guess it makes sense to have a spare nowadays. A much tidier set of steel wheels were bought via eBay for the grand sum of £2.50 and they were very local too. A mate will be bringing his engine crane over once the blue car has gone, so that will make things much easier. As soon as the paint on the 4 door is completed, I will crack on with the bodywork on this. There is a whole load of work to do but it is mostly straightforward and I am still looking forward to doing it. All things in time. Brodders, Ohdearme and LightBulbFun 3 Link to comment Share on other sites More sharing options...
purplebargeken Posted September 15, 2019 Share Posted September 15, 2019 Realised a bit of an update is required. The witches brew finally soaked away into the bores which remain fairly welded in place. The thermostat was removed and the coolant was cunningly replaced by a solid crystalline mass at some point in time. It's fucking fucked mate. Anyhoo. I have been slowly accruing bits for the car and have found seat covers to fettle and they will replace the original knackered ones. I have a replacement engine, gearbox and subframe in the other, now empty garage. I am stripping the new subframe of dirt, old paint and surface rust in preparation for rust killing and painting. The engine will be separated from the subframe so that I can do a proper job on the subframe as well as take off the sump to clean it all up. I have a spare set of steering rack polybushes which will be fitted. A service will be carried out and all the missing bits replaced with stuff from the original car. I will sort out the bodywork in the engine bay when I get rid of the old lump. It'll make it easier to sort with proper access. I need to get my arse in gear as I have about 2 months and a bit before I have to vacate the council lock up as they are refurbing the whole lot. I may just insure the red one, it is tax and MOT exempt and park it up outside the house where I can work on it until the garage is sorted. It'll be road legal just completely immobile. Not many options available really. The temp lock up will be full of spares and stuff. paulplom, 500tops, somewhatfoolish and 2 others 5 Link to comment Share on other sites More sharing options...
purplebargeken Posted November 19, 2019 Share Posted November 19, 2019 . andy18s 1 Link to comment Share on other sites More sharing options...
purplebargeken Posted November 23, 2019 Share Posted November 23, 2019 Whilst this languishes in the for sale thread I thought that I would remove all of the bagged and tagged stuff out of the garage and lob it in the loft until something happens one way or the other. This will keep the bits safe and make some room in the garage. I had the radiator in the boot of the Rover so I thought it prudent to take it out and give it a good flush. Happily it is all fine and dandy, just a few seconds worth of slightly rusty water came out with flushing and back flushing. After that a nice clean steady flow. Good that nothing apart from a cosmetic tidy up will be needed on the radiator at least. Brodders is hoping to pop over tomorrow so I would like us to try and get the spare engine and subframe separated so that I can carry on cleaning up the subframe, removing the sump and cleaning it out while it is suspended from the engine crane. I already have the appropriate sump gasket so no hardship there. . SiC 1 Link to comment Share on other sites More sharing options...
purplebargeken Posted November 23, 2019 Share Posted November 23, 2019 Meant to add that the planned development and refurb of the garages has been cancelled. The council letter said that they would be evaluating the entire stock of garages at some point. To me that means that they will likely evaluate the worthwhileness of keeping the garages in use against the revenue generation provided by knocking them down, making the spaces into parking spots and then having it all permit controlled. Maybe. SiC 1 Link to comment Share on other sites More sharing options...
purplebargeken Posted November 24, 2019 Share Posted November 24, 2019 Anyhow, garage woes put aside until something happens. Brodders dieseled over in a very tidy Pug obtained via these hallowed beige pages. Together we skilfully prised apart the gearbox, engine and subframe that has been sitting in the garage for many weeks. I can now crack on with cleaning and painting the subframe, cleaning the engine and doing the necessary to get it serviced and settled. Then the dead engine and knackered subframe in the 2 door Toledo will be removed and binned. Then lobbing in the good bits will happen. Tamworthbay, Brodders, andy18s and 1 other 4 Link to comment Share on other sites More sharing options...
purplebargeken Posted December 4, 2019 Share Posted December 4, 2019 Replacement subframe and engine cleaning and tidying is in progress. Subframe is very solid indeed and is awaiting delivery of some hopefully effective paint stripper for those awkward little places. I've ordered new rear subframe poly bushes and will get the front ones after christmas. I am hoping that the cup washers from the original subframe will be reusable along with the bolts and penny washers as the cup washers are pricey for what they are. Just need to unbolt the prop at the gearbox end and unbolt the brake line fasteners and shock absorbers and the original subframe and so on should pop out. The engine and subframe are scrap anyway, I shall put the gearbox to one side for now. Anyone want to help? Link to comment Share on other sites More sharing options...
purplebargeken Posted December 5, 2019 Share Posted December 5, 2019 Paint stripper has landed. Engine enamel ordered (black). More subframe work at the weekend. scdan4, paulplom and Tamworthbay 3 Link to comment Share on other sites More sharing options...
Brodders Posted December 5, 2019 Share Posted December 5, 2019 Sounds good and glad things are going along. I am free some weekends this month, so may be able to nip down and help out with getting the stuff out of the car. Link to comment Share on other sites More sharing options...
purplebargeken Posted December 5, 2019 Share Posted December 5, 2019 Thanks mate. That'd be cool, do you want to PM me with some availability dates and we can make suitable arrangements to sort this bugger out Poly bushes have landed today. Just need to see if the cup washers are usable from the original subframe. Link to comment Share on other sites More sharing options...
Crackers Posted December 6, 2019 Share Posted December 6, 2019 Good thread this. Mega soft spot for old Triumphs. purplebargeken 1 Link to comment Share on other sites More sharing options...
purplebargeken Posted December 8, 2019 Share Posted December 8, 2019 Spent about 5 hours working on the subframe with a selection of knotted wire wheels, flap disk and electric file sander. Am getting there! Most of the crappy paint has now been removed, hopefully by the weekend I should have it coated in rust killer. Thankfully the subframe is very solid indeed, a few areas of pitting on the underneath but what do you expect. This is the first time I will have ever done a resto on a subframe and it is a ball ache with all the hidden away, hard to get to bits. Hopefully this will last a long time once completed.. LightBulbFun 1 Link to comment Share on other sites More sharing options...
purplebargeken Posted December 10, 2019 Share Posted December 10, 2019 Lock up blocked by some silly cows Golf. No answer to my knocking on the door so..... Subframe mostly stripped now and some rust killing done on the subframe and the engine block. Bit more to be done on Wednesday and at the weekend then painting should commence. rusty998 and Brodders 2 Link to comment Share on other sites More sharing options...
purplebargeken Posted December 14, 2019 Share Posted December 14, 2019 Sum pikturs ov fings happenin. aldo135, SiC, GrumpiusMaximus and 6 others 9 Link to comment Share on other sites More sharing options...
purplebargeken Posted December 14, 2019 Share Posted December 14, 2019 So, there it is. Engine is now out as is t he gearbox! Mate had a free day so he popped over to help (do most of it). The subframe is still in as the OS front nut and bolt are seized, I will have to cut it out. The subframe can then be removed. Just have to move a couple of pipes out of the way then I can strip down the chassis rails and tidy up the bits that would normally be difficult to access with everything in place. I will then fit the new engine and subframe using poly bushes when everything is cleaned and painted. I can then fit the ancillaries after cleaning them up in the first instance. New nuts and bolts will be used all round. danthecapriman 1 Link to comment Share on other sites More sharing options...
purplebargeken Posted December 14, 2019 Share Posted December 14, 2019 The engine mounts are in great shape and are original Metalastic ones, they will be cleaned up and re-used. I need a new gearbox mount as the one on there looks like soggy chewed up licorice. Nasty. I will have to use the spare gearbox as the original one to the 2 door is a different type and I think the splines are different. Shame really as the clutch fitted looked unused. I shall have a good look though, just in case. Andyrew, Bren, Tamworthbay and 1 other 4 Link to comment Share on other sites More sharing options...
purplebargeken Posted December 15, 2019 Share Posted December 15, 2019 New gearbox mount priced up. A whopping £7.14. so not bad really Today saw more subframe cleaning up. Nearly done now. Tamworthbay, LightBulbFun and Brodders 3 Link to comment Share on other sites More sharing options...
purplebargeken Posted December 15, 2019 Share Posted December 15, 2019 The most irritating thing about cleaning up the subframe has been the sheer number of nooks and crannies to contend with. Thankfully I have a good selection of wire brush attachments for the drill. Just have to be methodical I guess. At least this one is nice and solid and will look quite smart when painted up. There is also the bonus of it having a front ARB fitted which wasn't a thing on the early cars. Link to comment Share on other sites More sharing options...
purplebargeken Posted December 15, 2019 Share Posted December 15, 2019 Hey hey, found it cheaper @ £4.98 LightBulbFun 1 Link to comment Share on other sites More sharing options...
Yoss Posted December 16, 2019 Share Posted December 16, 2019 Front ARB is one of the best things you can do to these cars. I've got uprated springs and shocks on mine too but I put the ARB on first and that made more difference on its own than the stiffer springs. Obviously you need the lower front struts from an ARB car too as they have the corresponding holes in. purplebargeken 1 Link to comment Share on other sites More sharing options...
purplebargeken Posted December 17, 2019 Share Posted December 17, 2019 New 'lecky file belts have arrived and will see action tomorrow. That should bring the cleaning up of the subframe to an end. Rust killing and painting should occur at the weekend. Link to comment Share on other sites More sharing options...
purplebargeken Posted December 18, 2019 Share Posted December 18, 2019 Subframe sripping completed. All cleaned and wiped down. Rust killing will occur on Friday as will the start of cleaning up the underneath of the Toledo (just where I will have limited access when the subframe goes back in), so that will be chassis rails and local bits to them. Then finish off the engine work. LightBulbFun and Brodders 2 Link to comment Share on other sites More sharing options...
purplebargeken Posted December 20, 2019 Share Posted December 20, 2019 Several layers of red oxide applied to the top and both sides of the subframe. Looks fucking good. I'll leave it to dry properly, then flip it over and do the other side. I haz pleased face. tooSavvy, adw1977, Six-cylinder and 3 others 6 Link to comment Share on other sites More sharing options...

Recommended Posts
Create an account or sign in to comment
You need to be a member in order to leave a comment
Create an account
Sign up for a new account in our community. It's easy!
Register a new accountSign in
Already have an account? Sign in here.
Sign In Now