richardthestag Posted March 4, 2019 Author Share Posted March 4, 2019 Here’s a less sweary video about a familiar early Range Rover. ah fatha thestags car Banger Kenny 1 Link to comment Share on other sites More sharing options...
richardthestag Posted March 4, 2019 Author Share Posted March 4, 2019 Sorry for the blurry phone picture. The holes are 1/8" diameter - not sure what that equates to in that new fangled metrical system... Apparently it helps the powder flow better. You should also check the seal on your powder tub to the gun as it can be a bit leaky - mine is fine but my mate's lets a small but steady stream of powder escape - nothing that can't be fixed though. Looking forward to seeing your results. IMG_20190302_1653156.jpg Cheers Clanger. going to be having a go today Link to comment Share on other sites More sharing options...
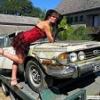
richardthestag Posted March 9, 2019 Author Share Posted March 9, 2019 sup shitters latest instalment in the daily joy that is now my career Was down in Devon just over a week ago. Had a nice day off on Friday 1st March as my Nephew "passed out" base training and is now signed up for Royal Navy. great day out and very proud of what he has achieved. New "pattern" solenoid arrived for the Lucas starter. fitted and tested fine. Installed into car and now starter engages properly. While I had my nephews around I employed muscle in Poly Tunnel frame erection. too windy to pull the cover on, I still need to bang in the anchor tubes and align everything. not bad for just under 2 hours work. I knew that the windscreen was fucked, welding and grinder splatter, leaving it installed while I did renovations did not improve it's situation. I liked this shot with Fatha thestags car looking on. Rimz are finally back from the Powder Coaters, look most fine. ready for tyres which are already in the unit. next up because I was expecting the roof panel back from the paintshop I had to bite the bullet and get on with the closing panel that sits on the rear goalpost just above the top tailgate. it is there to prevent rain water etc finding its way into the car when motoring. Trial fitted a later top tailgate and had to do some minor trimming so that the top tailgate would lift without snagging it. Got a powder coater Eastwood Dual Voltage jobby, here I am prepping the next batch. Learning on the job. I did a review on youtube of my findings - still uploading I will add a link later for anyone interested this is the damper part of the front crank pulley, cannot powder coat because I think the rubber damper might melt at the 230 degrees needed to start the powder curing process. so Hammerited. It was still sticky next day, powder coat takes approve 40 mins and is ready to fit. this is the crank and PAS pump bits completed and installed onto the engine, looks really good. the more stuff that I fit back onto the car the less time I seem to waste looking for things that I removed 2 years ago. However I have thus far been unable to locate the bracket that mounts the choke pull the the drivers a post. This one was "borrowed" from RedShed so that I could make a pattern/template. I folded one up out of 1mm steel to get a feel for the folding order. Need to make one for real out of 2.3mm (11 gauge) steel now. Power Steering reservoir coated and looking nice more to come The Moog, vulgalour, Exiled_Tat_Gatherer and 15 others 18 Link to comment Share on other sites More sharing options...
Dick Longbridge Posted March 9, 2019 Share Posted March 9, 2019 Looks like you've broken the back of this beast now. What a massive labour of love!Thanks for sharing - it's refreshing to read a quality resto thread in amongst the ww2 style blitz elsewhere on here. Have you got a deadline in mind? LightBulbFun and timolloyd 2 Link to comment Share on other sites More sharing options...
Tickman Posted March 9, 2019 Share Posted March 9, 2019 I had missed all of February updates and just read through. Excellent progress being made. LightBulbFun and richardthestag 2 Link to comment Share on other sites More sharing options...
richardthestag Posted March 9, 2019 Author Share Posted March 9, 2019 the latter part of this week was supposed to be installing the passenger door but paint reaction on the passenger a post means that I will put this off until next week. Still plenty of stuff to though This is supposed to show the horrendous scratches to the side fixed glass. I am looking at options to try polishing them out.. Any tips? Rockers covers coated, maybe need to go a shade darker. jury is out on that. Painted the top of the rear goalpost, looks good checking out my extensive stock of NSR wing panels and every one of them is rotted in the same place, where the inner arch rubber seal touches the outer wing. gah In other great news the roof panel has some extensive branch/offroad damage which had been filled. body shop still working on it. they think it can be saved. will find out next week fuel tank was cleaned and sealed using rustbuster products tailgate seal is a twat to fit. had to work on the trim to get the seal to sit in it. now it needs paint which I lost enthusiasm to do this week. Will be fixed next week then bolted the fuel tank into the chassis lastly sorted the windscreen seal which cleaned up like new with soapy water, panel wipe and then silicon spray eastwood powder coater review I posted Dick Longbridge, Momentary Lapse Of Reason, somewhatfoolish and 9 others 12 Link to comment Share on other sites More sharing options...
richardthestag Posted March 9, 2019 Author Share Posted March 9, 2019 Looks like you've broken the back of this beast now. What a massive labour of love!Thanks for sharing - it's refreshing to read a quality resto thread in amongst the ww2 style blitz elsewhere on here.Have you got a deadline in mind? This week I do feel like the back is broken. I want to get the engine running and tuned up end of this coming week. Hope to have the MOT sorted before end of this month. might look like a tall order but it is closer than it looks LightBulbFun, Dick Longbridge, Springer and 1 other 4 Link to comment Share on other sites More sharing options...
N Dentressangle Posted March 9, 2019 Share Posted March 9, 2019 T cut or jewellers rouge is supposed to be OK at getting scratches out of glass, or 2000 grit W&D if they're deep, followed by the previous two potions. Excellent progress - is this one going to be sold as it's now a business? richardthestag 1 Link to comment Share on other sites More sharing options...
LightBulbFun Posted March 9, 2019 Share Posted March 9, 2019 that powder coating stuff looks bloody amazing, does remind me a lot of how a toner based photo copier works would be pretty damn useful for vintage lighting restorations, if there was an oven you could fit an 8ft fluorescent fitting into (good video too ) richardthestag 1 Link to comment Share on other sites More sharing options...
richardthestag Posted March 10, 2019 Author Share Posted March 10, 2019 T cut or jewellers rouge is supposed to be OK at getting scratches out of glass, or 2000 grit W&D if they're deep, followed by the previous two potions. Excellent progress - is this one going to be sold as it's now a business? this is kind of the route that I was going towards, I tried some 1500 grade wet and dry on an edge and it had a result. I think it will need to be very wet and very soapy else I will just add to the scratches. Yes this one will need to be sold to pay for the next one plus living expenses. There are 5 more wrecks to go, reckon on 2 per year with a bit of series work to fill some gaps. Maybe a small retail ecommerce project for repair panels and unobtainium bits that I have found a suitable replacement for. I owe Fatha thestag a wedge of cash, some of which he will pay me to sort a few niggles out on his White RR. That will be the next one. Then my daily, now in it's 26th year, needs a going over mainly in the front inner wing dept. To which I also plan to fit new brake pipes and recon calipers, replace the steel fuel line and give it a lick of paint to get it looking smart again. Then I am not sure, the bobtail may be next because I like a challenge, but DVLA are being a bit slow on issuing me with a v5 and I am not touching it until then. Sigmund Fraud, somewhatfoolish, LightBulbFun and 1 other 4 Link to comment Share on other sites More sharing options...
N Dentressangle Posted March 10, 2019 Share Posted March 10, 2019 Sounds like a plan. Look forward to seeing that poor old bobtail get the treatment! richardthestag and LightBulbFun 2 Link to comment Share on other sites More sharing options...
timolloyd Posted March 10, 2019 Share Posted March 10, 2019 Can you get heritage certificates for the vehicles you are restoring? Is it worth it in terms of resale?I enjoyed your detective work on colours and reg numbers in an earlier video. richardthestag and LightBulbFun 2 Link to comment Share on other sites More sharing options...
Momentary Lapse Of Reason Posted March 10, 2019 Share Posted March 10, 2019 I'd like to suggest you make up a way of suspending your oven rack from the roof with a way of turning it thro 360+ degrees for when you are coating. I think you will find that holding it up with one hand will become a bit wearing. Also if you make a "shower curtain" around three sides with plastic sheet that comes down into a bucket any powder that escapes will not go all other the place. I used to use Dupoint epoxy primer powder coat first which help fill in pitting but if you need a high temperature filler then https://www.wheelpaints.co.uk/Powder-Coating-Products/Fillers/Alloywheel-Filler-Hi-Temp-1000g-57-1000-20.Html HTH Exiled_Tat_Gatherer and richardthestag 2 Link to comment Share on other sites More sharing options...
richardthestag Posted March 10, 2019 Author Share Posted March 10, 2019 Can you get heritage certificates for the vehicles you are restoring? Is it worth it in terms of resale? I enjoyed your detective work on colours and reg numbers in an earlier video. Yes I do get heritage certificates, Land Rover were pretty rubbish at recording details so all I tend to get is chassis number, original colour, build / dispatch dates and destination dealer. GDPR has royally fucked up the v5 v888 request that used to include previous owners details. Not even sure if I will be in breach of GDPR if I include previous owner history when I come to sell the car. and I love the old car archaeology stuff too. Helps me bond with it.. Mad I know LightBulbFun and Dick Longbridge 2 Link to comment Share on other sites More sharing options...
richardthestag Posted March 10, 2019 Author Share Posted March 10, 2019 I'd like to suggest you make up a way of suspending your oven rack from the roof with a way of turning it thro 360+ degrees for when you are coating. I think you will find that holding it up with one hand will become a bit wearing. Also if you make a "shower curtain" around three sides with plastic sheet that comes down into a bucket any powder that escapes will not go all other the place. I used to use Dupoint epoxy primer powder coat first which help fill in pitting but if you need a high temperature filler then https://www.wheelpaints.co.uk/Powder-Coating-Products/Fillers/Alloywheel-Filler-Hi-Temp-1000g-57-1000-20.Html HTH I had thought about 4 simple 1x1 posts on a base with turntable, make it in about 10 minutes I guess to support the shelf. I am only working with small things so that should work. Good idea on channelling the excess powder into a bucket also. I used a blowgun to redistribute it to other places in the barn but that is not really ideal Top tip be the epoxy primer. I was going to try rustbuster 4-2-1 epoxy primer in the over to see if it copes with the heat also. Link to comment Share on other sites More sharing options...
Momentary Lapse Of Reason Posted March 10, 2019 Share Posted March 10, 2019 Some (not all) wet system epoxy primers will outgas when you heat the item so you might need to do a little experimentation.I can't remember the brand name of the wet system epoxy we used, that was OK, or just use the power coat system epoxy primers. "I used a blowgun to redistribute it to other places in the barn but that is not really ideal"I used to work with someone who was proud of his ability to fart surplus powder about the walk in spray booth... richardthestag 1 Link to comment Share on other sites More sharing options...
richardthestag Posted March 20, 2019 Author Share Posted March 20, 2019 Near 2 weeks since the last update, you chaps deserve better* So what the fuck has been happening? Ups and downs but all project orientated, on the whole I am looking forwards to spring drilled out holes for early flap number plate on rear lower tailgate checked fit and identified a couple of holes that need tidying, body shop Steve said no problems Went all medieval with wire cup and prep wheels on stuff that needs powder coating or painting And filled the workshop with a thick film of dust, thank goodness for facemasks This is the unobtainium petrol filler cap from the project, the key doesnt work in it. despite much lube found a way to separate the halves and extract the lock which is utterly fused!, WIP New plugs fitted to the engine and struggled somewhat with new repro drive belts Fitted fuel pump to the chassis and then ran mix of Kunifer and ethanol friendly* hose between tank and carbs fitted return pipe to the drivers side chassis rail. Realy very easy doing it like this. Try doing it with floors in place and you will invent new profanity Then I got distracted by a trip to S Waleshire and a wobbly bonnet on the daily which turned out to be quite dangerous Vid for them interested Then I got distracted by feedback and uncertainty from one of my vids on youtube. Question was around orientation of a spacer between cam and dissy gear. as it turned out all was perfect but still 40 mins invested* Used my new frame made from old IKEA shelving to set up air filter for powder coating banged nails into the wall to hang stuff what has been chassis black'd more coming, rest yer sphincters Dick Longbridge, Banger Kenny, TagoraSX and 7 others 10 Link to comment Share on other sites More sharing options...
richardthestag Posted March 20, 2019 Author Share Posted March 20, 2019 last couple of days fun have included the following Painted passenger a-post after stripping it back to bare steel to avoid repeat of contaminationz. Then fitted the spare windscreen, triplex laminated original from 1974/1984 suspect the latter. it is in very tidy shape. PLUS the screen seal responded well finished off the tailgate seals. Fitted new passenger door seal which was an utter ballsache but a very good repro part. All of this was in prep for arrival of the painted roof panel, which has been delayed by a week because ..... etc I will not humour you with excuses. Now due mid next week definitely* Still plenty of other shite to do. Fitted repro PAS hoses from a UK based specialist. I like this kind of support of specialist engineering from UK PLC Then my 3 year old grinder caught fire! field windings got a bit warm and melted. stinky stuff. £25 and you might think it has lasted well. BUT my 30 year old anonymous unit is still going strong. Sorting out extra gauges from the centre console. Clock has to be one, then I have some matching issues for the other 3. looking into this Big delivery raised expectations after issues, ups and downs all weeks Passenger rear wing shipped was 2nd hand and not new!, irritated but the supplier agreed with me on a greatly reduced cost. Bouyed I got on with painting drivers side a and b post. B post was stripped back to bare steel because of reaction to paint. then despite blockers, panel wipes and much cleanliness it fucking happened again on the A post!!!!! FFS. deal with this next week. pissed off for now. Silicon spray from screen install is to blame. settled my sphincter with install of slam panel and bulkhead seal. on a plus side I did spend an hour shifting stuff around in the store and found everything that I thought was lost Also finished install of 2nd hand top tailgate onto my daily, replaced ignition components and also sorted out the faulty seat switches. I decided that I was not in the right place to deal with passenger door install today. largely as a result of a series of issues. It has got me thinking about how I deal with just fucking getting on with high risk jobs. I think I have the answer. I and it is getting there. thanks for reading scdan4, Momentary Lapse Of Reason, Sigmund Fraud and 11 others 14 Link to comment Share on other sites More sharing options...
richardthestag Posted March 20, 2019 Author Share Posted March 20, 2019 Episode 8 of the YooToob story on this car, same stuff as above etc LightBulbFun, Sigmund Fraud, Dick Longbridge and 2 others 5 Link to comment Share on other sites More sharing options...
richardthestag Posted March 31, 2019 Author Share Posted March 31, 2019 latest on the project, not moving as fast as I would like but lots of little jobs are taking far too long because.... just because. On top of all this the Bobtail has an export marker which I am trying to work through. I am not giving up on this one. So where am I with project #001? target for the week was to fit all nearside panels, paint the drivers side where the paint reacted and get the damned roof on Shell and rear wing fitting started with promise Fatha thestags ancient cat checking on progress all the way Got distracted, like I seem to, by stripping down the old top tailgate. with a view to using the glass in a new aluminium frame. Nice reflection pleased me like a cheap plastic framed mirror does to a budgerigar A short while later i found that the entire inside side of the glass panel was weighed down with fucking grinder sparks. Defo not me as the top tailgate was one of the first things off the car when I started out. result = scrap found another early rear heated screen in the stash. this one is Tripex for extra win. the terminally rusty frame was easily liberated Top tailgate was easily assembled and fitted to the car. whereapon I found that the new screen rubber is too phat. Needs clamping and steaming maybe?!? I will let you know Base coat went on drivers side after much prep, followed by a world of prep, couple of localised reactions, more prep and then primer was flatted. Reaction was caused by single pack primer reactivating by base coat thinners. under the crinkly paint the original primer was like porridge. PITA then got on with door fitting. These things are unwieldy and heavy. panel gap between door and rear wing is all over the place. lots more work required here Distracted by the remains of the tax disc holder on the screen and thought of you chaps. Anyone want it if I can get it off intact? After a day of painting, tailgates and fiddling I managed to get the door shell to line up nicely more coming coalnotdole, Dick Longbridge, LightBulbFun and 11 others 14 Link to comment Share on other sites More sharing options...
richardthestag Posted March 31, 2019 Author Share Posted March 31, 2019 After an eternity of shimming the door I fitted the front wing, which is so far out it needs a new timezone. not to worry! fitted the door glass and frame and then found that the additional and considerable weight allowed to the door to sag and no longer line up! GAAAAAAH. More work then Clear coated the drivers side and then went to collect the roof panel which might look great but has many fish eyes and a fair few high points. Not impressed is a slight understatement. Waited forever for this to be done and it looks like it ended up as a rush job from the night before! spent a big chunk of Saturday straightening up the hanger/poly tunnel frame, installing the anchor tubes ready for the cover to be pulled over... Only it is 6 foot too short, the frame not the cover. missing a hoop from what I can see. Poly project on hold. Consoled myself with a visit to the mad pub on Exmoor. Steve the landlord is having a dress down Saturday. Today started with a fresh view on door alignment and last look at the roofless car tarped up rust waiting for a cover and extra 6feet on the frame. nice and solid now though roof fitted with loads of 3m gloop body sealant 52 screws and washers to hold it tight. 22 of them in tricky places. took 4 hours. Day concluded with me getting the passenger door to fart close* then 20 mins later the hinges had sagged. bottom hinge might just be made from butter. Further investigation tomorrow morning before I possibly go medieval at the supplier. Fucked off with bodywork I might work on getting the fuel line electrics set up and start the car up tomorrow to test engine and box. Then the floor can go in. danthecapriman, Exiled_Tat_Gatherer, coalnotdole and 10 others 13 Link to comment Share on other sites More sharing options...
timolloyd Posted April 1, 2019 Share Posted April 1, 2019 Sounds frustrating, but huge respect for your perseverance. The Landlord would look amazing dressed like that behind the wheel of project number 1! richardthestag 1 Link to comment Share on other sites More sharing options...
richardthestag Posted April 1, 2019 Author Share Posted April 1, 2019 Sounds frustrating, but huge respect for your perseverance. The Landlord would look amazing dressed like that behind the wheel of project number 1! Alas the landlord is registered blind and a complete lunatic timolloyd 1 Link to comment Share on other sites More sharing options...
Rusty_Rocket Posted April 1, 2019 Share Posted April 1, 2019 Excellent progress Rich, and good luck with the business venture. Hope the DVLA doesn't dick you around much longer... richardthestag and LightBulbFun 2 Link to comment Share on other sites More sharing options...
barrett Posted April 1, 2019 Share Posted April 1, 2019 1000 internet credits. Seeing a car come together at this stage of a restoration is mega satisfying (to watch, anyway). I'm particularly looking forward to seeing those lovely fresh rims shod with HOT NEW RUBBER and the car sitting on its proper wheels again. Hubba hubba. LightBulbFun, richardthestag and timolloyd 3 Link to comment Share on other sites More sharing options...
LightBulbFun Posted April 12, 2019 Share Posted April 12, 2019 Just finished watching episode 11 on youtube of this very cool restoration serise Keep up the Awesome work! (I was wondering when you started the engine, does it need to have some sort of running in procedure after being rebuilt or is that not an issue in this case?) richardthestag 1 Link to comment Share on other sites More sharing options...
richardthestag Posted April 12, 2019 Author Share Posted April 12, 2019 Just finished watching episode 11 on youtube of this very cool restoration serise Keep up the Awesome work! (I was wondering when you started the engine, does it need to have some sort of running in procedure after being rebuilt or is that not an issue in this case?) yes it should, the cam will need running in, but then I also need to bed the cylinders in, as they are more important right now I plan to make sure it is not running too rich and set the ignition then run it for 30 mins up and down the rev range, ideally it should be on the road but that is not possible right now. LightBulbFun 1 Link to comment Share on other sites More sharing options...
richardthestag Posted April 12, 2019 Author Share Posted April 12, 2019 episode 11 if you hadn't already found out is up on yootoob Much activity with dissarpoints and rejoyces' I am now that the stage of gearbox test cannot wait any longer, main reason for lack of testing was the non functioning clutch hydraulics. Ordered a wedge of stuff in which included the slave and set of seals (arf arf) for the master. Started with the slave because it looked the cruddiest and also because fluid was getting to it I guessed that the master was at least part functioning. Swine of a job because of its location, surprising on a car this size really. Anyway slave was at fault, the piston was sticking in the bore, also managed to liberate the pushrod! gah not again. While cursing it I did some googling and found a neat method for installation which I adapted. 15 seconds of fiddling and straight in. Not wishing to tempt fate it is staying there. Clutch was bled from above, attached a tube to the bleed nipple which then routed straight up into the engine bay. My reasoning was that air would most like to go upwards to join other airs. worked a treat. fitted up the dash pod mainly to check the speedo was working as the drive is a ballsache to get to and much easier with the gearbox cover off. fixed the ignition switch wiring which had been butchered final check before action, all appears well. alas no fuel to the carbs despite much clicking from the pump. Found that fuel pickup into the tank doesn't quite* reach the 10 litres of pez that I had just lobbed in. so dunked a hose direct into pez and found that the pump while making the right noise was doing bugger all else. Lawn mower fuel tank to the rescue once more, Had to clamp the return pipe from carb to tank. However as you can see from the vid it fired up nice, had to tweak the ignition but bear in mind that this is running a base setting on then carbs, no balance nor anything. checked through the gearbox, the grind that you can hear happened when I touched the gearstick while in 2nd gear. As 1st/2nd gear selector also has reverse on it I quickly reasoned that reverse selector adjustment was required. Which I did. perfect now. all synchros are working well. fitted propshafts and new mild steel centre silencer was also fitted as lining it up is easier from above. Then trial fit the gearbox cover, with floors and heel-boards. used a 3m body seal, the floor is secured with spires and self tappers but I am struggling to get it tight enough. Going to try a couple of acme screws (hex head course thread) at intervals to get it done. next up started on with the drivers door, brimmed with knowledge from the passenger door and 2 days it took to fit out and install, I was way quicker to get to this stage. removed to fit the damned seal, found an easier way to install, check video, but a bent flat blade tin opener did greatly help. Tuesday was a grand day out to Redditch to pick up the retrimmed seats Rubs palms vigorously on thighs, omg these are beautiful. Currently locked away in a storage unit as they will be the very last thing to go into the car. Maybe the week after Easter Installed the door glass frame and minor adjustments needed... ... glass frame sticks out a little at the top and the window regulator is difficult to operate. Two issues because of the same problem, will fix on Sunday when back in Devon. In Laws are in middle of a house move over the next two weeks so struggling a little to be in the right place at the right time. Enjoy folks danthecapriman, Exiled_Tat_Gatherer, LightBulbFun and 4 others 7 Link to comment Share on other sites More sharing options...
richardthestag Posted April 12, 2019 Author Share Posted April 12, 2019 In other exciting news Some of you picked up that I was having issues getting a V5c for the bobtail due to export marker. I spoke to a nice lady at HMRC who sent me a NOVA1 form to complete. I sent this back as suggested complete with copies of V5C and purchase receipt. 1 week later DVLA sent me a fresh V5C in my name. Suggestion on another thread was that maybe the car had been to NI and re registered. Whatever I have ID and title for the car with it's original number. Yay next big project could be unbobtailing a bobtail. I am sure it is going to need a new chassis, looking into it soon Momentary Lapse Of Reason, Exiled_Tat_Gatherer, Sigmund Fraud and 5 others 8 Link to comment Share on other sites More sharing options...
Momentary Lapse Of Reason Posted April 12, 2019 Share Posted April 12, 2019 Excellent that you have got the docs for the bobtail sorted. I was playing part 11 video in the office this afternoon and one of my co-workers thinks you sound like Arthur Dustcart from Rex the Runthttps://www.comedy.co.uk/tv/rex_the_runt/characters/(I think she meant it in a complimentary sort of a way) Link to comment Share on other sites More sharing options...


Recommended Posts
Create an account or sign in to comment
You need to be a member in order to leave a comment
Create an account
Sign up for a new account in our community. It's easy!
Register a new accountSign in
Already have an account? Sign in here.
Sign In Now