Ben_O Posted September 30, 2018 Share Posted September 30, 2018 Following! Link to comment Share on other sites More sharing options...
fordmad80 Posted November 17, 2018 Share Posted November 17, 2018 Is there any updates on the sd1 Sent from my SM-G930F using Tapatalk Link to comment Share on other sites More sharing options...
JuridicalGrunt Posted December 8, 2018 Author Share Posted December 8, 2018 Evening all long time no update but steady progress has been made after finishing up the passenger side bulkhead i moved over to the drives side and did the same repair on that side. with the bulkhead repaired i moved on to making up a new end for the inner wing first i started by folding a 90 degree bend on my repair piece to make the edge that welds to the bulkhead ,then i used a shrinker stretcher to make the main shape then i finished shaiping it by hand. with that done i took the precaution of removing the clutch master cyinder brace plate, sd1s like to rust behind the bracket and then crack the bulkhead mine looked ok on the outside but had a nice layer of surface rust underneath. i cleaned every thnig up coated the bulkhead and brackets with por 15 and welded them back on. next up was a small few holes in the driver side floor pan so i cut it out and made a new section with that done i stripped the rest of the paint off the floor and painted it with por 15 with that done i decided i wanted a brake from the shell and moved on to reskinning all the doors. sd1 doors are very rot prone when removing the skins off my doors i was surpiesd at just how far the rust on the frame had got it was all the way round the edge of the frame it hadnt got through the outer skin on most doors but would would have in another few years. this is the drivers door these are some of the tools i used to remove the skin on the front doors of the sd1 the skin held by being crimped round the frame of the door with one spot weld at the bottom of the front edge of the door. it also has two stitch welds holding the top of the skin to the window frame there are also a few spot welds at the back of the door where the trim clips over. i was taught the best way to remove skins was with a 4 inch grinder with a 36 grit sanding disc using the grinder to sand throgh the edge of the door skin being carefull not to grind into the frame. once youve gone all the way round you can separate the skin with a chisel and just peel off the side of the skin that was inside the door and just lift the skin off with the skin off i could see the whole frame was covered in surface rust with a few small holes at the bottom i cleaned up the frame and repaired the small hole at the bottom and then painted the frame with por 15 next up was to prep the new skin i scuff sanded the inside with 120 grit sand paper and painted the new skin with por once that was done i slotted the new skin onto the door frame and turned the edge of the skin of using a panel hammer and a heavy dolly once that was done i refited it to the car and tweaked the door by pulling and twisting the door to get a nice gap once that was done i welded the skin to the window frame and two small welds to the bottom corners. and with that done thats one door done i have plenty more to update but i dont want to make this too long so shall do another update soon Thanks for looking Ryan TripleRich, vulgalour, Scruffy Bodger and 23 others 26 Link to comment Share on other sites More sharing options...
Heidel_Kakao Posted December 8, 2018 Share Posted December 8, 2018 Impressive stuff I wish I had bodywork skills, it prevents me from buying rusty project cars though. Link to comment Share on other sites More sharing options...
danthecapriman Posted December 8, 2018 Share Posted December 8, 2018 Great work again. You guys must go through gallons of that por paint! JuridicalGrunt 1 Link to comment Share on other sites More sharing options...
TripleRich Posted December 9, 2018 Share Posted December 9, 2018 We do get through quite a bit. We used to use cans of primer and the odd bit of stoneguard but that sucked the moisture in and started surface rusting. Most of the cars are in for major work so the shell can be in metalwork/storage for 6 months or more. The por seems to be much better but it does require more prep than say primer of schutz. Scruffy Bodger, The Old Bloke Next Door, JuridicalGrunt and 1 other 4 Link to comment Share on other sites More sharing options...
somewhatfoolish Posted December 9, 2018 Share Posted December 9, 2018 in workshop news this cavalier 8v sri is just about to start its metal work next week it has some serious rust issues in the rear end due to an old crash repair but other wise is pretty solid. IMG_20180407_170935.jpgIMG_20180407_170939.jpgIMG_20180407_170945.jpgIMG_20180407_170950.jpgIMG_20180407_170955.jpg Thanks for lookingHas that shell been chemically stripped? What's your experience with this, cost aside does it have negatives? Link to comment Share on other sites More sharing options...
JuridicalGrunt Posted December 10, 2018 Author Share Posted December 10, 2018 Has that shell been chemically stripped? What's your experience with this, cost aside does it have negatives?yeah that shell has been dipped one negative with it is it gets coated in a anti rust solution before it comes back but it will only hold the rust back for so long so cant leave it for a long period of time before working on it. you also need to have it e coated after finishing the repairs as all the box sections in the shell are bare steel. somewhatfoolish and Eddie Honda 2 Link to comment Share on other sites More sharing options...
TripleRich Posted December 10, 2018 Share Posted December 10, 2018 We've also had shells come back with more dents than they left with. Some of these places are not as careful as you'd like them to be. Link to comment Share on other sites More sharing options...
JuridicalGrunt Posted December 16, 2018 Author Share Posted December 16, 2018 Morning all After finishing skinning the drives door i did all the other doors. instead of showing every other door as there pretty much the same here is a picture of them of them finished and fitted to the car. With the doors all done it was time finish up some small repairs on the front end like tidying up the remaining sectons of the wing rails and preping the inner front panels like the rad box supports battery tray supports and various little pieces. I put the radiator in and lined up the supports and welded them in place. One issue i needed to sort out was the check strap on the drivers door. on series 1 sd1s this is a non removeable part at some point in the past probably when it had its accident they tried to ajust the door hinge by hitting it with a hammer. unfortunatly they snapped the check strap, what i had to do was buy an entire a post assembly from rimmer bros that comes complete with the hinges , but these hinges are for a series 2 car so look slightly diffrent but work perfectly so i set to swapping the hinge over. With that swapped over it now has a functional check strap. next up was to prep the front wings ready to fit. And after a final fit up it was time to commit and weld the wings on and the grill panel . and here it is after being welded and fitted up. And with that a big milestone has been achived as all the outer pannel work is done, and next up is to put it on a body roller and strip the undeseal, its getting really close to paint. Thanks for looking Ryan danthecapriman, Rocket88, Joey spud and 17 others 20 Link to comment Share on other sites More sharing options...
JuridicalGrunt Posted February 3, 2019 Author Share Posted February 3, 2019 Evening all with the outer panel work done it was time to strip it down and put it on a body roller to clean up the underside and do any final repairs. so i made up some mounts for the roller set up the lifting aframes and mounted it on the roller. my first proper look under it and it was looking pretty good. now for the really boring task of removing all the old underseal,i found on this the best way to get it off was with a heat gun and a scraper the wire wheels just made a mess. with the underseal removed i was pleasantly surpised i found one pin hole a few dents and some welds that needed cleaning up. i knocked out most of the dents but left a few in the chassis legs that run under the floor as their was no access to them from the other side and didnt want to slice the leg open to remove them their only small dents so im not too concerned. one thing i did need to do was one nut on the gearbox mount had been crossthreaded some time in the past, i ran a tap through hoping it would clean up but the threads were just too damaged so i had to remove it. with that done it was just a few small jobs left like filling in some small holes fitting some missing wiring tags and replacing that last broken door hinge. and with that done i think thats all the metalwork done on the shell,so with that milestone reached i went out and bought all the paint primer lacquer and upol raptor to paint and underseal the car.so next up should be prepping the underside for primer seamseal and raptor. Thanks for looking Ryan adw1977, LightBulbFun, Skizzer and 15 others 18 Link to comment Share on other sites More sharing options...
Scruffy Bodger Posted February 3, 2019 Share Posted February 3, 2019 I happened across a video the other day and they used dry ice to remove that rubbish. No idea on pros or cons of the process/cost but I know to do it manually is an absolute arse.Still loving the updates by the way JuridicalGrunt 1 Link to comment Share on other sites More sharing options...
Maurice Marina Posted February 3, 2019 Share Posted February 3, 2019 Some work there. Amazing stuff. JuridicalGrunt 1 Link to comment Share on other sites More sharing options...
Bren Posted February 4, 2019 Share Posted February 4, 2019 Sterling work. Rehanging four SD1 doors? I would sooner have a fully grown cactus forced up my rectum by compressed air than hang doors on an SD1 again. JuridicalGrunt and PhilA 2 Link to comment Share on other sites More sharing options...
JuridicalGrunt Posted March 31, 2019 Author Share Posted March 31, 2019 Morning all i had a week off so it was time to try to push it along in paint prep.time to remove the last bit of underseal on the sills as i wanted to prime them while it was on the body roller. the sills shall be coated in smooth upol raptor when they are painted.next was to key up the underside and a few of the outer panels ready for the epoxy primer. with that done it was time to push it into the booth and start priming it, its amizing what a bit of primer does to make it feeling like your getting somewhere, with it back out the booth it was time to key up the primer and seam seal. then back in the booth to have the upol black rapotor sprayed on. it took six bottles of raptor to do it and im really happy with the finish. its getting quite exiting now as its getting closer and closer to paint. Thanks for looking Ryan Joey spud, MrFarkinBasz, Skizzer and 10 others 13 Link to comment Share on other sites More sharing options...
Amishtat Posted March 31, 2019 Share Posted March 31, 2019 Having just read this thread from start to finish all I can say is that I'm in awe of your patience and skills. This will be amazing when you're finished. LightBulbFun and JuridicalGrunt 2 Link to comment Share on other sites More sharing options...
danthecapriman Posted March 31, 2019 Share Posted March 31, 2019 That looks absolutely superb, lovely and clean, tidy and no awful lumps and bumps from bodge ups and MOT patches blobbed on etc etc. It gives you such a huge boost to see the final coats start to go on and build up, its like the long time consuming bodywork stage is coming to an end and your onto the rebuild rather than fixing rust and damage. Great stuff! Skizzer and JuridicalGrunt 2 Link to comment Share on other sites More sharing options...
Timewaster Posted March 31, 2019 Share Posted March 31, 2019 Sterling work.See what you did there. JuridicalGrunt 1 Link to comment Share on other sites More sharing options...
Dick Dastardly Posted June 14, 2019 Share Posted June 14, 2019 Any more news on the SD1 ?? Is it painted now?? Link to comment Share on other sites More sharing options...
JuridicalGrunt Posted August 3, 2019 Author Share Posted August 3, 2019 Hello all Right its been a long time since i last updated this as work has been mega busy here is a few pictures of the last car i worked on a cavalier turbo which needed a fair bit of work. but on with the sd1 the plan changed i was originally going to paint it myself but after talking with our painters i decided to let them do it as i know painting is not my strong suit so after a chat with my boss it was booked in for paint.first up was to get the shell keyed up and primed and then rubbed back and the filler work started. all the work on the car is being done by our apprentice luke who is doing amazingly well and this will be his first metallic full respray, after luke finished the filler work the car went in for its second colored primer which for this is a cool peppermint green. after that next up was to paint the inside, i choose was to use tintable upol raptor tinted to the colour of the car and sprayed with a spay gun so its perfecty smooth. this just gives an extra layer of protection on the insde. after that luke moved on to flatting and topcoationg the door shuts, now im going to tease a little as i want to save the full reveal for when the car is fully painted but here is a little tease. this straight off the spray gun and the car will be flat and polished when its done, im getting really exited now the car is looking fantastic and i cant wait to start putting it back togeather. Thanks for looking Ryan Scruffy Bodger, bunglebus, Joey spud and 17 others 20 Link to comment Share on other sites More sharing options...
Scruffy Bodger Posted August 3, 2019 Share Posted August 3, 2019 Wow, that's going to look amazing when done! Glad that floor-pan came in useful in the end, so many Cavvy Turbos didn't make it through the Nova raping days it's good to know I helped save one JuridicalGrunt and Burnside 2 Link to comment Share on other sites More sharing options...
danthecapriman Posted August 3, 2019 Share Posted August 3, 2019 Superb! Your Rover looks stunning already and the teaser pic paint looks gorgeous! Its great to see some newer(!) cars like the Cav starting to get ‘the treatment’ nowadays too. It’s a given now seeing 70’s and older cars getting bare metal restorations and things done to them but seeing some 90’s cars slowly coming up for the same sort of love and attention is good to see. Scruffy Bodger, Burnside, mitsisigma01 and 1 other 4 Link to comment Share on other sites More sharing options...
JuridicalGrunt Posted December 31, 2019 Author Share Posted December 31, 2019 Hello all Its been a long time since i last update this, the last few months have been pretty busy and i got another car to add to the collection. Its a left hand drive 1964 hillman super mix that used to belong to a customer he decided he wanted to sell it and i fell in love with it and decided i had to have it, the car was in amazing condition having only had some small plates on the sills and being completely original every where else,ive put 2 new sills on it and new clutch and it runs and drives very well, it needs some electrical work then i can get it an mot and registed. But onto the rover the paint work is done its just waiting for a polish then i shall upload some pictures but while it was in paint i decided it was time to crack on with the mechanical work,so i pulled the engine and subframe and rear axel out of storage to strip them down. this is the first time they have seen the light of day in nearly 3 years.first up was to remove the engine from the subframe as im going to work on the engine last.then i stripped the subframe down to see what was useable Which as it turned out was not alot. once i started pulling it apart i started running into problems, first was the anti roll bar had rusted badly where the bushes go into the lower arms so it was junk. next up was strip the strut legs down i had hoped to reuse the legs but change the damper inserts,but i couldnt find new inserts and when trying to remove the nuts from the top of damper caseing it turns out rover made the nuts out of die cast zinc and even after heat i destroyed the nut trying to get it undone. and then upon removing the hub from the passnger side strut leg i found the bearing had spun destroying the spindle Which is part of the strut leg , the hub was destroyed because the race had also spun. so at this point the useable parts on the stuts was one hub the brake dust shields and the springs everything else was junk. so after doing some shopping i got everything to rebuild the struts. and thats one rebulit leg i did the same to the other and they are ready to refit to the subframe. i also painted the track control arms and poly bushed them ready to go on. next i went onto the rear axel. my main concern with this was that it might have no oil in it the back plate looked wet when i got the car but in my rush to put it on the road at the time i didnt check it. but when i pulled the back plate it was full of nice clean oil and looked in great shape so i made a decision.i bought bearings and seals for the whole axel but seen as i wasnt leaking any oil out of the half shaft seals or anywere else, it didnt wine or clunk i decided to leave it alone and clean and paint the axel and see how it goes if it does leak its an easy job to get the axel out. i filled the axel with new gear oil so its ready to have the brakes done. i had to buy new tie bars as the they had also rusted in the bushes i also got a complete new watts linkage as it was cheaper than buying just the bushes so i pained them ready to fit. next up i refurbished the rear dampers now this car has the nivomat rear dampers and they are no longer available luckily my car had new ones just before i bought it so they were in good nick i manged to get 2 pairs of used ones a few years ago as spares which came in handy as one on mine needed a new dust boot. a new old stock dust boot came up on ebay a litlle wile ago and they wanted 40 quid for one . i got the paint colour matched of them before i stripped the paint off but with them done they are ready to refit. ive got a bit more to update but dont want to make this too long. i hope everyone had a good christmas and great new year. Ryan Skizzer, mullett471, taxi paul and 13 others 16 Link to comment Share on other sites More sharing options...
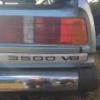
JuridicalGrunt Posted January 12, 2020 Author Share Posted January 12, 2020 Hello all the paintwork has been finished it has been polished so here it is. I am absolutely over the moon with it our apprentice luke has poured his heart and soul into it and gone the extra mile on it i really cant thank him enough.so the rebulid can begin so i really wanted to put the badges back on the rear i got a new 3500 v8 badge as mine was really worn out but i saved the rover badge. i cleaned and fiited the rear lights with new seals. also all the doors and boot and bonnet have brand new seals. ive been looking forward to fitting my brand new bonnet badge for a long time so on it went along with plastic insert for the grill. so next up from my parts collection is a pair of nos headlights i only got to fit one as one needed the frame repainting and a nos complete indicator unit. I am really exited to start the rebuild now and should be able to get it on its wheels fairly shortly. Thanks for looking Ryan Coprolalia, GrumpiusMaximus, Fumbler and 22 others 25 Link to comment Share on other sites More sharing options...
Fumbler Posted January 12, 2020 Share Posted January 12, 2020 That looks absolutely wonderful. Sudsprint and JuridicalGrunt 2 Link to comment Share on other sites More sharing options...
danthecapriman Posted January 12, 2020 Share Posted January 12, 2020 Fuck me! That is absolutely stunning. What a lovely colour, really suits the car. mitsisigma01, mullett471, Sudsprint and 1 other 4 Link to comment Share on other sites More sharing options...
JuridicalGrunt Posted January 12, 2020 Author Share Posted January 12, 2020 3 hours ago, danthecapriman said: Fuck me! That is absolutely stunning. What a lovely colour, really suits the car. Im completely in love with the colour you put it in the sun and flips between sea green and a various shades of blue.your capri and it would make a good pair hopefuly they can meet one day . danthecapriman 1 Link to comment Share on other sites More sharing options...
Broadsword Posted January 12, 2020 Share Posted January 12, 2020 Just caught up with this thread. I have to say the SD1 looks absolutely stunning. Fantastic colour! JuridicalGrunt 1 Link to comment Share on other sites More sharing options...
Skizzer Posted January 12, 2020 Share Posted January 12, 2020 (edited) Oh my goodness. That is stunning. Edited January 12, 2020 by Skizzer I’ve just used the same word as everyone else. No points for style — but it’s the right word. JuridicalGrunt 1 Link to comment Share on other sites More sharing options...
JuridicalGrunt Posted January 26, 2020 Author Share Posted January 26, 2020 Evening all i have made some more progress first up i finished fitting the new headlight and indicator to the car i also painted fitted the bonnet and boot latch. next up was to clean up and polish the front bumper but i needed to repir the number plate surround. on series 1 sd1s these sounds are usually broken as they stick out , now mine wasnt too bad only one side had cracked i fixed this a few years ago but during storage it cracked again,so i set to fixing it. so i keyed up the inisde and used a little bit of fibergalss then smoothed the outside down and painted it satin black and refitted it to the cleaned and polished bumper. here it is on the car with that it really starts to look like a car again. next up was to do the same to the rear bumper on that i had repair one of the jack tubes as the end of it had rusted out i thought about getting a new on but these bolt into the rubber corners and the bolts didnt want to move and i didnt want to ruin a good corner so i repired it. cleaned and polished and here it is on the car next up i need to get the running gear fitted so i can get it off the dolly so i fitted my rebult struts to the car and cleaned and painted the new subframe ready to start putting it togeather. next up will be fitting up the subrame, its getting really exiting as its close to being able to go onto its wheels. Many thanks Ryan timolloyd, cort1977, burraston2006 and 31 others 34 Link to comment Share on other sites More sharing options...


Recommended Posts
Create an account or sign in to comment
You need to be a member in order to leave a comment
Create an account
Sign up for a new account in our community. It's easy!
Register a new accountSign in
Already have an account? Sign in here.
Sign In Now