spartacus Posted July 1, 2019 Author Share Posted July 1, 2019 I need a driver's seat belt receiver if anybody has one, also a filler cap and key. Link to comment Share on other sites More sharing options...
DoctorRetro Posted July 1, 2019 Share Posted July 1, 2019 23 minutes ago, spartacus said: Are you the man of many Pandas, of which some had to go? No, I'm not that lucky. I do know a guy though, but lost contact. He's in Essex too, and has many Pandas, mostly modified. Was working on a V-tec powered one and a V6. Link to comment Share on other sites More sharing options...
BorniteIdentity Posted July 1, 2019 Share Posted July 1, 2019 That guy was called ForFiatsSake and was the last known keeper of the AS Y10 loaner. Link to comment Share on other sites More sharing options...
spartacus Posted July 1, 2019 Author Share Posted July 1, 2019 That's him! What happened to him? Link to comment Share on other sites More sharing options...
Ian_Fearn Posted July 1, 2019 Share Posted July 1, 2019 Pretty sure Forfiatssake was a guy called John. I bought my Panda off him. He’s a regular over on the classic panda FB group. Link to comment Share on other sites More sharing options...
spartacus Posted July 1, 2019 Author Share Posted July 1, 2019 Two steps forward and all that... I took the battery off it last night to charge it up, it certainly seems to have worked as it started the car about 5 times this evening. I also made a thick earth strap from engine to body, that completely cured all electrical problems, even the wash wipe worked as soon as I pulled the stalk. Then I tried to drive it out of the garage, it was clear that there was a brake stuck on somewhere, after jacking both sides up, which involved bumping the car across the garage so I could squeeze between it and the wall, it was plain that the drivers front was seized on. I had a look at MOT type stuff while I was poking around and it all looks pretty good, I've a minor list to work through, then I'll take it for a test! New tyre needed, I have the spare but the back wheel has to come off anyway. I can't bring myself to use the spare, I'm sure it's original and unused. Free off/replace caliper. Sort seat belt receiver out for drivers belt, it's obviously got stuck in the past and somebody's destroyed it to release the belt. Oil service. Burnside, uk_senator, Bucketeer and 1 other 4 Link to comment Share on other sites More sharing options...
lanciamatt Posted July 1, 2019 Share Posted July 1, 2019 Is the fuel cap same as mk1 uno, if so I think ive got one from my many uno days. Link to comment Share on other sites More sharing options...
spartacus Posted July 1, 2019 Author Share Posted July 1, 2019 I think so, it's just a small cap, it sort of sits flush and you lift it out with the key. Link to comment Share on other sites More sharing options...
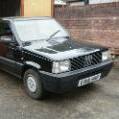
Burnside Posted July 2, 2019 Share Posted July 2, 2019 Nice Car haven't seen a Panda Super in ages ! My Brother had a 89 Panda 750L in White and also my sister had a 94 Panda 999cc CLX in Black as there first cars. Both were great fun. Uno MK1 cap will fit fine. Look forward to seeing future updates with it too. Link to comment Share on other sites More sharing options...
Dan302 Posted July 3, 2019 Share Posted July 3, 2019 My mate had a Panda as his first car I remember 3 of us sleeping in it at campsite visiting a cider centre not the comfiest night I've ever had. Link to comment Share on other sites More sharing options...
spartacus Posted April 23, 2020 Author Share Posted April 23, 2020 Holy Thread Resur... Etc etc. Mrs Spart has been working nights for the last few days and the lack of work and good weather enticed me out into the garage for a spell of Panda fondling. I'd taken the front bumper off to straighten out the mounting bracket but not got any further than that. The front panel wasn't in a bad way by any means but this is a Fiat, so any opportunity to help stem the invasion of rust should be taken. By a stroke of luck I had a bottle of Kurust or similar in my van, along with a tin of Fortress straight to rust paint. I forgot to take a picture after I'd painted it but if you could just try and imagine the same view but with no rust and very shiny, that'll do. The front bumper was minging, so I have it a good wash them a quick wipe over with WD40, it looks 100% better. Unfortunately one of the side fixings on the inside of the end had broken, so I glued it with some magic glue I had in the van. I threw it all back together earlier, it's looking good I think. I also charged up the battery and checked all the lights, one of the indicators had a poor earth so I cleaned that up. I might whip it in for an MOT tomorrow, even if it fails it'll give me a target to work to. Shite Ron, theshadow, Austat and 24 others 27 Link to comment Share on other sites More sharing options...
Split_Pin Posted April 24, 2020 Share Posted April 24, 2020 Good luck for the MOT! Be grand if it passed. spartacus 1 Link to comment Share on other sites More sharing options...
spartacus Posted April 24, 2020 Author Share Posted April 24, 2020 Sigh, the best laid plans etc... I got a couple of calls for work this morning, so the MOT is on hold. Hopefully Monday! Link to comment Share on other sites More sharing options...
spartacus Posted April 29, 2020 Author Share Posted April 29, 2020 Well, I got pretty giddy thinking I might whip this in for a test, other things happened and by the time I got to it, it was too late. Not wanting to waste precious time though I embarked on a 'little' job, you can probably tell already that it involved a can and a lot of worms. The rear bumper has never sat straight, it's had a knock on the drivers side rear corner and it's pushed the bumper in, the mounting brackets are a thin pressed steel sort of parrallelogram affair, all* I needed to do was whip the bumper off, straighten out the brackets and job done... err, no. As you can tell, from the photo above of the better one of the two, they're knackered. Unbelievably they're available new from various sources, I've ordered a couple, I could have made something up but with them being entirely hidden alignment would have been tricky and I've got plenty to get on with. They're held on to the bumper by a bolt with a large square head that sits in a plastic slot moulded into the back of the bumper, of course when I tried to undo them the plastic just deformed. My preferred method of removing nuts like this is to drill down the side of the nut, usually once is enough to weaken the hold but in this case each of the four nuts needed drilling twice, even when I'd done that I had to lever the nut away from the metalwork of the bracket, it was comprehensively rusted together. They did all come off OK, I should be able to run a die down the threads and re-use the bolts. Because it's a Fiat there was a little rust proofing to be done. It's not too bad considering its vintage but there were a few places that needed attention. I got busy with the wire brush and then the Kurust stuff. With any luck I'll be able to give it a coat of paint tomorrow, then it'll be ready for the bumper to go back on when the brackets arrive. Carlosfandango, Burnside, RobT and 7 others 10 Link to comment Share on other sites More sharing options...
spartacus Posted May 16, 2020 Author Share Posted May 16, 2020 I gave the rear panel a coat of paint, it's black but doesn't match the original colour, it doesn't really matter though as it's all hidden behind the bumper, what's important is the corrosion protection! Vin, strangeangel, Tickman and 7 others 10 Link to comment Share on other sites More sharing options...
spartacus Posted May 16, 2020 Author Share Posted May 16, 2020 The new bumper brackets arrived after OMGcovid19postaldelayexcuse and I fitted them using new stainless nuts and washers. I haven't got my tap and die set at my place so ended up cleaning the threads on the special bumper bolts using a needle file... It was a tiresome job! After giving the rear light clusters a polish and cleaning up the number plate lights I got giddy reassembling the rear end, as a result I forgot to take any 'in progress' pics, so you'll have to make do with the one I took at the MOT station. I'm still not entirely happy with the bumper alignment, even after three attempts, but realistically it's a bottom of the range Fiat from the '80's, so it's probably better than when it came out of the factory. Low Horatio gearbox, theshadow, RobT and 9 others 12 Link to comment Share on other sites More sharing options...
spartacus Posted May 16, 2020 Author Share Posted May 16, 2020 It failed. Not too dramatically, a ball joint dust cover and no effort on the O/S/R foot brake. I knew it would fail on brakes,I really wanted to know exactly what, now I know. I'm not messing about trying to free a seized cylinder off, I'll pick one up next week. I tried to get the ball joint apart to size up the dust cover but I don't have the required tools at my place, so that'll be a job for next week too. I didn't want to waste the afternoon so I thought I'd tackle the spectacularly floppy gearshift. Part of the mech features a rod that rotates in two bushes, at the top of the rod are two flats and a tab locates on these flats and transmits the rotating movement to the gear linkage at the gearbox end. Unfortunately the flats had begun to round off and allow some play, although not much, it was greatly magnified by the long gear lever. To further compound the difficulty of fixing it, the nut that holds the tab on is prevented from undoing itself with a blob of weld, why Fiat chose this instead of a nyloc nut is beyond me. Anyhoo, let's have some pics and a video! 20200516_153959_001.mp4 Split_Pin, Tickman, somewhatfoolish and 8 others 11 Link to comment Share on other sites More sharing options...
spartacus Posted May 16, 2020 Author Share Posted May 16, 2020 I came up with a couple of methods of fixing it but was limited with the tools and materials available. Recently I've fitted quite a few shower screens, (bear with me, this is relevant), they come with a 2.5 mm drill bit to drill through the wall profile. I have loads of these drill bits in the van, so I used one to drill in between the top of the rod and the edge of the tab, possibly better illustrated in the pics above, then I ground a small length off the chuck end of one of the bits and used it to make a 'key', I'm sure there's an engineering term for this. It worked, really well, I don't know how long it'll last bit of it starts to go floppy again, ooer matron, then I should be better placed to make a different, hopefully more permanent repair. Low Horatio gearbox, somewhatfoolish, Tickman and 2 others 5 Link to comment Share on other sites More sharing options...
somewhatfoolish Posted May 16, 2020 Share Posted May 16, 2020 6 minutes ago, spartacus said: I have loads of these drill bits in the van, so I used one to drill in between the top of the rod and the edge of the tab, possibly better illustrated in the pics above, then I ground a small length off the chuck end of one of the bits and used it to make a 'key', I'm sure there's an engineering term for this. Apparently an axially drilled cylindrical key is a Scotch Key or a Dutch Key according to Wikipedia; it doesn't explore the etymology though. I've used this a few times myself when short of the 'right' materials. spartacus 1 Link to comment Share on other sites More sharing options...
spartacus Posted May 16, 2020 Author Share Posted May 16, 2020 Cheers, that description is much more clear and concise than my drivel! I think the right material to use would be silver steel, but I'm guessing the end of a drill bit will suffice. Link to comment Share on other sites More sharing options...
somewhatfoolish Posted May 16, 2020 Share Posted May 16, 2020 Even cheapo drills are high speed steel these days, so more than tough enough and better than silver steel which is just high carbon steel usually supplied in a polished and semi-hard state. spartacus 1 Link to comment Share on other sites More sharing options...
busmansholiday Posted May 16, 2020 Share Posted May 16, 2020 Seem to remember my Panda was slightly earlier so not sure this, which is keeping the spiders amused in the garage is any use to you. spartacus and somewhatfoolish 1 1 Link to comment Share on other sites More sharing options...
Matty Posted May 16, 2020 Share Posted May 16, 2020 2 hours ago, somewhatfoolish said: Apparently an axially drilled cylindrical key is a Scotch Key or a Dutch Key according to Wikipedia; it doesn't explore the etymology though. I've used this a few times myself when short of the 'right' materials. Can't picture quite what you both mean but at work when a bore is sleeved to return it to a size, the sleeve is shrunk in and then as a belt and braces the gap between the two is drilled and tapped in a number of places and then grub screws put in. This is what we know as scotch keying something. Link to comment Share on other sites More sharing options...
spartacus Posted May 16, 2020 Author Share Posted May 16, 2020 @busmansholiday that's a really kind offer, I'll take you up on that please, I'll PM you, thanks! @Matty that's pretty much what's going on here, except it's not a threaded grub screw, just smooth. It's held in by the washer and nut on top. It's a genuine engineering 'thing', just not executed in a manner that would please a genuine engineer, if you get my drift. You can just about make out the flats on the end of the threaded section, circled, the metal tab is fitted in this picture and is pointing to the top left. The arrowed part is the end of the drill bit that I used as a key. Ideally it would be exactly half way across the threshold of where the two parts meet, but working in the back of my van, using the tool box as a bench and drilling with a battery drill was as ideal as I could manage! It works though, so it'll do until it starts getting sloppy again. I hope that makes it clearer. Carlosfandango, somewhatfoolish, auntiemaryscanary and 6 others 9 Link to comment Share on other sites More sharing options...
spartacus Posted May 24, 2020 Author Share Posted May 24, 2020 Wow! It's been 20 years but earlier in the week this car passed an MOT! As detailed in an earlier installment, the drivers side rear brake cylinder was seized and there was a damaged dust cover on a front ball joint. Miraculously the brake cylinder came off with no drama, the new went straight on and bled up easily. The dust cover wasn't much more difficult, just a little persuasion needed to separate the ball joint. Having got the car back I decided to wait until June 1st to tax it, mainly to spur me on to do a few more jobs on it. Burnside, Carlosfandango, RobT and 5 others 8 Link to comment Share on other sites More sharing options...
spartacus Posted May 24, 2020 Author Share Posted May 24, 2020 Previously I'd taken the back seat out and cleaned it, it came up well and I decided to take the front seats, the drivers in particular had acquired a thick layer of grime, like somebody had been driving it wearing greasy overalls. I elected to take the seats out and remove the covers, it didn't take long and I put them in the washing machine, 40° easy care, in case you wondered. I have them a good scrub first using upholstery cleaner. The difference in real life is even greater than the pics, I did both front seats and also cleaned the door trims, I'm really pleased with how it all came out. After removing the front seats I pulled the carpet out too, it's a 15 min job and it too was filthy. Again, I'm not sure if the pictures show how much better it looked after cleaning. Bonus depressed 'Y tho'! When I rebuilt the drivers seat I also swapped over the foam on the squab, it wasn't badly worn but it seemed foolish not to. While I was at it I took out the knackered speakers and ordered a new pair. When I bought the car there was a Blaupunkt Bristol head unit in the boot, it's a tape deck/radio and hopefully it'll work when I wire it back in. paulplom, Low Horatio gearbox, Burnside and 8 others 11 Link to comment Share on other sites More sharing options...
spartacus Posted May 24, 2020 Author Share Posted May 24, 2020 On the recommendation of another forum member in a different thread, I ordered a Gammatronix Power Driver, it's a little box of electronic gee gaws that is triggered by the points but without them having to carry a lot of current, it also replaces the condenser. I couldn't try it out as the battery was flat when I got to the car and wouldn't charge, I'll pick a new one up on Tuesday. Anyhoo, I whipped up a little ally bracket to mount the box of tricks on and bolted it up next to the coil. Split_Pin, Dan302, GrumpiusMaximus and 3 others 6 Link to comment Share on other sites More sharing options...
somewhatfoolish Posted May 24, 2020 Share Posted May 24, 2020 Everything shrinks with age; those things were massive in the 80s. Split_Pin 1 Link to comment Share on other sites More sharing options...
spartacus Posted May 24, 2020 Author Share Posted May 24, 2020 Ha ha, I remember those! The thing I've bought was only about £30, I can't remember how much the Sparkrite was but it'll have been more than that, even in the '80's. stuboy 1 Link to comment Share on other sites More sharing options...
Split_Pin Posted May 25, 2020 Share Posted May 25, 2020 Good work on this. I was thinking, no MOT for 20 years, that wee car didn't have a long service, before I remembered that 20 years ago was 2000! spartacus and aldo135 2 Link to comment Share on other sites More sharing options...

Recommended Posts
Create an account or sign in to comment
You need to be a member in order to leave a comment
Create an account
Sign up for a new account in our community. It's easy!
Register a new accountSign in
Already have an account? Sign in here.
Sign In Now