Jump to content

Korean Cortina - MOT day


mat_the_cat

Recommended Posts

I've not yet measured it, but the warning in the manual suggests ~200 Vac which seems to be higher than is common.


Hadn't considered LED illumination, but will have a crack at replacing the EL sheet first - at least I have a few spares to practice on!

Link to comment
Share on other sites

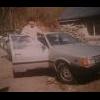
Today I planned to attend the Hubnut meet over in Stoke on Trent. All went well until 50 miles into my journey.


post-5223-0-59002100-1552170561_thumb.jpg


Approaching a roundabout, started to pull away and the engine died. Tried restarting and nothing :-( A quick check showed fuel was getting through so an electrical issue seemed most likely.


I was most pleased and surprised when a friendly trucker pulled over, parked behind me as a shield, pushed the car to a safer place, and then helped me fix it by watching for a spark while I turned the key. First we established that there was none at the plugs, and then none at the king lead. However on pulling out the king lead it fell apart, so I obviously thought I'd found the fault. Managed to bodge that back together but still nothing, so I was doubtful of my repair until I measured the voltage at the coil. Nothing!


Grabbed a temporary test lead with croc clips at each end, and powered the coild direct from the main positive terminal, and STILL no spark! Turned out the test lead had broken internally - started to think fate wasn't on my side at that point! A bit more investigation showed that the ballast resistor had failed, but as this alone would have at least let the engine run on cranking, it must mean that the direct feed from the starter solenoid has also failed in the past.


I rigged up a temporary wire to bypass the resistor, giving 12V to the coil at all times.


post-5223-0-78541200-1552171016_thumb.jpg


This had the risk of burning out the coil, so I had the choice of returning 50 miles straight home, or a 150 miles trip to the pub and back home. The pub won!


And, I obviously made it back home OK as I'm writing this now :-) Waiting for me was a package from Singapore, which was surprisingly swift! Inside were 3 EL backlights for the head unit display.


post-5223-0-11251700-1552171060_thumb.jpg


I figure I'll use one as a practice, one to fit, and one as a spare (or more practice if I mess up the first!)

Link to comment
Share on other sites

I stripped down one of my spare front panels:


post-5223-0-38811800-1552245832_thumb.jpg


post-5223-0-00171200-1552245897_thumb.jpg


To remove the LCD I had to straighten out the metal tabs, and lift off the display, to reveal the EL sheet below:


post-5223-0-95220400-1552245937_thumb.jpg


Ah. Bugger! The new ones are too big :-( I must have made a mistake with cross referencing part numbers. Back to the drawing board, or at least Google...

Link to comment
Share on other sites

Did you mean to post the pic with your name and address? I’d remove that if I were you, never know who’s watching.


I did mean to, as it was mildly exciting to get an item posted to me from the other side of the world! But I've removed it now, for safety. I might be being naive, but does anyone know exactly what could someone do with knowing my name and address, which they could do from the electoral register anyway (although I've obviously saved them the trouble!)?

Link to comment
Share on other sites

I did mean to, as it was mildly exciting to get an item posted to me from the other side of the world! But I've removed it now, for safety. I might be being naive, but does anyone know exactly what could someone do with knowing my name and address, which they could do from the electoral register anyway (although I've obviously saved them the trouble!)?


Come round and nick your lovely Stellar or LT35, mainly! 


Granted there are more obvious ways in which we expose ourselves to identity theft - my home address and annual earnings (until a couple of years ago) are there for the world to see on the Companies House website, for instance - but there's no point in making it any easier. 

Link to comment
Share on other sites

Haven't you got a dog the size of a small horse, too? I imagine that would be a reasonable "deterrent" :shock:


Yes, we have a really vicious Dobermann who will bite your hand off fall asleep on your hand:


post-5223-0-06443400-1552334814_thumb.jpg


Nice. I had one of those head units, and it did the same thing with the display. It did have many many hours on it though.


Damn good radio.


Phil


I think I've found the correct part now, but for one of them it's twice what I paid for three! So if I go for that I won't get the chance to practice first...

Link to comment
Share on other sites

The resistor arrived today, and was duly fitted. A simple job, made more difficult by a sheared off coil fixing screw.


post-5223-0-82552800-1552518132_thumb.jpg


I also thought it wise to protect the fuel filter slightly from direct heat from the exhaust manifold, so I folded up a heat shield from a piece of stainless sheet, and screwed it in place.


post-5223-0-08411600-1552518177_thumb.jpg


A couple of satisfying jobs complete!

Link to comment
Share on other sites

Next job is a bit of tarting up. The headlining in this is quite literally hanging!


post-5223-0-29202900-1552605399_thumb.jpg


You can see where I tried to reattach it a few years ago with contact adhesive, which only made it look about 10 times worse. So I've been keeping half an eye out for some suitable material. I've ended up going back to the upholsterers who did the seats in the LT, who sent me samples of the most likely materials:


post-5223-0-90973900-1552605428_thumb.jpg


Comparing them I have a choice between a close colour match (at least for the clean areas!) with a similar but finer pattern, or a similarly sized pattern but a darker fabric in the weave.


post-5223-0-46014900-1552605461_thumb.jpg


Not sure what to go for really - I probably shouldn't care too much about originality but I'm leaning more towards the lighter one as the closest to original. Any thoughts welcome...

Link to comment
Share on other sites

I reckon you're right - everything else is grey so probably best to not overdo it! That's now on order anyway.


Annoyingly I snagged the front number plate with my holed trousers the other day, and cracked it so will have to fit a new one. I've noticed there's less choice than there used to be of sellers doing pre-2001 fonts, although still available. Fancy Plates seem decent quality so have ordered some. I was half tempted by some raised digit plates, but from what I remember of the time everything was smooth perspex.

Link to comment
Share on other sites

Well, I think I found the problem with the ballast resistor!


post-5223-0-87409600-1552855306_thumb.jpg


The coil of resistance wire was encased in some kind of potting material, so I chipped that away to take a look. The wire had simply corroded through. Oh well, as far as I know it's original to the car so not bad going.


The source I thought I had for an EL backlight is a dead-end, which may be a blessing in disguise. After a bit more research I've found somewhere who may do what I need:


https://elpanelandtape.co.uk/el-backlights/


With a bit of luck it may be a standard size, but if not these are trimmable. Just need to measure the voltage and frequency, to see if it's suitable :-)

Link to comment
Share on other sites

I went and measured the voltage across the backlight - 220 volts!!! No wonder it has had a short life! I wonder if a new panel needs less voltage to run it at the same brightness, in which case I will need to mount a new inverter somewhere into the case, and tap into the front panel connector.


post-5223-0-19780600-1552943924_thumb.jpg


Interestingly, the dimming of the display when sidelights are on is done through the LCD (making it transmit less) rather than reducing the intensity of the backlight. That's not going to help the lifetime either.


As an aside, a little bit of Hyundai history here:


https://www.ozy.com/flashback/how-one-small-car-helped-save-south-korea/90817

Link to comment
Share on other sites

Today was the day that I was due to take the car in for a proper tune-up, so I was more than a little nervous. I worry about anybody else working on it, let alone repeatedly revving it to maximum rpm multiple times! So once I'd dropped it off I made myself scarce, and tried to put it to the back of my mind.


I came back a few hours later, and all was done. The initial power run was 142 bhp at the wheels, which with an estimated 15% power loss in the transmission meant that I was already up on the 'book' figure of 155 bhp. Could any more be coaxed out of it?


Well yes, quite a bit more as it happened!


post-5223-0-74247900-1553377029_thumb.jpg


163 bhp was the best figure obtained :-D That equates to a likely flywheel figure of around 190 bhp - which ties in well given that they said it was putting out similar power to a standard injection 3.9 litre.


Fuelling was apparently very close already, so most of the power gains were from playing with the ignition advance. I'd been given a ballpark figure £150-£200 depending on the work required, so I was most pleased when they told me it had taken less time than they'd expected, so only charged me £100. I'd have been none the wiser if they'd charged the quoted price, so I appreciated the honesty.


AB Garage, Deeside - a big thumbs-up from me:

https://www.yelp.co.uk/biz/a-b-garage-deeside

Link to comment
Share on other sites

Good result. I'm not doubting the bhp because it looks about right to me but I'm confused by that Dyno printout. 471 ft/lb of torque?!

Also, why does it say mph at the bottom, did they do the run in third and the power corresponds to the speed shown, if so, why not show what power at a given rpm, surely more useful and normal.

Again, not having a moan, just interested.

Link to comment
Share on other sites

That's torque at the wheels, so with third gear being less than a 1:1 ratio (plus the final drive), torque is multiplied quite considerably!


Yes, the run was done in 3rd - I guess that they put the speed on there as that's a measured value, rather than rpm which would have to be taken by connecting to the ignition system. TBH I thought it was rpm divided by 100 along the bottom until you pointed it out!

Link to comment
Share on other sites

Oh yes! Light throttle/low revs is a bit fluffy, but that's just a side effect of the lumpy cam. Press the pedal down a fraction and everything smoothes out beautifully.


Hopefully next weekend I'll be heading over to Sheffield in it. One of my friends from school has his 40th birthday then, and although we lost touch around 20 years ago his wife tracked our group of friends down and invited us all to a surprise party. I wonder if they remember the car - I often used to be the designated driver and take people into town for drinks in it!

Link to comment
Share on other sites

I decided to go for the Vredestein all-season tyres in the end, which arrived from Germany in a few days.


post-5223-0-08105800-1553896222_thumb.jpg


Got them fitted at a local tyre place who seem happy to fit supplied tyres (some around actually have refused me!)


post-5223-0-38137900-1553896421_thumb.jpg


post-5223-0-22078000-1553896480_thumb.jpg


Tyres done, now onto the important little things. My electroluminescent backlights arrived, and seemed to be a good match for the originals; the only problem being the connection wires.


post-5223-0-67299300-1553896292_thumb.jpg


I cut these off and soldered it in to one of the spare displays. It seems like a typical EL supply voltage is around 100 V, but I was going to be powering it with 220 V so I was a little nervous. I got no replies to my emails to the supplier asking what the input voltage should be, so at this point I had no idea whether the panel would illuminate, or disappear in a puff of smoke!


post-5223-0-14173400-1553896349_thumb.jpg


Success! Now it was just a case of repeating the whole process with my green display - for some reason all my spares are orange, which doesn't match the instrument lighting). I made some improvements with the way I connected to the backlight after the practice fitment, so it wasn't a waste of time.


post-5223-0-33054200-1553896527_thumb.jpg


As a comparison, this is the old display at full brightness:


post-5223-0-88254100-1553896558_thumb.jpg


And this is the finished job on the dimmed 'night' setting:


post-5223-0-72607900-1553896605_thumb.jpg


Time will tell how long this lasts...

Link to comment
Share on other sites

Create an account or sign in to comment

You need to be a member in order to leave a comment

Create an account

Sign up for a new account in our community. It's easy!

Register a new account

Sign in

Already have an account? Sign in here.

Sign In Now
×
×
  • Create New...