

mat_the_cat
-
Posts
6,428 -
Joined
-
Last visited
Reputation Activity
-

 mat_the_cat got a reaction from Minimad5 in What has two seats, a mid-mounted 6 cylinder engine, and a turbo? Time for windscreen number 5!
I've now trimmed the repair section for the other side. I'd wanted to have the joint on the curved section under the seal, both for neatness and also to minimise distortion. However on the passenger side I needed to cut out that little bit more, as the metal was quite thin.
I've also cleaned up both sides ready for welding; I've since painted with weld through primer but didn't get a photo.
-
 mat_the_cat got a reaction from Tickman in What has two seats, a mid-mounted 6 cylinder engine, and a turbo? Time for windscreen number 5!
Primed and ready to weld in:
Ideally I'd have left the aerial off, but access is incredibly restricted behind - the original poked through from the back and was tightened from the outside, but all I can find to replace it need tightening from the rear. I'm hoping I can reach the back to tighten, but don't rate my chances of actually threading the nut on!
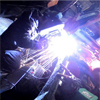
Then began the long process of welding it in, swapping sides regularly to allow to cool.
Driver's side is done...
...but I ran out of gas when the passenger side was almost complete
I didn't quite cut it perfectly at the bottom, so need to bridge the gap with weld.
-
 mat_the_cat got a reaction from juular in What has two seats, a mid-mounted 6 cylinder engine, and a turbo? Time for windscreen number 5!
I've now trimmed the repair section for the other side. I'd wanted to have the joint on the curved section under the seal, both for neatness and also to minimise distortion. However on the passenger side I needed to cut out that little bit more, as the metal was quite thin.
I've also cleaned up both sides ready for welding; I've since painted with weld through primer but didn't get a photo.
-
 mat_the_cat reacted to juular in 1964 Volvo 122S - Amazonian rustforest. Electroshite.
You'll have to wait for the sound video because I just did this.
The wiring on this was getting on my tits. Had a lot of instances whereby things work but not quite all the time, or fuses randomly blowing. The original factory wiring is shite. I have now ripped out EVERYTHING.
You can see on the right here that the back of the fuel gauge stands in as an unfused positive terminal for almost everything under the dash including the wiper motor, indicators, heater fan and who knows what else, held on by a piddly 6mm nut. That is going to change.
I present the main light switch. Again, unfused and permanently live, with the permanent live cut and twisted into the feed to the small footwell lights, from factory.
The big feed to the wiper switch. Again, some dodgy chaining of big positive wires going on here.
The circuits which are fused are run off a shitty engine bay fusebox which is riveted together, and the rivets are starting to come loose causing random dropouts. That and the small issue of continental/glass fuses being total shite and hard to come by when you need them most.
Solution : bin off the fusebox in the engine bay, and run everything off a pair of blade fuseboxes inside the footwell.
The fusebox on the left is the permanent live one, which will run the interior dome light, indicators / hazards, and headlamps.
The box on the right will be ignition switched, but I am also going to add a main ignition relay so that the ignition switch isn't constantly handling all of the current running through the entire car. I know it's designed to take it, but the switch (and key!) can get very hot and I'm just waiting on the contacts burning out, especially if I decide to add any more load in the future.
The important thing is that everything is going to be fused, and that the fuses are going to be easier to replace when needed.
I seem to be doing this all off the top of my head, WCPGW.
-
 mat_the_cat got a reaction from Back_For_More in What has two seats, a mid-mounted 6 cylinder engine, and a turbo? Time for windscreen number 5!
I've now trimmed the repair section for the other side. I'd wanted to have the joint on the curved section under the seal, both for neatness and also to minimise distortion. However on the passenger side I needed to cut out that little bit more, as the metal was quite thin.
I've also cleaned up both sides ready for welding; I've since painted with weld through primer but didn't get a photo.
-

 mat_the_cat got a reaction from JMotor in What has two seats, a mid-mounted 6 cylinder engine, and a turbo? Time for windscreen number 5!
Big shout out to https://www.weldingdirect.co.uk/ who had a new control board on the shelf for a 10 year old Chinese welder, and only £26!
Back to the LT, and I cut back a bit more of the pillar which had been thinned by rust. It's very little extra work to weld in a larger section, compared with battling constantly blowing through. I didn't want to use the whole repair panel though.
Reason being to weld in the top it would be quite tricky welding in the roof gutter, and potentially difficult to seal well again afterwards. So I wasted most of the panel and just cut out what I needed.
Unfortunately I had to leave it there as despite wearing goggles I got something in my eye, so writing this post from hospital.
-
 mat_the_cat got a reaction from rainagain in What has two seats, a mid-mounted 6 cylinder engine, and a turbo? Time for windscreen number 5!
Not one to rush a job I've made a start on the A pillars. I was right, there was more rust hidden!
But I've already bought the A pillars, which I initially thought would be all I needed. However the lower panel has also holed through in places, so will need to find one of those, or make up a repair strip from some angle section.
I've cut out the worst of the rot now but am leaving the lower bit until I know what I can replace it with, as that will dictate where I cut. Also need to fix the welder before I can do anything!
At least it makes it easier to replace the aerial now!
-
mat_the_cat got a reaction from rainagain in What has two seats, a mid-mounted 6 cylinder engine, and a turbo? Time for windscreen number 5!
Big shout out to https://www.weldingdirect.co.uk/ who had a new control board on the shelf for a 10 year old Chinese welder, and only £26!
Back to the LT, and I cut back a bit more of the pillar which had been thinned by rust. It's very little extra work to weld in a larger section, compared with battling constantly blowing through. I didn't want to use the whole repair panel though.
Reason being to weld in the top it would be quite tricky welding in the roof gutter, and potentially difficult to seal well again afterwards. So I wasted most of the panel and just cut out what I needed.
Unfortunately I had to leave it there as despite wearing goggles I got something in my eye, so writing this post from hospital.
-
 mat_the_cat got a reaction from Coprolalia in What has two seats, a mid-mounted 6 cylinder engine, and a turbo? Time for windscreen number 5!
I've now trimmed the repair section for the other side. I'd wanted to have the joint on the curved section under the seal, both for neatness and also to minimise distortion. However on the passenger side I needed to cut out that little bit more, as the metal was quite thin.
I've also cleaned up both sides ready for welding; I've since painted with weld through primer but didn't get a photo.
-
 mat_the_cat got a reaction from Burnside in 205 GTi - repairs underway
This is the original fuel pump housing; as I mentioned earlier it has been modified so that the supply hose connects directly to the pump, although this means a tight bend leaving the housing.
The pre-filter had also been damaged (presumably when the housing had been previously taken apart) so although you can still buy the earlier bare pumps, we really needed the whole assembly which is no longer available.
At least not as a new part, but managed to find a reasonably priced used one, at £40 delivered. The filter was in great condition too, in fact the only downside was a slightly messy repair to the wiring where it enters the top of the housing.
It was easily fitted, and the hose routing is much improved.
After @Puglet has been using it for a few trips it's obvious there is a problem with the idle speed. When hot it will rev at around 3k rpm, unless you blip the throttle in which case the idle settles down to around 1k rpm. Which tends to rule out a permanent air leak.
What it seems to be is that the throttle butterfly is not closing fully, unless you cause it to snap shut by blipping it. I wonder whether the throttle position switch is stiff and holding it open slightly, or perhaps the spring is weaker than it should be. The throttle body is new though, so a fault seems unlikely...
-
mat_the_cat got a reaction from Tickman in What has two seats, a mid-mounted 6 cylinder engine, and a turbo? Time for windscreen number 5!
I've now trimmed the repair section for the other side. I'd wanted to have the joint on the curved section under the seal, both for neatness and also to minimise distortion. However on the passenger side I needed to cut out that little bit more, as the metal was quite thin.
I've also cleaned up both sides ready for welding; I've since painted with weld through primer but didn't get a photo.
-
mat_the_cat got a reaction from Tickman in What has two seats, a mid-mounted 6 cylinder engine, and a turbo? Time for windscreen number 5!
Big shout out to https://www.weldingdirect.co.uk/ who had a new control board on the shelf for a 10 year old Chinese welder, and only £26!
Back to the LT, and I cut back a bit more of the pillar which had been thinned by rust. It's very little extra work to weld in a larger section, compared with battling constantly blowing through. I didn't want to use the whole repair panel though.
Reason being to weld in the top it would be quite tricky welding in the roof gutter, and potentially difficult to seal well again afterwards. So I wasted most of the panel and just cut out what I needed.
Unfortunately I had to leave it there as despite wearing goggles I got something in my eye, so writing this post from hospital.
-
 mat_the_cat got a reaction from Sunny Jim in 205 GTi - repairs underway
This is the original fuel pump housing; as I mentioned earlier it has been modified so that the supply hose connects directly to the pump, although this means a tight bend leaving the housing.
The pre-filter had also been damaged (presumably when the housing had been previously taken apart) so although you can still buy the earlier bare pumps, we really needed the whole assembly which is no longer available.
At least not as a new part, but managed to find a reasonably priced used one, at £40 delivered. The filter was in great condition too, in fact the only downside was a slightly messy repair to the wiring where it enters the top of the housing.
It was easily fitted, and the hose routing is much improved.
After @Puglet has been using it for a few trips it's obvious there is a problem with the idle speed. When hot it will rev at around 3k rpm, unless you blip the throttle in which case the idle settles down to around 1k rpm. Which tends to rule out a permanent air leak.
What it seems to be is that the throttle butterfly is not closing fully, unless you cause it to snap shut by blipping it. I wonder whether the throttle position switch is stiff and holding it open slightly, or perhaps the spring is weaker than it should be. The throttle body is new though, so a fault seems unlikely...
-
mat_the_cat got a reaction from Sunny Jim in What has two seats, a mid-mounted 6 cylinder engine, and a turbo? Time for windscreen number 5!
I've now trimmed the repair section for the other side. I'd wanted to have the joint on the curved section under the seal, both for neatness and also to minimise distortion. However on the passenger side I needed to cut out that little bit more, as the metal was quite thin.
I've also cleaned up both sides ready for welding; I've since painted with weld through primer but didn't get a photo.
-
 mat_the_cat got a reaction from Dyslexic Viking in 205 GTi - repairs underway
This is the original fuel pump housing; as I mentioned earlier it has been modified so that the supply hose connects directly to the pump, although this means a tight bend leaving the housing.
The pre-filter had also been damaged (presumably when the housing had been previously taken apart) so although you can still buy the earlier bare pumps, we really needed the whole assembly which is no longer available.
At least not as a new part, but managed to find a reasonably priced used one, at £40 delivered. The filter was in great condition too, in fact the only downside was a slightly messy repair to the wiring where it enters the top of the housing.
It was easily fitted, and the hose routing is much improved.
After @Puglet has been using it for a few trips it's obvious there is a problem with the idle speed. When hot it will rev at around 3k rpm, unless you blip the throttle in which case the idle settles down to around 1k rpm. Which tends to rule out a permanent air leak.
What it seems to be is that the throttle butterfly is not closing fully, unless you cause it to snap shut by blipping it. I wonder whether the throttle position switch is stiff and holding it open slightly, or perhaps the spring is weaker than it should be. The throttle body is new though, so a fault seems unlikely...
-
 mat_the_cat got a reaction from Joey spud in 205 GTi - repairs underway
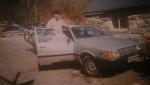
I know I suggested recreating the photo, but this wasn't what I had in mind!
(On the way back from a Cars & Coffee meet, on only its second trip out!)
-
mat_the_cat got a reaction from Joey spud in 205 GTi - repairs underway
I've had a go at the rear calipers, and unfortunately one is beyond repair. The bleed screw has seemingly been hammered into the body, and after a good while welding things to that and the remains of the flexi, they both came free (yay!) but the threads were non-existent (boo). I drilled out and re-tapped larger, but it turned out the body was cracked
The better one of the two is pictured above, and that was savable. I dunked the steel part of the body in Deox C, along with various other brackets.
It took several days to remove all the rust!
Before a coat of galvanising primer.
I've never rebuilt a caliper with integral handbrake mechanism before, so had to make up a tool from an old socket to compress everything to reassemble.
The last part was fitting a new piston, which is where things went less well. It was the wrong size, and too small to seal in the bore. Double checking sizes and the 205 uses a 30mm piston, however the 206 uses a 32mm piston which looks to be what we have. I'd already bought another 205 caliper to replace the cracked one, but wouldn't match the one I was repairing.
Still, I thought I may as well finish the repair and see if I can sell to recoup the costs of the kit. New piston going in:
And the finished job.
Surely worth £30 to someone?
-
mat_the_cat got a reaction from Joey spud in 205 GTi - repairs underway
Fuel pipes are now replaced, and I've had to replicate the pipe sticking straight up out of the tank, as for some reason it's been modified to clamp to the pipe inside the tank. I plan to fit a right angle coupling at the top however.
There's a few bodges I'm finding on this, such as the battery clamp being a thin piece of bent metal, a penny washer and a UNF bolt in an M6 hole.
It was so flimsy the battery was flopping about all over the place! Now replaced with the proper clamp.
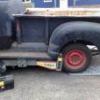
Next was the handbrake cables, should be a nice easy job until I noticed a drip from one of the rear drums.
Wait a minute...drums on a 1.9? Well yes, when she bought it the owner pointed out it was originally a 1.6, but they'd been gradually replacing all the bits to turn it into a 1.9. They'd bought the correct rear beam for it, complete with brake calipers although it looked like it'd been sitting at the bottom of the sea. So the plan was always to rebuild that at leisure, and swap it over at the same time as changing the front struts to restore the correct ride height.
So with the rear end, I'm just going to to the bare minimum to make it functional, and swap the whole thing over in the summer. I have to admit I sometimes reuse the staked nuts if the the groove falls in a different spot on the nut. But I think this one has been reused one too many times! Especially when I levered it away and it just crumbled off.
Both new handbrake cables are now on, and I'm just waiting for a new cylinder...under £10 delivered so not a big problem.
While I was there I coated everything with Lanoguard, to keep moisture away. Really impressed with the overall condition, despite the bodges!
-
mat_the_cat got a reaction from Coprolalia in 205 GTi - repairs underway
Not sure how long this knob will last, so that link may be useful.
I brushed past the front number plate the other day and one end fell off, so I had a closer look and the fibreglass was a bit crumbly around the screw holes. I could have just drilled (yet) another hole, but instead used a couple of these.
Once I had dug out my square 8mm drill bit they popped straight in.
Nice easy job; they expand like a rawlplug so should be more robust than screwing straight into the bumper.
I popped underneath to make a start on the next job which is replacing the handbrake cables and fuel hoses. Look at the rust bulge!
Looking at the top though, it's clear someone has been here before me as that doesn't look factory.
One of the hoses looks like someone (for some reason) has just drilled the top of the tank insert and poked in the hose! The resulting kink hasn't done the hose much good.
It seems firmly attached however, so will have to remove the tank outlet and see what's going on.
For now I just busied myself replacing missing trim clips and a couple of rivets which stiffened up the rear valance.
-
mat_the_cat got a reaction from rainagain in 205 GTi - repairs underway
Back in 2000, I bought @Puglet a Pioneer radio as a birthday present, which she fitted to her 205 XS, This was bought partly for the sound quality, but also because the display showed swimming dolphins It was transferred to the next car, a Renault Megane Coupe, and the MINI after that.
Unfortunately, an iPod adapter interface was bought which came with a reversed polarity lead, and this fed +12 V through the ground connection on the expansion socket, taking out the button illumination
This has sat for the last 10 years, so with the need for a radio again I downloaded the wiring diagram and did some probing. There was no illumination supply to the front panel so not just a case of a new front. The transistor which switched the supply was open circuit, so that was the first replacement but no joy.
Time to delve further in the circuit, and I found a couple of zener diodes which didn’t measure right.
(Circled, with the new transistor already in place)
These were a low noise type of quite a tight tolerance, which I couldn’t find exact replacements for. Eventually I managed to find some low noise types with a slightly different voltage, but with wider tolerance bands (5.2 to 6 V and 9.4 to 10.6 V). I needed 5.5 to 5.8 V and 9.5 to 9.9 V, so I just bought 10 of each and measured them until I found ones which were close to the middle of the original spec.
I soldered them in, and then re-applied lacquer to the PCB as was originally done.
Then a bit of fiddly reassembly.
And the end result?
Yay, the dolphins are back! (I confess I had tested it before reassembly and fitting though!)
-
mat_the_cat got a reaction from Coprolalia in 205 GTi - repairs underway
So, despite the listing clearly saying it's suitable based on the reg no., Autodoc are wanting me to return the incorrect arm to Germany at our cost. Wish I'd double checked, but assumed it was a generic picture. Correct one (hopefully!) on the way at least.
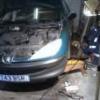
In the meantime I've made some progress although few photos. The filter behind the servo had totally disintegrated, so I made a new one from a piece of foam.
Once the cambelt was done I put the new servo in place, and came across a problem. We'd managed to source on in France, but it turns out that due to space restrictions, RHD 205s had a slightly smaller servo! This one fouled the bulkhead before seating in place.
Fortunately it was only a few mm, and was relieved with a hammer before a coat of paint. It's a little tighter around the fuel filter now, but at least it all fits.
I've had to put the vacuum inlet on the opposite side of the servo to avoid a clash, so still need to shorten the hose.
But the alternator is now in place, with a well overdue new belt. Inner CV joint and brake fluid next I think. Fortunately this caliper at least is sliding freely although I'll grease it as preventative maintenance.
-
mat_the_cat got a reaction from Coprolalia in 205 GTi - repairs underway
Looking on the bright side, a shiny new alternator will match the shiny rebuilt engine better, and removing it gives even more access for the cambelt change! And while I've got it jacked up to do the belt, there's the track rod end, wishbone and CV joint to change on that side.
Old wishbone off, and there appears to be a slight cosmetic difference. Looks like an error in the Autodoc listing, so hopefully should be able to get a refund.
TRE was fairly easily removed - it's such a nice change working on things which aren't heavily rusted. This at least matches the new one!
The driveshaft inner joint definitely has some play, and the boot has evidently split, so that will be changed.
And the cambelt is ready for swapping...it's all coming back to me once the covers came off.
I've adjusted the pushrod in the new brake servo ready for fitting...surprisingly the spec is 0.2mm wide so tighter than I'd have thought! Hopefully soon we'll be able to actually fit parts rather than dismantling.
-
mat_the_cat got a reaction from rainagain in 205 GTi - repairs underway
Another door pocket was duly purchased and fitted, although I forgot to photo it. Puzzlingly, it came with two extra gear knobs - one new reproduction type of the incorrect BE1 shift pattern...
...and what I assume to be the original, cracked one seeing as there was a correct reproduction knob actually fitted.
The originals in good condition are rather rare, so the obvious thing to do was to make one good knob from the two.
Onto the mechanical side, and I took a look at the alternator which was only outputting around 12.7 volts. The brushes looked well used, so for £20 was worth a try for a brush and regulator pack. Comparing the two side by side:
And easily fitted with the alternator in-situ.
Unfortunately, absolutely no change in the output, so back to the drawing board 😞
Also on the list to do was the brake servo, fuel filter, and the remaining fuel hoses. I made a start by removing the old parts, and noticed something strange with the wiring. Three wires from the main loom came to a point and just appeared to have been cut.
I'd already removed the sleeving, as it was in pretty ropey condition!
From the 3 wires, there's one heavy current wire (blue), a smaller wire (orange) and an earth (green & yellow). The only possible clue is that there's something in the history about a fuel pump wiring mod, so wonder if this was something no longer deemed required. Certainly everything seems to function, so have just taped them up for now and replaced the sleeving.
I've got the new servo ready to fit, but seeing as the cambelt also needs changing I think I'll hold back for now to give a bit more access, not that I remember it being all that difficult although it has been 20 years since I last did one! (Certainly more space than on the 16v engine...)
-
mat_the_cat got a reaction from Coprolalia in 205 GTi - repairs underway
The driver's door pocket for this was missing, so had a look on eBay for a replacement. Unbroken ones were around the £40 mark, but settled for one with minor damage around the screw hole for £30 posted.
Before fitting it I took the door card off to check for condition inside and to fill the seams with cavity wax.
I'd warmed the metal (and the wax) so it penetrated right into the joint.
Back on with the (slightly distorted) door card, and the pocket. I carefully repaired the cracked screw hole with some epoxy, and redrilled to match the others.
Only to find I'd bought another passenger side one
It was listed as such too, so I don't have any excuse apart from maybe too many Christmas festivities!
-
 mat_the_cat got a reaction from Turbowomble in 205 GTi - repairs underway
Thanks, that's very kind of you.
The air filter housing finished its bath, but was in rather worse condition than first thought - some of it there was no good steel to dissolve back to!
My welder is out of action, so I taped up the inside and used epoxy (3M 2216) to build up a layer.
Then a coat of paint and new filter.
Job done, and looking a lot better! New coolant level sensor also fitted.
Next was the lights - a headlight was misty, an indicator cracked, and both had been changed for the facelifted clear type fitted to the later models.
I took the lights off, and again was really pleased how good condition the metalwork was behind.
I took the opportunity to spray some cavity was around, including injecting it into the chassis legs.
It also seemed a good idea to clean up all the electrical connections and coat with silicone grease. Both headlights were dried and sealed up, before refitting with the correct amber indicators.