


mat_the_cat
-
Posts
6,425 -
Joined
-
Last visited
Reputation Activity
-

 mat_the_cat got a reaction from Sunny Jim in What has two seats, a mid-mounted 6 cylinder engine, and a turbo? Time for windscreen number 5!
Before doing any welding whatsoever, I made an extra long lance from 3 originals joined together.
This is so I could arrange it in the correct position for optimum coverage, before putting the panel in position.
I used mini G clamps to hold the 3 layers together.
And here you can see how the holes in the outer panel are lined up with those in the middle layer, which I'd previously only tacked into position and ground back.
This meant I could create a decent plug weld, and tie all 3 layers together.
Once I'd done all the plug welds and tacked the front edge, I ground them all back ready for seam welding in stages.
I was trying to minimise the gap to make life easier for myself when it came to welding 1mm steel. I found that on a current sufficient to get good penetration on the first pulse, by the time I'd laid down 3 or 4 more pulses, the localised heat build up meant I was in danger of blowing through, so I just moved on to another location. And repeat...
Finally, it was a case of taking the flap disc to it, followed by the power sander to flatten out any imperfections. This should still be under the seal, so I dont think I need to use filler.
Then a coat of etch primer to protect while I treat the surface rust which is around the rest of the frame.
Lastly I used my new lance to spray cavity wax on the rear of the weld, which did reveal two pinholes...easily dealt with though. Time for bed now!
-
 mat_the_cat got a reaction from mercedade in What has two seats, a mid-mounted 6 cylinder engine, and a turbo? Time for windscreen number 5!
The inner panel repair is now complete.
So I then made a couple of holes in it! Just so I could inject some cavity wax into it, as it's far easier to do it from above - and it also is so penetrative, it highlights any pinholes in the welding.
I've hacked up my new panel, and sat it in the correct position...
...before beginning the slow process of trimming to match what I've cut feom the van.
-
mat_the_cat got a reaction from mercedade in What has two seats, a mid-mounted 6 cylinder engine, and a turbo? Time for windscreen number 5!
Work on this has slowed slightly for two reasons. Firstly we are now having guests staying in the Airstream, and I don't think they would appreciate angle grinding during their stay. And secondly my welder had failed again!
A different fault, but I traced it to the new board I'd been sent. I contacted the supplier, rather expecting them to suggest that another fault in the welder must have damaged their replacement board. But fortunately they sent a replacement out to me but agreed it was rather puzzling.
To my surprise the next day two arrived!! They decided to send two from different batches just in case there was a more widespread issue and i suffered another premature failure. Over and above as far as I'm concerned.
Back to the van and I actually managed to do a better job than expected in curving the inner repair section.
I started by cutting a few slots in it, but when I started flattening out the 90 degree angle to match the original, found it naturally started curving in the right direction! I drilled out to match the position of the original spot welds...
...and have begun the steady process of welding it all into position.
I did bite the bullet and go for a new panel in the end - I think this will enable me to do a neater repair and hopefully avoid needing to use filler. It's still a zinc coated panel so should be better at resisting rust, even if not hot-dip galvanised as the inner layer now is.
-
 mat_the_cat got a reaction from JMotor in What has two seats, a mid-mounted 6 cylinder engine, and a turbo? Time for windscreen number 5!
The inner panel is now cut back to decent metal, revealing rust which had crept between the layers of the lip.
Before cleaning it up I welded the marks from the spot weld drill. I wanted to make sure the metal was full thickness so when it comes to welding the layers together I can crank up the current without risking blowing through.
It took a while to remove the rust, as it had pitted quite deeply in places.
There's a little bit of light rusting on the inside, which I've treated with phosphoric acid to hopefully stop it getting worse. I'll inject with cavity wax after welding, obviously.
One casualty was the angle grinder I use for knot wheeling - only a cheap one so really a disposable item.
-
 mat_the_cat got a reaction from cobblers in What has two seats, a mid-mounted 6 cylinder engine, and a turbo? Time for windscreen number 5!
Minor update - both A pillars and (quite a few) rust spots on the upper lip have been cleaned up, phosphate treated and ready for masking and etch primer.
I'm hoping for some decent weather so I can bake the paint before the screen is fitted, but not massively optimistic. Thinking at least a week to harden.
-
 mat_the_cat got a reaction from Lacquer Peel in What has two seats, a mid-mounted 6 cylinder engine, and a turbo? Time for windscreen number 5!
The inner panel is now cut back to decent metal, revealing rust which had crept between the layers of the lip.
Before cleaning it up I welded the marks from the spot weld drill. I wanted to make sure the metal was full thickness so when it comes to welding the layers together I can crank up the current without risking blowing through.
It took a while to remove the rust, as it had pitted quite deeply in places.
There's a little bit of light rusting on the inside, which I've treated with phosphoric acid to hopefully stop it getting worse. I'll inject with cavity wax after welding, obviously.
One casualty was the angle grinder I use for knot wheeling - only a cheap one so really a disposable item.
-
 mat_the_cat got a reaction from Coprolalia in What has two seats, a mid-mounted 6 cylinder engine, and a turbo? Time for windscreen number 5!
Minor update - both A pillars and (quite a few) rust spots on the upper lip have been cleaned up, phosphate treated and ready for masking and etch primer.
I'm hoping for some decent weather so I can bake the paint before the screen is fitted, but not massively optimistic. Thinking at least a week to harden.
-
 mat_the_cat got a reaction from Dick Longbridge in What has two seats, a mid-mounted 6 cylinder engine, and a turbo? Time for windscreen number 5!
Minor update - both A pillars and (quite a few) rust spots on the upper lip have been cleaned up, phosphate treated and ready for masking and etch primer.
I'm hoping for some decent weather so I can bake the paint before the screen is fitted, but not massively optimistic. Thinking at least a week to harden.
-
mat_the_cat got a reaction from mercedade in What has two seats, a mid-mounted 6 cylinder engine, and a turbo? Time for windscreen number 5!
Before doing any welding whatsoever, I made an extra long lance from 3 originals joined together.
This is so I could arrange it in the correct position for optimum coverage, before putting the panel in position.
I used mini G clamps to hold the 3 layers together.
And here you can see how the holes in the outer panel are lined up with those in the middle layer, which I'd previously only tacked into position and ground back.
This meant I could create a decent plug weld, and tie all 3 layers together.
Once I'd done all the plug welds and tacked the front edge, I ground them all back ready for seam welding in stages.
I was trying to minimise the gap to make life easier for myself when it came to welding 1mm steel. I found that on a current sufficient to get good penetration on the first pulse, by the time I'd laid down 3 or 4 more pulses, the localised heat build up meant I was in danger of blowing through, so I just moved on to another location. And repeat...
Finally, it was a case of taking the flap disc to it, followed by the power sander to flatten out any imperfections. This should still be under the seal, so I dont think I need to use filler.
Then a coat of etch primer to protect while I treat the surface rust which is around the rest of the frame.
Lastly I used my new lance to spray cavity wax on the rear of the weld, which did reveal two pinholes...easily dealt with though. Time for bed now!
-
mat_the_cat got a reaction from JMotor in What has two seats, a mid-mounted 6 cylinder engine, and a turbo? Time for windscreen number 5!
The inner panel repair is now complete.
So I then made a couple of holes in it! Just so I could inject some cavity wax into it, as it's far easier to do it from above - and it also is so penetrative, it highlights any pinholes in the welding.
I've hacked up my new panel, and sat it in the correct position...
...before beginning the slow process of trimming to match what I've cut feom the van.
-
mat_the_cat got a reaction from JMotor in What has two seats, a mid-mounted 6 cylinder engine, and a turbo? Time for windscreen number 5!
Work on this has slowed slightly for two reasons. Firstly we are now having guests staying in the Airstream, and I don't think they would appreciate angle grinding during their stay. And secondly my welder had failed again!
A different fault, but I traced it to the new board I'd been sent. I contacted the supplier, rather expecting them to suggest that another fault in the welder must have damaged their replacement board. But fortunately they sent a replacement out to me but agreed it was rather puzzling.
To my surprise the next day two arrived!! They decided to send two from different batches just in case there was a more widespread issue and i suffered another premature failure. Over and above as far as I'm concerned.
Back to the van and I actually managed to do a better job than expected in curving the inner repair section.
I started by cutting a few slots in it, but when I started flattening out the 90 degree angle to match the original, found it naturally started curving in the right direction! I drilled out to match the position of the original spot welds...
...and have begun the steady process of welding it all into position.
I did bite the bullet and go for a new panel in the end - I think this will enable me to do a neater repair and hopefully avoid needing to use filler. It's still a zinc coated panel so should be better at resisting rust, even if not hot-dip galvanised as the inner layer now is.
-
mat_the_cat got a reaction from Sunny Jim in What has two seats, a mid-mounted 6 cylinder engine, and a turbo? Time for windscreen number 5!
Minor update - both A pillars and (quite a few) rust spots on the upper lip have been cleaned up, phosphate treated and ready for masking and etch primer.
I'm hoping for some decent weather so I can bake the paint before the screen is fitted, but not massively optimistic. Thinking at least a week to harden.
-
 mat_the_cat got a reaction from RayMK in What has two seats, a mid-mounted 6 cylinder engine, and a turbo? Time for windscreen number 5!
Before doing any welding whatsoever, I made an extra long lance from 3 originals joined together.
This is so I could arrange it in the correct position for optimum coverage, before putting the panel in position.
I used mini G clamps to hold the 3 layers together.
And here you can see how the holes in the outer panel are lined up with those in the middle layer, which I'd previously only tacked into position and ground back.
This meant I could create a decent plug weld, and tie all 3 layers together.
Once I'd done all the plug welds and tacked the front edge, I ground them all back ready for seam welding in stages.
I was trying to minimise the gap to make life easier for myself when it came to welding 1mm steel. I found that on a current sufficient to get good penetration on the first pulse, by the time I'd laid down 3 or 4 more pulses, the localised heat build up meant I was in danger of blowing through, so I just moved on to another location. And repeat...
Finally, it was a case of taking the flap disc to it, followed by the power sander to flatten out any imperfections. This should still be under the seal, so I dont think I need to use filler.
Then a coat of etch primer to protect while I treat the surface rust which is around the rest of the frame.
Lastly I used my new lance to spray cavity wax on the rear of the weld, which did reveal two pinholes...easily dealt with though. Time for bed now!
-
 mat_the_cat got a reaction from Magic in What has two seats, a mid-mounted 6 cylinder engine, and a turbo? Time for windscreen number 5!
Minor update - both A pillars and (quite a few) rust spots on the upper lip have been cleaned up, phosphate treated and ready for masking and etch primer.
I'm hoping for some decent weather so I can bake the paint before the screen is fitted, but not massively optimistic. Thinking at least a week to harden.
-
 mat_the_cat reacted to fatharris in FatHarris - tales of a motoring moron ***Non-BX related content 17/4***
A slow day today, because I was still shattered from the drive.
The postman had been busy dropping more bits off for me, namely the brand new middle timing belt cover I snagged on eBay - the old one was too far gone to be reused, and would touch the belt if fitted.
I was expecting three more parcels which should have been delivered last week, but hadn't appeared yet. The delivery service tracker (Evri) said they were 'out for delivery' on Saturday.
I was panicking about this one, as it was the bulk of the parts needed to build the engine back up, as well as the steering rack ram which was now showing as out of stock.
A quick email and a couple of hours later, a knock on the door.
Phew! Aside from some easily sourced consumables items, I think I've finally got all I need to finish this.
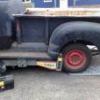
As I didn't have the engine back yet, I cracked on with one of the more unpleasant jobs.
Bloody hate the grease on this, spreads everywhere, stinks and is a bastard to clean off.
The CV joint was putting up a fight to come off, but eventually gave in.
There was a plastic ring in the old boot, so I transferred it over.
There was only one driveshaft boot that had actually torn, but it made sense to get them all replaced now whilst it was all in bits.
Onto the next one.
Both done and ready for fitment.
After that, it was time to hop in the car for a little drive.
Left some money in a box.
And loaded up some precious cargo. Safety first.
Got it mounted into the stand.
Both the block and head have loads of swarf and debris in the chambers so they'll require a thorough clean before assembly.
As it's late and I have work in the morning, I tried my hand at removing the valve stem seals. Tricky little bastards, but heating them up with a heat gun helped free them.
The work is going to start ramping up now - the deadline is rushing up and I've still a lot to do.
Going to take a few days off work soon, hopefully I'll get to lock myself in the garage and get this cracked out.
Either way, small jobs today, but straight back into it.
-
 mat_the_cat reacted to catsinthewelder in Shitefest Shropshire 12-14th July
Well the loo is booked and paid for so I should probably think about ordering something else.
Telford Steam Railway are open to the public on Sundays at the moment but I could ask how much it would cost to run us a train on the Saturday, perhaps with the North British built shunter (the most Autoshite of diesels).
-
 mat_the_cat got a reaction from juular in What has two seats, a mid-mounted 6 cylinder engine, and a turbo? Time for windscreen number 5!
Before doing any welding whatsoever, I made an extra long lance from 3 originals joined together.
This is so I could arrange it in the correct position for optimum coverage, before putting the panel in position.
I used mini G clamps to hold the 3 layers together.
And here you can see how the holes in the outer panel are lined up with those in the middle layer, which I'd previously only tacked into position and ground back.
This meant I could create a decent plug weld, and tie all 3 layers together.
Once I'd done all the plug welds and tacked the front edge, I ground them all back ready for seam welding in stages.
I was trying to minimise the gap to make life easier for myself when it came to welding 1mm steel. I found that on a current sufficient to get good penetration on the first pulse, by the time I'd laid down 3 or 4 more pulses, the localised heat build up meant I was in danger of blowing through, so I just moved on to another location. And repeat...
Finally, it was a case of taking the flap disc to it, followed by the power sander to flatten out any imperfections. This should still be under the seal, so I dont think I need to use filler.
Then a coat of etch primer to protect while I treat the surface rust which is around the rest of the frame.
Lastly I used my new lance to spray cavity wax on the rear of the weld, which did reveal two pinholes...easily dealt with though. Time for bed now!
-
mat_the_cat got a reaction from JMotor in What has two seats, a mid-mounted 6 cylinder engine, and a turbo? Time for windscreen number 5!
Before doing any welding whatsoever, I made an extra long lance from 3 originals joined together.
This is so I could arrange it in the correct position for optimum coverage, before putting the panel in position.
I used mini G clamps to hold the 3 layers together.
And here you can see how the holes in the outer panel are lined up with those in the middle layer, which I'd previously only tacked into position and ground back.
This meant I could create a decent plug weld, and tie all 3 layers together.
Once I'd done all the plug welds and tacked the front edge, I ground them all back ready for seam welding in stages.
I was trying to minimise the gap to make life easier for myself when it came to welding 1mm steel. I found that on a current sufficient to get good penetration on the first pulse, by the time I'd laid down 3 or 4 more pulses, the localised heat build up meant I was in danger of blowing through, so I just moved on to another location. And repeat...
Finally, it was a case of taking the flap disc to it, followed by the power sander to flatten out any imperfections. This should still be under the seal, so I dont think I need to use filler.
Then a coat of etch primer to protect while I treat the surface rust which is around the rest of the frame.
Lastly I used my new lance to spray cavity wax on the rear of the weld, which did reveal two pinholes...easily dealt with though. Time for bed now!
-
 mat_the_cat got a reaction from Asimo in What has two seats, a mid-mounted 6 cylinder engine, and a turbo? Time for windscreen number 5!
Before doing any welding whatsoever, I made an extra long lance from 3 originals joined together.
This is so I could arrange it in the correct position for optimum coverage, before putting the panel in position.
I used mini G clamps to hold the 3 layers together.
And here you can see how the holes in the outer panel are lined up with those in the middle layer, which I'd previously only tacked into position and ground back.
This meant I could create a decent plug weld, and tie all 3 layers together.
Once I'd done all the plug welds and tacked the front edge, I ground them all back ready for seam welding in stages.
I was trying to minimise the gap to make life easier for myself when it came to welding 1mm steel. I found that on a current sufficient to get good penetration on the first pulse, by the time I'd laid down 3 or 4 more pulses, the localised heat build up meant I was in danger of blowing through, so I just moved on to another location. And repeat...
Finally, it was a case of taking the flap disc to it, followed by the power sander to flatten out any imperfections. This should still be under the seal, so I dont think I need to use filler.
Then a coat of etch primer to protect while I treat the surface rust which is around the rest of the frame.
Lastly I used my new lance to spray cavity wax on the rear of the weld, which did reveal two pinholes...easily dealt with though. Time for bed now!
-
.thumb.JPG.c423b11d285a842ce16ccde3f52edfdd.JPG) mat_the_cat got a reaction from Six-cylinder in What has two seats, a mid-mounted 6 cylinder engine, and a turbo? Time for windscreen number 5!
mat_the_cat got a reaction from Six-cylinder in What has two seats, a mid-mounted 6 cylinder engine, and a turbo? Time for windscreen number 5!
Before doing any welding whatsoever, I made an extra long lance from 3 originals joined together.
This is so I could arrange it in the correct position for optimum coverage, before putting the panel in position.
I used mini G clamps to hold the 3 layers together.
And here you can see how the holes in the outer panel are lined up with those in the middle layer, which I'd previously only tacked into position and ground back.
This meant I could create a decent plug weld, and tie all 3 layers together.
Once I'd done all the plug welds and tacked the front edge, I ground them all back ready for seam welding in stages.
I was trying to minimise the gap to make life easier for myself when it came to welding 1mm steel. I found that on a current sufficient to get good penetration on the first pulse, by the time I'd laid down 3 or 4 more pulses, the localised heat build up meant I was in danger of blowing through, so I just moved on to another location. And repeat...
Finally, it was a case of taking the flap disc to it, followed by the power sander to flatten out any imperfections. This should still be under the seal, so I dont think I need to use filler.
Then a coat of etch primer to protect while I treat the surface rust which is around the rest of the frame.
Lastly I used my new lance to spray cavity wax on the rear of the weld, which did reveal two pinholes...easily dealt with though. Time for bed now!
-
 mat_the_cat got a reaction from JakeT in What has two seats, a mid-mounted 6 cylinder engine, and a turbo? Time for windscreen number 5!
Before doing any welding whatsoever, I made an extra long lance from 3 originals joined together.
This is so I could arrange it in the correct position for optimum coverage, before putting the panel in position.
I used mini G clamps to hold the 3 layers together.
And here you can see how the holes in the outer panel are lined up with those in the middle layer, which I'd previously only tacked into position and ground back.
This meant I could create a decent plug weld, and tie all 3 layers together.
Once I'd done all the plug welds and tacked the front edge, I ground them all back ready for seam welding in stages.
I was trying to minimise the gap to make life easier for myself when it came to welding 1mm steel. I found that on a current sufficient to get good penetration on the first pulse, by the time I'd laid down 3 or 4 more pulses, the localised heat build up meant I was in danger of blowing through, so I just moved on to another location. And repeat...
Finally, it was a case of taking the flap disc to it, followed by the power sander to flatten out any imperfections. This should still be under the seal, so I dont think I need to use filler.
Then a coat of etch primer to protect while I treat the surface rust which is around the rest of the frame.
Lastly I used my new lance to spray cavity wax on the rear of the weld, which did reveal two pinholes...easily dealt with though. Time for bed now!
-
 mat_the_cat got a reaction from meshking in What has two seats, a mid-mounted 6 cylinder engine, and a turbo? Time for windscreen number 5!
Before doing any welding whatsoever, I made an extra long lance from 3 originals joined together.
This is so I could arrange it in the correct position for optimum coverage, before putting the panel in position.
I used mini G clamps to hold the 3 layers together.
And here you can see how the holes in the outer panel are lined up with those in the middle layer, which I'd previously only tacked into position and ground back.
This meant I could create a decent plug weld, and tie all 3 layers together.
Once I'd done all the plug welds and tacked the front edge, I ground them all back ready for seam welding in stages.
I was trying to minimise the gap to make life easier for myself when it came to welding 1mm steel. I found that on a current sufficient to get good penetration on the first pulse, by the time I'd laid down 3 or 4 more pulses, the localised heat build up meant I was in danger of blowing through, so I just moved on to another location. And repeat...
Finally, it was a case of taking the flap disc to it, followed by the power sander to flatten out any imperfections. This should still be under the seal, so I dont think I need to use filler.
Then a coat of etch primer to protect while I treat the surface rust which is around the rest of the frame.
Lastly I used my new lance to spray cavity wax on the rear of the weld, which did reveal two pinholes...easily dealt with though. Time for bed now!
-
 mat_the_cat got a reaction from Westbay in What has two seats, a mid-mounted 6 cylinder engine, and a turbo? Time for windscreen number 5!
Before doing any welding whatsoever, I made an extra long lance from 3 originals joined together.
This is so I could arrange it in the correct position for optimum coverage, before putting the panel in position.
I used mini G clamps to hold the 3 layers together.
And here you can see how the holes in the outer panel are lined up with those in the middle layer, which I'd previously only tacked into position and ground back.
This meant I could create a decent plug weld, and tie all 3 layers together.
Once I'd done all the plug welds and tacked the front edge, I ground them all back ready for seam welding in stages.
I was trying to minimise the gap to make life easier for myself when it came to welding 1mm steel. I found that on a current sufficient to get good penetration on the first pulse, by the time I'd laid down 3 or 4 more pulses, the localised heat build up meant I was in danger of blowing through, so I just moved on to another location. And repeat...
Finally, it was a case of taking the flap disc to it, followed by the power sander to flatten out any imperfections. This should still be under the seal, so I dont think I need to use filler.
Then a coat of etch primer to protect while I treat the surface rust which is around the rest of the frame.
Lastly I used my new lance to spray cavity wax on the rear of the weld, which did reveal two pinholes...easily dealt with though. Time for bed now!
-
 mat_the_cat got a reaction from Jenson Velcro in What has two seats, a mid-mounted 6 cylinder engine, and a turbo? Time for windscreen number 5!
Before doing any welding whatsoever, I made an extra long lance from 3 originals joined together.
This is so I could arrange it in the correct position for optimum coverage, before putting the panel in position.
I used mini G clamps to hold the 3 layers together.
And here you can see how the holes in the outer panel are lined up with those in the middle layer, which I'd previously only tacked into position and ground back.
This meant I could create a decent plug weld, and tie all 3 layers together.
Once I'd done all the plug welds and tacked the front edge, I ground them all back ready for seam welding in stages.
I was trying to minimise the gap to make life easier for myself when it came to welding 1mm steel. I found that on a current sufficient to get good penetration on the first pulse, by the time I'd laid down 3 or 4 more pulses, the localised heat build up meant I was in danger of blowing through, so I just moved on to another location. And repeat...
Finally, it was a case of taking the flap disc to it, followed by the power sander to flatten out any imperfections. This should still be under the seal, so I dont think I need to use filler.
Then a coat of etch primer to protect while I treat the surface rust which is around the rest of the frame.
Lastly I used my new lance to spray cavity wax on the rear of the weld, which did reveal two pinholes...easily dealt with though. Time for bed now!
-
 mat_the_cat got a reaction from catsinthewelder in What has two seats, a mid-mounted 6 cylinder engine, and a turbo? Time for windscreen number 5!
Before doing any welding whatsoever, I made an extra long lance from 3 originals joined together.
This is so I could arrange it in the correct position for optimum coverage, before putting the panel in position.
I used mini G clamps to hold the 3 layers together.
And here you can see how the holes in the outer panel are lined up with those in the middle layer, which I'd previously only tacked into position and ground back.
This meant I could create a decent plug weld, and tie all 3 layers together.
Once I'd done all the plug welds and tacked the front edge, I ground them all back ready for seam welding in stages.
I was trying to minimise the gap to make life easier for myself when it came to welding 1mm steel. I found that on a current sufficient to get good penetration on the first pulse, by the time I'd laid down 3 or 4 more pulses, the localised heat build up meant I was in danger of blowing through, so I just moved on to another location. And repeat...
Finally, it was a case of taking the flap disc to it, followed by the power sander to flatten out any imperfections. This should still be under the seal, so I dont think I need to use filler.
Then a coat of etch primer to protect while I treat the surface rust which is around the rest of the frame.
Lastly I used my new lance to spray cavity wax on the rear of the weld, which did reveal two pinholes...easily dealt with though. Time for bed now!