I’ve started a project for one of my partwork 1:43 Leyland FG trucks.
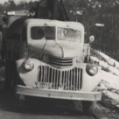
I have 3 of these so far so this one will be getting hacked about to resemble a car transporter truck. Something along the lines of this one. I’ve not decided on a livery yet but the basic truck will be similar.
I was going to scratch build the transporter deck but fortunately I have another partwork Pegaso truck bought cheaply to donate a rather nice one! Obviously there is a slight difference in length but most of that is the bed not the chassis.
Strip down. Here the FG chassis (grey) is actually bigger! The problem is though the cab design sits further back than the Pegaso cab and the the replacement transporter bed sits much further back on the chassis which looks quite odd.
This is just a quick mock up to show how it will sit. The wheelbase on the FG is quite short for the tipper body. With the longer transporter bed the rear axle is sitting too far forward. Obviously if it was a real truck with a load on it’d drive awfully with much of the weight too far behind the rear axle! Plus, it just looks wrong!
So it needs the chassis extended between the axles. Trying to move the axle back would be an arse as it’s all cast into the chassis with suspension springs etc too. So after a bit of fag packet maths and trying to decide exactly where best to cut, the razor saw was deployed! I had to chop the air tank off the side of the chassis as it was right in the way of the cut, but I’ve got the bit and it will go back on later.
No going back now.
I found some spare lengths of brass section and some nickel silver angle section left over from one of my model railway projects so these will be perfect for the chassis extension.
This might be a bit overkill really but I figured it better to be too strong than not strong enough considering it’s likely to have a diecast car on the back.
I cut 4 lengths of the nickel silver angle, basically to create a C channel that fit in between the chassis cross members then glued them onto the original chassis on one half.
Then went for lunch while it dried.
Once dry I lined up the other original chassis half in the C channel and, after measuring it was the right size and square glued that in position.
It’s actually very strong now! The gap inside the C channel will be filled in with some brass strip and filled smooth so it looks original.
With that fully cured and rock solid here’s another mock up to show the difference.
The rear axle is now moved back almost by its own width. My measurement was a 16mm extension to the chassis which puts the axle about right when looking at pictures of real FG transporters.
It just looks right now too, when a car sits on the bed the load is right over the rear axle rather than behind it.
Ive also modified the underside of the bed. Originally it had two short frame legs at the very back only which fit flush with the back of the Pegaso chassis. I’ve had to cut some plastic card strips to extend these to become full length of the bed, as without them the bed hits the wheel arch covers but also looks a bit too low.
I’ve left everything to go off now, but the next task is to finish filling the ‘gap’ in the new chassis to flush it off with the original. Then glue the air tank back in place. I might refit the spare wheel mounting under one side (it was under the back originally). Or should I leave it off??
The transporter bed will get a rub down with fine wet & dry then given a coat of primer.
Cab needs stripping down and paint removing, then the SAVA spec additional grill slots filling in.
Interior needs swapping over to rhd. It’s a nice little interior unit on these! I used to play in an abandoned FG as a kid! It was an ex BR mobile workshop truck dumped in the corner of a field. The cab interior looked exactly like this!
That truck is actually still there too.
That was actually a days work! Most of the time was wasted by having to keep looking for tools and bits & bobs I’ve packed for moving house. Incredibly frustrating!


 matt79 got a reaction from AndyW201 in Shite in Miniature II
 matt79 got a reaction from Remspoor in Shite in Miniature II
 matt79 got a reaction from andrew e in Shite in Miniature II

 matt79 got a reaction from Stinkwheel in eBay tat volume 3.


.thumb.JPG.c423b11d285a842ce16ccde3f52edfdd.JPG)