


jonny69
-
Posts
2,418 -
Joined
-
Last visited
Reputation Activity
-

 jonny69 got a reaction from LightBulbFun in Mind the used Jonnys. Anglia 105E & G1 Honda Insight FOR SALE
Lunchtime shens. I soldered up the resistors and connected the solenoid up to my 12V supply so I could trigger it manually and have a look at what the battery sticks do. Started with an 8 Ohm resistor because not much can go wrong there and then added in the 1 Ohm ones one by one as I got braver. So with all five 1 Ohm resistors in parallel, that's 0.2 Ohms, which is about 40A at 8V and 35A at 7V depending on the state of charge. Just for reference, the car commands about 10A for cranking and 35-40A at around 50% hybrid assist when driving.
This stick was sitting around 7.7V resting voltage, and pulled down to 7V with the full load attached:
Emergency snips on hand in case anything bad happens. Snip through that thick red wire on the left.
The voltage actually settled after a few seconds so I don’t think I’ll need to bother with the Arduino. I think I'm just interested to see what it drops to under heavy load, to see if there are any weak cells and I'm pretty sure this will tell me what I need to know. It’ll be pretty obvious which sticks have a weak or bad cell in them because the voltage will drop further.
I actually brought two sticks in to play with and, based on the above, it looks like I might have one good one and one bad one on the bench. MUCH EXCITE. 'Bad' stick was 7.3V resting and 5.2V under load - a much bigger drop. However, I do need to repeat this after a full charge because these Insight sticks haven’t been charged since July and are probably a bit self-discharged. Then I can rattle through these of a lunchtime. Takes very little time per stick, but there are 60 of them to do!
-
 jonny69 reacted to Tickman in Mind the used Jonnys. Anglia 105E & G1 Honda Insight FOR SALE
This is all just words but very interesting words.
-
 jonny69 got a reaction from loserone in Mind the used Jonnys. Anglia 105E & G1 Honda Insight FOR SALE
They must have been absolutely amazing batteries. If you think that up until a couple of months ago mine was still happy delivering 100A at full assist until just one or two of them in the pack couldn’t do it. A hundred amps; that is in excess of MIG welding currents out of an 18 year old battery!
-
 jonny69 got a reaction from Tickman in Mind the used Jonnys. Anglia 105E & G1 Honda Insight FOR SALE
That’s not a bad shout. I’m not an expert on that scope but I’m pretty sure it’ll do what you’ve described and hold the trace on the screen.
-
 jonny69 got a reaction from rainagain in Mind the used Jonnys. Anglia 105E & G1 Honda Insight FOR SALE
Lunchtime shens. I soldered up the resistors and connected the solenoid up to my 12V supply so I could trigger it manually and have a look at what the battery sticks do. Started with an 8 Ohm resistor because not much can go wrong there and then added in the 1 Ohm ones one by one as I got braver. So with all five 1 Ohm resistors in parallel, that's 0.2 Ohms, which is about 40A at 8V and 35A at 7V depending on the state of charge. Just for reference, the car commands about 10A for cranking and 35-40A at around 50% hybrid assist when driving.
This stick was sitting around 7.7V resting voltage, and pulled down to 7V with the full load attached:
Emergency snips on hand in case anything bad happens. Snip through that thick red wire on the left.
The voltage actually settled after a few seconds so I don’t think I’ll need to bother with the Arduino. I think I'm just interested to see what it drops to under heavy load, to see if there are any weak cells and I'm pretty sure this will tell me what I need to know. It’ll be pretty obvious which sticks have a weak or bad cell in them because the voltage will drop further.
I actually brought two sticks in to play with and, based on the above, it looks like I might have one good one and one bad one on the bench. MUCH EXCITE. 'Bad' stick was 7.3V resting and 5.2V under load - a much bigger drop. However, I do need to repeat this after a full charge because these Insight sticks haven’t been charged since July and are probably a bit self-discharged. Then I can rattle through these of a lunchtime. Takes very little time per stick, but there are 60 of them to do!
-
jonny69 got a reaction from LightBulbFun in Mind the used Jonnys. Anglia 105E & G1 Honda Insight FOR SALE
Right then, got pretty much everything I need. Essentially what I was planning to do was just take a voltage reading, manually trigger the solenoid and take another voltage reading after 5-6 seconds. This would be perfectly adequate, but I decided to complicate things a little by adding some Arduino control. I can get the Arduino to automatically trigger the solenoid and read/log the voltage for 5-6 seconds, then disconnect it again. So below I’ve got:
Spare bit of aluminium extrusion construction kit stuff, two Insight sticks, bag of high current M8 ring terminals, Arduino UNO, 4x relay board for the Arduino, bag of 100W 1R resistors, and a 1970s Triumph starter solenoid. Well spotted @captain_70s
Quick mock-up with some bolts and washers and T-slot nuts for the extrusion stuff and it’s going to look something like this:
The Arduino will be controlling the board with 4x relays. Will get one of those relays to switch on the starter solenoid from a 12V supply. It pulls about 3A at 12V DC so it’s probably going to need a flywheel diode across the solenoid coil to protect the relay. Relay is rated to 10A at 30V DC but my experience is switching DC tends to make those sorts of relays stick. I found some 1N5401 diodes in my stash at work which are pretty big. They ought to handle anything the coil spits back out.
So then the Arduino reads the voltage. It only reads up to 5V and the stick voltage is 8-9V depending on state of charge, so I’ll put it on a 10k potential divider with a 50/50 split. My pal also suggested I put a 5V Zener diode across the Arduino to protect it from getting fried when the solenoid disconnects the batteries. I had another root in my stash and found some 1N5338B Zeners which are 5.1V. Voltage reading range will be up to around 4.2V so they’re ideal.
I am of course wondering if I’m over-complicating things. It’s not too late to back out of this and just do it manually…
-
jonny69 got a reaction from Tickman in Mind the used Jonnys. Anglia 105E & G1 Honda Insight FOR SALE
Lunchtime shens. I soldered up the resistors and connected the solenoid up to my 12V supply so I could trigger it manually and have a look at what the battery sticks do. Started with an 8 Ohm resistor because not much can go wrong there and then added in the 1 Ohm ones one by one as I got braver. So with all five 1 Ohm resistors in parallel, that's 0.2 Ohms, which is about 40A at 8V and 35A at 7V depending on the state of charge. Just for reference, the car commands about 10A for cranking and 35-40A at around 50% hybrid assist when driving.
This stick was sitting around 7.7V resting voltage, and pulled down to 7V with the full load attached:
Emergency snips on hand in case anything bad happens. Snip through that thick red wire on the left.
The voltage actually settled after a few seconds so I don’t think I’ll need to bother with the Arduino. I think I'm just interested to see what it drops to under heavy load, to see if there are any weak cells and I'm pretty sure this will tell me what I need to know. It’ll be pretty obvious which sticks have a weak or bad cell in them because the voltage will drop further.
I actually brought two sticks in to play with and, based on the above, it looks like I might have one good one and one bad one on the bench. MUCH EXCITE. 'Bad' stick was 7.3V resting and 5.2V under load - a much bigger drop. However, I do need to repeat this after a full charge because these Insight sticks haven’t been charged since July and are probably a bit self-discharged. Then I can rattle through these of a lunchtime. Takes very little time per stick, but there are 60 of them to do!
-
 jonny69 got a reaction from RayMK in Mind the used Jonnys. Anglia 105E & G1 Honda Insight FOR SALE
Lunchtime shens. I soldered up the resistors and connected the solenoid up to my 12V supply so I could trigger it manually and have a look at what the battery sticks do. Started with an 8 Ohm resistor because not much can go wrong there and then added in the 1 Ohm ones one by one as I got braver. So with all five 1 Ohm resistors in parallel, that's 0.2 Ohms, which is about 40A at 8V and 35A at 7V depending on the state of charge. Just for reference, the car commands about 10A for cranking and 35-40A at around 50% hybrid assist when driving.
This stick was sitting around 7.7V resting voltage, and pulled down to 7V with the full load attached:
Emergency snips on hand in case anything bad happens. Snip through that thick red wire on the left.
The voltage actually settled after a few seconds so I don’t think I’ll need to bother with the Arduino. I think I'm just interested to see what it drops to under heavy load, to see if there are any weak cells and I'm pretty sure this will tell me what I need to know. It’ll be pretty obvious which sticks have a weak or bad cell in them because the voltage will drop further.
I actually brought two sticks in to play with and, based on the above, it looks like I might have one good one and one bad one on the bench. MUCH EXCITE. 'Bad' stick was 7.3V resting and 5.2V under load - a much bigger drop. However, I do need to repeat this after a full charge because these Insight sticks haven’t been charged since July and are probably a bit self-discharged. Then I can rattle through these of a lunchtime. Takes very little time per stick, but there are 60 of them to do!
-
jonny69 reacted to Asimo in Mind the used Jonnys. Anglia 105E & G1 Honda Insight FOR SALE
As you've got the 'scope meter, why not set the 'scope up single shot with timebase say = 30 seconds.
Serial number on the stick, run the test, photograph the plot with it's serialised stick. and repeat.
Unmuddleable* record of each stick's 30 second discharge characteristic!
-
 jonny69 got a reaction from Zie in Mind the used Jonnys. Anglia 105E & G1 Honda Insight FOR SALE
Lunchtime shens. I soldered up the resistors and connected the solenoid up to my 12V supply so I could trigger it manually and have a look at what the battery sticks do. Started with an 8 Ohm resistor because not much can go wrong there and then added in the 1 Ohm ones one by one as I got braver. So with all five 1 Ohm resistors in parallel, that's 0.2 Ohms, which is about 40A at 8V and 35A at 7V depending on the state of charge. Just for reference, the car commands about 10A for cranking and 35-40A at around 50% hybrid assist when driving.
This stick was sitting around 7.7V resting voltage, and pulled down to 7V with the full load attached:
Emergency snips on hand in case anything bad happens. Snip through that thick red wire on the left.
The voltage actually settled after a few seconds so I don’t think I’ll need to bother with the Arduino. I think I'm just interested to see what it drops to under heavy load, to see if there are any weak cells and I'm pretty sure this will tell me what I need to know. It’ll be pretty obvious which sticks have a weak or bad cell in them because the voltage will drop further.
I actually brought two sticks in to play with and, based on the above, it looks like I might have one good one and one bad one on the bench. MUCH EXCITE. 'Bad' stick was 7.3V resting and 5.2V under load - a much bigger drop. However, I do need to repeat this after a full charge because these Insight sticks haven’t been charged since July and are probably a bit self-discharged. Then I can rattle through these of a lunchtime. Takes very little time per stick, but there are 60 of them to do!
-
 jonny69 got a reaction from mk2_craig in Mind the used Jonnys. Anglia 105E & G1 Honda Insight FOR SALE
Lunchtime shens. I soldered up the resistors and connected the solenoid up to my 12V supply so I could trigger it manually and have a look at what the battery sticks do. Started with an 8 Ohm resistor because not much can go wrong there and then added in the 1 Ohm ones one by one as I got braver. So with all five 1 Ohm resistors in parallel, that's 0.2 Ohms, which is about 40A at 8V and 35A at 7V depending on the state of charge. Just for reference, the car commands about 10A for cranking and 35-40A at around 50% hybrid assist when driving.
This stick was sitting around 7.7V resting voltage, and pulled down to 7V with the full load attached:
Emergency snips on hand in case anything bad happens. Snip through that thick red wire on the left.
The voltage actually settled after a few seconds so I don’t think I’ll need to bother with the Arduino. I think I'm just interested to see what it drops to under heavy load, to see if there are any weak cells and I'm pretty sure this will tell me what I need to know. It’ll be pretty obvious which sticks have a weak or bad cell in them because the voltage will drop further.
I actually brought two sticks in to play with and, based on the above, it looks like I might have one good one and one bad one on the bench. MUCH EXCITE. 'Bad' stick was 7.3V resting and 5.2V under load - a much bigger drop. However, I do need to repeat this after a full charge because these Insight sticks haven’t been charged since July and are probably a bit self-discharged. Then I can rattle through these of a lunchtime. Takes very little time per stick, but there are 60 of them to do!
-
 jonny69 got a reaction from grizgut in Mind the used Jonnys. Anglia 105E & G1 Honda Insight FOR SALE
Lunchtime shens. I soldered up the resistors and connected the solenoid up to my 12V supply so I could trigger it manually and have a look at what the battery sticks do. Started with an 8 Ohm resistor because not much can go wrong there and then added in the 1 Ohm ones one by one as I got braver. So with all five 1 Ohm resistors in parallel, that's 0.2 Ohms, which is about 40A at 8V and 35A at 7V depending on the state of charge. Just for reference, the car commands about 10A for cranking and 35-40A at around 50% hybrid assist when driving.
This stick was sitting around 7.7V resting voltage, and pulled down to 7V with the full load attached:
Emergency snips on hand in case anything bad happens. Snip through that thick red wire on the left.
The voltage actually settled after a few seconds so I don’t think I’ll need to bother with the Arduino. I think I'm just interested to see what it drops to under heavy load, to see if there are any weak cells and I'm pretty sure this will tell me what I need to know. It’ll be pretty obvious which sticks have a weak or bad cell in them because the voltage will drop further.
I actually brought two sticks in to play with and, based on the above, it looks like I might have one good one and one bad one on the bench. MUCH EXCITE. 'Bad' stick was 7.3V resting and 5.2V under load - a much bigger drop. However, I do need to repeat this after a full charge because these Insight sticks haven’t been charged since July and are probably a bit self-discharged. Then I can rattle through these of a lunchtime. Takes very little time per stick, but there are 60 of them to do!
-
jonny69 got a reaction from Tickman in Mind the used Jonnys. Anglia 105E & G1 Honda Insight FOR SALE
Right then, got pretty much everything I need. Essentially what I was planning to do was just take a voltage reading, manually trigger the solenoid and take another voltage reading after 5-6 seconds. This would be perfectly adequate, but I decided to complicate things a little by adding some Arduino control. I can get the Arduino to automatically trigger the solenoid and read/log the voltage for 5-6 seconds, then disconnect it again. So below I’ve got:
Spare bit of aluminium extrusion construction kit stuff, two Insight sticks, bag of high current M8 ring terminals, Arduino UNO, 4x relay board for the Arduino, bag of 100W 1R resistors, and a 1970s Triumph starter solenoid. Well spotted @captain_70s
Quick mock-up with some bolts and washers and T-slot nuts for the extrusion stuff and it’s going to look something like this:
The Arduino will be controlling the board with 4x relays. Will get one of those relays to switch on the starter solenoid from a 12V supply. It pulls about 3A at 12V DC so it’s probably going to need a flywheel diode across the solenoid coil to protect the relay. Relay is rated to 10A at 30V DC but my experience is switching DC tends to make those sorts of relays stick. I found some 1N5401 diodes in my stash at work which are pretty big. They ought to handle anything the coil spits back out.
So then the Arduino reads the voltage. It only reads up to 5V and the stick voltage is 8-9V depending on state of charge, so I’ll put it on a 10k potential divider with a 50/50 split. My pal also suggested I put a 5V Zener diode across the Arduino to protect it from getting fried when the solenoid disconnects the batteries. I had another root in my stash and found some 1N5338B Zeners which are 5.1V. Voltage reading range will be up to around 4.2V so they’re ideal.
I am of course wondering if I’m over-complicating things. It’s not too late to back out of this and just do it manually…
-
 jonny69 got a reaction from Asimo in Mind the used Jonnys. Anglia 105E & G1 Honda Insight FOR SALE
Lunchtime shens. I soldered up the resistors and connected the solenoid up to my 12V supply so I could trigger it manually and have a look at what the battery sticks do. Started with an 8 Ohm resistor because not much can go wrong there and then added in the 1 Ohm ones one by one as I got braver. So with all five 1 Ohm resistors in parallel, that's 0.2 Ohms, which is about 40A at 8V and 35A at 7V depending on the state of charge. Just for reference, the car commands about 10A for cranking and 35-40A at around 50% hybrid assist when driving.
This stick was sitting around 7.7V resting voltage, and pulled down to 7V with the full load attached:
Emergency snips on hand in case anything bad happens. Snip through that thick red wire on the left.
The voltage actually settled after a few seconds so I don’t think I’ll need to bother with the Arduino. I think I'm just interested to see what it drops to under heavy load, to see if there are any weak cells and I'm pretty sure this will tell me what I need to know. It’ll be pretty obvious which sticks have a weak or bad cell in them because the voltage will drop further.
I actually brought two sticks in to play with and, based on the above, it looks like I might have one good one and one bad one on the bench. MUCH EXCITE. 'Bad' stick was 7.3V resting and 5.2V under load - a much bigger drop. However, I do need to repeat this after a full charge because these Insight sticks haven’t been charged since July and are probably a bit self-discharged. Then I can rattle through these of a lunchtime. Takes very little time per stick, but there are 60 of them to do!
-
 jonny69 got a reaction from Jenson Velcro in Mind the used Jonnys. Anglia 105E & G1 Honda Insight FOR SALE
Lunchtime shens. I soldered up the resistors and connected the solenoid up to my 12V supply so I could trigger it manually and have a look at what the battery sticks do. Started with an 8 Ohm resistor because not much can go wrong there and then added in the 1 Ohm ones one by one as I got braver. So with all five 1 Ohm resistors in parallel, that's 0.2 Ohms, which is about 40A at 8V and 35A at 7V depending on the state of charge. Just for reference, the car commands about 10A for cranking and 35-40A at around 50% hybrid assist when driving.
This stick was sitting around 7.7V resting voltage, and pulled down to 7V with the full load attached:
Emergency snips on hand in case anything bad happens. Snip through that thick red wire on the left.
The voltage actually settled after a few seconds so I don’t think I’ll need to bother with the Arduino. I think I'm just interested to see what it drops to under heavy load, to see if there are any weak cells and I'm pretty sure this will tell me what I need to know. It’ll be pretty obvious which sticks have a weak or bad cell in them because the voltage will drop further.
I actually brought two sticks in to play with and, based on the above, it looks like I might have one good one and one bad one on the bench. MUCH EXCITE. 'Bad' stick was 7.3V resting and 5.2V under load - a much bigger drop. However, I do need to repeat this after a full charge because these Insight sticks haven’t been charged since July and are probably a bit self-discharged. Then I can rattle through these of a lunchtime. Takes very little time per stick, but there are 60 of them to do!
-
 jonny69 got a reaction from dome in Mind the used Jonnys. Anglia 105E & G1 Honda Insight FOR SALE
Lunchtime shens. I soldered up the resistors and connected the solenoid up to my 12V supply so I could trigger it manually and have a look at what the battery sticks do. Started with an 8 Ohm resistor because not much can go wrong there and then added in the 1 Ohm ones one by one as I got braver. So with all five 1 Ohm resistors in parallel, that's 0.2 Ohms, which is about 40A at 8V and 35A at 7V depending on the state of charge. Just for reference, the car commands about 10A for cranking and 35-40A at around 50% hybrid assist when driving.
This stick was sitting around 7.7V resting voltage, and pulled down to 7V with the full load attached:
Emergency snips on hand in case anything bad happens. Snip through that thick red wire on the left.
The voltage actually settled after a few seconds so I don’t think I’ll need to bother with the Arduino. I think I'm just interested to see what it drops to under heavy load, to see if there are any weak cells and I'm pretty sure this will tell me what I need to know. It’ll be pretty obvious which sticks have a weak or bad cell in them because the voltage will drop further.
I actually brought two sticks in to play with and, based on the above, it looks like I might have one good one and one bad one on the bench. MUCH EXCITE. 'Bad' stick was 7.3V resting and 5.2V under load - a much bigger drop. However, I do need to repeat this after a full charge because these Insight sticks haven’t been charged since July and are probably a bit self-discharged. Then I can rattle through these of a lunchtime. Takes very little time per stick, but there are 60 of them to do!
-
jonny69 got a reaction from Asimo in Mind the used Jonnys. Anglia 105E & G1 Honda Insight FOR SALE
Right then, got pretty much everything I need. Essentially what I was planning to do was just take a voltage reading, manually trigger the solenoid and take another voltage reading after 5-6 seconds. This would be perfectly adequate, but I decided to complicate things a little by adding some Arduino control. I can get the Arduino to automatically trigger the solenoid and read/log the voltage for 5-6 seconds, then disconnect it again. So below I’ve got:
Spare bit of aluminium extrusion construction kit stuff, two Insight sticks, bag of high current M8 ring terminals, Arduino UNO, 4x relay board for the Arduino, bag of 100W 1R resistors, and a 1970s Triumph starter solenoid. Well spotted @captain_70s
Quick mock-up with some bolts and washers and T-slot nuts for the extrusion stuff and it’s going to look something like this:
The Arduino will be controlling the board with 4x relays. Will get one of those relays to switch on the starter solenoid from a 12V supply. It pulls about 3A at 12V DC so it’s probably going to need a flywheel diode across the solenoid coil to protect the relay. Relay is rated to 10A at 30V DC but my experience is switching DC tends to make those sorts of relays stick. I found some 1N5401 diodes in my stash at work which are pretty big. They ought to handle anything the coil spits back out.
So then the Arduino reads the voltage. It only reads up to 5V and the stick voltage is 8-9V depending on state of charge, so I’ll put it on a 10k potential divider with a 50/50 split. My pal also suggested I put a 5V Zener diode across the Arduino to protect it from getting fried when the solenoid disconnects the batteries. I had another root in my stash and found some 1N5338B Zeners which are 5.1V. Voltage reading range will be up to around 4.2V so they’re ideal.
I am of course wondering if I’m over-complicating things. It’s not too late to back out of this and just do it manually…
-
jonny69 got a reaction from mk2_craig in Mind the used Jonnys. Anglia 105E & G1 Honda Insight FOR SALE
Right then, got pretty much everything I need. Essentially what I was planning to do was just take a voltage reading, manually trigger the solenoid and take another voltage reading after 5-6 seconds. This would be perfectly adequate, but I decided to complicate things a little by adding some Arduino control. I can get the Arduino to automatically trigger the solenoid and read/log the voltage for 5-6 seconds, then disconnect it again. So below I’ve got:
Spare bit of aluminium extrusion construction kit stuff, two Insight sticks, bag of high current M8 ring terminals, Arduino UNO, 4x relay board for the Arduino, bag of 100W 1R resistors, and a 1970s Triumph starter solenoid. Well spotted @captain_70s
Quick mock-up with some bolts and washers and T-slot nuts for the extrusion stuff and it’s going to look something like this:
The Arduino will be controlling the board with 4x relays. Will get one of those relays to switch on the starter solenoid from a 12V supply. It pulls about 3A at 12V DC so it’s probably going to need a flywheel diode across the solenoid coil to protect the relay. Relay is rated to 10A at 30V DC but my experience is switching DC tends to make those sorts of relays stick. I found some 1N5401 diodes in my stash at work which are pretty big. They ought to handle anything the coil spits back out.
So then the Arduino reads the voltage. It only reads up to 5V and the stick voltage is 8-9V depending on state of charge, so I’ll put it on a 10k potential divider with a 50/50 split. My pal also suggested I put a 5V Zener diode across the Arduino to protect it from getting fried when the solenoid disconnects the batteries. I had another root in my stash and found some 1N5338B Zeners which are 5.1V. Voltage reading range will be up to around 4.2V so they’re ideal.
I am of course wondering if I’m over-complicating things. It’s not too late to back out of this and just do it manually…
-
 jonny69 got a reaction from sdkrc in Mind the used Jonnys. Anglia 105E & G1 Honda Insight FOR SALE
Right then, got pretty much everything I need. Essentially what I was planning to do was just take a voltage reading, manually trigger the solenoid and take another voltage reading after 5-6 seconds. This would be perfectly adequate, but I decided to complicate things a little by adding some Arduino control. I can get the Arduino to automatically trigger the solenoid and read/log the voltage for 5-6 seconds, then disconnect it again. So below I’ve got:
Spare bit of aluminium extrusion construction kit stuff, two Insight sticks, bag of high current M8 ring terminals, Arduino UNO, 4x relay board for the Arduino, bag of 100W 1R resistors, and a 1970s Triumph starter solenoid. Well spotted @captain_70s
Quick mock-up with some bolts and washers and T-slot nuts for the extrusion stuff and it’s going to look something like this:
The Arduino will be controlling the board with 4x relays. Will get one of those relays to switch on the starter solenoid from a 12V supply. It pulls about 3A at 12V DC so it’s probably going to need a flywheel diode across the solenoid coil to protect the relay. Relay is rated to 10A at 30V DC but my experience is switching DC tends to make those sorts of relays stick. I found some 1N5401 diodes in my stash at work which are pretty big. They ought to handle anything the coil spits back out.
So then the Arduino reads the voltage. It only reads up to 5V and the stick voltage is 8-9V depending on state of charge, so I’ll put it on a 10k potential divider with a 50/50 split. My pal also suggested I put a 5V Zener diode across the Arduino to protect it from getting fried when the solenoid disconnects the batteries. I had another root in my stash and found some 1N5338B Zeners which are 5.1V. Voltage reading range will be up to around 4.2V so they’re ideal.
I am of course wondering if I’m over-complicating things. It’s not too late to back out of this and just do it manually…
-
 jonny69 got a reaction from auntiemaryscanary in Mind the used Jonnys. Anglia 105E & G1 Honda Insight FOR SALE
Right then, got pretty much everything I need. Essentially what I was planning to do was just take a voltage reading, manually trigger the solenoid and take another voltage reading after 5-6 seconds. This would be perfectly adequate, but I decided to complicate things a little by adding some Arduino control. I can get the Arduino to automatically trigger the solenoid and read/log the voltage for 5-6 seconds, then disconnect it again. So below I’ve got:
Spare bit of aluminium extrusion construction kit stuff, two Insight sticks, bag of high current M8 ring terminals, Arduino UNO, 4x relay board for the Arduino, bag of 100W 1R resistors, and a 1970s Triumph starter solenoid. Well spotted @captain_70s
Quick mock-up with some bolts and washers and T-slot nuts for the extrusion stuff and it’s going to look something like this:
The Arduino will be controlling the board with 4x relays. Will get one of those relays to switch on the starter solenoid from a 12V supply. It pulls about 3A at 12V DC so it’s probably going to need a flywheel diode across the solenoid coil to protect the relay. Relay is rated to 10A at 30V DC but my experience is switching DC tends to make those sorts of relays stick. I found some 1N5401 diodes in my stash at work which are pretty big. They ought to handle anything the coil spits back out.
So then the Arduino reads the voltage. It only reads up to 5V and the stick voltage is 8-9V depending on state of charge, so I’ll put it on a 10k potential divider with a 50/50 split. My pal also suggested I put a 5V Zener diode across the Arduino to protect it from getting fried when the solenoid disconnects the batteries. I had another root in my stash and found some 1N5338B Zeners which are 5.1V. Voltage reading range will be up to around 4.2V so they’re ideal.
I am of course wondering if I’m over-complicating things. It’s not too late to back out of this and just do it manually…
-
jonny69 got a reaction from dome in Mind the used Jonnys. Anglia 105E & G1 Honda Insight FOR SALE
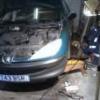
Another Civic battery has entered the building. Let the stick matching commence.
So the rough plan of action here is to get an idea of the capacity of the sticks and to see what they do under load. I had a root through my resistors in the loft and I’ve got these, which will do me a selection of loads from almost nothing up to a couple of amps:
They’ll be fine for voltage readings and light discharge. Then to pull some serious current out of them to highlight any bad cells, I’ve bought five 1 Ohm 100W resistors. The stick voltage is around 8V when charged, so each of these will pull 8A. That’s about 64W going through the resistor. With all of them in parallel, I’ll be able to pull 40A out of a stick for a couple of seconds and basically see what the stick does under heavy load. That’s a lot of current, so I’ll be switching it with a spare solenoid I found in my shed stash:
Handy. I’ve also got some heavy gauge wire and M8 ring terminals that can handle that sort of current. I should be able to sort all the sticks and pick the best ones and make a good pack.
I’m stressing a little less about this now because I’ve sorted out a tiny replacement. That means I don’t have to worry too much about timescales or insurance, I’ll just sort that out ad-hoc for test drives, MOT etc.
-
 jonny69 got a reaction from yes oui si in HMC- 1979 escort 1.3GL is here!
Full pineapple on the Beetle please.
Those hand-painted plates, you tend to see them on much older stuff. I usually see them on VSCC-age vehicles or older, Brooklands kind of stuff. Cool find.
-
jonny69 got a reaction from mk2_craig in Cars that are an antithesis of eachother..
Well for a start there’s a 207 sat outside, so everything else is more special than that. Note no asterisk required on everything. Nothing is well thought out on that turd; bad design decisions on other cars look like engineering marvels in comparison.
-
 jonny69 got a reaction from HMC in HMC- 1979 escort 1.3GL is here!
Full pineapple on the Beetle please.
Those hand-painted plates, you tend to see them on much older stuff. I usually see them on VSCC-age vehicles or older, Brooklands kind of stuff. Cool find.
-
 jonny69 got a reaction from Rust Collector in 1964 Volvo 122S - Amazonian rustforest. Electroshite.
This is looking gr9 m7.
Those pinholed lower panels - I did exactly the same with the rear panel on my Anglia. As long as you seal it well on both sides it works just fine. Painted mine in 2007 and it’s one of the panels which have survived the best!