


dieselnutjob
-
Posts
3,428 -
Joined
-
Last visited
Content Type
Profiles
Forums
Events
Posts posted by dieselnutjob
-
-
Please can someone tell me how the trinary switch system works on the 75 coolant fan?
I have a 75 ECU now running on my Freelander 1 (I already got hill descent and traction control working), but the way a Freelander1 ECU controls its cooling fan is totally different.
I think that the solution is to convert the Freelander 1 to the 75 trinary switch system but I don't really understand how they work. It has air conditioning so I'll have to do that the 75 way as well.
-
anyone know of a breakers that specialises in 75s ?
I'm after a torque converter but it needs to be from a 1.8 K series auto.
-
-
I love my Jag XJ 2.7 diesel.
It's really quick and yet can do 50mpg on a run with just a little restraint.
It's supremely comfortable and has all the toys.
It can tow a two ton trailer.
However I don't think it complies with "peak" car because if one ECU fails, or the battery is a bit weak then all the electronics go nuts, and it's not ULEZ compliant so it' rapidly becoming an ornament instead of a car.
For me peak car has electronics, because toys like cruise control, but they should remain discrete and having one fail shouldn't kill the whole car. My 1996 Passat was like that and so was the 2000 806.
The smaller Rovers (25/45) were also like that and the last ones are ULEZ compliant so maybe peak car is a Rover 45 unless the last of the last Peugeot 406 was ULEZ compliant.
-
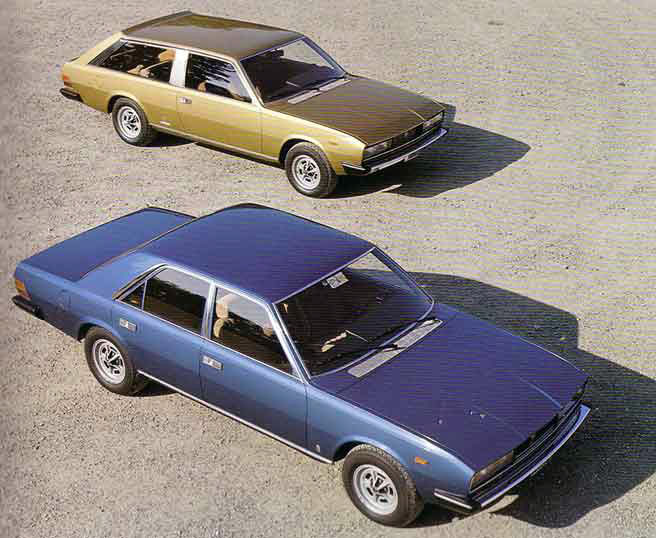
There is a 604 for sale in Doncaster at the moment:-
-
Not sure if this is the right place to leave this:-
- coachie, SteersWithThrottle, LabRat and 1 other
-
 4
4
-
It probably is worse.
-
I started looking into rust in the engine bay, which can only be fixed now with the engine out.
This is the drivers side "chassis" rail that runs along the bottom of the inner wing.

you can see some holes where the metal has become so thin that holes have formed
and this is view of the same rail from underneath
I also made the mistake of poking at some loose underseal on the wheelarch / splash guard thing
-
The 604 was used as a goon car in Never Say Never Again
-
-
-
-
I have been chatting on WhatsApp with someone in CPUK and he has convinced my not to worry about the oil galleries. He said the same thing that I was kind of thinking, which is that drilling out galleries should only be done in the context of a total stripdown so that swarf can by properly cleaned out.
However I am going to have a go at getting the rocker arms off. On one side the shaft can easily be slid out but on the other I think it has to go either through or past the camshaft drive sprocket and the timing cover definitely has to come off. I just found out that Deloreango has plenty of stock of timing cover gaskets so that settles it.
-
I posted a question on Aussiefrogs seven years ago about the PRV engine and finally got an answer.
The post is here https://www.aussiefrogs.com/forum/index.php?threads/prv-v6-top-end-lubrication-mod.113300/
The oil pressure on this engine is maybe a little low, but then equally I was running it on fully synthetic oil (I think 5W40) and it's maybe too thin.
Edit: let me clarify. On a normal idle the light doesn't come on. But if the idle is a bit low then the light starts flickering.
Normal advice is that these "modern" oils are too thin for a classic, but according to the Renault Alpine folks the PRV engines were actually manufactured to pretty modern tolerances and they think that modern synthetics are good for them.
So given how much work it is to get these engines out should I strip it down and check stuff? Or just do the obvious and easy (front and rear oil seals, rocker arms because I have some good ones).
If I have to pull the front pulley to change the oil seal (and I do) then I could pretty easily pull off the timing cover and check out the chain and tensioners at the same time.
I checked the compression last year and it was good on all six. There's no blue smoke from the exhaust but I can't tell what oil consumption is like because it leaks out of the engine so fast.
-
-
5 minutes ago, spartacus said:
@dieselnutjob, this is a 'go to' thread for me now, I'm loving the progress you're making on what was frankly a forgotten car. Please be careful working in that tight space, although I do understand it's all you've got.
yes it is a little tight but I am absolutely loving it.
I haven't really had a proper weather proof enclosed space to work in before, and being able to just leave stuff where it is to have a break or even come back to it the next day is such a relief. The access road that the garage is on is now secure (there are security gates across all the entrances) so I don't have to worry that someone is going to nick my tools if I leave it open whilst I go away for 1/2 hour.
In comparison four years ago I changed the turbo on the Jag on my front drive and I just hate working like that. Every time I needed a tool that I hadn't anticipated I have to go through the house to get it and being a busy road I just couldn't leave things for more than a few minutes. There was also the soul destroying feeling of a rain shower starting.
-
One of the harder parts was getting the starter motor off.
Once you see these photos it's obvious, but when it's on the car it's very difficult to figure out because you just cannot see the bolts.
The official Peugeot manual was no help, neither was the Renault 30 nor Volvo 740 / 760 Haynes manuals.
However the Volvo 260 Haynes manual (number 400) had a beautiful photo of the starter motor which really helped.
The struggle was figuring out how the forward end (near the oil filter) is attached.
It's held on by the two slots that you can clearly see once it's off
which is located onto the block with the two bolts shown here
I didn't do much yesterday.
This morning I just put all of the bolts into the right holes and made sure that all of the holes had a bolt.
I know that this engine will be out for a while and I know that in a few weeks time I won't remember where everything is or where it goes.
-
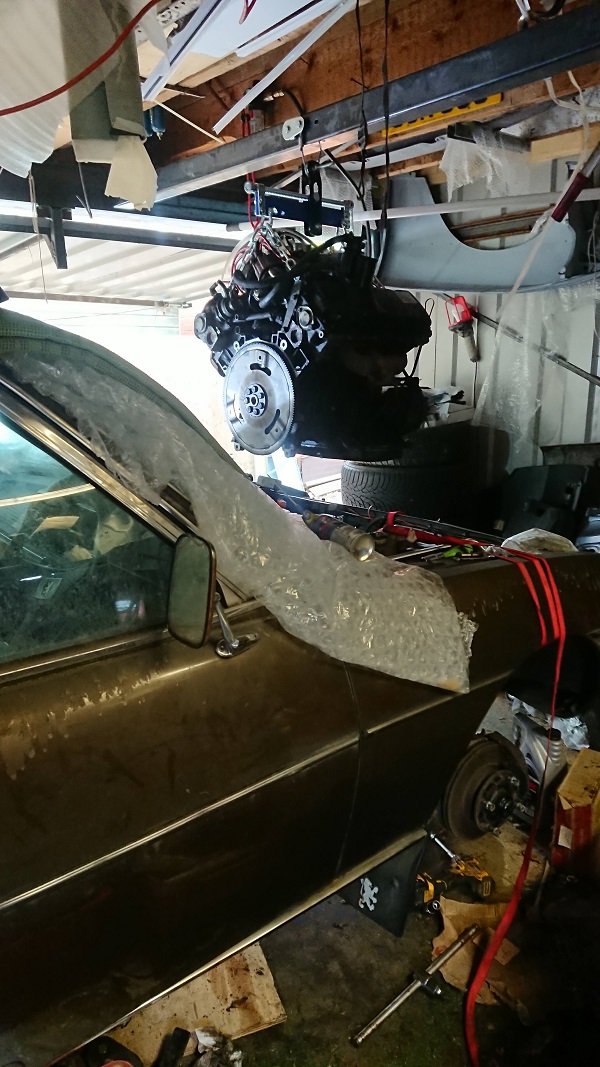
and from today
The cross member bolts were (I think) M12 fine but I found some long 10mm coach bolts lying around so dropped it 2cm
I think it was necessary. You can see that the lug on the block only just clears, and this is with the engine as high as it will go with the transmission attached
coolant pipes on the back of the engine are much easier once the engine and transmission are separated a bit
it started to come out
then I noticed that the engine was starting to twist and so I went round the other side to have a look
its out!
if you look at the middle of this photo there is a pipe snapped off
that's from the inlet manifold to the automatic vacuum capsule.
Either I snapped it lifting the engine out, or it was already broken off which might explain why this engine never ran right.
You will also notice that the bell housing is bone dry. I think that the rear main old seal is/was actually fine. The front of the engine is soaked in oil though.
- Stevebrookman, Minimad5, Datsuncog and 5 others
-
8
-
Photos from yesterday
I thought that the manifold nuts would be impossible.
They just laughed at a ring spanner.
However I was able to got a blowtorch on them and with a combination of 3/8" extensions and UJs, or a 1/2" if I got lucky they all came off. It was just a case of finding gaps like this
exhaust off
- mk2_craig, Angrydicky, Burnside and 1 other
-
4
-
6 hours ago, mk2_craig said:
How much structural work do you think is required within the engine bay DNJ?
I need to get a wire wheel on there before I can answer that. I know from experience the rust is always 100 time worse than it first appears.
4 hours ago, Dead_E23 said:How have you been getting on with your Milwaukee ratchet? Is it making stuff any easier?
It's a brilliant, brilliant tool. I love it. I am using a DeWalt 1/2" hammer driver thing for the big stuff, and the Milwaukee for everything else. The only problem is that in some really tight spots (and there are plenty on a 604) it's too big to get in there.
The DeWalt LED torch is crap. The detents on the swivel head are too weak and it's like a drunk mate who just falls over all the time when you ask him for help.
-
The video before that one is where they actually do the work. The last ten minutes is them moving the engine around without it coming out and I'm not sure why.
My starter motor is out.
-
I will have a look at that later. Thanks!
Today I removed the entire exhaust. It took me about 5 hours.
Now I have entire exhaust from the exhaust manifolds all the way to very strange back boxes off and in individual parts.
These things take some time when you are on your back under the car on axle stands and you don't want to break anything. You can't just pop down to PartCo and buy a new exhaust for an early 604.
I can now see the engine mount bolts; hooray.
- The Moog, ProgRocker, RobT and 2 others
-
5
-
I spent a couple of hours trying to drop the rack and failed
the rack is right at the bottom of this photo.
the power steering ram is sandwiched between the rack and the cross member
you can see one of the bolts that holds the rack onto the cross member in the photo, and above that is much longer bolt that attaches the ram to the cross member by going all the way through it
That long bolt can't come out because it hits the rack, and the nut is underneath all those pipes.
I think that's why Peugeot say to drop the whole cross member. However the engine is sitting on it and getting to the engine mount bolts looks pretty difficult. You can hardly see them let alone get tools on them.
-
Today I didn't make as much progress as hoped.
I got the brake booster after a bit of a fight. This clip pinged off and I spent an hour looking for it but it's gone.
I think I would like a garage floor made of magnetised steel sheet so that when something falls it doesn't bounce but just "sticks" where it falls.
Still, there is a lot more room without it
The power steering pump is actually underneath the battery tray, which is welded to the shell.
so there is not way that the engine will left up with that attached to the engine.
It came off okay
The power steering pipes are all attached to things with 17mm nuts and they are all really tight. I haven't succeeded in undoing any of them.
so ordered some "flare nut spanners" off Amazon prime.
I also had a look at the rack/engine interference situation. There are two lugs on the bottom of the engine for attaching to the transmission and they hang down lower that the top of the rack, and basically I think that the engine will only come back 2cm before hitting the rack.
- Datsuncog, phil_lihp, Stevebrookman and 3 others
-
6


Youtube moments
in AutoShite
Posted
My Jag on YouTube
https://www.youtube.com/watch?v=URTG9gV1jSo