


Surface Rust
-
Posts
274 -
Joined
-
Last visited
-
Days Won
1
Reputation Activity
-

 Surface Rust reacted to Split_Pin in Shite in Miniature II
I can see the local headlines now:
'HUGE DROP IN SALE OF THE WEE CARS AT ST. GEORGES, THOUSANDS JOBLESS'
'It was like the Mary Celeste' said Frances as she packed away antique toy cars which remained unsold at just five pounds each.
'No difference to my trade, haven't sold any of them wee cars in a year', Alan of Alan's Emporium.
'That bugger said he'd have the beige Oxford Maestro I got in special, now I dont know what to do with it', Mulligans Irish Gifts.
'HAHAHAHAHAHA'. Nemesis, Fitzroy Avenue.
-

 Surface Rust got a reaction from N19 in N19's fleet - exhausting
If a ham fisted idiot like me can do a head gasket on a DOHC engine (Saab 900), then anyone can.
Just be methodical. It'll give you a great sense of achievement, after THE FEAR has long since vanished.
-
Surface Rust reacted to RetroShite in Retroshite
I hadn't done any welding in a while so spent a few hours over the last couple of days welding this Lada.
Outer sill was very frilly and inner sill wasn't much better. I rebuilt the inner sill then welded on a new outer I'd purchased last year.
After that I finished some bits around the b-pillar and around the rear arch.
I trial fitted some wheels but can't decide whether to fit them to this or the other Lada.
The other Lada is already lowered so might pull off the wheels better.
-

 Surface Rust got a reaction from High Jetter in N19's fleet - exhausting
If a ham fisted idiot like me can do a head gasket on a DOHC engine (Saab 900), then anyone can.
Just be methodical. It'll give you a great sense of achievement, after THE FEAR has long since vanished.
-
Surface Rust reacted to B4lljoints in Pandamonium! New arrival at new Balljoints towers...
Oh forgot to add the Lancias in question.
-
Surface Rust reacted to B4lljoints in Pandamonium! New arrival at new Balljoints towers...
Hi Shiters,
In a rare fit of practicality I sold my old Merc 190e (I know, I know) back in September due to an impending house move/renovation which demanded a more suitable day-to-day tip run/DIY fetching and carrying type of thing.
Something that did a few more empeegees and had a hatch with folding seats was the criteria so something along the lines of a battered old estate car was on the list...
Obviously, with me being a serial Italophile as well as being a serial Merc licker I saw this wee Panda for sale and snapped it up (it fits some of the wishlist at least)
I've always admired Pandas for some bizarre reason - I think it's their lack of pretence at being anything other than a cheapy little runabout.
So, what do I think of it I hear you all ask? Well, it's super cheap to run while I'm spending lots of hard earned on house shite. It likes to be ragged around and it really annoys commuters in their sales rep specials if you dare to overtake them. It goes pretty well for a little fella - it's the later 1.2 VVT engine so it boasts a mighty 69bhp!
I don't mind that it's silver - my old Lancia Delta was silver so it takes me back. The interior is a bit like sitting in a coal mine but there's lots of glass so it's not gloomy.
So far it's had a cambelt/waterpump change at a local* Italian specialist - this was actually an excuse to go and drool over some Lancia porn
Things that need doing - a new foglight at the offside one is discoloured and then a basic service in a few weeks time.
Anyway, here it is...
-
Surface Rust reacted to Zelandeth in Zel's Motoring Adventures...Peugeot, Renault, Rover, Trabant, Invacar & A Sinclair C5 - 19/04 - HVAC Preemptive Investigation...
Okay, let's have another shot at getting this steering rack to track rod bracket apart.
Attempt number 1. This failed. The puller would always slip off well before getting any real torque involved.
This wasn't actually in use, I just stuck it on there for the photo, so yes I know it's not lined up right.
The correct tool for this job is essentially just a big ball joint splitter. However buying one of those would require spending more money than I really wanted to, and waiting for something to arrive.
Instead, take one £15 splitter from Halfords and spend ten minutes mutilating it with a grinder until it fits.
Remember, it's not stupid if it works!
That let go with one HELL of a bang.
The old boot was removed and things cleaned up ready for the new one to go on, which I'd already had long enough to have completely forgotten which box it was in and requiring 10 minutes of rummaging until it turned up.
Done.
Well, almost. I didn't initially spot that there's a flat cast into the bracket where the locking washer is meant to locate. So the nut was loosened off again and the washer rotated through 180 degrees since this photo was taken.
Only casualty was me being careless with the grinder and nearly setting myself on fire.
I was already kind of paranoid about fire was I was relatively close to the Rover while doing this job and it's proven so far to be by far the most stubbornly not fuel-tight vehicle I've ever owned!
MOT has been re-booked for next Thursday. Shame they can't fit me in sooner, but it is what it is, I know they're always busy. Aside from the usual sanity check beforehand and making sure all the lights etc are working, I need to try to tweak the headlight aim a bit as I think it's still way too low. I'll make sure all the adjusters are properly lubricated before taking it in so it can be easily tweaked at the time if need be.
-
Surface Rust reacted to fatharris in FatHarris - tales of a motoring moron ***Non-BX related content 17/4***
Well bugger me sideways, I've only gone and done it.
It's remarkable just how easy it is when you have the correct information to hand - this came in the form of OEM wiring diagrams for the fuse board itself.
With that, I tracked the lines and worked out which continuity checks needed doing. Was surprised to note that the fuse board connectors went in reverse order (6,5,4,3,2,1) as you view it.
It became evident that the very first continuity check was open circuit which was promising.
This meant it had to come out (again)
With the board on the bench, it was a lot easier to repeat all the required continuity checks, and we finally had the fault pinpointed.
There was an open circuit from the 'cold' side of the fuse socket, to the first junction of the horn/heated screen circuit, namely the high power input for the heated screen relay (this then carries on to the horn side of the circuit)
Unfortunately, it's a double-layered board and I was unable to access the actual board. Luckily, I had a surplus piggyback fuse with a flylead, so I elected to add a flylead to the relay terminal. Ended up using solid core wire on the board half as it's quite a high amperage circuit.
With that all assembled, the board was re-tested and continuity was restored. The board was reconnected to the car and the horn now works!
Also, billy bonus, the HRW works and the switch illuminates, so I must have been talking bollocks about it working beforehand.
With that all confirmed to work, the interior was rebuilt (glovebox light fixed)
As an aside, I noticed the oil level gauge wasn't working any more - this was traced to the sensor plug coming off for some reason so that's an easy win.
So, I'm back to bodywork repairs for the rest of the week, hopefully without any more nasty surprises!
Cheers.
-
Surface Rust reacted to sierraman in Shite in Miniature II
The Corvette is one I distinctly remember, it came in a set I had once for Xmas, long gone now unfortunately. At the time I was sourcing everything from the car boots, new 1-75 seemed thin on the ground, I think my mums line was that you could get 5 of them at a jumble sale for the cost of one new one. I don’t know if a lot of you were the same as a kid but I always looked for the usual cars in the street so these were an unusual departure for me!
I remember I’d always have a favourite’ one that I’d have, Rover SD1, Cortina 1.6, Porsche 959 spring to mind. I’d always play the same game if you like, I’d line up all the broken ones as a scrapyard (I was fixated with dereliction and scrapyards) as a kid. My mum was confused as to why I always wanted to keep the broken ones instead of binning them.
Thinking back that was a really content time, a Saturday afternoon playing at scrapyards on the rug in front of the gas fire watching ‘Hollywoods Greatest Stunts’ or the A Team. Just a Lion bar for company but it was escapism that as an adult for some reason you cannot fully achieve. There’s always some other shit floating around in your head like work or jobs that need doing, so you aren’t ever fully free. I think that’s why I like collecting diecast, it’s as close as you’ll get to those hassle free days as a kid.
-
Surface Rust reacted to Uncleben in Such Brown wafty land yachtage
I'm now basically an undercover FBI agent....
roof mounted for attending shows and chasing bad guys, dash mounted for everyday waftage.
Not the right style of light, they have been out of stock for ages, so got this cheap Chinese strobe light in the meantime
-
Surface Rust reacted to brownnova in Brownnova’s eponymous vehicle... It might be over for my Nova.
Bye Nova 👋
See you soon.
-
Surface Rust reacted to Justwatching in Daily DeLorean project (now with Jeep Wrangler "spared no expense")
Many hours later...
I got everything reassembled this weekend and even had it running briefly.
I reused the copper washers on the fuel lines, which paid the expected dividend.
I had enough spare washers to replace all but two. Not wanting to halt progress, I chose a couple of the best looking used washers and annealed them with a blow torch.
Everything sealed up second time around, so I started the engine back up and continued looking for coolant leaks. What I found was an ATF leak - it's those bloody transmission cooler lines I replaced. I couldn't see anything wrong with how I installed them and they were done up plenty tight. Did a bit of research, and it looks like the new lines need copper washers to seal. The original lines didn't have washer, so it didn't cross my mind when ordering.
Got on with some other jobs while I wait for parts - adjusted the handbrake and removed the headlight switch. The switch has two positions - press it once for sidelights and twice for driving lights - but sometimes it doesn't stay in position and pops back out as soon as I remove my finger.
Took the switch apart and cleaned it up with alcohol. I think the metal paw was sticking and not falling into the position detent.
Reassembled the switch and put it back in the car. Seemed to work fine but the problem is intermittent, so I'll need to use it for a while to be sure. Hopefully that's £60 saved.
-
Surface Rust reacted to MVX11V in Jaguar S Bype R - An Imposter, saving a bird, and that effin supercharger!
Well... that was an experience! I attempted to update my email address some time ago and my account was rendered useless. Unable to sign in meant I couldn't do anything, I couldn't even contact anyone to raise the issue. I attempted several ways to get it going again, even re-signing up, but I was unable to validate my email address, or several others, so I gave up trying... in fact, gave a lot of the internet a rest for a bit.
It's no ones fault, there's a bug in a system somewhere where my outlook email will not display the validation screen properly. Still, yesterday I attempted a new sign up and here we are!
I've just had a flick back and seen where we got up to... hells bells, there's some work to do! Rest assured, without giving anything away, the car is in one piece again (and recently broken again 👍 ) and I'll start sticking bits up like nothing ever happened!
-
Surface Rust reacted to Peter C in 1987 Ford Sierra Sapphire 1.8L - Earning its keep - see page 28
I've been looking forward to this day since I bought the Sierra.
I used T-Cut and water to cut the paint where it was faded but not scratched.
And this stuff where the paint was badly damaged.
And then this stuff to polish the paint after cutting.
The cutting made a huge difference.
Looking better already.
Another before / after photo, spoiled by a crappy iPhone camera.
Job done. The paint responded well to the cut and polish. The deepest scratches remain and I did not try to get them out as I didn't want to risk cutting through to the primer. I almost did along part of the bonnet. Under my workshop LED light, the scratches are still obvious but under a halogen light and, most likely, daylight, the paint should look ok.
Since my first inspection of the Sierra, I knew that the paint was bad and getting it to this standard wasn't quick or easy and I am happy with the results. The nearside front door is not a good colour match and there are various flaws around the car where it was previously painted. Doesn't matter, it looks ok.
It will look better outside, in natural light.
Then my wife brought me lunch.
After lunch, I had to do something with the two tone sills.
I masked off the bottom of the doors and sprayed both sills with the blue aerosol (no primer). Again, no chemical reactions, no cracking or wrinkling.
Much better.
I'm getting there.
-
Surface Rust reacted to Zelandeth in Zel's Motoring Adventures...Peugeot, Renault, Rover, Trabant, Invacar & A Sinclair C5 - 19/04 - HVAC Preemptive Investigation...
That's definitely one of those things I'm filing away as useful stuff for future reference. Would never have thought of it but yes, that's a really good idea.
Been feeling pretty frazzled today, so probably not the worst thing that it worked out I was lacking a worthwhile car to take to Rustival. Reckon I'd probably just have been overwhelmed and ended up retreating after about an hour.
I did need to run a couple of errands in the morning though. Decided to take a brave pill regarding transport.
Proof it has actually moved.
Made it home again too. Without breaking down. In fact without adding anything else to the to do list.
Though the oil leak hasn't miraculously fixed itself.
That's going to be a barrel of laughs to fix. It's the gasket behind the oil pump/filter housing that needs to be replaced. It's just *slightly* awkward to get to.
That's a problem for some point over the next few days though.
I did grab a quick video showing where we've got to this afternoon. I literally just wedged my phone between the dash and the windscreen, so low production quality! The loud bang about halfway through was me closing the glove box which decided to fall open and scare me half to death completely randomly.
So...
Oil leak is the big priority for the sake of other road users. I'm not comfortable driving it further until that's sorted. Other high priority items will be getting the radiator recored, the remaining original coolant lines replaced and the tyres need to be changed as they are definitely flat spotted. Only really noticeable above 50, so not a huge issue for local use, but definitely want doing before any longer trips - they're absolutely ancient anyway so they want changing anyway.
I do actually feel like I'm making progress now at last rather than just chasing my tail, which is nice.
However, you remember the fuel leak which caused a small environmental disaster and caused our house to stink of fuel for a full week? Guess what reappeared this afternoon? From exactly the same spot...Yep, the same bloody leak.
I think the root cause of the issue was actually down to the fuel filter itself. This had no ridge on the end of the hose barb, and I think the hose was just sliding down from the 8mm to 6mm section. Said cheap and nasty tiny filter has now been consigned to the bin and a larger, better quality one has been fitted.
It was immediately apparent once the hose was connected that it was far more secure even before the hose clip was done up. Said hose clip has also been replaced to be safe. I've had that happen before on one of these but thought at the time it was a fluke. They're getting binned though now.
Will I be obsessively checking these connections every single time the car is used for about the next year? Yes.
Also really need to get some black HT leads, like seriously...
Rover wasn't intended to be today's main target though. My box of several different sized pullers had turned up, so battle commenced with the Trabant wheel bearing replacement.
Honestly not sure if I had loosened it when I tried to remove it last time, as it just slid straight off today with relatively little effort.
Not maybe quite as bad as I was expecting given the noise this was making, but yeah this clearly isn't as clean as you would like to see.
Even more to my surprise, the lower shock absorber bolt unscrewed with any drama.
Couple of people had mentioned that removing the handbrake cable *before* starting to remove the trailing arm was a good way to save your sanity, so I wasted far too long trying to figure out the correct way to dismantle the brakes. Got there in the end though. Reassembling that won't be at all awkward I'm sure.
The self adjusters in this are really quite clever. A really simple sliding ratchet arrangement which is built into the shoe retaining pins. They can move outward away from the piston, but not inward - so the force of the shoe moving itself works the adjuster. It's really simple, but looks to me like this should be quite reliable.
The brake line itself was the next thing to be disconnected.
Of course because I am highly intelligent, I parked the car such that I had to lay in the Rover's oil puddle while doing this. Well done.
Then it was literally just a case of unscrewing the two trailing arm bolts. I did support the bottom of the hub with a jack to ensure any remaining tension on the spring was supported. There wasn't much, but there was definitely a bit of tension left. Just enough I'm sure to make getting everything back together an absolute pain.
Something definitely missing here!
Oh, here it is!
The shock absorber mounting bracket also then needs to be removed from the arm as it gets in the way.
I was really worried these bolts might snap, but they thankfully didn't. Did protest a bit, but they came out. The rubber cover the revealed the cause of our issue. The inner bearing had clearly suffered water contamination based on the amount of rust that fell out.
Pretty sure this was the cause of our issues as the outer bearing didn't seem to be noisy.
The stub axle could then be knocked through the back of the hub. This is seriously chunky looking for a 600kg car. Can of Plusgas for scale.
The inner bearing can just be pushed out the back of the housing with a suitable drift. The outer one comes out from the wheel side - after you've found and removed the circlip hiding in among the slimy old grease under the seal.
One set of knackered bearings. The thing on the left is the spacer which sits between the two.
This needs to be cleaned up, then I can set about (carefully) installing the new bearings.
That's probably going to be tomorrow afternoon's job.
[] Clean hub.
[] Pack new bearings with grease.
[] Install bearings.
[] Install new seal.
[] Reinstall stub axle & add some more grease just for good measure.
[] Reinstall cover.
[] Reinstall trailing arm.
[] Reconnect brake line.
[] Reassemble brake shoe assembly & handbrake cable.
[] Reinstall hub with new nut and locking washer.
[] Reinstall brake drum.
[] Bleed brakes.
[] Put wheel back on.
[] Test drive. Assuming I've not missed anything critical.
Now I know how it comes apart hopefully should go back together a little quicker.
Having now seen how it comes apart, I reckon you *could* do this with the trailing arm still on the car, but it would be way, way more awkward - and the additional stress and swearing probably isn't worth the half hour or so it might save.
*Hopefully* we'll have this back together tomorrow.
-
Surface Rust reacted to Zelandeth in Zel's Motoring Adventures...Peugeot, Renault, Rover, Trabant, Invacar & A Sinclair C5 - 19/04 - HVAC Preemptive Investigation...
Ping me a PM, sure we can come to an arrangement. It's not going to do me any good as all of the hardware on mine is the later style. I'll need to see if I can un-seize it at least. Sadly it's suffered the same fate as everything that was in the boot, looking as though it's been stored on the bottom of the ocean.
Had half hoped the puller might have turned up today, but it hasn't. Have been feeling really rough today as well which has hindered my productivity somewhat.
Some of you who have followed my trials and tribulations with the Rover will remember me finding this floating around in the back of the engine bay not attached to anything when I had the heads off.
My guess was that it was a breather which should be attached to the gearbox proved to be correct. Somebody had obviously removed it at some point and never hooked it back up. Why I'll never know.
This isn't something you really want to leave open to the elements for obvious reasons. However reattaching that original line wasn't going to be easy.
Can you see where it attaches?
Zoom...
Zoom further...
There it is!
Yeah, there's no way I'm getting the original moulded nylon line back on there. Maybe if I had the car properly up on a lift and I could get two hands in there from underneath, maybe. On the driveway, not a chance. After fighting with it for about half an hour I gave in and fitted a rubber hose instead.
You'll have to take my word for the fact that it's attached at the gearbox end. Should do the same job just fine though.
The fluid level was also a *little* on the low side.
Took this to get it up to what looks to be the correct level (the handbook has the fluid level check procedure marked down wrong), saying to check it cold with engine off...not warm with engine running as is correct. Prior to adding that fluid we had nothing on the stick at all when the engine was running.
Also worth noting that these gearboxes do NOT take normal Dex II/III fluid. They need type F fluid. Surprisingly, Mileham's had a few (admittedly rather dusty) bottles on the shelf. Don't imagine they'll be bothering to re-stock those! It looks, feels and smells the same as what's in the box so I'm reasonably confident this hasn't been filled with the wrong fluid at least.
Also apparently the heater box is missing a bunch of screws.
Don't think I have any others that are short enough in stock so will need to buy some.
So far the fuel system still seems to be cooperating. Though I do need to adjust things a little as the warm idle is way too high, at about 1000 rpm in neutral. Should be nearer 750 - or lower if you can get the engine to reliably idle slower, to reduce the "thump" when selecting drive/reverse.
In other news, did I drive around in circles for ten minutes this afternoon so I could catch this?
Yes, yes I did.
-
Surface Rust reacted to Ianlea73 in Introducing my 1985 American ford ltd sedan
I had a chance to do a few jobs this morning. Jacked up the rear, removed the drums for a look as I have new shoes & wheel cylinders which were supplied, removed the rear shocks which were absolutely shot then pulled the fuel tank.
The filler neck rubber is perished as is the one way Valve rubber seal on top the tank but the valve works fine. I removed the fuel pump housing for an inspection & found the filter sock dirty & torn. I took some pics inside the tank & discovered loads of grit. The fuel was so bad I couldn't even light the spilt fuel on the floor.
Took a few pics of the underside of the car & I'm really pleased there's only mild surface rust. I just need to work out the best way of treating it. Should I remove the axle, knot wheel, deox thrn underseal or just hand paint underseal onto the substrate that's already there?
So the fuel tank needs cleaning out & then I'll paint it black. I need to work out how to use rock auto parts & order a few fuel related parts.
-
-
Surface Rust reacted to hairnet in Rustival ( for half an hour)
Nsu
OOOOOOOOOOOFFFFFFFFFFFFFF
Lanchester was first thing seen
Drinking tea and wait till 3 cos oxford reading and soton all at home
( heading for winchester)
-
Surface Rust reacted to Datsuncog in Shite in Miniature II
Just following on from yesterday's little packaging-opening party, I thought I'd document how I get models out of their blister packs.
I like to open up any models I acquire and handle them, not just keep them pristine and unopened. No judgement on anyone who chooses differently; that's just me.
But I also like the packaging, as I feel that's all part of the toy's appeal too.
I love the artwork, and for older models it plays a big part in the nostalgia factor.
Late 1970s and early 1980s Lesney artwork styles bring back strong memories of staring at toyshop display cases, trying to decide what to spend my pocket money on. I've only a couple of boxed Lesney from this era, but I'd like to find more.
Ideally, I wish Matchbox would make their oddly named 'Power Grab' boxes as their standard mainline packaging, as I find them so much easier to open and store.
And hey, maybe if there's a continuing drift towards reducing plastic in packaging, it could happen - I note that the 2023 power grab boxes came with tissue paper liners to protect the model inside, while older releases had clear plastic bags doing the job.
Meanwhile, the 2024 Moving Parts range (like Bunglebus' newly arrived VW Type 3 fastback upthread) boasts both recycled metal in the models, and 100% biodegradable paper-foam packaging. However, this packaging has drawn some criticism online from collectors who've found that it doesn't seem to protect the models from damage, or paint rubbing while in transit. So we'll see.
But anyway. For now, most Mattel mainline releases come in plastic and cardboard blister packs - and removing the model without trashing the packaging is something of a challenge for me, since I like to keep both.
I've tried and failed to emulate YouTube videos which use acetone as a solvent to dissolve the blister adhesive - and consumer-grade paint thinners also seems too weak to do the job, though I understand Wilco-branded stuff was good, if sadly unobtainable in Norn Iron.
So, what's my favoured technique?
I've a little plastic tool apparently designed for use with modelling clay. It's thin and angled at one end, and just slips easily between the card and the plastic blister in the middle, where there's generally a gap or dimple in the plastic.
See-sawing it backwards and forwards as I go cuts through each side of the printed paper on the backing neatly, preventing tearing.
I generally just go up as far as the top of the blister side, so as to leave a 'hinge' connecting the blister to the back.
Then the same for the other side, and out it comes.
Of course there's some tearing along the glued surfaces - but when the blister's lowered back down again, it's really not noticeable.
So I can mess around with the lil' Honda, display it for a bit, and then ultimately put it away again in the original packaging without it looking too shit. I don't glue them shut again or anything - it'll never be MINT UNOPENED and I don't intend to pass them off as such, but that's not why I collect these; I just do it because it's fun, not for the resale value.
We all know where that ends up, anyway.
Incidentally, I've noticed that a few Matchbox come with a bit of stiff clear plastic behind the model - the Bronco Sport had this yesterday, as does the Lamborghini LM002.
I'm assuming this is to avoid paint loss from rubbing - though I dunno why some models have it, but not others?
So yeah - there's some I might open straight away, and others I'll maybe put away for a while, then come back and open them when I feel like it.
I'm unlikely to run out of them anytime soon...
-
Surface Rust reacted to Six-cylinder in Six Cylinders Motoring Notes
The view is great this morning!
-
Surface Rust reacted to Six-cylinder in Six Cylinders Motoring Notes
The pez shot, yes full as I needed to see if the fuel gauge worked along with the speedo as they are often broken on these Volvos.
I have now collected the Volvo 940 Estate fitted with a new cambelt, tensioner and oil change and it is running great.
3 out 4 isn’t bad!
Yes 3 out of 4 of our Volvos are legal, working and on the drive ready to go.
-
 Surface Rust got a reaction from Coprolalia in LightBulbFun's Invacar & general ramble thread, index on page 1, survivors lists on Pages 24/134 & AdgeCutler's Invacar Mk12 Restoration from Page 186 onwards, still harping on...
A great outcome. Hopefully you can persuade Dunc to photograph and document his efforts so we can enjoy vicariously.
Though I think I've probably seen more of the innards of Invacars between AS and Hubnut than I've seen of my own cars!
-
Surface Rust reacted to HMC in HMC- 1979 escort 1.3GL is here!
Also had been meaning to take a pic of this…
Because patina
-
Surface Rust reacted to Zelandeth in Zel's Motoring Adventures...Peugeot, Renault, Rover, Trabant, Invacar & A Sinclair C5 - 19/04 - HVAC Preemptive Investigation...
The images everywhere aside from on here are hosted on ImgBB. I have heard of some VPNs and the like sometimes having issues with that host. Glad that my nonsense has provided interest.
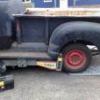
So today didn't go quite according to plan. Failed at the first hurdle, getting the hub off the Trabant. Looking at the parts diagram it should just pull off once the hub nut and locking washer are off. However my puller literally exploded before anything moved a millimetre. I've ordered a rather more substantial one, but it won't be here for a day or two.
So I spent an hour on the Rover instead.
First thing I noticed was that I'd missed trimming the cable ties underneath the car. Oops.
Up until now I've had a power supply to the pump jumped off the feed to the starter solenoid, requiring the bonnet to be opened and a plug physically connected or disconnected every time the engine was started or stopped. Today I set about wiring in a proper, ignition switched source. Borrowed from the heater blower fuse and routed to the pump via the routing of the factory wiring loom.
Looking a bit tidier.
Thirty minutes of so of driving around, then leaving it to cook idling in gear for ten minutes or so didn't reveal any more unknown issues. So I need to take a brave pill and actually try taking it out of the neighborhood tomorrow to see what happens!
Felt kind of odd doing a test without either ending up at the side of the road or having to bodge anything!