.jpg.03e1c8cc4a0c543fdcdfef2933cb2f03.jpg)
Marina door handles
-
Posts
441 -
Joined
-
Last visited
Content Type
Profiles
Forums
Events
Everything posted by Marina door handles
-
I don't want to perpetuate an argument but..... I cannot resist! BL weren't so much into tech as they brought disparate and competing brands who had very different views on how to make a car together were as Ford kept it simple for good reason. Triumph were very late to monocoque construction They managed to give us a quite scary version of independent rear suspension Engine wise - under developed 16v head on the sprint (Ford were way more sensible going to Cosworth for the Escort RS1600s engine), they then followed that with a lovely but flawed V8 and don't mention the normal four cylinder engines appetite for conrod bearings! Austin - Hydro elastic suspension - feel car sick yet? Gearbox in the sump, gear sets swimming in old engine oil? MG - lets not invest or develop the product after about 1970, the Yanks will keep on buying this, hopefully? The list goes on and yet I have to admit I still have a massive soft spot for Triumphs, Austins, MGs, Rovers but I wont wear rose tinted glasses!
-
Same here, I feel rather bad about that as I have met Edd and he is a nice bloke but yeah he is no youtuber.
-
I do like the fact its not a variation of the 500, 500X, 500E, 500XL, 500L etc
-
That's quite tasty. I would need to move the front number plate though. Unless its made of rubber it wont last hanging right there will it?!
-
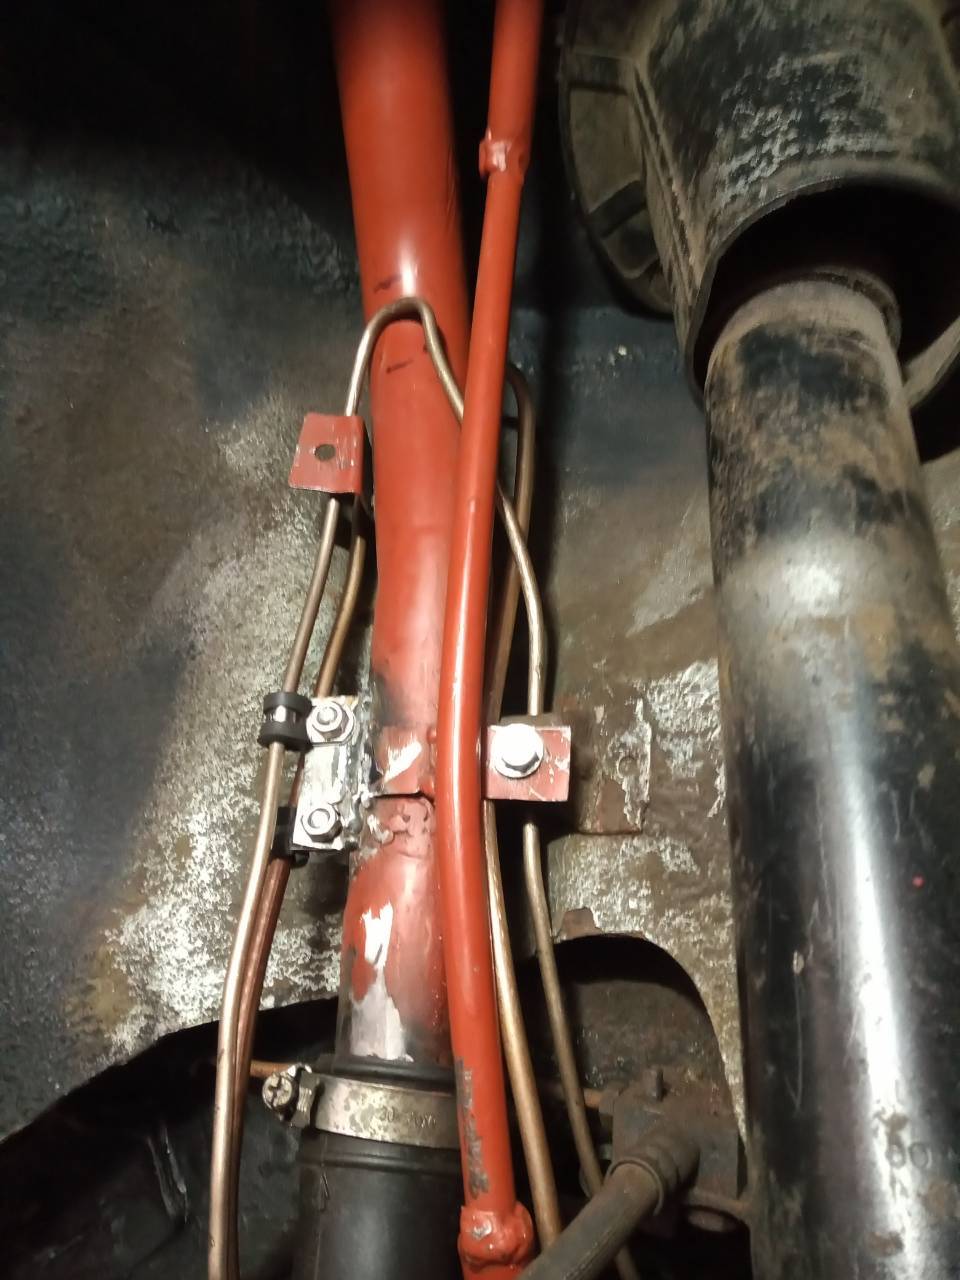
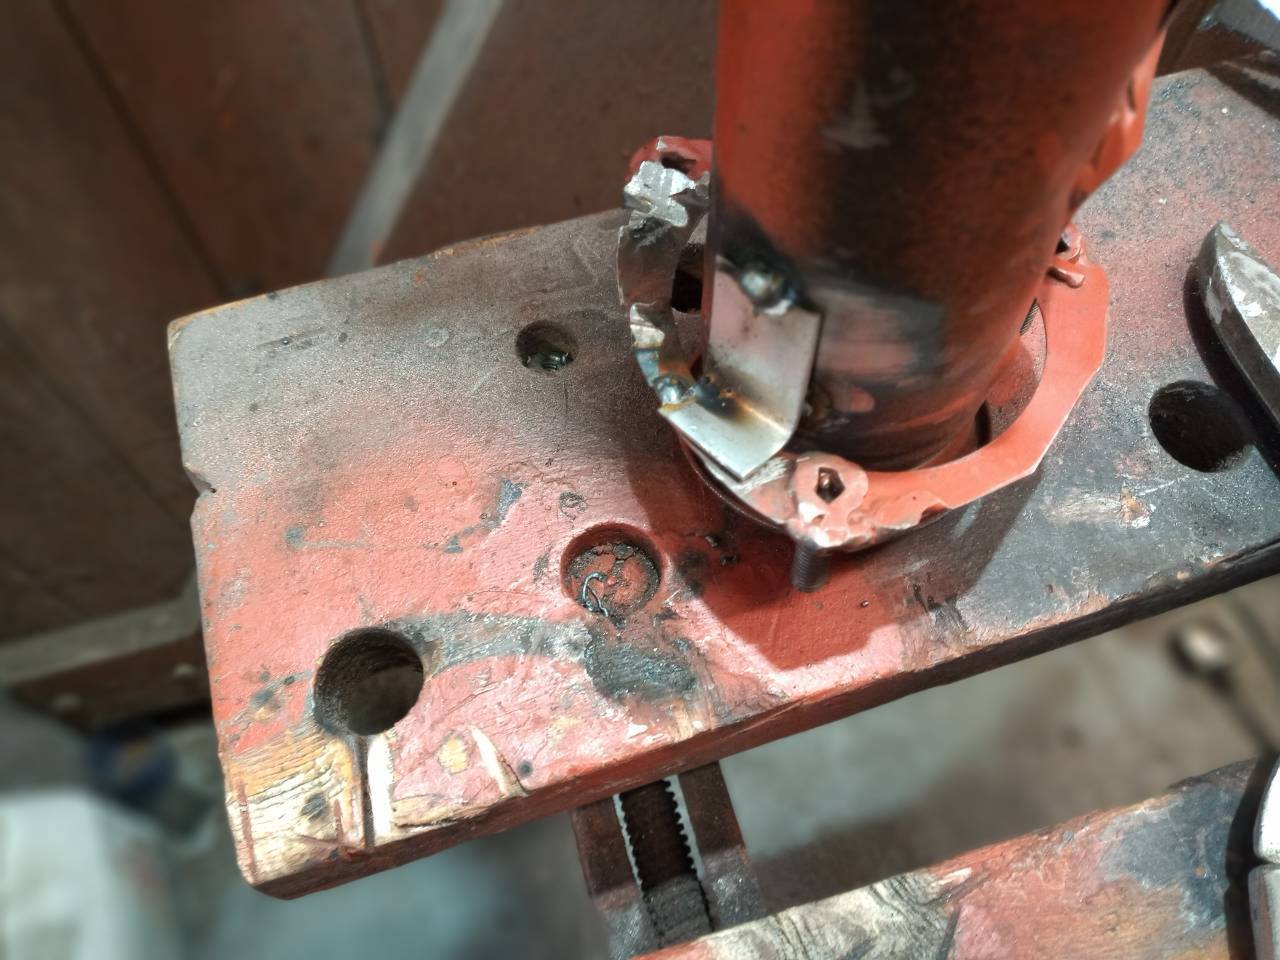
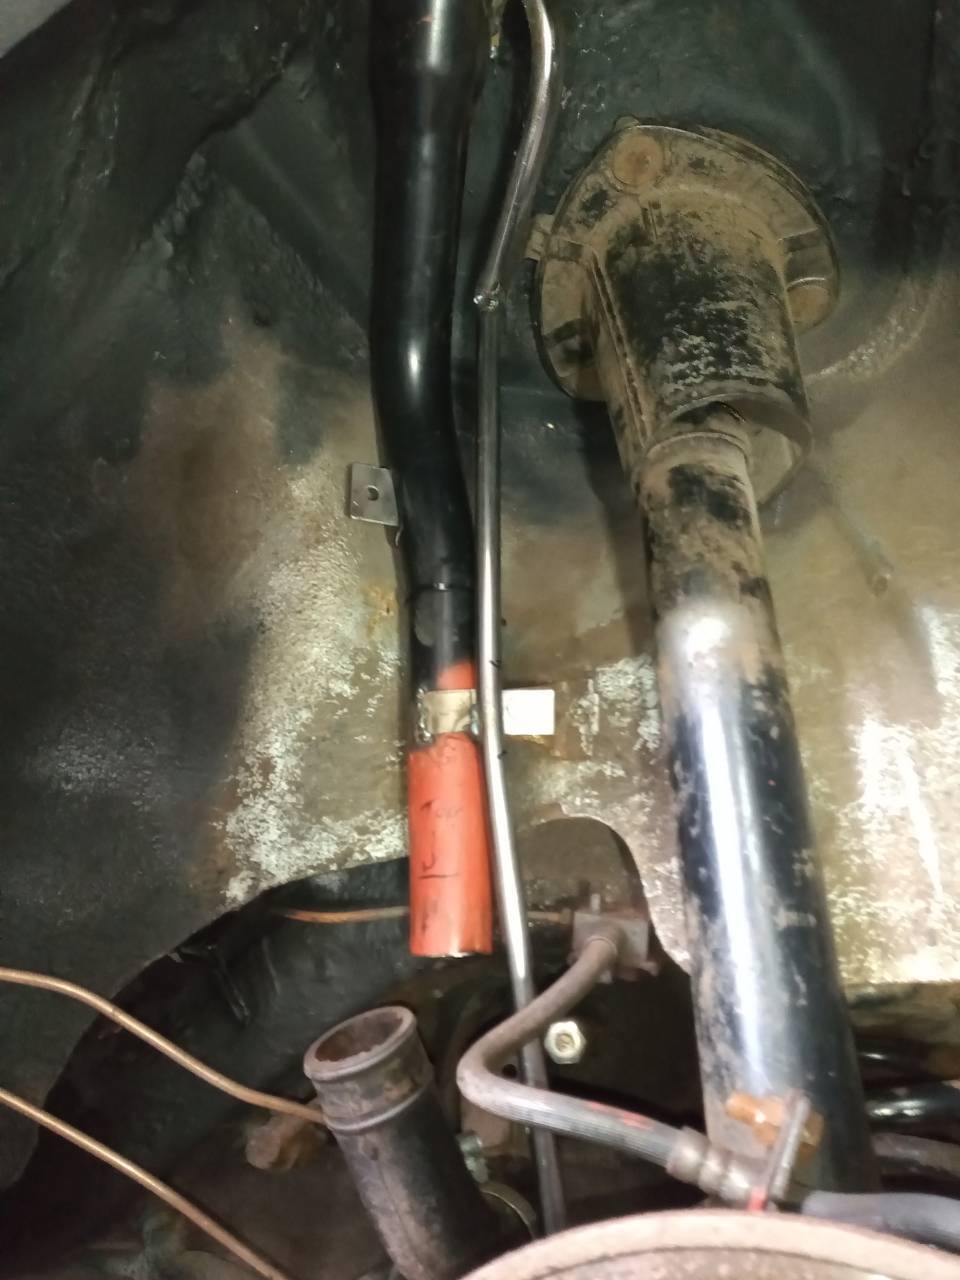
.thumb.jpg.408c8d25f5f8434a87eaaa2ce0685365.jpg) Well its very nearly Rover and out on the filler...... St jude..... The final little details just need sorting. Firstly the end of the filler were it meets the main rubbery hose. The end is completely smooth and which means it wont take much for the hose to pop off, which is a bit undesirable! I cannot flange the end out as the hose only just fits so the next option is to kind of Christmas cracker the end... Basically narrow the section just behind the end by cutting and welding (how else) create a waist if you see what I mean so the hose clamp has something to grip. Sort of like this ....... Not exactly pretty (or very well in focus!) but it appears to work, well it past the yank test! Post yank test picture..... Next stage the extra mysterious pipe work is rather lose and rattly (on the original pipe its all in steel and welded together, cant do this as I am using copper for the extra), I don't think that is a great idea. I decided to create a bracket that I could fit P clips to, so that I can secure the extra pipeage. Final bit of chopping was caused by the Subaru filler cap. The cap actually catches slightly on the hinge of the filler door. Fortunately the hinge area has some excess plasticky sections, which I duly trimmed down. Now it all fits. So what does it need to finish this part of the project? Well some paint on the filler neck, careful deletion of the word Subaru from the cap and a couple of new rubber hoses and then I can decide which bit of the car to sort next as I have now decided to try and get it though or at least to an MOT.
Well its very nearly Rover and out on the filler...... St jude..... The final little details just need sorting. Firstly the end of the filler were it meets the main rubbery hose. The end is completely smooth and which means it wont take much for the hose to pop off, which is a bit undesirable! I cannot flange the end out as the hose only just fits so the next option is to kind of Christmas cracker the end... Basically narrow the section just behind the end by cutting and welding (how else) create a waist if you see what I mean so the hose clamp has something to grip. Sort of like this ....... Not exactly pretty (or very well in focus!) but it appears to work, well it past the yank test! Post yank test picture..... Next stage the extra mysterious pipe work is rather lose and rattly (on the original pipe its all in steel and welded together, cant do this as I am using copper for the extra), I don't think that is a great idea. I decided to create a bracket that I could fit P clips to, so that I can secure the extra pipeage. Final bit of chopping was caused by the Subaru filler cap. The cap actually catches slightly on the hinge of the filler door. Fortunately the hinge area has some excess plasticky sections, which I duly trimmed down. Now it all fits. So what does it need to finish this part of the project? Well some paint on the filler neck, careful deletion of the word Subaru from the cap and a couple of new rubber hoses and then I can decide which bit of the car to sort next as I have now decided to try and get it though or at least to an MOT.
-
Love the look of this Granny and I have no problem with a free car (had a couple!) but this rings alarm bells, most free cars have a back story, mine certainly did.
-
If you let the white lines fade, people will park were they like, then it's chaos!
-
Have you tried the parking light feature to see what that does? I agree with you though its way more likely to be a switch fault rather than an earth fault, my guess would be indicator stalk issue as it gets the most use.
-
What makes you grin? Antidote to grumpy thread
Marina door handles replied to outlaw118's topic in AutoShite
My better half is doing a spot of online clothes shopping and spotted this and then did a double take, if you think Detroit and cars what's the first thing that comes to mind? Obviously there are loads of options but I bet most people wouldn't go TR7 would they?! https://www.urbanoutfitters.com/en-gb/shop/uo-green-detroit-derby-sweatshirt?category=SEARCHRESULTS&color=030&searchparams=q%3Ddetroit&type=REGULAR&quantity=1
-
I am going to completely ignore your criteria and suggest this, assuming it stays below the 4k mark! https://www.ebay.co.uk/itm/186377872921
-
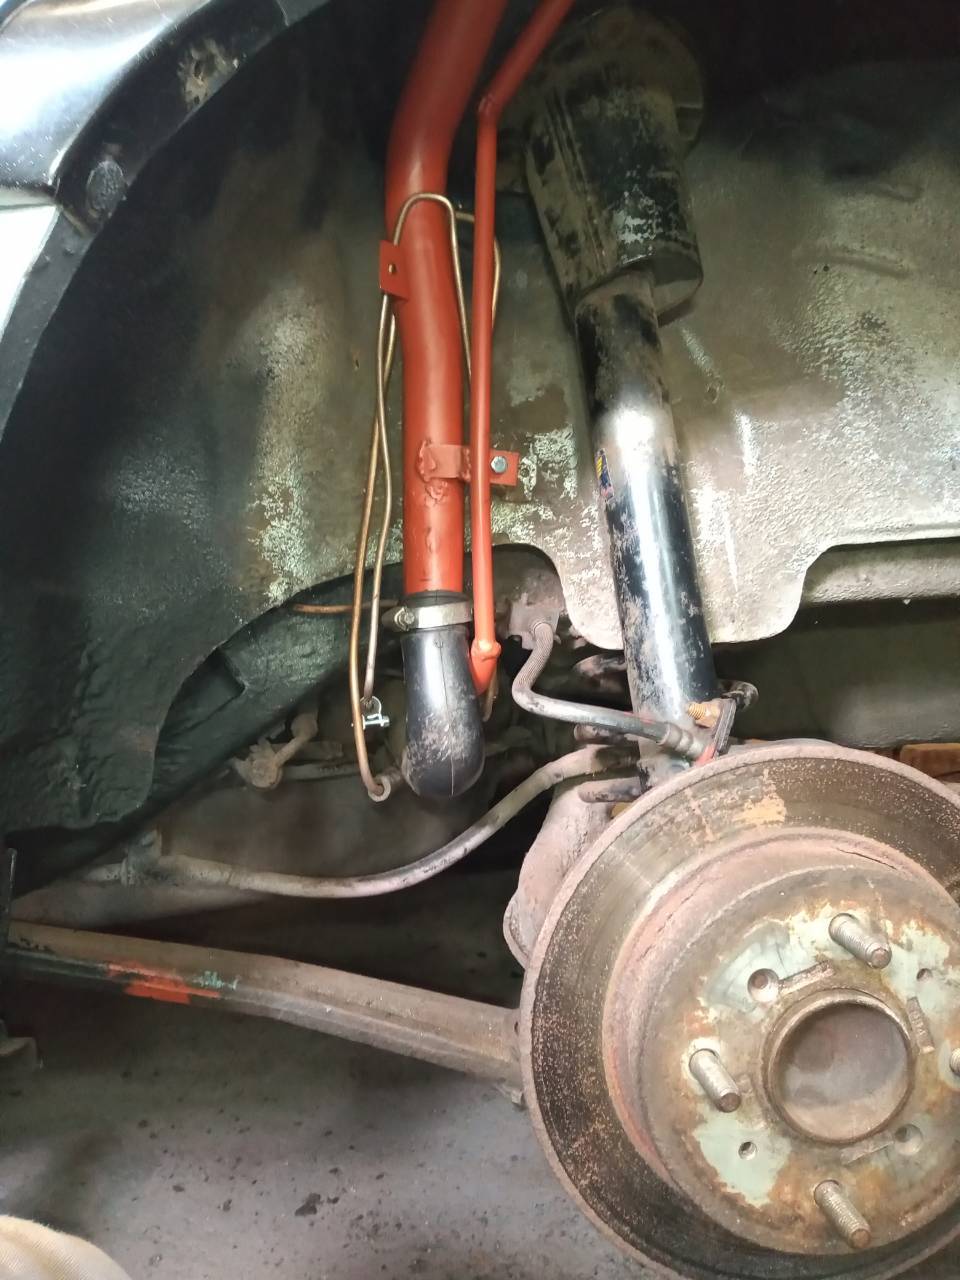
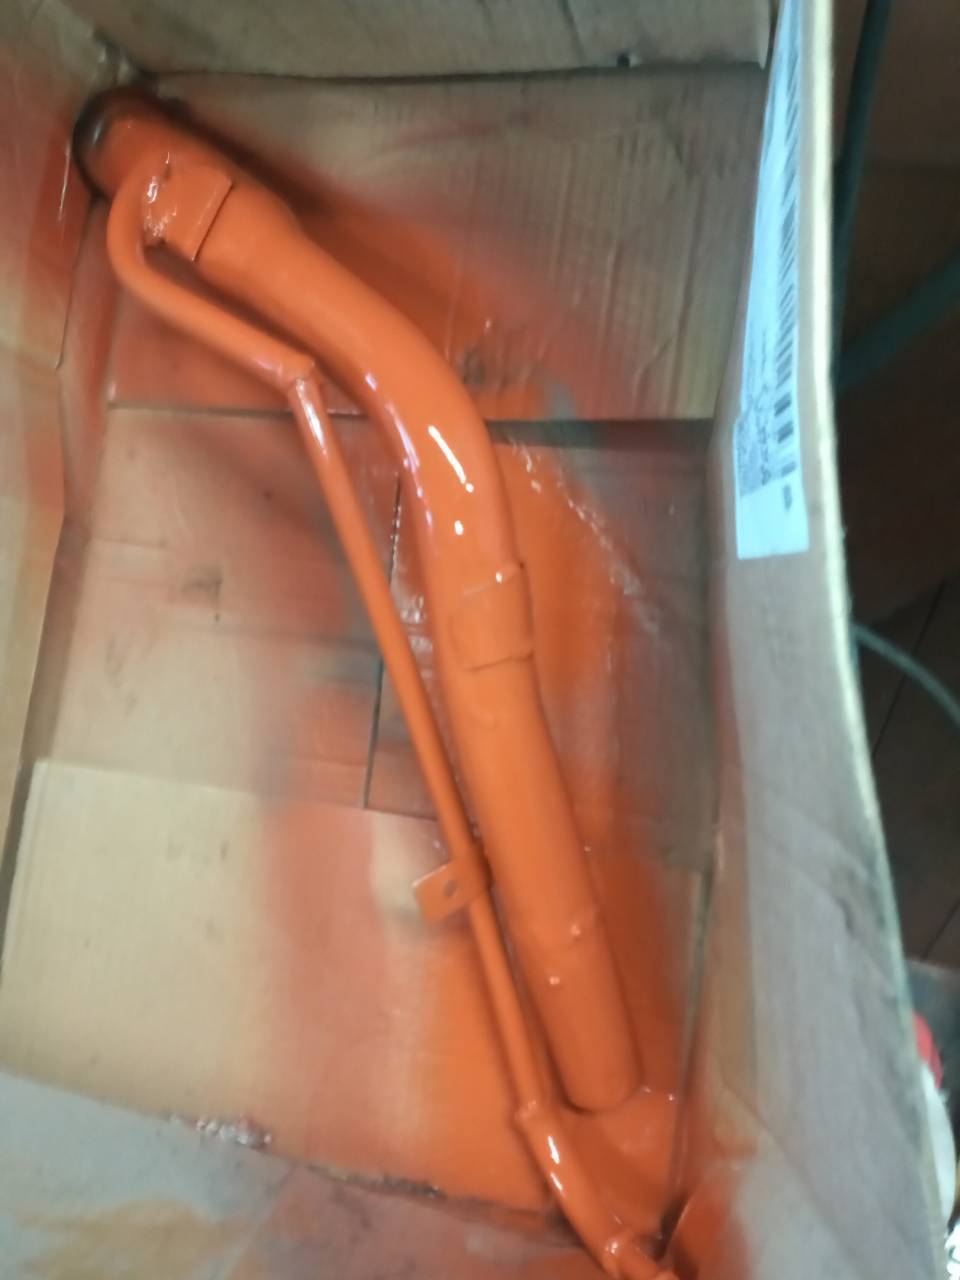
Another day off so more work on the filler, well after an exciting morning trip to the tip, yep I know how to party! Firstly I smoothed off the end of the breather pipe were I had created a kind of flange. Used the bench grinder and the finger sander, as I need to keep it flanged so it wont pull off the hose easily but it needs to be smooth for obvious reasons. Next job was to fit the flange/collar that bolts to the body of the car, inside the filler flap area. This was a pain in the arse! Turns out that the filler is a very tight fit and fitting the collar and pipe lose is easy, getting them into place when attached is very difficult. This part took a lot of trial and error. Initially cable tied it all together but this gave a bit of a false impression as it allowed a lot of movement. Next up I started tacking it together. Not pretty but it works. After much faff I found that the best way was to just secure it on 2 sides so it can flex a bit. Finally for today - another trial fit, it feels like I am actually getting some were! Sadly it will be painted black, I quite like it in red but that is just primer and I only have black top coat at the moment!
-
Subaru neck - mainly luck I had one lying around and the top half is roughly the right shape and size. Clearance is a concern I am testing this by re fitting a wheel and jumping up and down on the sill at each stage of the build. Its all a bit trial and error. The other thing to consider is my car is a Sterling and is on relatively small wheels, later models may have come on wider wheel and tyre combos.
-
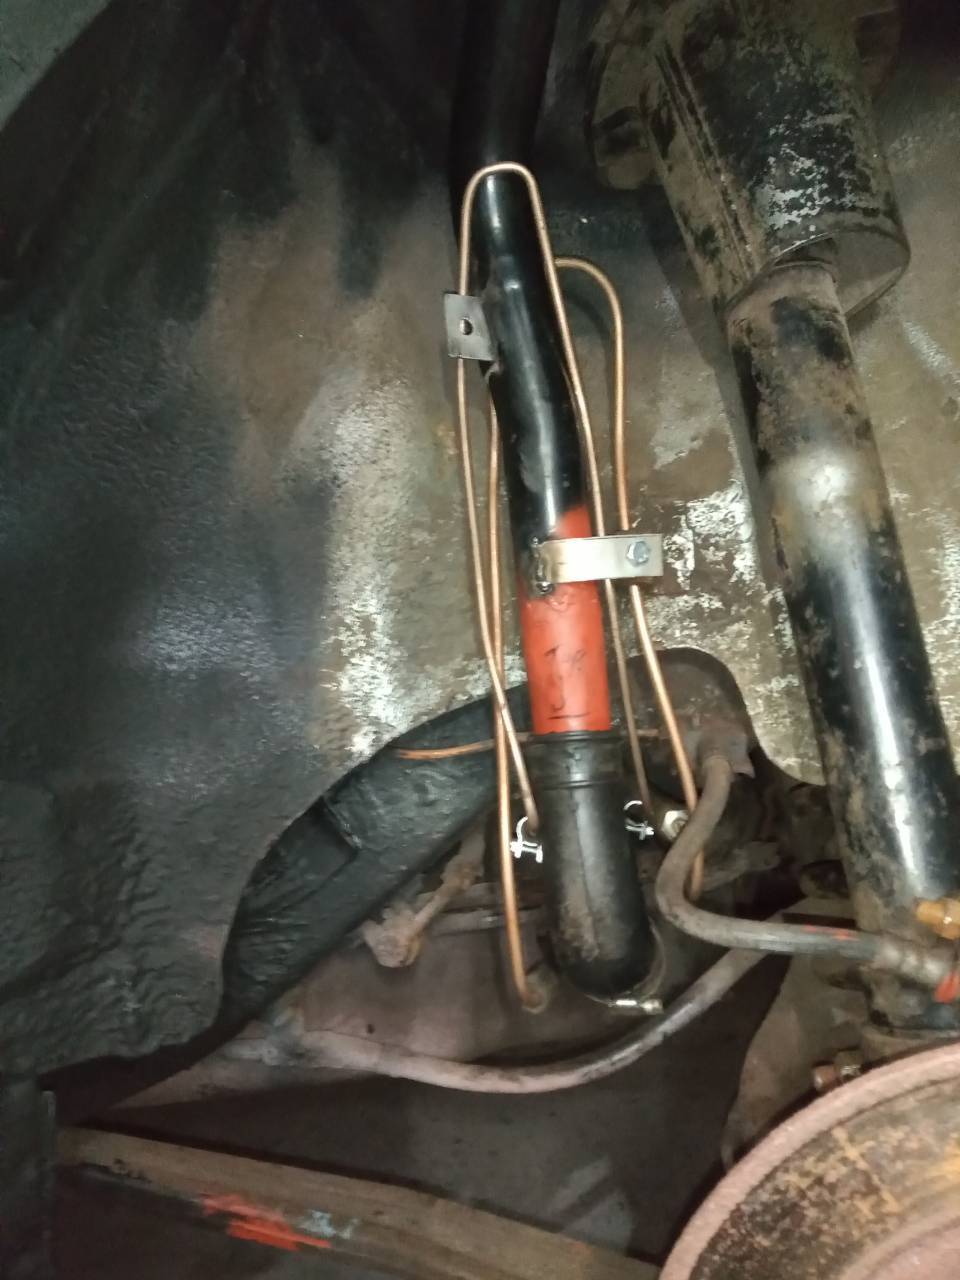
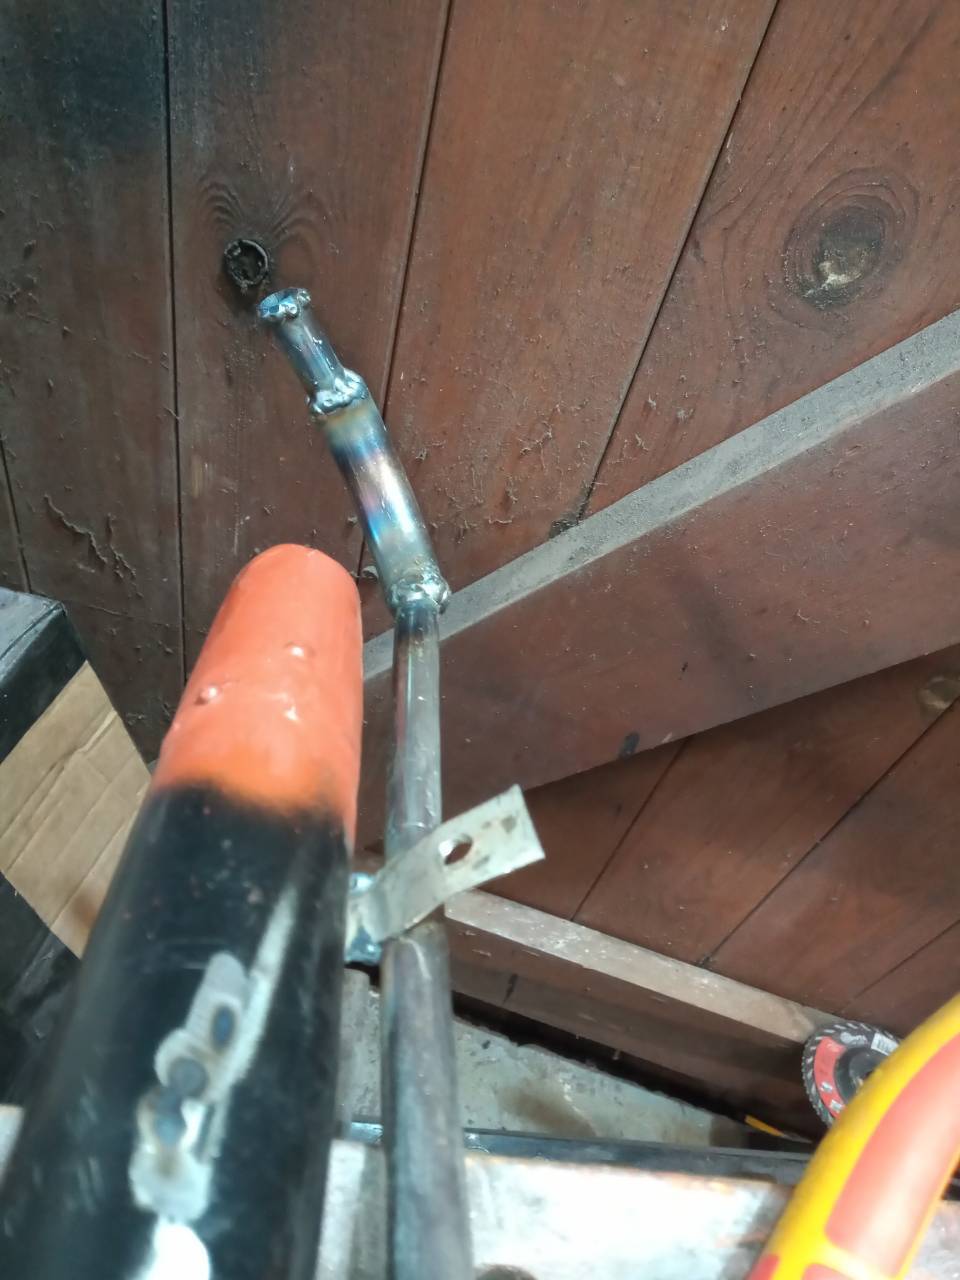
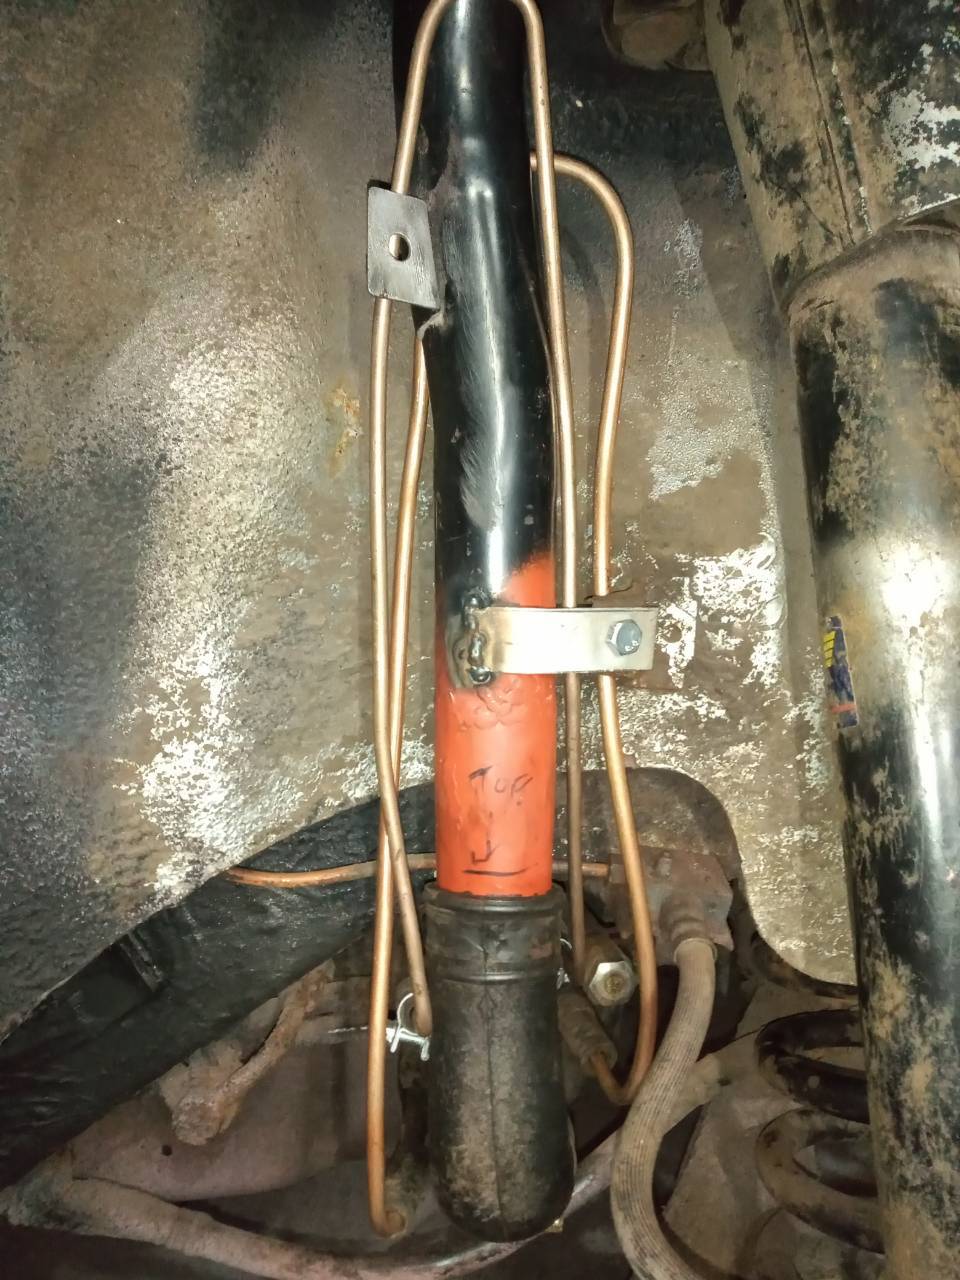
Back on the fuel filler, some metal pipe arrived a straight length and a curved bit, time to make the breather.... Firstly I used an old bit of brake pipe to rough out were I wanted it to go then, copied it on the bench with steel tube, I haven't followed this through step by step so here is a rough before and after. Before.... And no those bits of copper pipe are not the breather, they will be in the final build as they are part of the other bit of the fuel system. Trial fit with the main sections of breather tacked in place... Welding the main sections properly. Adding the end part and creating a flange to hold the hose in place... Paint with primer but never mind focusing properly....... Jobs left are to clean up the welded flange to make it nice and smooth, re check fit and possibly run some water through it to find pin holes in the welding. Then this part will be done.
-
Soup classic motoring is finally back, his videos are nearly as sporadic as Bad Obsessions (actually that's unfair nobody is that bad!)... Lotus update.
-
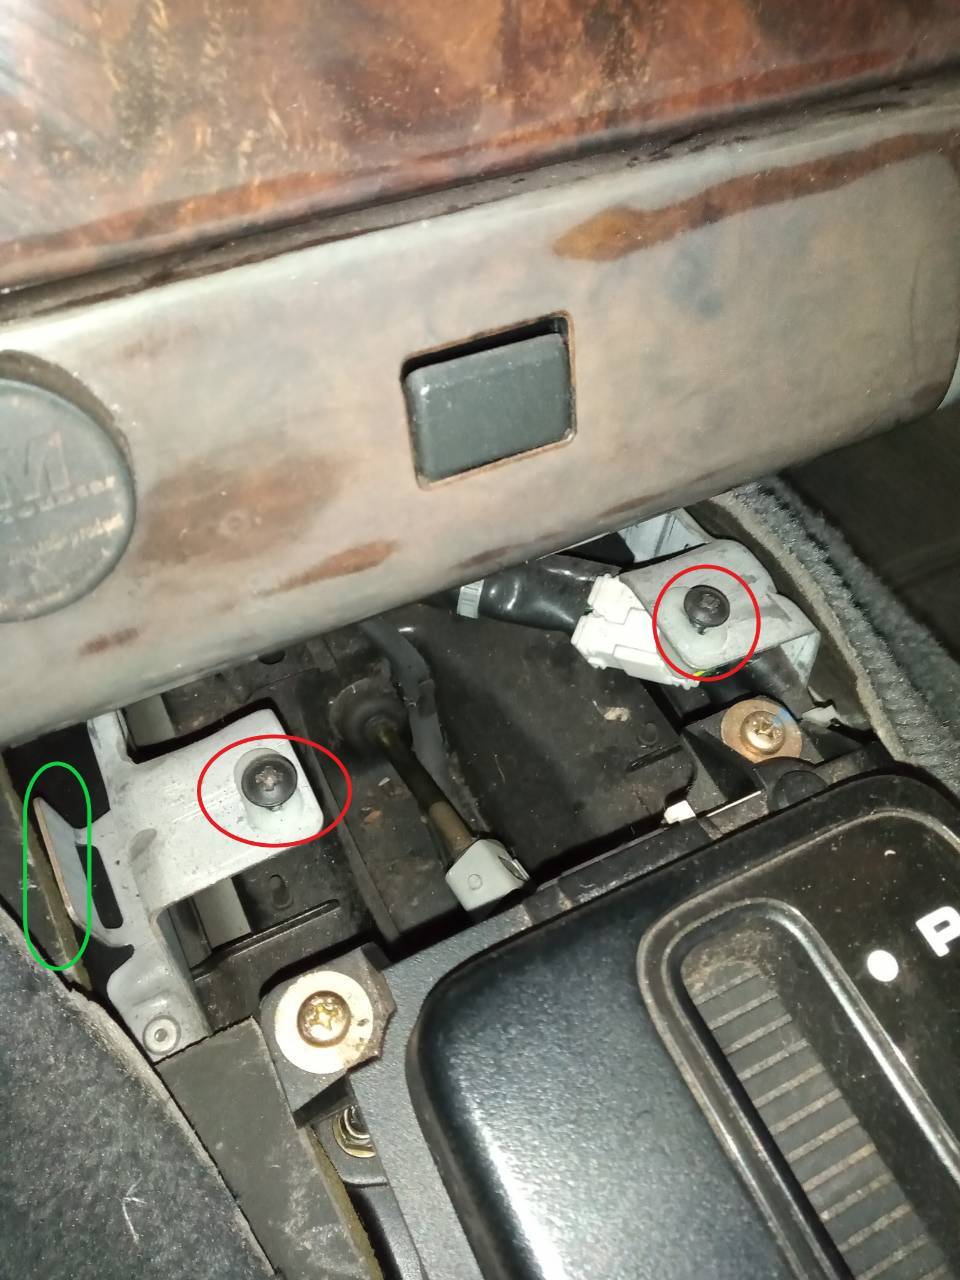
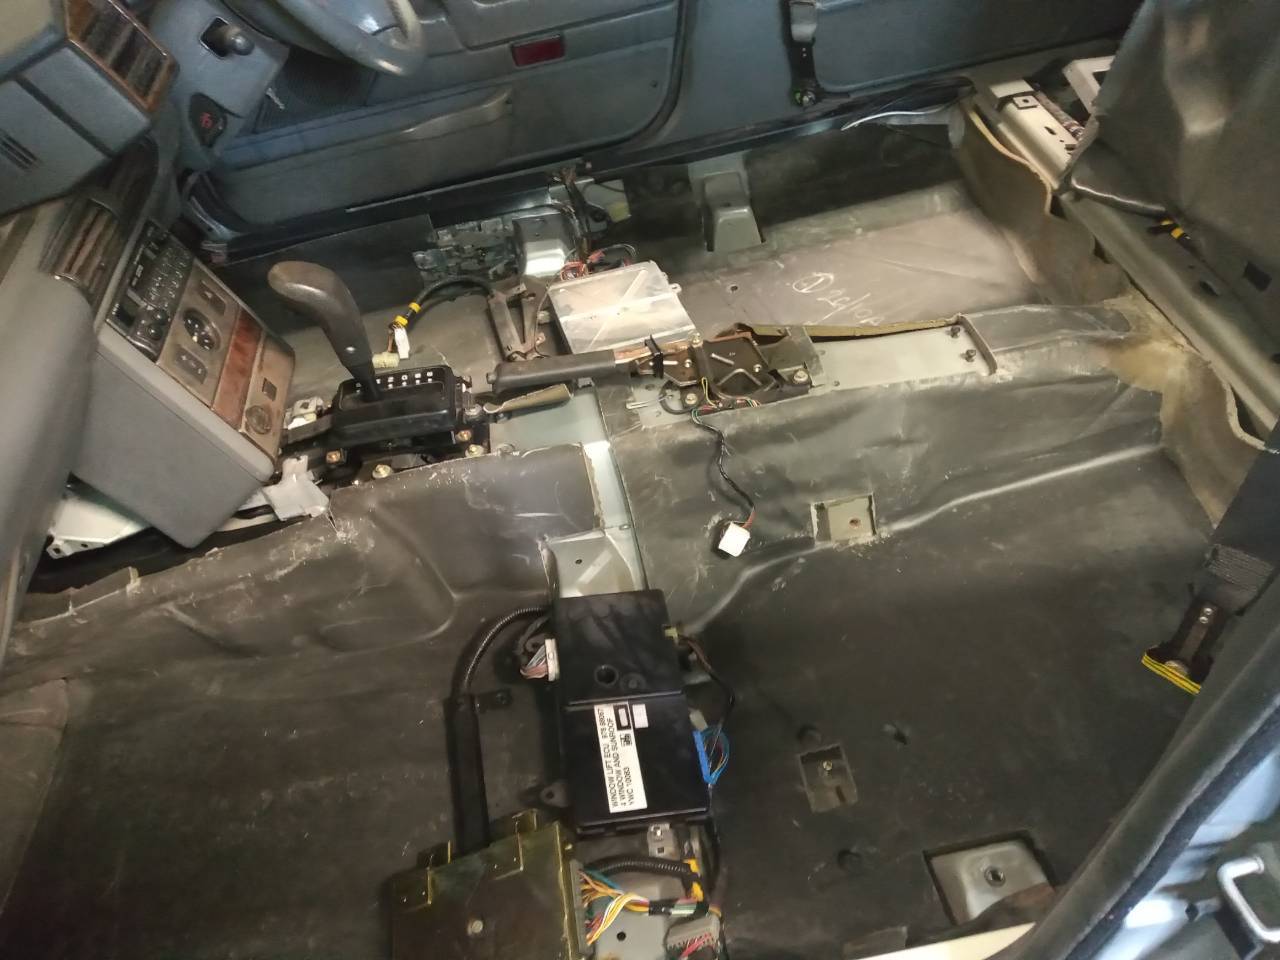
Not sure if this will help but..... The red circles are definite attachment points. It gets a little vague at the dash end, red circles are clearly attachment points - green circles are a case of I cannot remember but there is something going on there! Hope this helps.....
-
I have 2 of these books, they are pretty good but I think you missed a trick in not doing a "pop up" edition, all the best books are pop up!
-
I cannot remember it being particularly challenging but it was at least a year ago (time can help heal painful memories!) . I will dig it out and have a look at it for you when I get a moment.
-
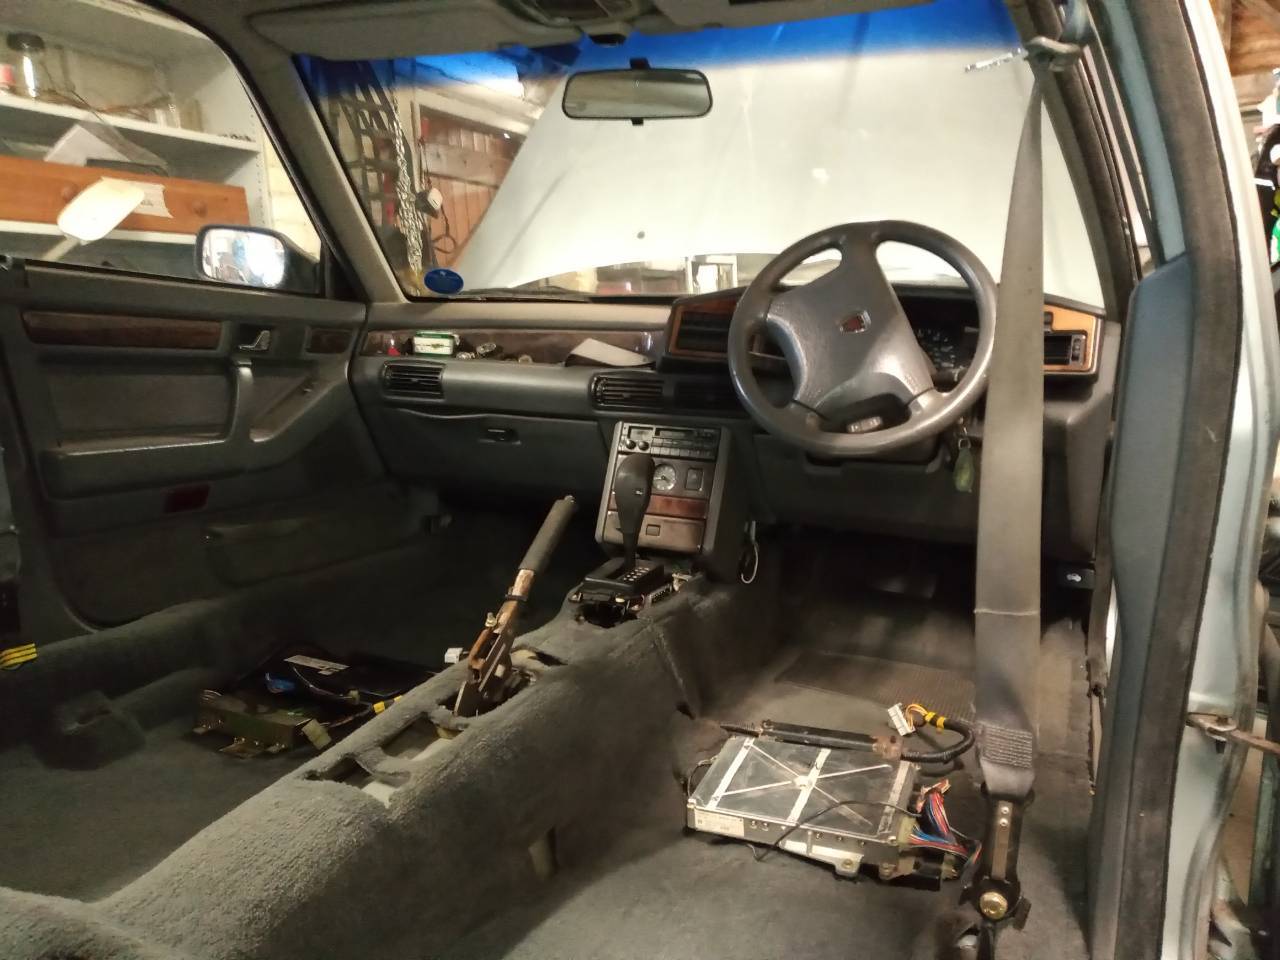
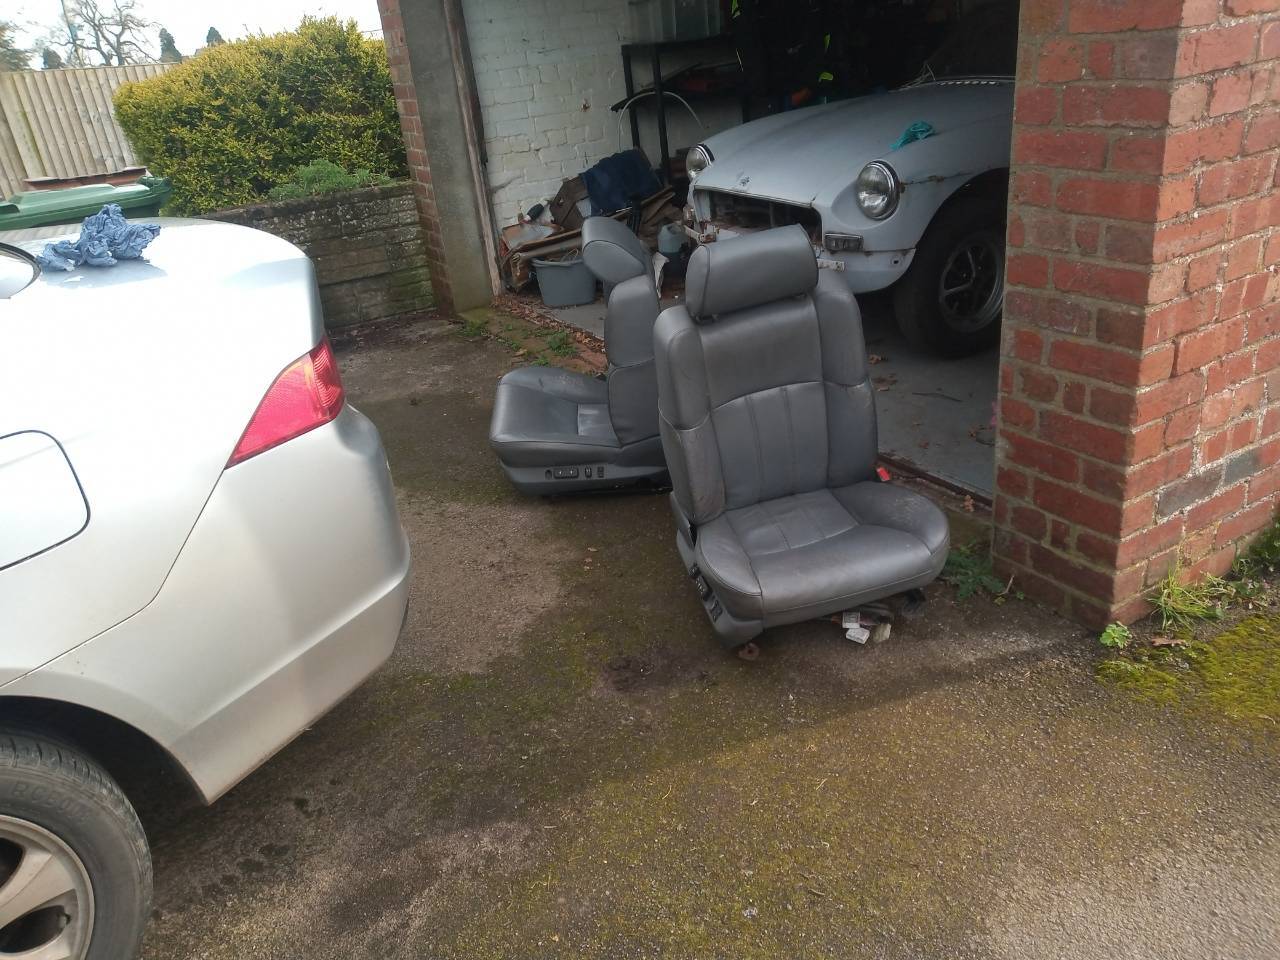
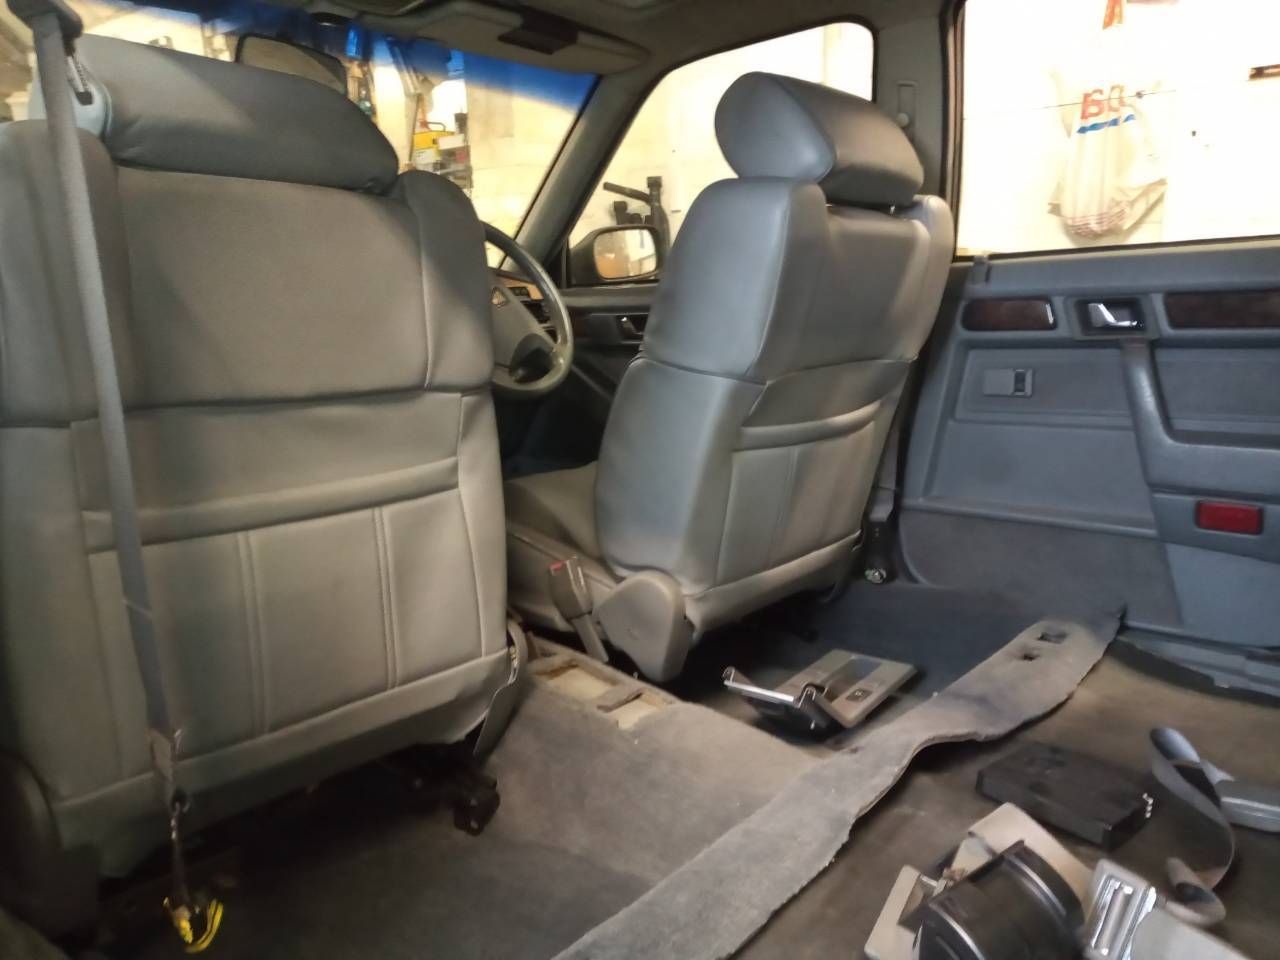
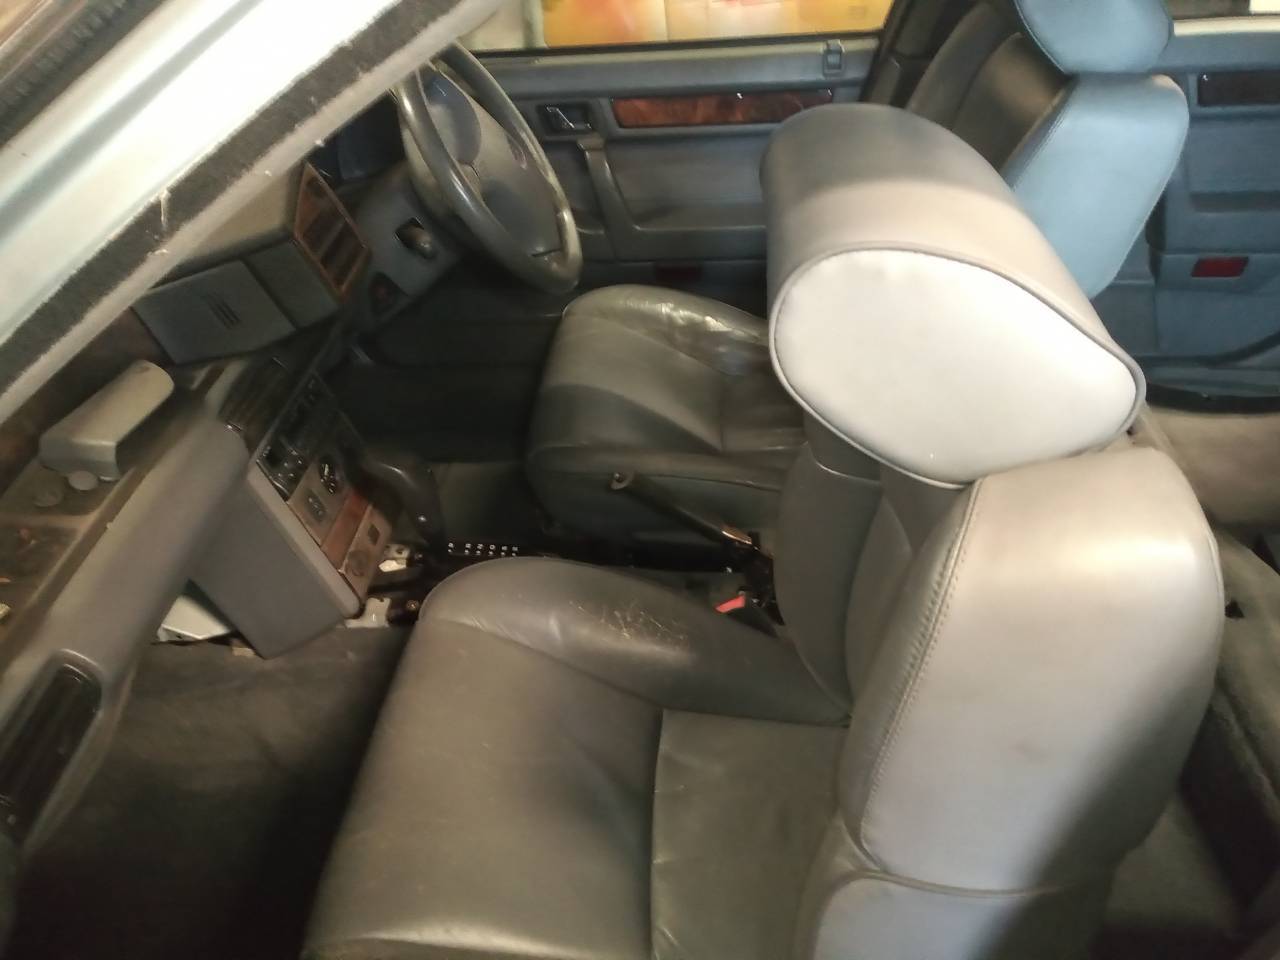
More interior faff, rear sound proofing in then carpet in but sort of loose should I need to lift the rear section for access... Then dig out the front seats and clean them up, well give them a wipe anyway....... They're in rougher condition than I remembered..... Never mind, they will have to do. Front seats in! Then back on to the fuel filler neck. I have made up some copper nickel lines in two different widths to replace the mysterious pipe work and have started experimenting with welding on fixing plates. I have also had some 13mm wide steel tube arrive to make up the breather pipe. This is properly fiddly work and yes I have re fitted the wheel and lowered the car back down to check clearance, I have even jumped up and down on the sill to try and get full droop as it were! It seems to clear okay. Yet more filler faffage to follow, I know how you all love the filler faff! Thanks for reading and looking at the pictures!
-
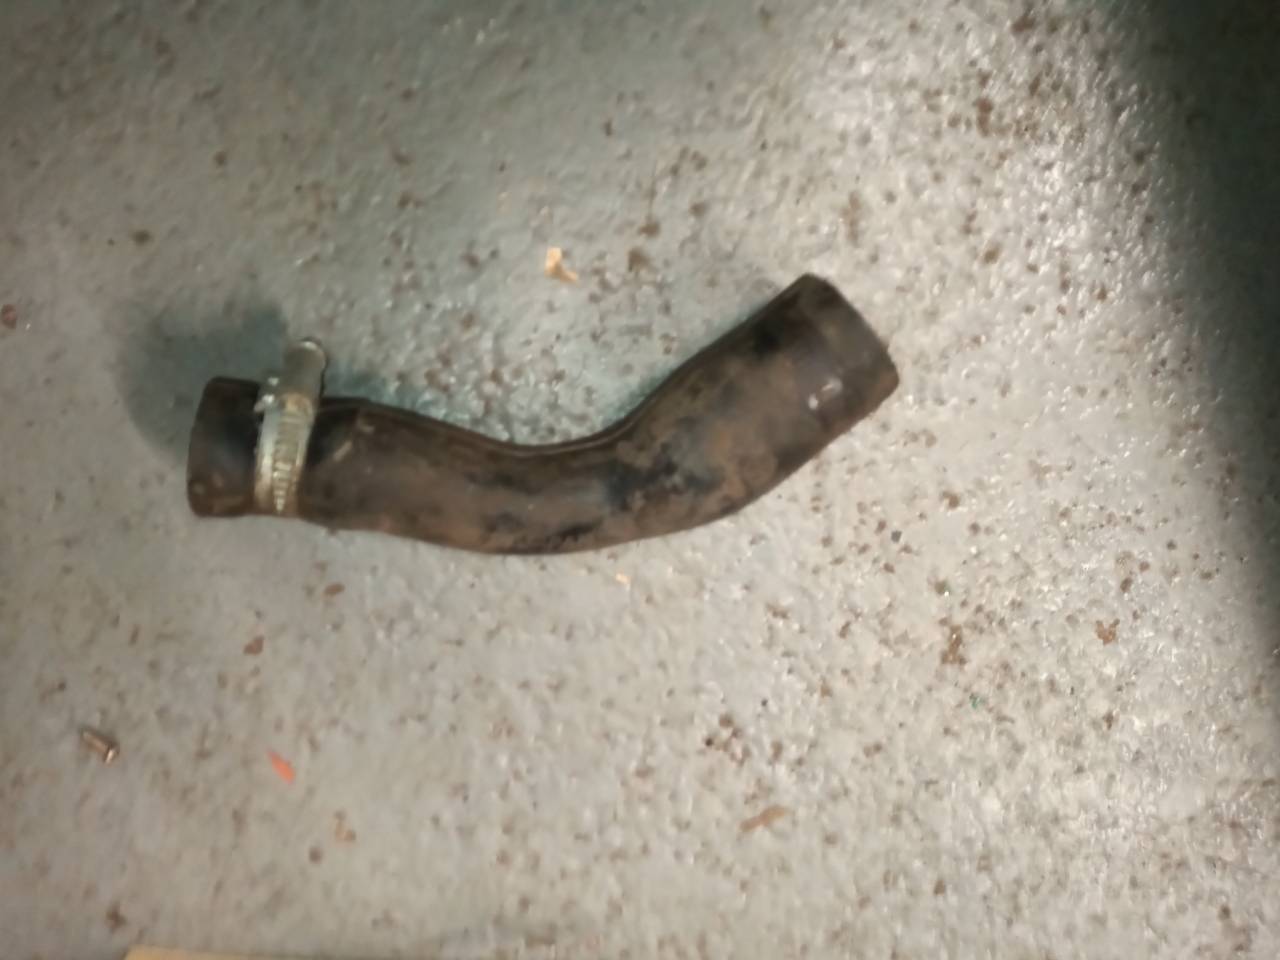
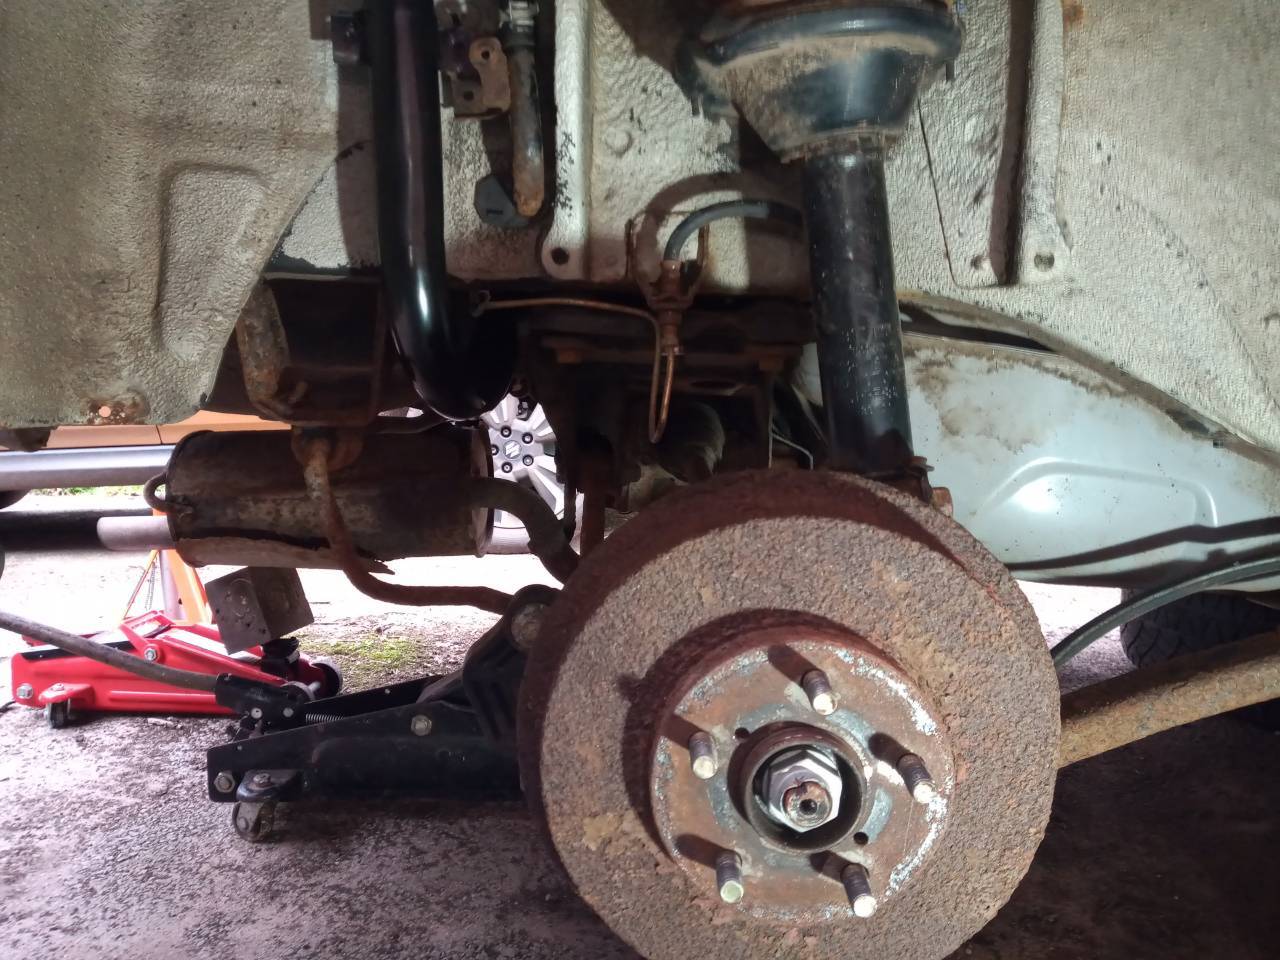
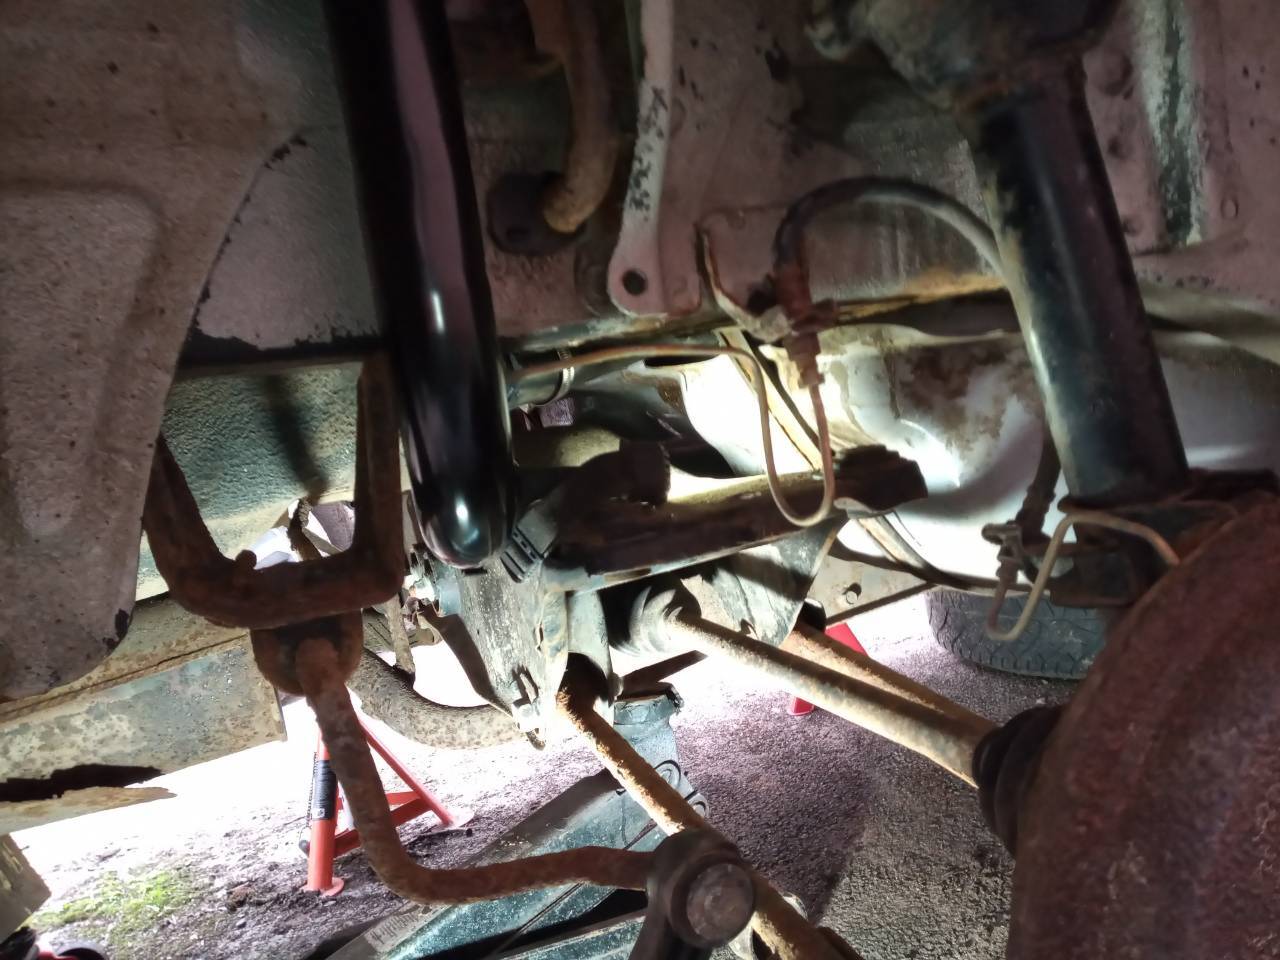
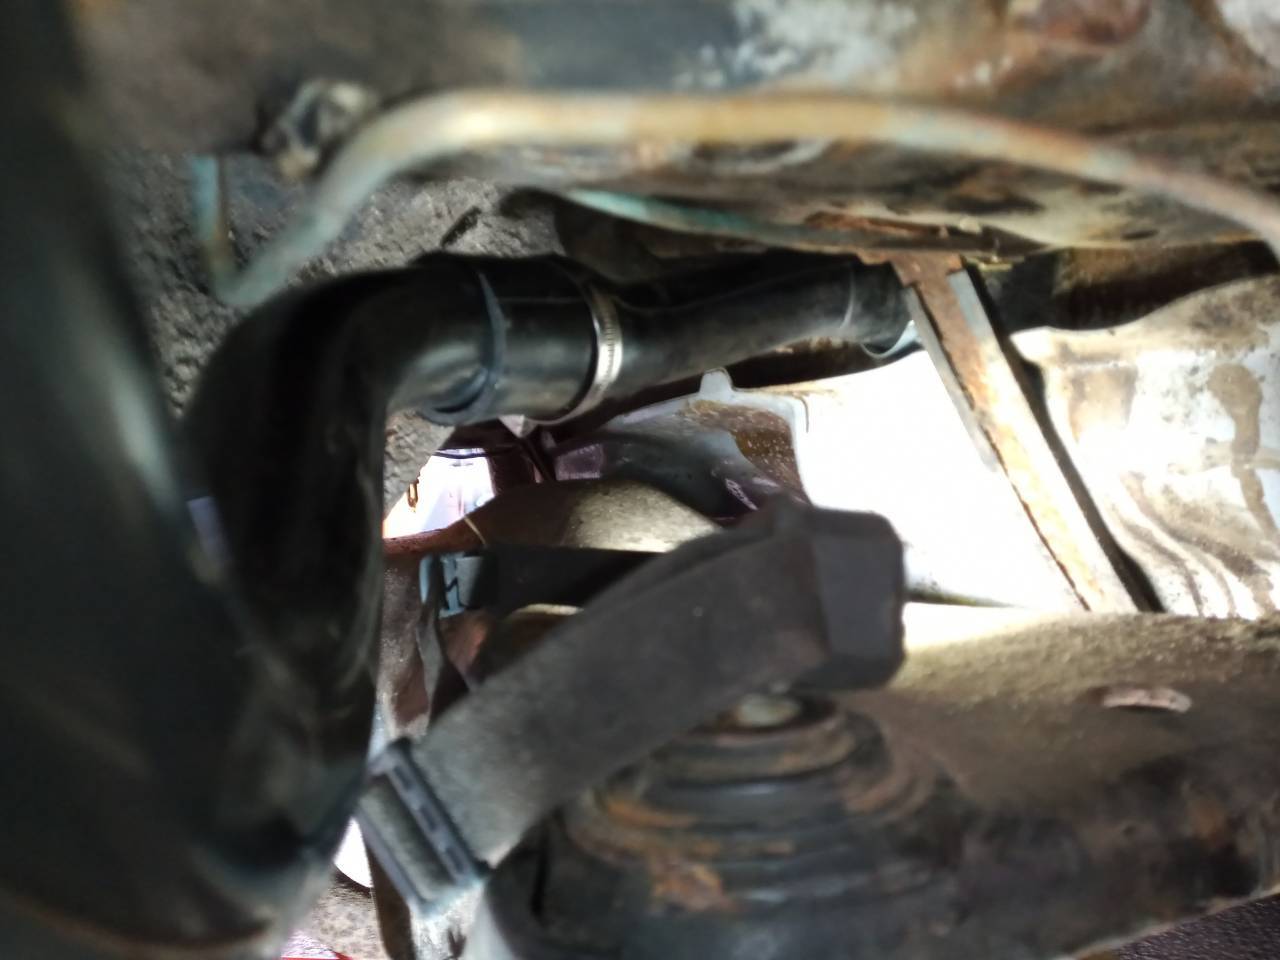
Next fun issue with the Forester, is that it occasionally leaks fuel when filling up.... Being yelled at on loud speaker at a petrol station was embarrassing! My initial thought was the filler neck as these are known issue, I removed and checked the filler neck, its definitely crusty and on the way out but it didn't appear to be the actual culprit. Still it was heavily corroded so I ordered a new one and also the main hose that runs between the filler and the tank (the tank is brand new see page 1 of this thread!) . The new filler arrived and turned out to be the wrong version, this ended up hacked about and is being trial fitted to my Rover (see my Rover thread for more.... ) , so I ordered a different version and that was just the ticket. At that point in time the filler hose (rubber section, not the neck) still hadn't arrived, it was ordered from Japan so wasn't going to be quick. Problem is I needed to move the car so I went to just fit the filler neck on its own. On faffing uncomfortably under the car for a bit I skillfully snatched defeat from the jaws of victory and pulled the original rubber hose off ! Hmm it should not have just "pulled off" at all as it has a hose clamp on the fuel tank end... I think the hose has had it and I suspect the hose clamp cannot be much good either... Finally the new hose arrived, so time to crack on and get it fitted. The main issue with this job is access, were the tank connects to the hose is just above the rear subframe and is basically inaccessible. The best way to deal with this is to drop the subframe and which is a bit involved. I did want to use my garage pit but thanks to the constant damp weather I cannot get it empty of water (first world problems I guess), so next option do this on the drive. Jack the car on the rear diff, support the body of the car on axle stands. Drop the crusty old exhaust out of the way then undo the four main subframe bolts and lower the diff which takes the subframe with it... Subframe in place.. Subframe down... Like working through a letter box! A properly fiddly job but hopefully that will fix the incontinence! Just need to brave a trip to a petrol station to find out of its all good! Thanks for reading.
-
I got fed up with the DVLA/DVSA so decided to do what I do with my insurance and shop around. I have now moved my road tax to the RSPCA, not only is it cheaper they through in a free rescue Guinea pig with my first years tax win, win!
-
Watch me make a stupid mistake - Peugeot 504 Break L
Marina door handles replied to meowmeow's topic in AutoShite
That is proper time warp wall paper, although the illusion is some what shattered by the modern double glazed window! -
I always hang my clutch cables in my wardrobe with my shirts and trousers, I though everyone did this?
-
Looking at the diagram and having a reasonable idea of how these things work, I think part 18 should come with part 1 - (bracket assembly thing finis code 6713933 )
-
Didn't Olivier Panis win the Monaco Grand Prix in one of those........
-
Dad Inlaw's bike collection going to Auction.....
Marina door handles replied to Marina door handles's topic in AutoShite
I have been told June-ish, I will update the thread when I know more, it will be an online auction.