St.Jude
-
Posts
9,429 -
Joined
-
Last visited
-
Days Won
2
Content Type
Profiles
Forums
Events
Everything posted by St.Jude
-
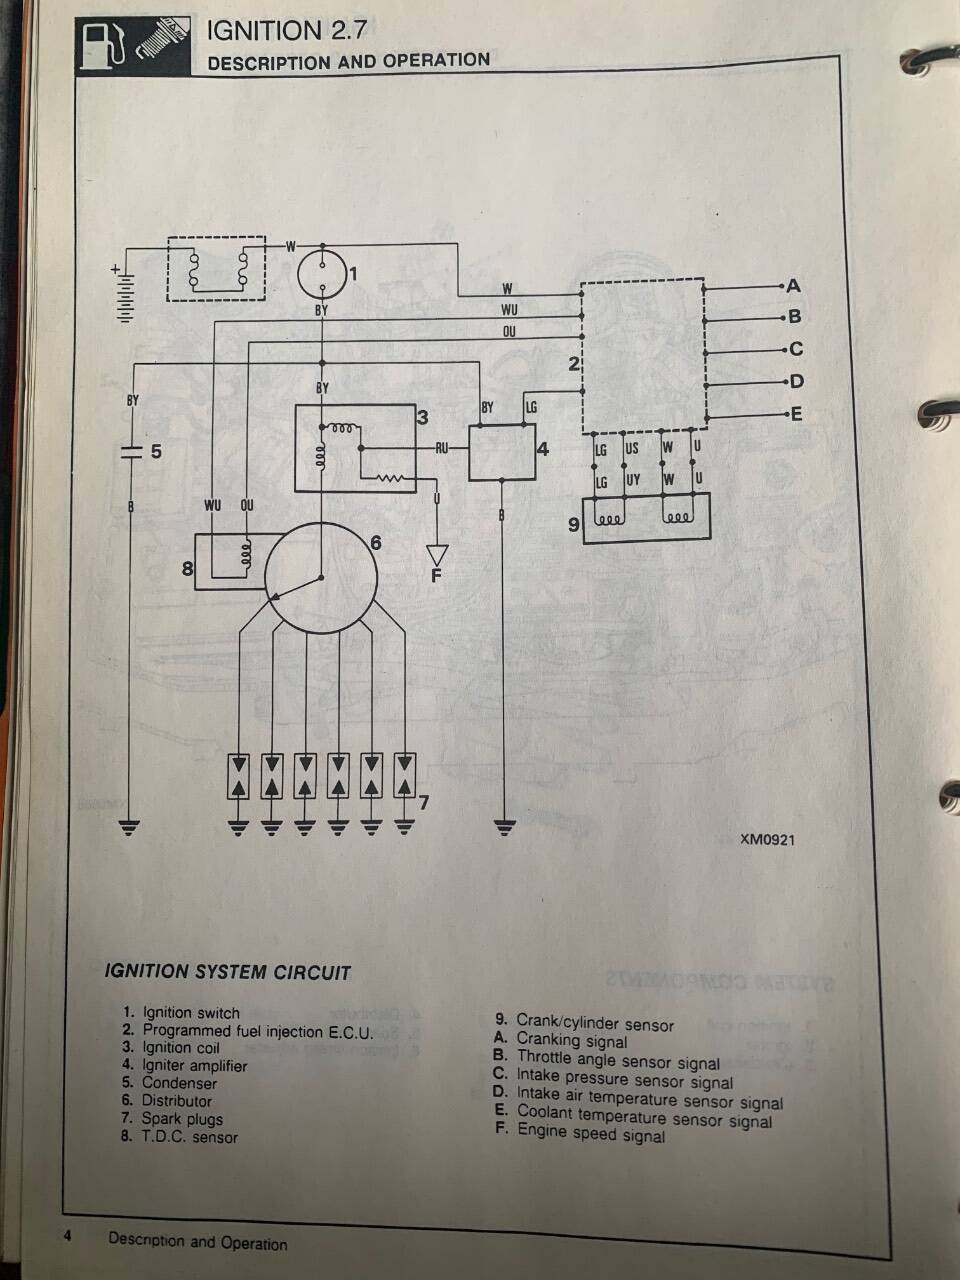
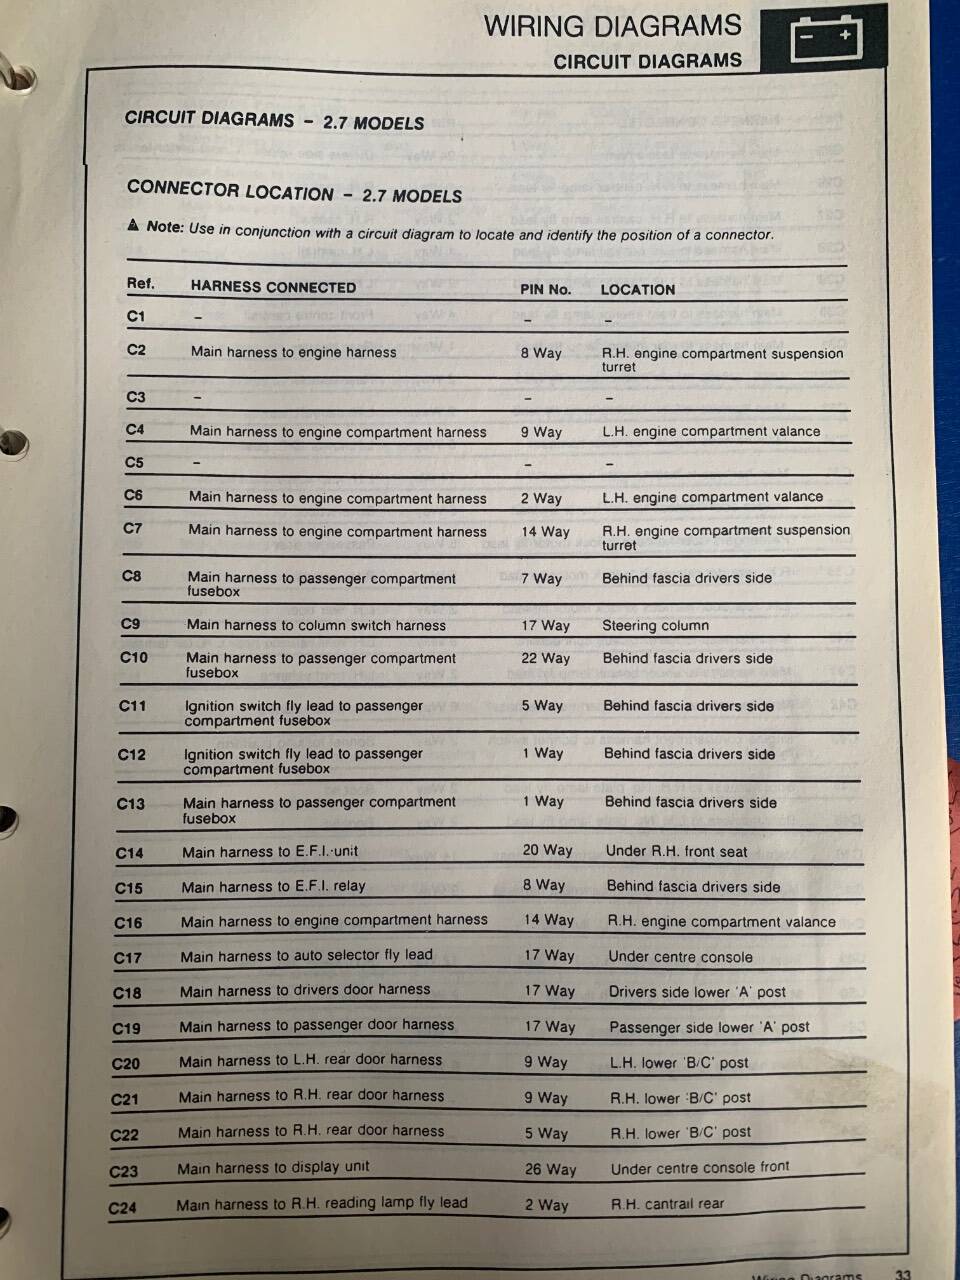
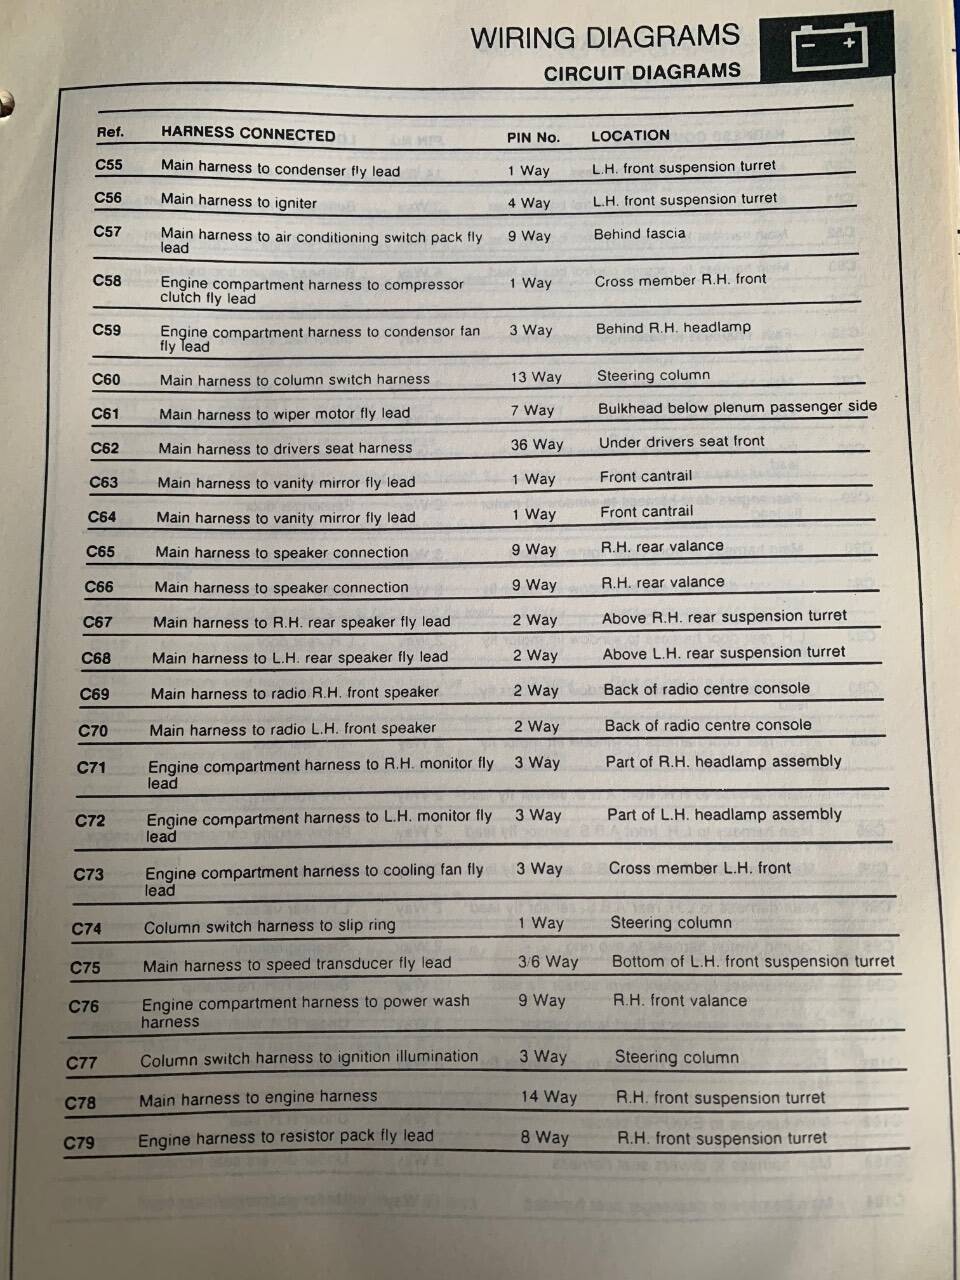
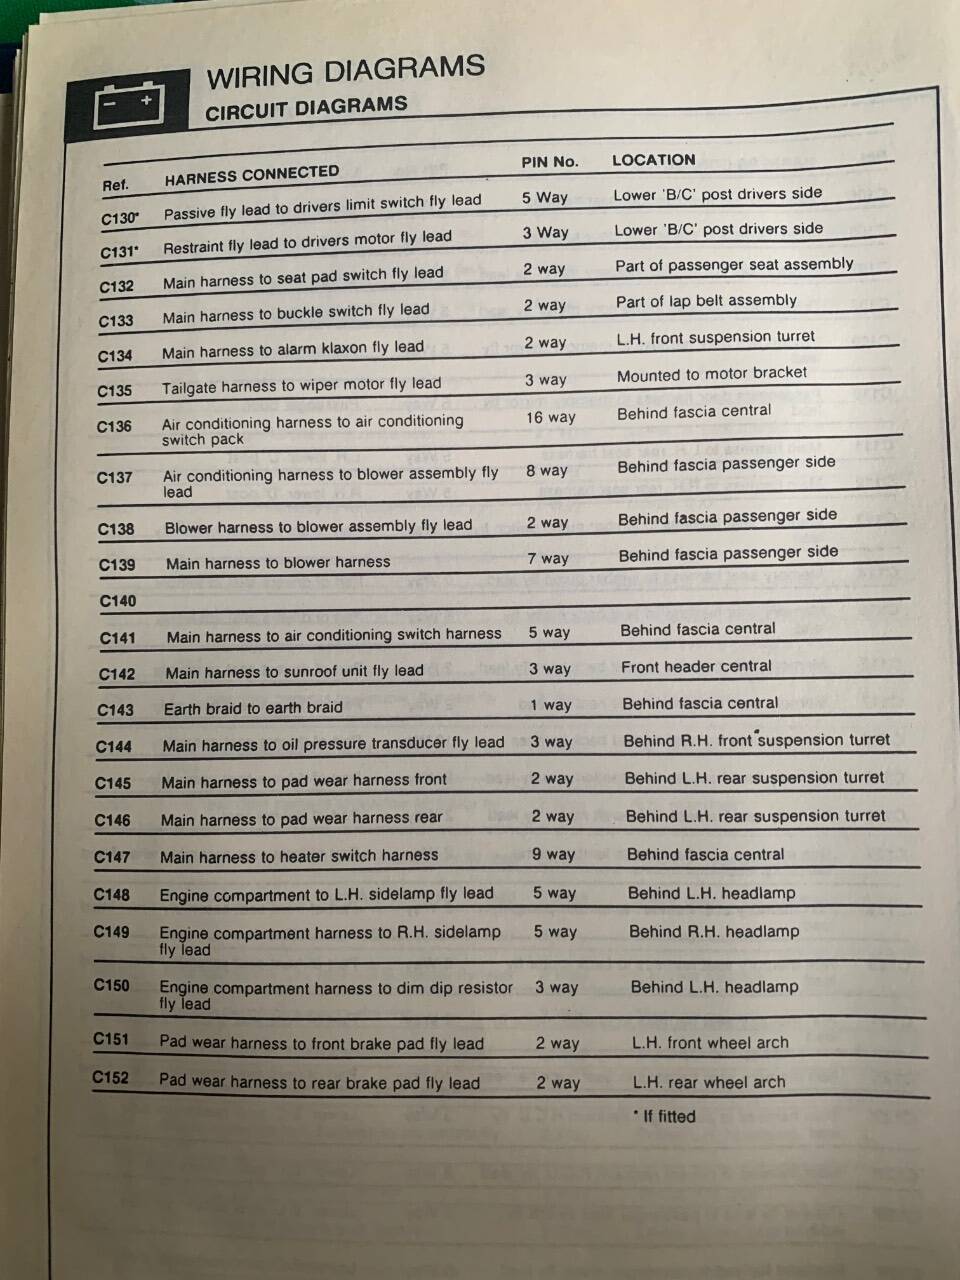
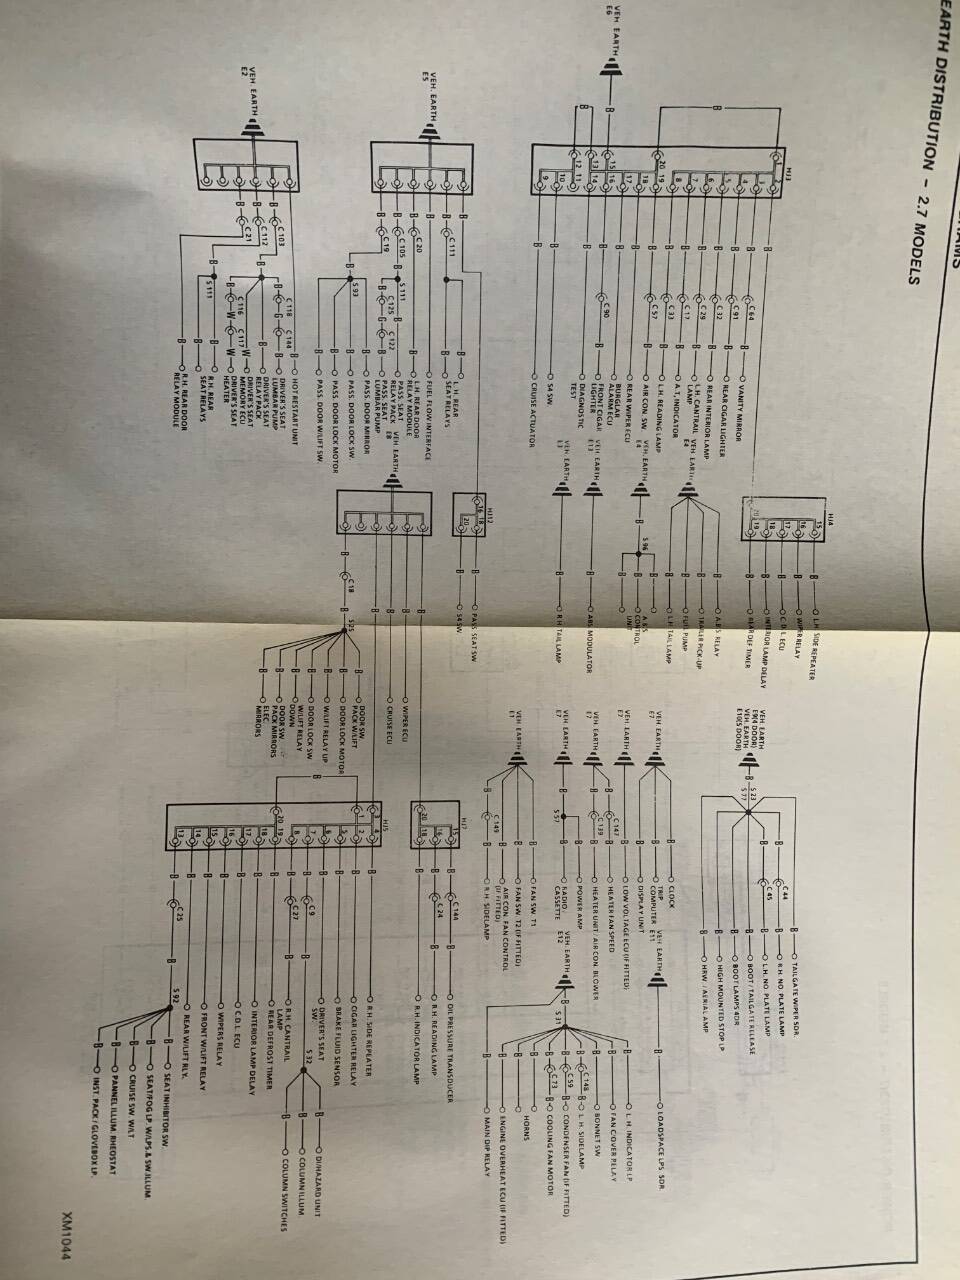
Maybe. Ive gone through everything I have. I found 3x 4 digit codes in different places. Two of the 3 are the same, and that’s definitely a radio code. There is another code on a piece of printed paper from the internet but no indication as to what it’s for. So I would take that as an EKA… Through the books etc there is no real mention of an immobiliser. And through the diagrams I’ve got there is no mention of one either. Here are the diagrams I have. They are copyrighted 1988.

-
That's about £5 more than the people I've called, but I guess I'd get it near enough instantly. I don't have the handbook for it I don't think. I'll go through what I've got again tonight and see. At least last time I went through it I didn't see anything to do with an EKA.
-
Scoured the papers I have for it and I didn't come across any 4 digit codes. Think tomorrow evening I'll have a bit of time after work to look through the papers again and the diagram to see if an immobiliser exists in it. One thing I've seen Project Nigel do is once the EKA is put in he just disconnects the door lock and something else under the steering column which stops the EKA code from having to be entered. No idea though if this works without a code being entered or if one must be entered before the plugs are removed.
-
Thanks @rovik88 You don't happen to know another way, or someone else, who does EKA codes for these things? I've called MGR a few times today to see if they'd accept the documents they give electronically instead of via the post but I've not had a call back yet.
-
Keith Duckworth (the Worth in Cosworth) talking about how he was designing a turbo engine for Ford for the Beatrice F1 team, driven by Alan Jones.
-
I think on Mk2’s there would be a red LED on the right hand side bank of buttons. But on a Mk1 I don’t know if it’s a thing. Ive got a week to research this anyway and do it Saturday 👍
-
In my mind if it had the immobiliser there would be a red light illuminated on the dashboard? I don’t recall there being one. That said, if there is one then that could well be an issue. I think though that the first instances of this happening I did do the whole lock/unlock bollocks and nothing happened. Never investigated the door lock switch.
-
I have the folder of the proper diagrams, apparently. I'll scan these this week, but I'll check the link that was shared here to see if it's the same as what I have.
-
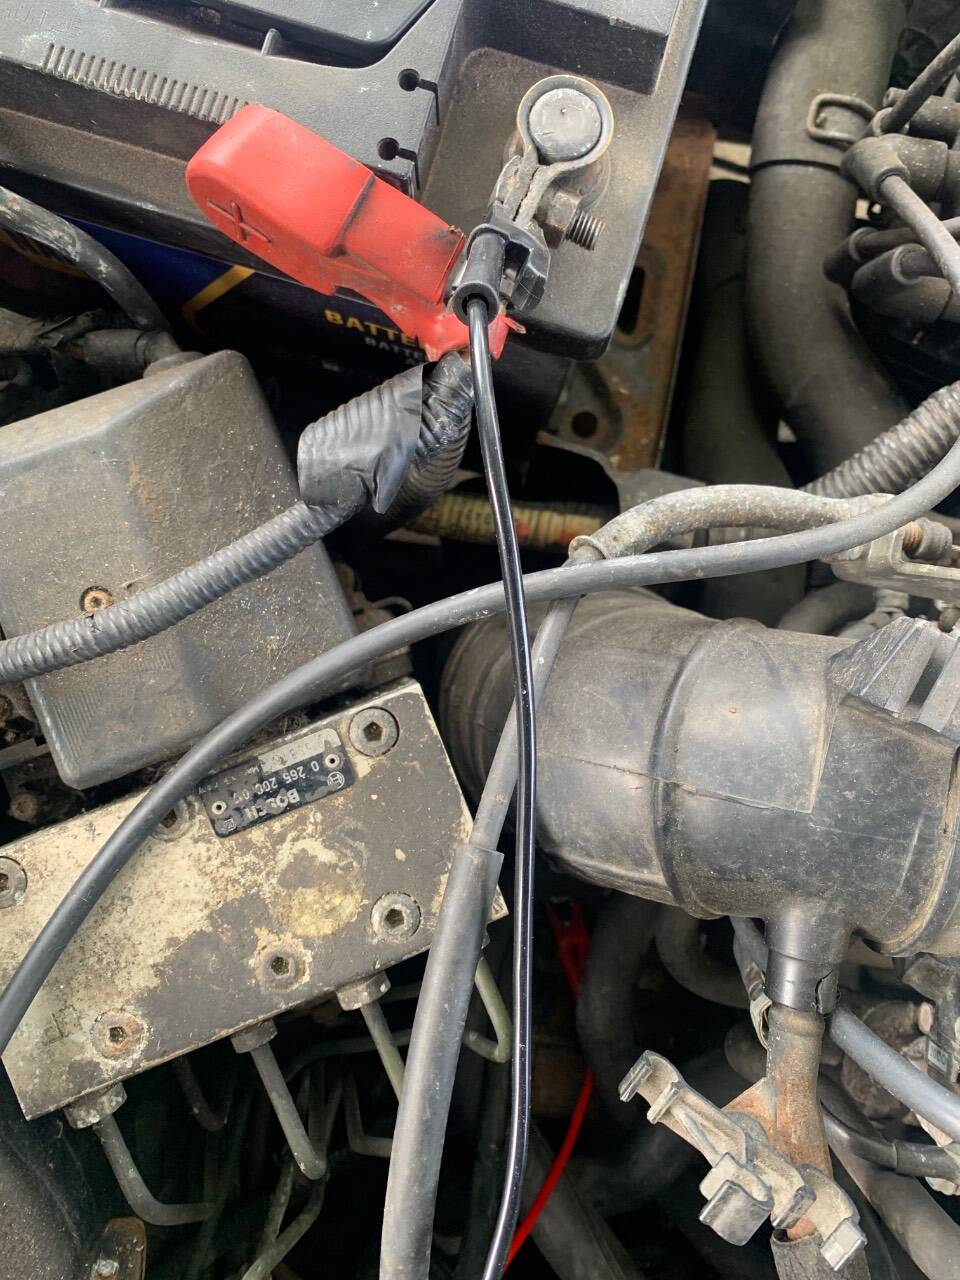
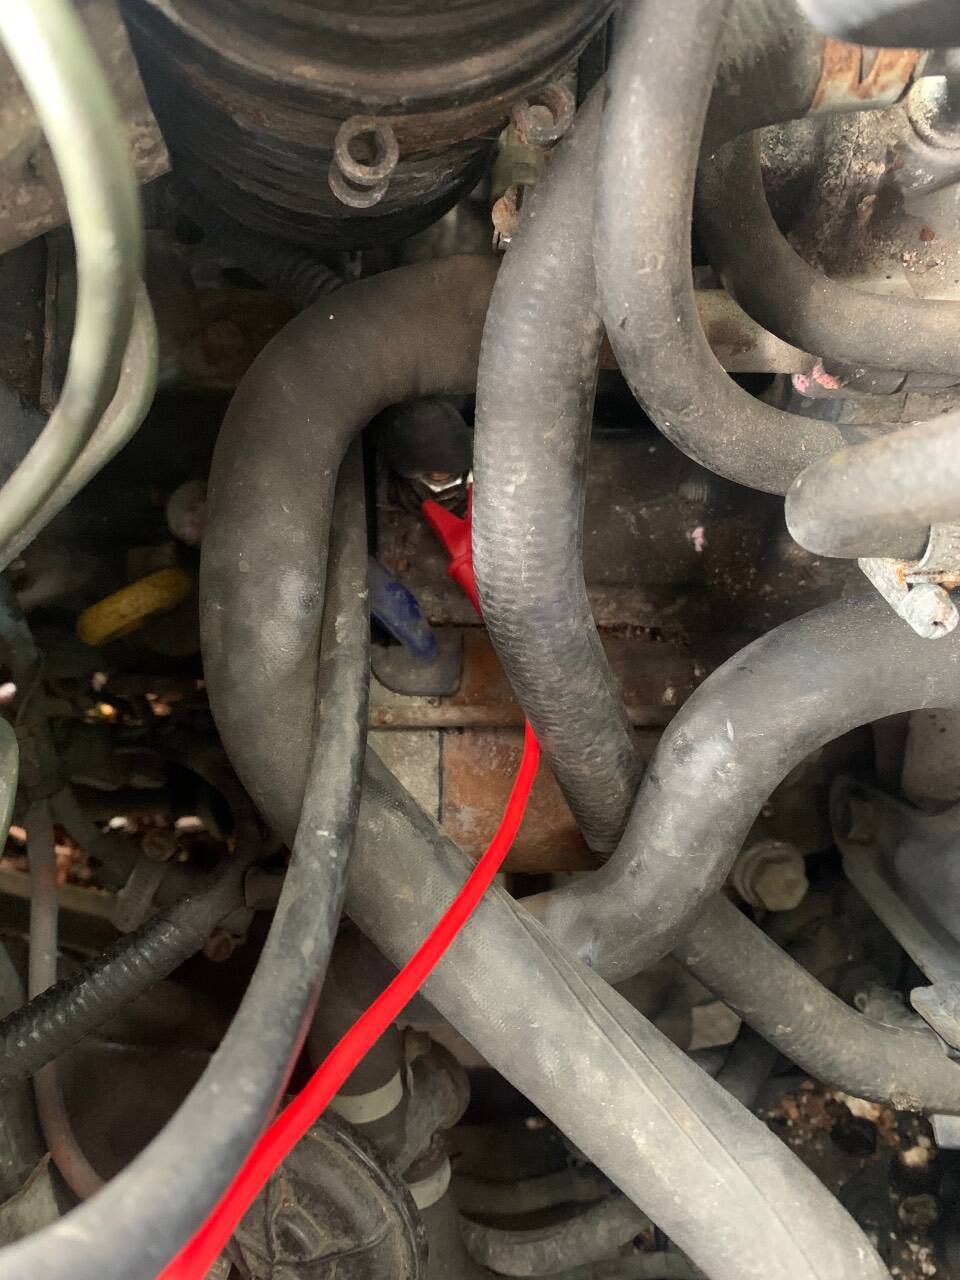
Thanks, I will try this next weekend when I'm over there. Access is a bastard really. That's good to know, although I am so angry at myself about it because I did a quick Google and did the first thing it said without reading it thoroughly. After the highlighted text it says you should see 12v and then when the ignition is on it'll drop to 0.5v. Didn't see that, but I know for next time.
-
FUCK SAKE!!!!
-
I had the red of the multimeter going to the starter, then the black/negative goes to the positive of the battery.
-
Also I will pay in beer for diagram help!!!
-
Had an hour to look at this today. Thanks to @Marina door handles I had a better idea (and head) to get the the centre console out. All of this shit had to come out to get this far. Yeah I broke some veneer, it’s wood. It’ll be easy to fix. I couldn’t really get to the bit I was looking for as the Haynes BOL says you need to go under it etc and I’ve no Jack or stands here so I can’t take that out. I did ask my sister though to start it, as I could hear clicking. There is clicking from the engine bay, I think it’s the ABS pump being primed. Forgot though I bought crocodile clips for my multimeter, so I hooked it up. Zero volts at every point. So there is no power going to the starter. Should also say that when I put it in reverse the reverse lights come on aswell.
-
 Show off.
 -
Very impressive mate. Fairly sure you've just lost 10hp not keeping the Subaru name on the cap though!
-
Finished for the day. Door is off, had to drill the two screws I fucked earlier. The stumps are still there but I can deal with that later. Somehow. Replaced the arch and the panel that the A pillar welds to. I think I’ve been told a porky that the Lada uses 1.2mm steel. I think it’s closer to 1.0mm. But it is what it is. I need to put in the chassis arm/jacking point, floor, inner sill which hopefully is next weekend. Then I need to take the outer sill off. And my smashed phone got even more smashed at the end. So that’s annoying as I liked using it for filming. But it’s dead now.
-
Finally welding. This is a replacement part of the bottom of the A pillar. And it’s a hard reminder of how easy it is to blow holes in existing steel. It’s not too bad really though. I also added a plate on the back (seen above, the strip with three holes in). This plate goes behind it, so it’s like a “C” going around the pillar. That’s welded behind too, as well in the front (as per how the original was put on). But the strip on the right didn’t exist, so I’ve added that. Anyway, onward.
-
A very literal interpretation of the question. The car depicted is a Ferrari 365 GTC/4.
-
Rover and out.
-
So finally got the order of rust remover, and realised something. I am a full kit wanker for Bilt Hamber. But I like what I’ve used, and the primer stood up well to being outside. The Deox-Gel has been applied to the bottom of the A pillar, I’ve no cling film so relying on a sandwich bag and gaffer tape to keep the gel from drying out. In the mean time, this came today. Only place I could find one of these was the US Amazon site. All the others were Beta ones with a chrome fitment at the base which I didn’t want. But why would I want this? Well unbeknownst to you all I started to remove the door. One screw, eventually, came undone. The second screw was a proper bitch, to the point this happened: The bit twisted, then slipped, and I ended up chewing the screw. So it needs drilling out. That’s for another time. Tomorrow I’m working from home for the rest of the week. So I will be cutting the steel to make a replacement panel.
-
Might of missed it, but why did you settle on the Subaru neck? And have you checked this with the wheel in place to see if it rubs?
-
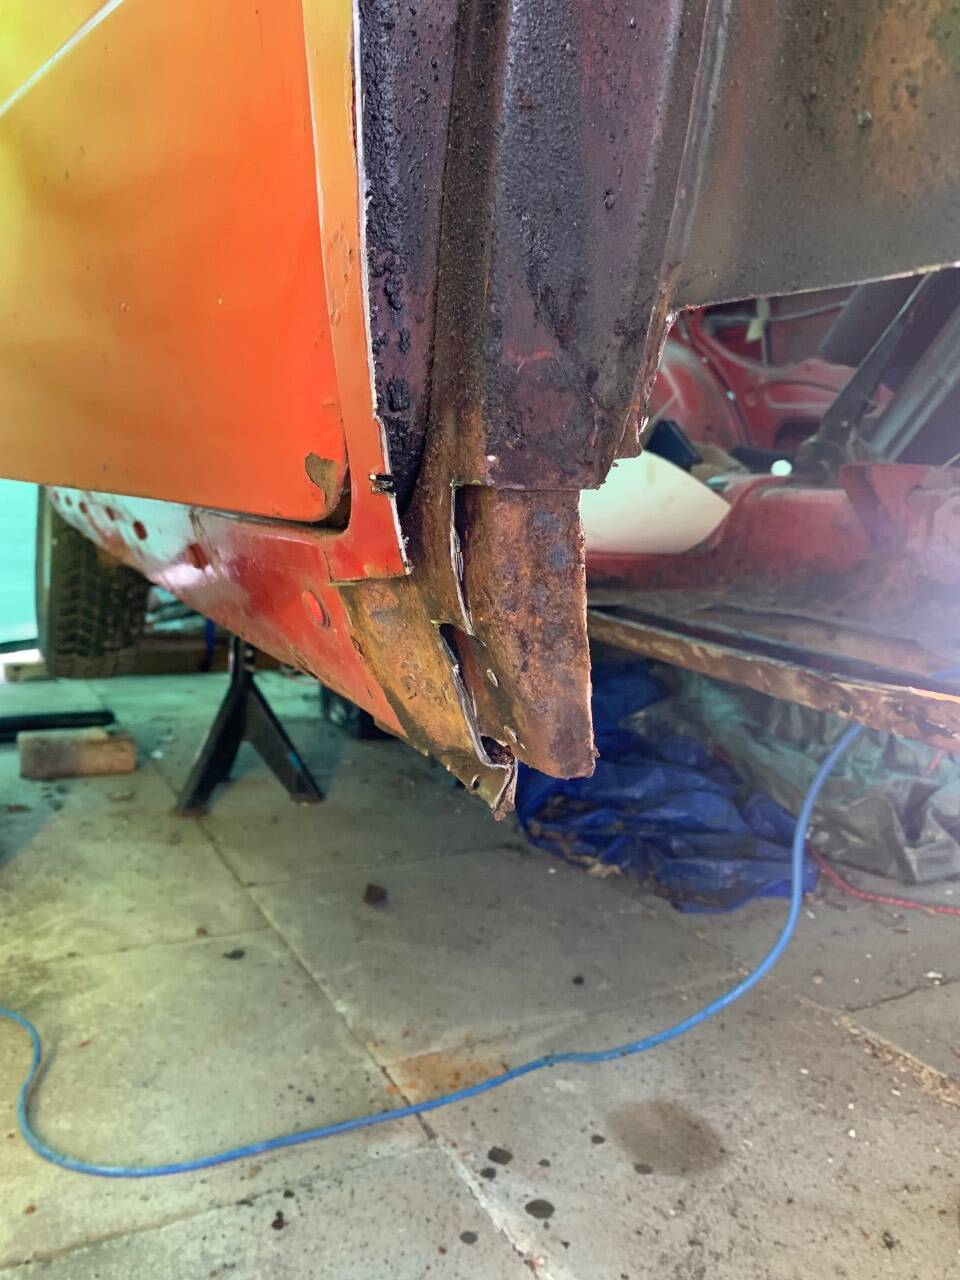
I did no welding today. Not for the want of trying. In a quest to tidy the area up and sort out the rust I found yesterday - well I found more. At the foot of the A pillar it was thick with muck. A good 3” block of it. Given I have to put a new outer sill on, I thought I would just take the whole bottom of the wing off. I was cleaning up the inside sill stuff and I gave that rusty bit a tap with the chisel. No hammer, just me… Oh dear. Yeah all of this needs to go. Not all finished with rust discovery though. The bottom of the A pillar was equally rotten. Thankfully, this covered more steel which was rusted BUT only rusted where you see it. I cut more of the skin off to see. As you can see in Australia, this is how it looks. But the inside part is strong. I have cut back more of the interior sill because I suspected the inner sill was rotten. It was, but only really where the A pillar meets it. Remember kids - this car is MOT exempt! I had intended to use rust remover on the A pillar before painting it and putting things back together. I don’t have any, and couldn’t find any, so I’m going to order some online. When it comes I’ll give it another go with the wire brush (already did it once) and will paint it with weld through primer. Which I may need to buy some of! It’s a jigsaw now really. Love it!
-
Could be there all week doing that but it’s worth a shot. Tried to drill out the welds I could see but mostly took the chisel to it. And the angle grinder to get it off properly. Will cut the bit of floor out from under where the seat rail was tomorrow. Then going to attack the hole in the sill tomorrow.
-
So here is a 10 minute video of the mistake I made leaving it under that sheet and the work I did last week: This evening I decided to get a head start on tomorrow. I spotted a hole under where the the seat rail is last week, and decided the best thing to do is to take the rail out altogether. For now anyway. Some spot welds are easy to find… But I can’t really see where the main spot welds are… And fucked if I know how to get my drill in to this gap! However, this gaping hole passed me by last week. Hiding above the jacking point. View from the inside: So I’m going to go ahead with the removal of the seat rail tonight. I will drill what I can see but the rest I’ll just hammer with a chisel. Tomorrow I’ll remedy that hole in the sill before I cut the rest of the floor and make a panel. Also a question to the hive mind: the sills on this are full of a bituminous substance. If it gets hot in the summer it drips out, and I never really could get it clean before. What can I use to remove it? I’m guessing the bulk will come off with a scraper but it’s difficult to get inside the sill. What else could I use?