


Crispian_J_Hotson
-
Posts
2,630 -
Joined
-
Last visited
-
Days Won
2
Reputation Activity
-

 Crispian_J_Hotson got a reaction from Coprolalia in Jaguar S Bype R - An Imposter, saving a bird, and that effin supercharger!
Thanks for the input, forum members.
This part is tedious. I am descaling and painting all the bits that I took off and this heat is baking me. I've been at it for a couple of days now and I've thrown the towel in to escape the sun. Good opportunity to catch up as there is a bit to discuss. First off, I have realised that there is what I now call 'the daily spend' and this is for anything that I've found along the way that needs replacing. There is something- every day! This is on top of the stuff that I've already got... none of which I can fit yet.
As an example, when I removed the two tensioners (one for the ancillaries and one for the supercharger belts) and the two idle pulleys, I discovered that all their bearings sounded like someone was dragging a box across a floor.
New replacements were ordered up and only then I realised that I'd ordered a modified idler pulley for the supercharger belt. This revised pulley is for a double sided ribbed belt, not the single which I have! The reason for the modification is to cure the cold start squeal (which I had) so getting the mod wasn't so bad, but I've got a new single sided belt for the old pulley. That means that I had to order a new double sided belt.
This type of scenario was a thing, as I have the early engine and Jag have made changes for improvement along the way.
I suppose I could off set that belt and some of pulleys cost as there is a recent water pump that was loosely bolted in and weeping...
Everything else like the AC pump, alternator (which is also recent), and PS pump were in good shape.
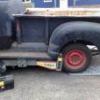
So you see that Crank pulley in the above image? Yeah, getting that off was the next milestone to hit. She's on at 375Nm with thread lock and legend has it that it is frowned upon to a) use a locking pin to hold the engine and 2) rotate the engine backwards.
Something like this:
The main issue I had was that apart from it being effing tight, the special tool that I got was for the V8. Great right? No...
The supercharged has the extended crank pulley so the tool is now not long enough to reach into the pulley, sit flush, and bolt up. That is unless you have a bearing press set like me!
All that was needed was one of the sleeves to go over the business end of the tool and some longer threaded bolts made up, like those shown above. It worked... just...
I've used my bearing press set a lot more for things which aren't bearings.
To add extra challenge, the only 24mm socket I had, split on me a long time ago... something to do with a 3 meter scaffold tube, but it refuses to die and completed this task without fail too.
Around the same time, before or after this job... can't remember... I had to remove the EGR. This bit is one of the scary parts people don't like but I had half a chance as in the vehicle history, this part had been replaced on 2.2.2018 as there is a bill for 1200£ for that and some wiring repairs. Those bolts should come out then?
It's a bit of a terror as you cannot see what you are doing and every tool is too long or too short, however, there is always more than one way to skin a cat, but it's all blind work. Fortunately, I have been in this situation many times ( mainly working for Citroen) and it doesn't really phase me, it just needs to be done.
So the bolts, and studs on the exhaust, did come out but there was a fight. The fight was only because of the fucktards that put them in. Have a look...
The also forgot* to bolt down the throttle body base casting, as seen by the missing bolt in the center of the below image (there's one missing on the other side too):
They wrecked the EGR flexible pipe by bending on it and putting a hole in it...
And that's a 200£ pipe believe it or not. Let's have a look at the wiring repairs whilst we are here eh?
Nice! Let me explain what's going on here, this is the supply and comms to the throttle body control. There is one green factory wire, connected to a big white, different gauge wire, connected to something in a black sleeve, connected to the rest of the original green wire. Along the way, they have torn off an earth connection which is supposed to connect to the head, and that's that fuzzy bit of bare cable just poking out of the sheathing. "Carz fixed sir... £twelve hunnit pls"!
Shockingly*, this was carried out by a Cat specialist in Coventry and that follows along the lines of all the shit work this car has had done to it, and the area from where I got it from. You can't argue with the facts.
That's not all though, it gets much more eye opening later.
-
 Crispian_J_Hotson got a reaction from Coprolalia in Jaguar S Bype R - An Imposter, saving a bird, and that effin supercharger!
It was due. I had planned to strip down the problematic engine at August end. I was however, very reluctant to do it as it meant the car being immobilised for some time. It wasn't totally broken and worked fairly well, but...
I was motoring along the A14 with the sunroof open and was accompanied by the occasional rancid stench of rich exhaust fumes. A reminder that the emission components on the car had been brutally attacked over the last few years in a bid to keep the light off.
A strip down would mean that parts could be repaired and uprated. So, over the last few months I had been accumulating all the parts to get the engine at a stage where it was better and I know what's going on with it, there were too many unknowns.
This work all came from a blow on the Exhaust manifold and further inspection with a endoscope revealed that there was a snapped stud and bodged fixings. The only problem was that the manifold was pretty much inaccessible and removing a snapped stud impossible. Head off was the only answer.
Join me, as I embark on the journey of unknowns.
I am at a stage where I have completed a lot of the strip down, I think I started it 5 days ago in the rain, with a plan back then to throw everything into it... but the law of sod saw end to that and despite the fortunate weather for once, my partner has fallen ill and is stuck laid up leaving me to single parent 3 kids and do doctor runs. It's a bit of a nightmare as this engine requires a few tools and is filthy, so I'm having about 3 showers a day to go back and fourth doing stuff and I'm losing about 4 hours a day on it. I can't leave the build as I've taken time off to do it and will need the car for when I return. So, it's a bit challenge Anneka. But Challenge is actually my middle name!
As I have images of the various stages of strip down, wouldn't it be fun* to series them? Here we go then in a world first...
Beauty covers, scuttle, and cross brace off...
Intake system, belts and pulleys off...
EGR, remaining throttle body parts, and supercharger off...
Water to air coolers and injection off...
More plugs and mounts off and degreasing...
Crank pulley off...
Timing cover off...
Timing locked and gear off...
Cams out...
Heads off...
BOOM! I AM THE BOSS OF YOU!
It wasn't bad at all and I hope you all know where the bits go because I have no idea. Now I have a shed full, and I mean full, of parts that need cleaning, repairing and painting. I found that asshats had been at the EGR valve and throttle wiring as well as elsewhere, but thankfully no-one has been inside the engine. I will, in my next post display the highlights and lowlights of this operation so far... I need to go boil spaghetti now.
-
 Crispian_J_Hotson got a reaction from Dave_Q in Jaguar S Bype R - An Imposter, saving a bird, and that effin supercharger!
I have been dying to see this manifold. Sure, it's just a blow, but the snapped stud and loose stud don't make sense, especially as the heat shield was correctly replaced and the fixings were pretty rotten. I suspect that the specialists would not have bothered with that and whenever someone was there, it was a long time ago.
Here is what we are looking at:
Specifically this bit...
The shiny nut I managed to put on as this stud was loose and the nut behind it rotten and solid and the other stud I could tighten. I got enough grab on them to tighten it a bit more but couldn't get it flat against the head. It did stop the EML from coming on every time I booted it though, and you see that snapped guy there? These things don't snap by themselves... or do they?
Remember that I could not really see or get anything of any worth onto these whilst they were in the car and this was all behind a nicely fitted heat shield box. My first impressions are that I can't see any major blow marks! Don't worry, it's not going to let us down...
That shiny back plate there is part of the gasket structure and it needs to come off now.
Ahh, there she is!
A blow on 3 ports too, it wasn't messing around. It's in a pretty shit state. My aim on this day was to get all the studs out of both heads. First of all we go to the one at the top right with a simple t30 socket, it came out no problem, but I could see why it wouldn't tighten-
The threads are burred over.
Next is the snapped stud. With an Aluminium head you can mig a nut onto the snapped guy and the head won't damage. Clean the snap with some brake cleaner, hold the nut with a shit spanner and mig away!
Note the use of a bit of fire blanket and this is a measure to stop any splatter going down to the valve seats through the exhaust port. Wound right out... this is easy as pie.
Up next, Mr 'I aint moving for toffee'. I really didn't want to snap this guy so tried the double nut technique, no dice. I then welded the nut on to the stud, the heat likely helping to break any corrosion...
We have a succeed!
You see there why I use the shit spanners, don't want to be burning up the good tools here.
All studs out of this head, cleanly and now they are ready to be tapped out later.
Next head...
All hand tight!
The remaining studs came out with no issues but even this manifold looked like it may have been chuffing?
I need answers. Who, what, when, and where? Why is the other manifold in such a state? Why is this one not tight? The last thing I want is to rebuild this and have the same issue so, detective hat on, and Sherlock mode- Engaged...
Evidence. The gasket on the left is date stamped 2005 and the gasket (and cover) on the right are stamped 2004 (the 2002 cover has been reused). This car was built in 2002/3 and sold new in 2003. So it's had manifold gaskets when it was 2 years old and that can only be because it was blowing. What's more, if you have a new car and it develops an issue in a limited time from the date of sale, where do you take it?
Therefore it could be suggested that a main dealer or other authorised repairer themselves carried out work on this component... and fucked it, because you know what, that manifold is warped, a simple straight edge check will show that, and so is the other one, but I bet that they didn't even take the things off to check.
You will not straighten cast iron if it is bent with an M8 stud. I can also conclude that this car has since, very close to it's beginning, had a manifold issue which means that it has been running rich and likely smoked the cats long ago which lead to the moving of the oxygen sensor, smashing out the cats, and all that bollocks they did to it in Coventry.
Luckily, I had already got hold of a replacement for this bank, existing is at the top...
Wait... What? They've changed the design? Is that because they bend? Looks like they have removed material to make it a bit 'less stressed'.
What this means is that I've had to get the other one replaced to this revised design where there are no reported problems of blows.
There are further changes which are an improvement but not as exciting and we'll have a look at this later.
Matey who's outing his early STR needs to read this post!
-
 Crispian_J_Hotson got a reaction from Back_For_More in Jaguar S Bype R - An Imposter, saving a bird, and that effin supercharger!
Not losing the will to live or anything but, you know when you wish you hadn't started something...
TEDIOUS!
That is the word of the week kids. I still have a crate of bits to clean and paint but they are all basic castings so not very in depth.
The other head got painted and all the threads tapped out and cleaned. The new studs turned up and both heads got fitted up and a final prep clean ready to be fitted. The supercharger was put back together and got prepped for fitting. Needs oil yet.
Washers... forgot to get some washers for the manifolds. Out of the billion bits of hardware I have stashed, nothing worked well enough so I ordered some thick, stainless jobbies and a 100 normal stainless M8's as I'm out apparently, these are for other things.
What was looming on the Horizon was the pig arse job of cleaning the block, pistons and engine bay in general. I wasn't looking forward to this and just didn't know where to start with it. At the beginning is my usual resolution.
Rust...
Potato cam engaged! This is the bottom of the O/S turret. A great shit trap on all these models. Crap is accumulated in this box section from within the inner arch and sits on the chassis rail FOREVER. Here we can see (sort of) that the grot has seeped down the overlapping panel and destroyed it, marked in the yellow pen. I intended to cut a small section and weld in new plate but decided to cut the whole lot out and weld the panel cut directly to the chassis rail.
Snip...
Then the rust could do one and sparkly stick commences. Note the Gr8* condition of the unfinished paint, thanks Jag, but look below for improvements!
Racecar.
That was shit, so moving on...
Pistolas!
Grim yeah? Watch this...
BOOM!
Then I proceeded to clean 89% of the engine bay with degreaser and a toothbrush!
What a load of bollocks that was, but it's the last worst bit out of the way really. Now it opens up for a bit of painting, wiring repairs, and a general tidy up. In the above image, the bubble wrap is inadvertently covering my latest modification. I decided that in order for this to be a real race car, the AC needs to be ripped out. It doesn't work and I found that it had been bodged which was shocking. One of the Schrader valves must have been leaking and instead of changing the simple valve, clearly the better option was to fill it with JB weld and stick the cap back on. Yeahhhhhh.
Anyhoos, by removing the ridiculous AC pipework and the massive cooler in the rad pack, I have gained an inch of space and extra air flows for the important stuff. I should measure up the compressor mounting and pulley position so that I can eventually bin in and fit an idler pulley or just get a shorter belt if it works, don't know yet. I don't use AC in cars, never have, and it never works!
A day off tomorrow perhaps. I want to get the looms fixed up good next but I'm running the risk that in a car renowned for breaking it's wires, I've had to move these looms a fair bit and I'll get it all done and then have to go tracing seventeen broken wires when it's all done... I guess whatever happens, happens right? 😆
-
Crispian_J_Hotson got a reaction from Back_For_More in Jaguar S Bype R - An Imposter, saving a bird, and that effin supercharger!
Smoll update because this bit is slow and boring.
The other manifold turned up, so now I have a pair of later manifolds, I reckon my ones will just go to scrap as they are problematic. First off with these things is that no one removes the downpipe fixings because they are arsehats to get out half the time, and need a lot of heat... and that takes a while. Then they need to be tapped out to clean the threads up and this is slow and painful X4.
Every bit I've took off this engine is getting checked and painted and that includes these manifolds. Yesterday was spent removing the fixings, cleaning them up and supporting them for painting in such a way that all areas could be accessed and they are not swinging around on a couple of bits of wire. That done, I got the paint, brush, and as I cut the tape sealing the lid on the tin... it started to drop water out of the sky really slowly and annoyingly.
Undeterred, I managed to squish my whole rig into the little space left in the shed and got to painting whilst climbing over car parts and tools.
Today they could have their second coat outside.
Stay with me here, I have artist GCE's.
That didn't take so long so next on the list is the other head which needs total cleaning and the threads cleaned out.
And that is ready for paint tomorrow. Note my special skimming* file.
The collection of painted bits are mounting up:
There are other bits done, but there is still a bin full of stuff to do!
I needed new studs for the down pipes, EGR, and manifolds. The downpipe studs are a bit Jaguar but are not mega money and the EGR are too really as I looked about, but only needed two of those so bit the bullet and got all that from Barratts. The studs for the manifold though, I need 16 and the Jag ones are like just over 3£ each, without nuts! Of course they are weird lengths and proportions but I found VW ones which will do the job just fine as they are pretty close and I got 20 of those, with nuts for 14£ delivered!
The supercharger kit turned up, so I'll probably have that in bits tomorrow after painting the other head in the morning and I'd like to get the timing cover in colour but that's a stretch for the time I have.
I've been thinking about the front pipes and the CATs I've got to weld in. I also will likely need Lambda and O2 sensors as they've been in the hands of complete wronguns on this car, but the budget has been strangled now. Then I had a bright idea... and yes, the sensors are the same as the ones on the black car I'm breaking, and they do all work! In fact, I'm going to go and get the entire exhaust system off of it.
The 200 cell CATs I've got are going to be tough to make work and I need to invent a position for the O2 sensors, Jag put them in the middle of the CAT and I can't do that without damaging the new CATs so I'll have to place them immediately after and hope for the best, but then the pipes are sitting right by the gearbox so I need to see where I can fit sensors in.
This and the rad are keeping me awake at night dang it!
-
 Crispian_J_Hotson got a reaction from coachie in Jaguar S Bype R - An Imposter, saving a bird, and that effin supercharger!
Better catch up, this is an evolving machine... Things have happened, things have broken, but we are still moving.
Filling the car with fuel became an issue. For every 10£ put in the tank, 2£ hit the floor of the forecourt. It got worse. Several attempts at bodgery didn't have an ounce of effect and it persistently leaked fuel on fill up. It would appear that the filler hose which is made from steel, has rotted out where it connects to a rubber hose to the tank. This rubber hose had also broke down, leaving thick black deposits over anything that touched it. 75 jubilee clips later, I threw the towel in and looked at my options.
Meanwhile under the bonnet, I had some cover parts on the black car which were too unicorn poo like to waste, so set about seeing if I could fit those on this car which had the locating holes in the inner wings.
In the meantime, the radiator top hose turned up and I went to fit it.
The radiator top mounts on the car were formed of plastic and on the black car they are metal so for what is was worth, I swapped these out.
Whilst in there I scanned over the rest of the cooling system. Removing the top hose it appeared that the radiator plastic core was fragmenting as it had lost it's hose securing bead and looked like rats had been at it. So a radiator was added to the list.
Another radiator which turned out to be the supercharger cooler, appeared to be leaking too.
This unit isn't cheap and research is telling me that this is the best thing to use to cool the supercharger, thin and plenty of surface area, so my options are limited for a replacement. I had visions of some ally thing hanging out the front with Yee har text pained on in JDM style, but that isn't going to happen. I can likely get this repaired but I'll need it out to have a proper look at it.
The Cooling rad however, there is an aftermarket Ally item by Worley. I bit the bullet and ordered that.
The top rad hose I ordered in silicone was too big, I had grossly over measured in the tight space. Disappointing but I could at least measure it properly now and get the right one. This turned up a couple of days later and was fitted.
The engine was topped back up with coolant, bled and run up to fan. It's interesting to note here that the header tank for the STR is different from the usual offerings in that it has an outlet for a hose to the Supercharge cooler, seen in the above image, coming out the back of the tank. I have read a case where a normal tank was fitted and the hose bunged off. This extra feed provides pressure equalisation to both systems, so bunging the hose off is probably not a good idea.
Further parts were ordered for the engine overhaul next month. There is an issue with these cars where 2 cooling hoses run under the supercharger in the valley between the heads. The hoses have a dead stop restriction where the pipes change size and it is here that many owners have found issue with hoses tearing. It's a sod of a job to replace these hoses but I found a modded hose where the reduction is part of the hose molding, eliminating this problem area. It is made of rubber, I was after silicone but couldn't source any so ordered those. Once they arrived, I found the ones I wanted in silicone... Bugger. So I got those too.
In the meantime, the 20 head bolts turned up to go with the timing set, top end gasket set and 200 cell CATs.
Jagdroid gave me a date to send the touchscreen off and that was now. I had already ordered a spare unit to run whilst mine was being modified but it turned up 'not as advertised' i.e; the wrong unit, so I got the right one sent for a small extra cost. I took out my unit and prepared it for sending off.
That has now been sent where it will be propelled into the 21st century, but look standard fit and retain all of original functions.
I found myself watching lots of you tubes where vehicles were catching fire, given the car leaks fuel, it got me spooked so I fitted a can of no flames discreetly in the glove box:
The Caldoofy intake is also made and on it's way, can't wait for that bit!
The car was low on fuel, I had one last go at putting fuel in it, saw what leaked out and called it a day. It needed fixing immediately. I used the fuel in the tank and looked at my options. In a nutshell, the filler neck is no longer available. I found a rotten one in the UK for 80£ which would get me nowhere and a good one in the States for 180£.
Being a bit mad, I hatched a plan and thought that I'd go against the Jaguar owners code of fitting the exact same part because the same cars are so different and nothing crosses over, and find an alternative solution. Most, if not all of the other S Type filler necks are expensive and made from stainless steel unlike my rotten thing. It would be an expensive trial if the part didn't fit. I did however stumble across a Diesel neck with the rubber connection included for 25£. I can swallow that... So I did!
Yesterday, I allowed myself 3 hours to get it done. Removing the old stuff was fairly straight forward, just having to unbolt something on top of the rear frame to create access to a securing tab on the pipe. The toughest bit was trying to remove the 20+ year old fixings from the inner arch liner. With a bit of a wangle, the old filler neck came out and revealed its failing.
She's done. I compared the two necks...
That was looking promising in a 'your going to fit whether you like it or not' kind of way, even if it involved a blow torch.
Well, it didn't involve a torch and with a bit of brute force, it was in it's new home.
I had to make a spacer and add a new fixing as it was in a completely different place, but it was factory. The replacement had a mounting tab that lined up the same as the old one, and the rubber hose to the tank fitted perfectly.
All that was missing was the filler cap. That was different to my one. I trialed the one off the Diesel S Type and it fitted so ordered an extra.
Hilarious.
I then placed an old aerosol lid over the other cars open filler and kept the stolen borrowed one. I had no time to test anything so took the car to the fuel station, filled it up to the top and took off on a 100 mile trip. There were no issues with leaks, running operations or anything untoward. So that is considered a success.
-
Crispian_J_Hotson got a reaction from coachie in Jaguar S Bype R - An Imposter, saving a bird, and that effin supercharger!
My not stolen centre caps turned up today, excellent service from someone that is not a crack head. Immediately, I set about 'diluting' the appearance of the screwdriver marks and proceeded to go fit them...
That's 2bhp added, if ever I've seen it! I cannot wait to rip the head off and get this exhaust manifold issue sorted, I still have never heard the beauty of this car taking off because it is destroyed by tractor sounds from under the bonnet. What a day that is going to be! Found a firm that does snout pulley work for the 10%er. It's 350£ odd, but you know.... Whilst I'm there etc ...
This car is going to be fucking fast. That's all I have, I'm overcome with excitement.
I know you are all eyeing up the neighbours Nissan, it's fucked, stop it
-
 Crispian_J_Hotson got a reaction from cbowditch in Jaguar S Bype R - An Imposter, saving a bird, and that effin supercharger!
Smoll update because this bit is slow and boring.
The other manifold turned up, so now I have a pair of later manifolds, I reckon my ones will just go to scrap as they are problematic. First off with these things is that no one removes the downpipe fixings because they are arsehats to get out half the time, and need a lot of heat... and that takes a while. Then they need to be tapped out to clean the threads up and this is slow and painful X4.
Every bit I've took off this engine is getting checked and painted and that includes these manifolds. Yesterday was spent removing the fixings, cleaning them up and supporting them for painting in such a way that all areas could be accessed and they are not swinging around on a couple of bits of wire. That done, I got the paint, brush, and as I cut the tape sealing the lid on the tin... it started to drop water out of the sky really slowly and annoyingly.
Undeterred, I managed to squish my whole rig into the little space left in the shed and got to painting whilst climbing over car parts and tools.
Today they could have their second coat outside.
Stay with me here, I have artist GCE's.
That didn't take so long so next on the list is the other head which needs total cleaning and the threads cleaned out.
And that is ready for paint tomorrow. Note my special skimming* file.
The collection of painted bits are mounting up:
There are other bits done, but there is still a bin full of stuff to do!
I needed new studs for the down pipes, EGR, and manifolds. The downpipe studs are a bit Jaguar but are not mega money and the EGR are too really as I looked about, but only needed two of those so bit the bullet and got all that from Barratts. The studs for the manifold though, I need 16 and the Jag ones are like just over 3£ each, without nuts! Of course they are weird lengths and proportions but I found VW ones which will do the job just fine as they are pretty close and I got 20 of those, with nuts for 14£ delivered!
The supercharger kit turned up, so I'll probably have that in bits tomorrow after painting the other head in the morning and I'd like to get the timing cover in colour but that's a stretch for the time I have.
I've been thinking about the front pipes and the CATs I've got to weld in. I also will likely need Lambda and O2 sensors as they've been in the hands of complete wronguns on this car, but the budget has been strangled now. Then I had a bright idea... and yes, the sensors are the same as the ones on the black car I'm breaking, and they do all work! In fact, I'm going to go and get the entire exhaust system off of it.
The 200 cell CATs I've got are going to be tough to make work and I need to invent a position for the O2 sensors, Jag put them in the middle of the CAT and I can't do that without damaging the new CATs so I'll have to place them immediately after and hope for the best, but then the pipes are sitting right by the gearbox so I need to see where I can fit sensors in.
This and the rad are keeping me awake at night dang it!
-
Crispian_J_Hotson got a reaction from cbowditch in Jaguar S Bype R - An Imposter, saving a bird, and that effin supercharger!
Here, I produced a thing which compares the old exhaust manifold against the revised replacement:
The old is on the left and the new one on the right. Look at those bore sizes! I would go as far to say that this is an upgrade for the old STR!
Moving on...
Today was consumed with moar cleaning, checking, and painting mundane engine parts. There is a few. To give myself some inspiration, I decided to tackle that manky head. There will be no media blasting, chemical dipping or other such nonsense, no, this is all to be done by hand, like in ye olden days.
First we need put on our engineering hat, get that head, and to remove the corrosion, debris and other junk that we don't want. I bought some plastic scrapers for things like this but they've turned out to be just a frilly gimmick, luckily I have thousands of Stanley blades and a chisel. The excessive amount of corrosion here made things slow and the ally was burred up in places, nothing that a big, long, and flat file couldn't sort out. It's effectively been skimmed.
It's clean and it's flat, so it'll do it's job and the stud threads all got a tap run down them to remove corrosion and thread lock. Yes, I was waiting for the tap to shear in one, but it all cleared out lovely.
Next the business bit got a de-scale...
It was quite satisfying chipping away at the carbon build up.
I then turned my attention to the inlet side which was much the same as the exhaust side. After sorting that side out, I got all excited and decided to initiate the decoration sequence. This is where it's going boys...
It's a bit of a shame that once it's all squeezed back in, there won't be much to see, but I know it's there and that's what counts! Besides, when I'm doing this all again next year after bending 2 valves and spitting a head gasket out on my first track day, it'll be a lot more pleasant to take apart.
-
Crispian_J_Hotson got a reaction from cbowditch in Jaguar S Bype R - An Imposter, saving a bird, and that effin supercharger!
I have been dying to see this manifold. Sure, it's just a blow, but the snapped stud and loose stud don't make sense, especially as the heat shield was correctly replaced and the fixings were pretty rotten. I suspect that the specialists would not have bothered with that and whenever someone was there, it was a long time ago.
Here is what we are looking at:
Specifically this bit...
The shiny nut I managed to put on as this stud was loose and the nut behind it rotten and solid and the other stud I could tighten. I got enough grab on them to tighten it a bit more but couldn't get it flat against the head. It did stop the EML from coming on every time I booted it though, and you see that snapped guy there? These things don't snap by themselves... or do they?
Remember that I could not really see or get anything of any worth onto these whilst they were in the car and this was all behind a nicely fitted heat shield box. My first impressions are that I can't see any major blow marks! Don't worry, it's not going to let us down...
That shiny back plate there is part of the gasket structure and it needs to come off now.
Ahh, there she is!
A blow on 3 ports too, it wasn't messing around. It's in a pretty shit state. My aim on this day was to get all the studs out of both heads. First of all we go to the one at the top right with a simple t30 socket, it came out no problem, but I could see why it wouldn't tighten-
The threads are burred over.
Next is the snapped stud. With an Aluminium head you can mig a nut onto the snapped guy and the head won't damage. Clean the snap with some brake cleaner, hold the nut with a shit spanner and mig away!
Note the use of a bit of fire blanket and this is a measure to stop any splatter going down to the valve seats through the exhaust port. Wound right out... this is easy as pie.
Up next, Mr 'I aint moving for toffee'. I really didn't want to snap this guy so tried the double nut technique, no dice. I then welded the nut on to the stud, the heat likely helping to break any corrosion...
We have a succeed!
You see there why I use the shit spanners, don't want to be burning up the good tools here.
All studs out of this head, cleanly and now they are ready to be tapped out later.
Next head...
All hand tight!
The remaining studs came out with no issues but even this manifold looked like it may have been chuffing?
I need answers. Who, what, when, and where? Why is the other manifold in such a state? Why is this one not tight? The last thing I want is to rebuild this and have the same issue so, detective hat on, and Sherlock mode- Engaged...
Evidence. The gasket on the left is date stamped 2005 and the gasket (and cover) on the right are stamped 2004 (the 2002 cover has been reused). This car was built in 2002/3 and sold new in 2003. So it's had manifold gaskets when it was 2 years old and that can only be because it was blowing. What's more, if you have a new car and it develops an issue in a limited time from the date of sale, where do you take it?
Therefore it could be suggested that a main dealer or other authorised repairer themselves carried out work on this component... and fucked it, because you know what, that manifold is warped, a simple straight edge check will show that, and so is the other one, but I bet that they didn't even take the things off to check.
You will not straighten cast iron if it is bent with an M8 stud. I can also conclude that this car has since, very close to it's beginning, had a manifold issue which means that it has been running rich and likely smoked the cats long ago which lead to the moving of the oxygen sensor, smashing out the cats, and all that bollocks they did to it in Coventry.
Luckily, I had already got hold of a replacement for this bank, existing is at the top...
Wait... What? They've changed the design? Is that because they bend? Looks like they have removed material to make it a bit 'less stressed'.
What this means is that I've had to get the other one replaced to this revised design where there are no reported problems of blows.
There are further changes which are an improvement but not as exciting and we'll have a look at this later.
Matey who's outing his early STR needs to read this post!
-
Crispian_J_Hotson got a reaction from cbowditch in Jaguar S Bype R - An Imposter, saving a bird, and that effin supercharger!
It was due. I had planned to strip down the problematic engine at August end. I was however, very reluctant to do it as it meant the car being immobilised for some time. It wasn't totally broken and worked fairly well, but...
I was motoring along the A14 with the sunroof open and was accompanied by the occasional rancid stench of rich exhaust fumes. A reminder that the emission components on the car had been brutally attacked over the last few years in a bid to keep the light off.
A strip down would mean that parts could be repaired and uprated. So, over the last few months I had been accumulating all the parts to get the engine at a stage where it was better and I know what's going on with it, there were too many unknowns.
This work all came from a blow on the Exhaust manifold and further inspection with a endoscope revealed that there was a snapped stud and bodged fixings. The only problem was that the manifold was pretty much inaccessible and removing a snapped stud impossible. Head off was the only answer.
Join me, as I embark on the journey of unknowns.
I am at a stage where I have completed a lot of the strip down, I think I started it 5 days ago in the rain, with a plan back then to throw everything into it... but the law of sod saw end to that and despite the fortunate weather for once, my partner has fallen ill and is stuck laid up leaving me to single parent 3 kids and do doctor runs. It's a bit of a nightmare as this engine requires a few tools and is filthy, so I'm having about 3 showers a day to go back and fourth doing stuff and I'm losing about 4 hours a day on it. I can't leave the build as I've taken time off to do it and will need the car for when I return. So, it's a bit challenge Anneka. But Challenge is actually my middle name!
As I have images of the various stages of strip down, wouldn't it be fun* to series them? Here we go then in a world first...
Beauty covers, scuttle, and cross brace off...
Intake system, belts and pulleys off...
EGR, remaining throttle body parts, and supercharger off...
Water to air coolers and injection off...
More plugs and mounts off and degreasing...
Crank pulley off...
Timing cover off...
Timing locked and gear off...
Cams out...
Heads off...
BOOM! I AM THE BOSS OF YOU!
It wasn't bad at all and I hope you all know where the bits go because I have no idea. Now I have a shed full, and I mean full, of parts that need cleaning, repairing and painting. I found that asshats had been at the EGR valve and throttle wiring as well as elsewhere, but thankfully no-one has been inside the engine. I will, in my next post display the highlights and lowlights of this operation so far... I need to go boil spaghetti now.
-
 Crispian_J_Hotson got a reaction from mercedade in Jaguar S Bype R - An Imposter, saving a bird, and that effin supercharger!
Not losing the will to live or anything but, you know when you wish you hadn't started something...
TEDIOUS!
That is the word of the week kids. I still have a crate of bits to clean and paint but they are all basic castings so not very in depth.
The other head got painted and all the threads tapped out and cleaned. The new studs turned up and both heads got fitted up and a final prep clean ready to be fitted. The supercharger was put back together and got prepped for fitting. Needs oil yet.
Washers... forgot to get some washers for the manifolds. Out of the billion bits of hardware I have stashed, nothing worked well enough so I ordered some thick, stainless jobbies and a 100 normal stainless M8's as I'm out apparently, these are for other things.
What was looming on the Horizon was the pig arse job of cleaning the block, pistons and engine bay in general. I wasn't looking forward to this and just didn't know where to start with it. At the beginning is my usual resolution.
Rust...
Potato cam engaged! This is the bottom of the O/S turret. A great shit trap on all these models. Crap is accumulated in this box section from within the inner arch and sits on the chassis rail FOREVER. Here we can see (sort of) that the grot has seeped down the overlapping panel and destroyed it, marked in the yellow pen. I intended to cut a small section and weld in new plate but decided to cut the whole lot out and weld the panel cut directly to the chassis rail.
Snip...
Then the rust could do one and sparkly stick commences. Note the Gr8* condition of the unfinished paint, thanks Jag, but look below for improvements!
Racecar.
That was shit, so moving on...
Pistolas!
Grim yeah? Watch this...
BOOM!
Then I proceeded to clean 89% of the engine bay with degreaser and a toothbrush!
What a load of bollocks that was, but it's the last worst bit out of the way really. Now it opens up for a bit of painting, wiring repairs, and a general tidy up. In the above image, the bubble wrap is inadvertently covering my latest modification. I decided that in order for this to be a real race car, the AC needs to be ripped out. It doesn't work and I found that it had been bodged which was shocking. One of the Schrader valves must have been leaking and instead of changing the simple valve, clearly the better option was to fill it with JB weld and stick the cap back on. Yeahhhhhh.
Anyhoos, by removing the ridiculous AC pipework and the massive cooler in the rad pack, I have gained an inch of space and extra air flows for the important stuff. I should measure up the compressor mounting and pulley position so that I can eventually bin in and fit an idler pulley or just get a shorter belt if it works, don't know yet. I don't use AC in cars, never have, and it never works!
A day off tomorrow perhaps. I want to get the looms fixed up good next but I'm running the risk that in a car renowned for breaking it's wires, I've had to move these looms a fair bit and I'll get it all done and then have to go tracing seventeen broken wires when it's all done... I guess whatever happens, happens right? 😆
-
 Crispian_J_Hotson got a reaction from Popsicle in Jaguar S Bype R - An Imposter, saving a bird, and that effin supercharger!
Not losing the will to live or anything but, you know when you wish you hadn't started something...
TEDIOUS!
That is the word of the week kids. I still have a crate of bits to clean and paint but they are all basic castings so not very in depth.
The other head got painted and all the threads tapped out and cleaned. The new studs turned up and both heads got fitted up and a final prep clean ready to be fitted. The supercharger was put back together and got prepped for fitting. Needs oil yet.
Washers... forgot to get some washers for the manifolds. Out of the billion bits of hardware I have stashed, nothing worked well enough so I ordered some thick, stainless jobbies and a 100 normal stainless M8's as I'm out apparently, these are for other things.
What was looming on the Horizon was the pig arse job of cleaning the block, pistons and engine bay in general. I wasn't looking forward to this and just didn't know where to start with it. At the beginning is my usual resolution.
Rust...
Potato cam engaged! This is the bottom of the O/S turret. A great shit trap on all these models. Crap is accumulated in this box section from within the inner arch and sits on the chassis rail FOREVER. Here we can see (sort of) that the grot has seeped down the overlapping panel and destroyed it, marked in the yellow pen. I intended to cut a small section and weld in new plate but decided to cut the whole lot out and weld the panel cut directly to the chassis rail.
Snip...
Then the rust could do one and sparkly stick commences. Note the Gr8* condition of the unfinished paint, thanks Jag, but look below for improvements!
Racecar.
That was shit, so moving on...
Pistolas!
Grim yeah? Watch this...
BOOM!
Then I proceeded to clean 89% of the engine bay with degreaser and a toothbrush!
What a load of bollocks that was, but it's the last worst bit out of the way really. Now it opens up for a bit of painting, wiring repairs, and a general tidy up. In the above image, the bubble wrap is inadvertently covering my latest modification. I decided that in order for this to be a real race car, the AC needs to be ripped out. It doesn't work and I found that it had been bodged which was shocking. One of the Schrader valves must have been leaking and instead of changing the simple valve, clearly the better option was to fill it with JB weld and stick the cap back on. Yeahhhhhh.
Anyhoos, by removing the ridiculous AC pipework and the massive cooler in the rad pack, I have gained an inch of space and extra air flows for the important stuff. I should measure up the compressor mounting and pulley position so that I can eventually bin in and fit an idler pulley or just get a shorter belt if it works, don't know yet. I don't use AC in cars, never have, and it never works!
A day off tomorrow perhaps. I want to get the looms fixed up good next but I'm running the risk that in a car renowned for breaking it's wires, I've had to move these looms a fair bit and I'll get it all done and then have to go tracing seventeen broken wires when it's all done... I guess whatever happens, happens right? 😆
-
 Crispian_J_Hotson got a reaction from Shep Shepherd in Jaguar S Bype R - An Imposter, saving a bird, and that effin supercharger!
Ohhhh, we're not done yet...
Whilst all the wheels were off the ground and I was changing gears, every time I pressed the brake with my hand from outside the car the OSR wheel caught my eye as it was doing a strange thing. Turns out that the bottom arm bush is slaughtered and the wheel is moving around and actually hitting the inner well, mainly running at a toe out angle, dragging the tyre which will explain why the 10 year old Michelins with the same date code have about 5mm difference in tread between them. I really wonder where this car has been getting it's MOT's... I just can't figure it out?
So, decision was made to poly bush the lot, which is on order and not being delivered on time.
With the cars box now put back together, a short test drive was had, you know, because the rear wheel is about to rip off and no faults appeared. I then put the console back together to complete the car and take it on a decent run- slowly. I covered 10 miles and pulled up behind a parked lorry to overtake it, as I pulled away, GEARBOX FAULT!
This was different though, The car hadn't gone into safe and was still running ok. Upon return, code P0705 hadn't returned, but instead it had traded for several others, one flagging a rear speed sensor. Given the work that was done on the car and as its been sat, the faults were noted and cleared. Now I've been using it every day just to ease it back into service and there has been no faults stored and we're all good.
Desperately waiting on the bushes though. Chasing these tomorrow.
The wheel nuts were expired. They swell up causing all sorts of issues trying to get them off.
And the locking key was bent and almost destroyed, so I got black wheel nuts and had replacement locking ones. The wheels will be getting a refurb and going a bit darker in colour.
The interior wood trim... I can't stand it on these cars. The S Type was meant to appeal to younger customers so they stuck old timer wood in it? No. My wood in this car is supposed to be Grey. The sun made sure it didn't stay like that.
So I covered it to pretend it's not there.
A nice tidy up of the interior, and it's a nice place for me to be. I also run a remote and RCA to the back which had to tap into the existing rear speakers so I could get a sub in the boot. I need a sub- always. I also changed all the interior lamps to LED as well as the number plate and front side light lamps. It brings it up to date and uses less power, generating less heat too which destroys the plastics surrounding the old lamps.
Everything, even the AC works... I can't believe it. I've never had working AC in any of my cars (except the Disco, that was for the missis though). It sounds great, looks good and nearly smells good.
I also discovered that this car has electric adjustable pedal box and wait for it... head restraints. Electric head restraints... Lets think about how good that is, and how necessary, for a moment.
Next was to service the engine. No major issues there except for the oil filter not being included in a package and therefore arriving late and the plugs were all just over hand tight.
There is a squeak from the ancillary drive belt area on cold start. The belt and tension look and feel good. I read that putting a smaller pully on the supercharger for moar HPs can cause belt squeak so I'd like this to be what's causing it rather than a worn belt. I haven't checked yet.
There sounds like a manifold blow on heavy acceleration that I need to look into which is a shame as it muffles the supercharger noise so this must be sorted immediately!
Speaking of which, where the car has been sat, opening the bonnet was like opening the crypt door... it was dusty in there and the supercharger casing had lost is luster. So I covered that too to pretend it's not happened and make it look brand new.
Then I washed it for the first time for years yesterday and took it out for a show in the sun.
After all that, I'm pleased with it and I'm happy to keep it. Moral of that story is : Keep buying massive liabilities, sight unseen.
-
 Crispian_J_Hotson got a reaction from Asimo in Jaguar S Bype R - An Imposter, saving a bird, and that effin supercharger!
Not losing the will to live or anything but, you know when you wish you hadn't started something...
TEDIOUS!
That is the word of the week kids. I still have a crate of bits to clean and paint but they are all basic castings so not very in depth.
The other head got painted and all the threads tapped out and cleaned. The new studs turned up and both heads got fitted up and a final prep clean ready to be fitted. The supercharger was put back together and got prepped for fitting. Needs oil yet.
Washers... forgot to get some washers for the manifolds. Out of the billion bits of hardware I have stashed, nothing worked well enough so I ordered some thick, stainless jobbies and a 100 normal stainless M8's as I'm out apparently, these are for other things.
What was looming on the Horizon was the pig arse job of cleaning the block, pistons and engine bay in general. I wasn't looking forward to this and just didn't know where to start with it. At the beginning is my usual resolution.
Rust...
Potato cam engaged! This is the bottom of the O/S turret. A great shit trap on all these models. Crap is accumulated in this box section from within the inner arch and sits on the chassis rail FOREVER. Here we can see (sort of) that the grot has seeped down the overlapping panel and destroyed it, marked in the yellow pen. I intended to cut a small section and weld in new plate but decided to cut the whole lot out and weld the panel cut directly to the chassis rail.
Snip...
Then the rust could do one and sparkly stick commences. Note the Gr8* condition of the unfinished paint, thanks Jag, but look below for improvements!
Racecar.
That was shit, so moving on...
Pistolas!
Grim yeah? Watch this...
BOOM!
Then I proceeded to clean 89% of the engine bay with degreaser and a toothbrush!
What a load of bollocks that was, but it's the last worst bit out of the way really. Now it opens up for a bit of painting, wiring repairs, and a general tidy up. In the above image, the bubble wrap is inadvertently covering my latest modification. I decided that in order for this to be a real race car, the AC needs to be ripped out. It doesn't work and I found that it had been bodged which was shocking. One of the Schrader valves must have been leaking and instead of changing the simple valve, clearly the better option was to fill it with JB weld and stick the cap back on. Yeahhhhhh.
Anyhoos, by removing the ridiculous AC pipework and the massive cooler in the rad pack, I have gained an inch of space and extra air flows for the important stuff. I should measure up the compressor mounting and pulley position so that I can eventually bin in and fit an idler pulley or just get a shorter belt if it works, don't know yet. I don't use AC in cars, never have, and it never works!
A day off tomorrow perhaps. I want to get the looms fixed up good next but I'm running the risk that in a car renowned for breaking it's wires, I've had to move these looms a fair bit and I'll get it all done and then have to go tracing seventeen broken wires when it's all done... I guess whatever happens, happens right? 😆
-
 Crispian_J_Hotson got a reaction from CreepingJesus in Jaguar S Bype R - An Imposter, saving a bird, and that effin supercharger!
Not losing the will to live or anything but, you know when you wish you hadn't started something...
TEDIOUS!
That is the word of the week kids. I still have a crate of bits to clean and paint but they are all basic castings so not very in depth.
The other head got painted and all the threads tapped out and cleaned. The new studs turned up and both heads got fitted up and a final prep clean ready to be fitted. The supercharger was put back together and got prepped for fitting. Needs oil yet.
Washers... forgot to get some washers for the manifolds. Out of the billion bits of hardware I have stashed, nothing worked well enough so I ordered some thick, stainless jobbies and a 100 normal stainless M8's as I'm out apparently, these are for other things.
What was looming on the Horizon was the pig arse job of cleaning the block, pistons and engine bay in general. I wasn't looking forward to this and just didn't know where to start with it. At the beginning is my usual resolution.
Rust...
Potato cam engaged! This is the bottom of the O/S turret. A great shit trap on all these models. Crap is accumulated in this box section from within the inner arch and sits on the chassis rail FOREVER. Here we can see (sort of) that the grot has seeped down the overlapping panel and destroyed it, marked in the yellow pen. I intended to cut a small section and weld in new plate but decided to cut the whole lot out and weld the panel cut directly to the chassis rail.
Snip...
Then the rust could do one and sparkly stick commences. Note the Gr8* condition of the unfinished paint, thanks Jag, but look below for improvements!
Racecar.
That was shit, so moving on...
Pistolas!
Grim yeah? Watch this...
BOOM!
Then I proceeded to clean 89% of the engine bay with degreaser and a toothbrush!
What a load of bollocks that was, but it's the last worst bit out of the way really. Now it opens up for a bit of painting, wiring repairs, and a general tidy up. In the above image, the bubble wrap is inadvertently covering my latest modification. I decided that in order for this to be a real race car, the AC needs to be ripped out. It doesn't work and I found that it had been bodged which was shocking. One of the Schrader valves must have been leaking and instead of changing the simple valve, clearly the better option was to fill it with JB weld and stick the cap back on. Yeahhhhhh.
Anyhoos, by removing the ridiculous AC pipework and the massive cooler in the rad pack, I have gained an inch of space and extra air flows for the important stuff. I should measure up the compressor mounting and pulley position so that I can eventually bin in and fit an idler pulley or just get a shorter belt if it works, don't know yet. I don't use AC in cars, never have, and it never works!
A day off tomorrow perhaps. I want to get the looms fixed up good next but I'm running the risk that in a car renowned for breaking it's wires, I've had to move these looms a fair bit and I'll get it all done and then have to go tracing seventeen broken wires when it's all done... I guess whatever happens, happens right? 😆
-
Crispian_J_Hotson got a reaction from CreepingJesus in Jaguar S Bype R - An Imposter, saving a bird, and that effin supercharger!
Yes, these engines can get to 967 degrees centigrade. I was once warned that covering my SC intake pipe with vinyl would destroy most of the UK in a hideous fire ball, bigger than the sun. In reality, it just needed a dusting off now and then and looked pretty cool.
The cylinder head paint is only 20BHP, but with the manifold pack, we're looking at nearer to 3000 at the spare wheel.
So, the last couple of days have been... a total pain in the arse really. I'm not going to sugar coat it. The SC kit didn't come with instructions, the seller didn't respond to my question 'where the shitting heck are the instructions' and the internet is void of anything to work with.
You need a press for the supercharger build. That is a fact. I have one but it was buried at the back of 99000 car parts in the shed. So I got that out. The SC pulley is 'on there' but after my marathon shed clearance, the press breathed on it, and it all fell to bits.
Re-bearing the snout transfer spindle was not straight forward. Once I had built it, the spindle was all bound up and hard to turn. Something wasn't right. I had to take it apart again and the new bearing got destroyed in a fit of anger and frustration. Luckily, the old bearing was fine so I put that in and then the oil seal on and then pressed on the new pulley. This bound up with the casing and the whole thing wouldn't operate. Not only that, the spindle was not pushed through completely as it was too short through the pulley. The pulley, although smaller, has the same central mounting dimensions and it was not the same as it was before. Cut a long story short, it all came apart again so I could work out where it was going wrong.
I engineered* some of the casing off where the pulley was to sit over, and rebuilt the spindle for the third time. SUCCESS!
The cleaning was also a nightmare and tedious and as for the needle bearings in the main casing... after that fucking around, they can stay as they are... they work just fine. It got a lick of paint and will get put back together tomorrow with it's new coupler and then I don't ever want to see it again.
Needless to say, this held me up a bit as well as still single parenting oh and a wanted, knife wielding maniac posing as my step sons football buddy, coming into my home with him after car jacking him and his friend, and removing a grand in cash, whilst my family sat in the lounge. Life is shitting me lemons right now but, as Yaz said, the only way is up! On the plus side, my daughter and I found an injured pigeon a few weeks old on the pavement 2 days ago and we rescued on it. He's made a good recovery and tomorrow we start flying lessons! Chocks away!
-

 Crispian_J_Hotson got a reaction from barefoot in Jaguar S Bype R - An Imposter, saving a bird, and that effin supercharger!
Cheers for that. The studs remain as steel. It's the washers retaining the manifold that are stainless. I'm trying to avoid getting the corroded nubbins that they turn into. I have seen cast spacers used by Jaguar but I've not seen them used on this model, and there were none on it. Thanks for the advice, it may be worth spending an hour setting up a test rig and heating it to 9000 degrees to see how my chosen set up reacts. Good plan!
-

 Crispian_J_Hotson reacted to Dave_Q in Jaguar S Bype R - An Imposter, saving a bird, and that effin supercharger!
One word of warning about just stainlessing everything, are you using stainless for the exhaust manifold studs, and do you know what they use originally?
Generally it's not stainless, some sort of high alloy steel and the reason being that the types of stainless used for fasteners (austenitic) have a thermal expansion somewhere around 1.6x higher than the cast manifold they are clamping, which can lead to some uncool situations with regard to not leaking when hot.
And exhaust manifolds are hot and we don't want to find you at the bottom of the nearest sea when you've put it all back together and the manifold is blowing.
Sorry if you're not planning to use stainless manifold studs, (you may have mentioned and I've missed it) but I'd probably not is the point I'm getting at here. Fine for nuts and lower temperature stuff.
Anyway that's the message, as you were.
-
 Crispian_J_Hotson got a reaction from Tepper in Jaguar S Bype R - An Imposter, saving a bird, and that effin supercharger!
Not losing the will to live or anything but, you know when you wish you hadn't started something...
TEDIOUS!
That is the word of the week kids. I still have a crate of bits to clean and paint but they are all basic castings so not very in depth.
The other head got painted and all the threads tapped out and cleaned. The new studs turned up and both heads got fitted up and a final prep clean ready to be fitted. The supercharger was put back together and got prepped for fitting. Needs oil yet.
Washers... forgot to get some washers for the manifolds. Out of the billion bits of hardware I have stashed, nothing worked well enough so I ordered some thick, stainless jobbies and a 100 normal stainless M8's as I'm out apparently, these are for other things.
What was looming on the Horizon was the pig arse job of cleaning the block, pistons and engine bay in general. I wasn't looking forward to this and just didn't know where to start with it. At the beginning is my usual resolution.
Rust...
Potato cam engaged! This is the bottom of the O/S turret. A great shit trap on all these models. Crap is accumulated in this box section from within the inner arch and sits on the chassis rail FOREVER. Here we can see (sort of) that the grot has seeped down the overlapping panel and destroyed it, marked in the yellow pen. I intended to cut a small section and weld in new plate but decided to cut the whole lot out and weld the panel cut directly to the chassis rail.
Snip...
Then the rust could do one and sparkly stick commences. Note the Gr8* condition of the unfinished paint, thanks Jag, but look below for improvements!
Racecar.
That was shit, so moving on...
Pistolas!
Grim yeah? Watch this...
BOOM!
Then I proceeded to clean 89% of the engine bay with degreaser and a toothbrush!
What a load of bollocks that was, but it's the last worst bit out of the way really. Now it opens up for a bit of painting, wiring repairs, and a general tidy up. In the above image, the bubble wrap is inadvertently covering my latest modification. I decided that in order for this to be a real race car, the AC needs to be ripped out. It doesn't work and I found that it had been bodged which was shocking. One of the Schrader valves must have been leaking and instead of changing the simple valve, clearly the better option was to fill it with JB weld and stick the cap back on. Yeahhhhhh.
Anyhoos, by removing the ridiculous AC pipework and the massive cooler in the rad pack, I have gained an inch of space and extra air flows for the important stuff. I should measure up the compressor mounting and pulley position so that I can eventually bin in and fit an idler pulley or just get a shorter belt if it works, don't know yet. I don't use AC in cars, never have, and it never works!
A day off tomorrow perhaps. I want to get the looms fixed up good next but I'm running the risk that in a car renowned for breaking it's wires, I've had to move these looms a fair bit and I'll get it all done and then have to go tracing seventeen broken wires when it's all done... I guess whatever happens, happens right? 😆
-
 Crispian_J_Hotson got a reaction from rainagain in Jaguar S Bype R - An Imposter, saving a bird, and that effin supercharger!
Not losing the will to live or anything but, you know when you wish you hadn't started something...
TEDIOUS!
That is the word of the week kids. I still have a crate of bits to clean and paint but they are all basic castings so not very in depth.
The other head got painted and all the threads tapped out and cleaned. The new studs turned up and both heads got fitted up and a final prep clean ready to be fitted. The supercharger was put back together and got prepped for fitting. Needs oil yet.
Washers... forgot to get some washers for the manifolds. Out of the billion bits of hardware I have stashed, nothing worked well enough so I ordered some thick, stainless jobbies and a 100 normal stainless M8's as I'm out apparently, these are for other things.
What was looming on the Horizon was the pig arse job of cleaning the block, pistons and engine bay in general. I wasn't looking forward to this and just didn't know where to start with it. At the beginning is my usual resolution.
Rust...
Potato cam engaged! This is the bottom of the O/S turret. A great shit trap on all these models. Crap is accumulated in this box section from within the inner arch and sits on the chassis rail FOREVER. Here we can see (sort of) that the grot has seeped down the overlapping panel and destroyed it, marked in the yellow pen. I intended to cut a small section and weld in new plate but decided to cut the whole lot out and weld the panel cut directly to the chassis rail.
Snip...
Then the rust could do one and sparkly stick commences. Note the Gr8* condition of the unfinished paint, thanks Jag, but look below for improvements!
Racecar.
That was shit, so moving on...
Pistolas!
Grim yeah? Watch this...
BOOM!
Then I proceeded to clean 89% of the engine bay with degreaser and a toothbrush!
What a load of bollocks that was, but it's the last worst bit out of the way really. Now it opens up for a bit of painting, wiring repairs, and a general tidy up. In the above image, the bubble wrap is inadvertently covering my latest modification. I decided that in order for this to be a real race car, the AC needs to be ripped out. It doesn't work and I found that it had been bodged which was shocking. One of the Schrader valves must have been leaking and instead of changing the simple valve, clearly the better option was to fill it with JB weld and stick the cap back on. Yeahhhhhh.
Anyhoos, by removing the ridiculous AC pipework and the massive cooler in the rad pack, I have gained an inch of space and extra air flows for the important stuff. I should measure up the compressor mounting and pulley position so that I can eventually bin in and fit an idler pulley or just get a shorter belt if it works, don't know yet. I don't use AC in cars, never have, and it never works!
A day off tomorrow perhaps. I want to get the looms fixed up good next but I'm running the risk that in a car renowned for breaking it's wires, I've had to move these looms a fair bit and I'll get it all done and then have to go tracing seventeen broken wires when it's all done... I guess whatever happens, happens right? 😆
-
Crispian_J_Hotson got a reaction from rainagain in Jaguar S Bype R - An Imposter, saving a bird, and that effin supercharger!
Here, I produced a thing which compares the old exhaust manifold against the revised replacement:
The old is on the left and the new one on the right. Look at those bore sizes! I would go as far to say that this is an upgrade for the old STR!
Moving on...
Today was consumed with moar cleaning, checking, and painting mundane engine parts. There is a few. To give myself some inspiration, I decided to tackle that manky head. There will be no media blasting, chemical dipping or other such nonsense, no, this is all to be done by hand, like in ye olden days.
First we need put on our engineering hat, get that head, and to remove the corrosion, debris and other junk that we don't want. I bought some plastic scrapers for things like this but they've turned out to be just a frilly gimmick, luckily I have thousands of Stanley blades and a chisel. The excessive amount of corrosion here made things slow and the ally was burred up in places, nothing that a big, long, and flat file couldn't sort out. It's effectively been skimmed.
It's clean and it's flat, so it'll do it's job and the stud threads all got a tap run down them to remove corrosion and thread lock. Yes, I was waiting for the tap to shear in one, but it all cleared out lovely.
Next the business bit got a de-scale...
It was quite satisfying chipping away at the carbon build up.
I then turned my attention to the inlet side which was much the same as the exhaust side. After sorting that side out, I got all excited and decided to initiate the decoration sequence. This is where it's going boys...
It's a bit of a shame that once it's all squeezed back in, there won't be much to see, but I know it's there and that's what counts! Besides, when I'm doing this all again next year after bending 2 valves and spitting a head gasket out on my first track day, it'll be a lot more pleasant to take apart.
-
Crispian_J_Hotson got a reaction from rainagain in Jaguar S Bype R - An Imposter, saving a bird, and that effin supercharger!
I have been dying to see this manifold. Sure, it's just a blow, but the snapped stud and loose stud don't make sense, especially as the heat shield was correctly replaced and the fixings were pretty rotten. I suspect that the specialists would not have bothered with that and whenever someone was there, it was a long time ago.
Here is what we are looking at:
Specifically this bit...
The shiny nut I managed to put on as this stud was loose and the nut behind it rotten and solid and the other stud I could tighten. I got enough grab on them to tighten it a bit more but couldn't get it flat against the head. It did stop the EML from coming on every time I booted it though, and you see that snapped guy there? These things don't snap by themselves... or do they?
Remember that I could not really see or get anything of any worth onto these whilst they were in the car and this was all behind a nicely fitted heat shield box. My first impressions are that I can't see any major blow marks! Don't worry, it's not going to let us down...
That shiny back plate there is part of the gasket structure and it needs to come off now.
Ahh, there she is!
A blow on 3 ports too, it wasn't messing around. It's in a pretty shit state. My aim on this day was to get all the studs out of both heads. First of all we go to the one at the top right with a simple t30 socket, it came out no problem, but I could see why it wouldn't tighten-
The threads are burred over.
Next is the snapped stud. With an Aluminium head you can mig a nut onto the snapped guy and the head won't damage. Clean the snap with some brake cleaner, hold the nut with a shit spanner and mig away!
Note the use of a bit of fire blanket and this is a measure to stop any splatter going down to the valve seats through the exhaust port. Wound right out... this is easy as pie.
Up next, Mr 'I aint moving for toffee'. I really didn't want to snap this guy so tried the double nut technique, no dice. I then welded the nut on to the stud, the heat likely helping to break any corrosion...
We have a succeed!
You see there why I use the shit spanners, don't want to be burning up the good tools here.
All studs out of this head, cleanly and now they are ready to be tapped out later.
Next head...
All hand tight!
The remaining studs came out with no issues but even this manifold looked like it may have been chuffing?
I need answers. Who, what, when, and where? Why is the other manifold in such a state? Why is this one not tight? The last thing I want is to rebuild this and have the same issue so, detective hat on, and Sherlock mode- Engaged...
Evidence. The gasket on the left is date stamped 2005 and the gasket (and cover) on the right are stamped 2004 (the 2002 cover has been reused). This car was built in 2002/3 and sold new in 2003. So it's had manifold gaskets when it was 2 years old and that can only be because it was blowing. What's more, if you have a new car and it develops an issue in a limited time from the date of sale, where do you take it?
Therefore it could be suggested that a main dealer or other authorised repairer themselves carried out work on this component... and fucked it, because you know what, that manifold is warped, a simple straight edge check will show that, and so is the other one, but I bet that they didn't even take the things off to check.
You will not straighten cast iron if it is bent with an M8 stud. I can also conclude that this car has since, very close to it's beginning, had a manifold issue which means that it has been running rich and likely smoked the cats long ago which lead to the moving of the oxygen sensor, smashing out the cats, and all that bollocks they did to it in Coventry.
Luckily, I had already got hold of a replacement for this bank, existing is at the top...
Wait... What? They've changed the design? Is that because they bend? Looks like they have removed material to make it a bit 'less stressed'.
What this means is that I've had to get the other one replaced to this revised design where there are no reported problems of blows.
There are further changes which are an improvement but not as exciting and we'll have a look at this later.
Matey who's outing his early STR needs to read this post!
-
Crispian_J_Hotson got a reaction from rainagain in Jaguar S Bype R - An Imposter, saving a bird, and that effin supercharger!
They say in the community that supercharger removal is the worst job in the world on this engine but let me re-assure you, it's not. In fact it's probably the easiest thing to do once all the other shite is outta the way. You may read that people are cutting out a rear bolt hole in the super charger casting and making special tools to aid removal in the future. There really is no need at all to do this. If the directions in the workshop guide are followed then removing the throttle body lower casting by it's 4 bolts which can all be accessed easily, makes the fabled hardest bolt in the world, the easiest bolt in the world to get to.
The supercharger is getting rebuilt by me once the kit turns up. It was to be sent away but then I realised that there's two parts to the service, the snout and the body. I was under the impression that the service was £300 but then later found that that was for the snout only! So to get the snout and body serviced, and a 6% pulley (smaller for moar powah) fitted, I'd be looking at a fart over £800. No.
I bought a... let's call it a kit in it's infant stages of testing, for 135£. This includes bearings, coupler and oil. My coupler, the bushy bit that connects the pulley shaft to the main veins, is original and of the spring dampered type. The replacement will be a cushioned oil filled type out of polyurethane. Mine has play but it's not excessive which is gr8, this new coupler will eliminate any sloppiness for instant charge! Downside is that it makes a noise described as marbles in a tin. Some have no noise, so I need to suck it and see really. Two bearings in this M112 supercharger cannot be changed really as they are built in during manufacture and they are submerged in oil, failure is rare.
The 6% pulley was not cheap and it will complete that component. I favoured a 10% reduction pulley but even though the casting of the snout needs to be ground down for clearance with that, this engine is problematic with heat dispersal and a 10% will produce heat that cannot be managed well by the existing cooling system set up. I am modifying the cooling slightly but, I'd rather have easily enough cooling than not enough.
The timing chains and gear needed to go next and in order to do that, the engine should be locked. The 4 cams have cut outs that align for locking bars and the Crank position sensor should be removed where a locking tool is replaced through it's hole in the block casting and into a timing plate on the flywheel at the gearbox side.
'Remove CPS' or something to that effect says the manual. Not so easy after it's been in there for 20 years. The above image was taken after the fact but note the corrosion, especially in the CPS hole. This CPS is plastic and gubbins into a stainless cap which sits a few mm from that plate in the image above. The stainless cap on mine had welded itself to the block casting. I had to destroy the sensor and then spent, and I'm not joking, over 2 hours trying to get the cap out between that plate and the block. I made tools, I swore and I was unhappy to do this.
A replacement used sensor from a very good outlet, Auto reserve, was bought for £18 and this one was sent to it's death... in pain...
The next day and not in a bit of a huff, I had to clean out the corrosion in that hole to fit the locking tool. The engine could be rotated the right way by refitting the crank bolt on spacers as to not wind it right in. I did have it 180 degrees out on the first attempt, as seen by the cams flat side pointing down but it was easy enough to sort out by now. it's a 50/50 chance if your on your own under the car!
Once locked, I had to stick a note on the dash saying it's locked. Habit. I've witnessed the alternative outcome!
Then the cams get locked using the special tools. If the engine is out of position, you can't lock it in these places. Easy peasy job to remove the tensioners which are the ratchet type, guides, and primary/secondary chains and cam chains. They are in great condition but I have new to replace them.
Once that's out of the way, the cams themselves can be removed. The whole lot gets marked up and ordered although the caps have numbers stamped and direction arrows, if I can make things easier at reassembly time, it's worth it.
The head bolts are under the cams and are not extremely tight. The manual states that the head bolts can be used 'only twice' and when refitting they should be punched to denote their second use. Yeah, so I got a set of new bolts anyways. The usual head bolt undoing pattern applies.
Heads released without a fight and were removed. As the exposed block is going to sit for a few days, any coolant was dried up and a liberal squirting of penetration oil was applied. That's all left until I get to cleaning and painting it all.
The combustion side of things showed that it had been overfuelling for a long time with glaze and carbon build up. I know what is causing this, the blow from the manifold (and now added EGR apparently).
The blows will cause a lean reading at Lambda which will cause the ECU to run it rich, when in fact, it just has a blow (or several) and it's missing combustion measures.
The next milestone is afoot, what is going on with the manifold?
-
 Crispian_J_Hotson got a reaction from Tickman in Jaguar S Bype R - An Imposter, saving a bird, and that effin supercharger!
Not losing the will to live or anything but, you know when you wish you hadn't started something...
TEDIOUS!
That is the word of the week kids. I still have a crate of bits to clean and paint but they are all basic castings so not very in depth.
The other head got painted and all the threads tapped out and cleaned. The new studs turned up and both heads got fitted up and a final prep clean ready to be fitted. The supercharger was put back together and got prepped for fitting. Needs oil yet.
Washers... forgot to get some washers for the manifolds. Out of the billion bits of hardware I have stashed, nothing worked well enough so I ordered some thick, stainless jobbies and a 100 normal stainless M8's as I'm out apparently, these are for other things.
What was looming on the Horizon was the pig arse job of cleaning the block, pistons and engine bay in general. I wasn't looking forward to this and just didn't know where to start with it. At the beginning is my usual resolution.
Rust...
Potato cam engaged! This is the bottom of the O/S turret. A great shit trap on all these models. Crap is accumulated in this box section from within the inner arch and sits on the chassis rail FOREVER. Here we can see (sort of) that the grot has seeped down the overlapping panel and destroyed it, marked in the yellow pen. I intended to cut a small section and weld in new plate but decided to cut the whole lot out and weld the panel cut directly to the chassis rail.
Snip...
Then the rust could do one and sparkly stick commences. Note the Gr8* condition of the unfinished paint, thanks Jag, but look below for improvements!
Racecar.
That was shit, so moving on...
Pistolas!
Grim yeah? Watch this...
BOOM!
Then I proceeded to clean 89% of the engine bay with degreaser and a toothbrush!
What a load of bollocks that was, but it's the last worst bit out of the way really. Now it opens up for a bit of painting, wiring repairs, and a general tidy up. In the above image, the bubble wrap is inadvertently covering my latest modification. I decided that in order for this to be a real race car, the AC needs to be ripped out. It doesn't work and I found that it had been bodged which was shocking. One of the Schrader valves must have been leaking and instead of changing the simple valve, clearly the better option was to fill it with JB weld and stick the cap back on. Yeahhhhhh.
Anyhoos, by removing the ridiculous AC pipework and the massive cooler in the rad pack, I have gained an inch of space and extra air flows for the important stuff. I should measure up the compressor mounting and pulley position so that I can eventually bin in and fit an idler pulley or just get a shorter belt if it works, don't know yet. I don't use AC in cars, never have, and it never works!
A day off tomorrow perhaps. I want to get the looms fixed up good next but I'm running the risk that in a car renowned for breaking it's wires, I've had to move these looms a fair bit and I'll get it all done and then have to go tracing seventeen broken wires when it's all done... I guess whatever happens, happens right? 😆