


Crispian_J_Hotson
-
Posts
2,630 -
Joined
-
Last visited
-
Days Won
2
Content Type
Profiles
Forums
Events
Posts posted by Crispian_J_Hotson
-
-
PARTS AHOY!

The arm to the bottom right of the image is the bit I broke... too much bend on it.
It's a bit like parts darts except I actually need all the parts I'm throwing at it!
- grogee, Low Horatio gearbox, dome and 8 others
-
 11
11
-
10 hours ago, N Dentressangle said:
Most of all, thanks for putting me off ever buying a Jag. That rear end looks like something Bob Ballard would get a stiffy about
From ship wrecks to train wrecks, this thread has it all!
- N Dentressangle, scorchio69, RoadworkUK and 1 other
-
1
-
 1
1
-
 2
2
-
CHECK 1-2...
WOW, I've just been on an adventure... from hell...
I've just spent 2 days bound up in the rear suspension, trying to sort out from the subframe to those bleedin bushes!
The subframe was minging, a past custodian had carried out work that involved painting all the rust, stones, and mud in MOT black and it wasn't pretty. Like most British made products, the bits you don't see much get infested with corrosion and the case of the rear frame on these S Bypes is no different.
I only wanted to swap some bushes over but I couldn't ignore that. So, most of the rear frame got a beating from some blunt metal, a wire brushing and a tickle of rust cure and prevention.
This car is also haunted. I now know this because for the third time, I have gone to take images of it close up and my phone battery has died after a couple of snaps with over 40% battery left. Today was 56% and this does not happen elsewhere, so explain that.
I started with the OSR bottom arm off, that involves removing most of the stuff in the way but I did see that it had replacement copper brake lines routed badly and replacement speed sensors of which the wiring was left laying on active suspension components. These were put right.
The rear track rods are almost toast and I have cheapy replacements but opted to wait until I can get the proper kit, funds are tight to non existent for now for this car as it's eaten everything! Hold that thought though.
A professional* had been here before as there was evidence of sawing out stuck bolts and hammer marks on the handbrake calipers which I had to file out so they looked half decent again.
They had beaten the crap out of that one, so it must have stuck at some point, which is normal.
The bushes were
pressedforcefully taken out and there was nothing nice about that. The arm did not fit in the press at all to remove them, so a bit of heat and 9000 wops with thor saw them gone.
Stupid things. Little did I know that these new bushes (the metal insert is missing in the image) were going to bite me right in the arse!
The arms were manky so I found some cheap primer in the shed to cheer them up a bit.
I'm not sure if the 'SC' on them means for the supercharged? I compared them to the spare 3L arms and they are only a bit beefier, but they are pretty much identical. I reckon that in the event of an emergency, the 3L ones could be used.
More painting of 'orrible bits...
Refitting the arms...
And that went great. That was until I came to tighten the last bolt on the NSR lower arm.
CRRRRACCKK!
What the?
At that point I really done well to not smash anything up, even my beanie stayed on despite moving down into my eyes constantly and irritating the fcuk outta me.
How did this happen then? Well, it goes back to Jaguar using 2 sized bushes in the arm and 1 size carrier hub. No-one knows what's going on so they say "measure it M8", which I did. I have the smaller ones at 54mm or something. The bigger are 59mm. Because they don't do 54mm aftermarket poly they say use the inner bushes here and it'll work out right for ya.
As we can see, it doesn't. I'm pissed about that because if I had been tightening it laying underneath, I would have seen that the ally carrier could not have taken the slack, instead I had the stupid brake disc in my face and done it blind.
To compound the issue, this was the NS and that wasn't even causing a problem in the first place! I just had to be proper and do it right by changing in pairs... IDIOT!
Well, that's what I said at the time. Upon reflection, it's happened, lessons have been learnt, and it needs sorting out. Do you remember what I said above about all the funds have been rinsed? Yeah, this peach of a job just set me back another £205 in repairs with the bonus that I can't use the car either. Wot a reeesult M8!
A warrantied replacement carrier with fitted new bearing is zooming it's way over here as we speak.
Defying the human instinct of wanting to shove heavy metal things through the windows of the car, I am still managing to turn bad things into good things. This NS has the mother of all diff leaks from the output shaft seal, so I've got a seal coming too with the appropriate oil to put in after. When I replace the carrier and inevitably break the one on the other side, I'll pull the driveshaft and stick that in, where I'll no doubt find that it needs a new diff.
The bushes will need packing out which apparently is the norm and that does not mean that the packing washers supplied in the bush kit are the ones for the actual packing, no, I need to use those and add more. Why then couldn't I just get the bigger bush in the first place? My mind has had enough.
In the meantime, have a happy picture of the car taken last week just after it threw its EML for that lean fault...
-
5 hours ago, grogee said:
It can't be just me that thinks that @Crispian_J_Hotson is getting off too lightly with his S-BYPE R
SHEEEEYT!
-
Not all cars. I watched a scottie kilmer stint where he was flapping his arms about over a $1k V6 rwd Cadillac with borked cats and an appetite for oil. Worthless in emission controlled states, and the supercharged v8 was described as worse. FWD's are a gearbox eating pig or something to that effect.
They sound perfect. If they didn't sink in water, I'd have them floated over here immediately.
-
1 hour ago, mercedade said:
Love superchargers. The only world where this can be true:
Change the oil > it now makes more noise than before = SUCCESS
Great read - thanks
Literally just discussing this elsewhere! Of course, it leads on to the manufacturers 'sealed for life' debate. (which we're not having on this thread thank you very much!)
-
SUPERCHARGER TIYME111
I've never had a car with one so I've never done this bit. I carried out extensive research last night in preparation. There are some key points:
- Access is a bitch and getting the oil out is worse.
- The old oil stinks and maybe radioactive*
- It needs around 125ml of new oil in it or until it comes back out the fill hole.
- Plug any gaps around the teeny tiny fill plug so that it doesn't drop down into oblivion and get lost forever.
- Job duration: up to three hours.
Welp, that wasn't too bad really. Great tip to ram something down the engine to close off any holes. The plug got dropped several times whilst I fudged around with my sausage fingers.
The Americans say a 3/16th allen key goes in. I could not get an allen key in there, 4mm was too small and 5mm couldn't get in, I think I have one 4.5mm but that's MIA by the looks of things. So, being British, I stuck a T30 in there and cracked it off by sticking a tube over it.
For what it was worth, I removed the intake, because you need too really and took off another breather from bank 1, it just made tight access that little bit better, plus I could see if the breather plastic hose had gone brittle, which it hasn't.
I found that it paid to clean the face with a wire brush as there was a lot of debris shifting about and I didn't want that going back in there. I messed about with sucking out stuff, I read that there was some success by attaching a WD40 type straw to the syringe but I only managed to pull out 40 odd ml and I couldn't seal the pipe joins enough. It just seemed to suck in more air than strain it through the small straw.
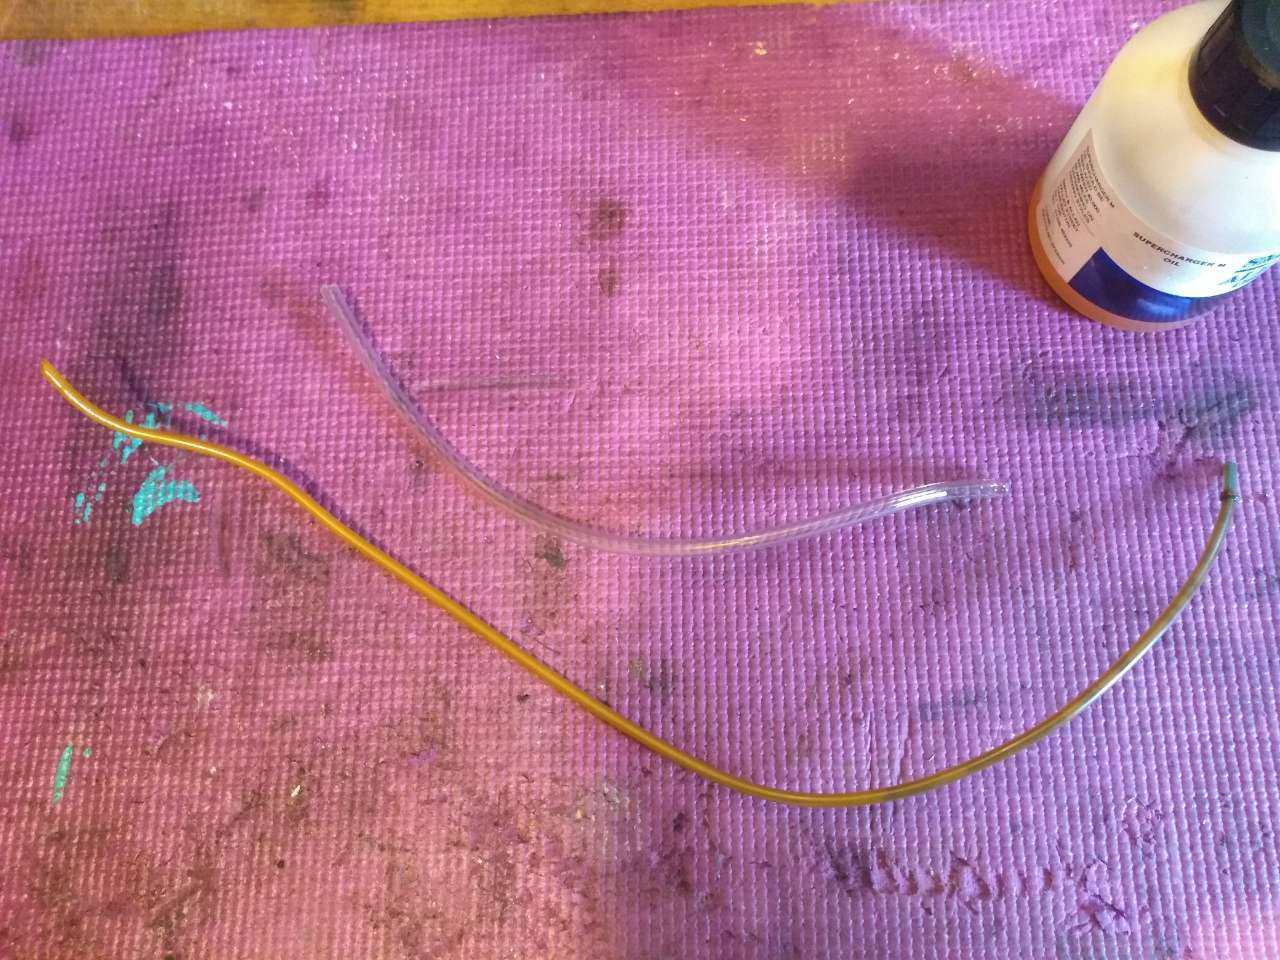
So I went to the shed. In there I found a 1986 BMW vacuum line.
And this had a handy shape in it...
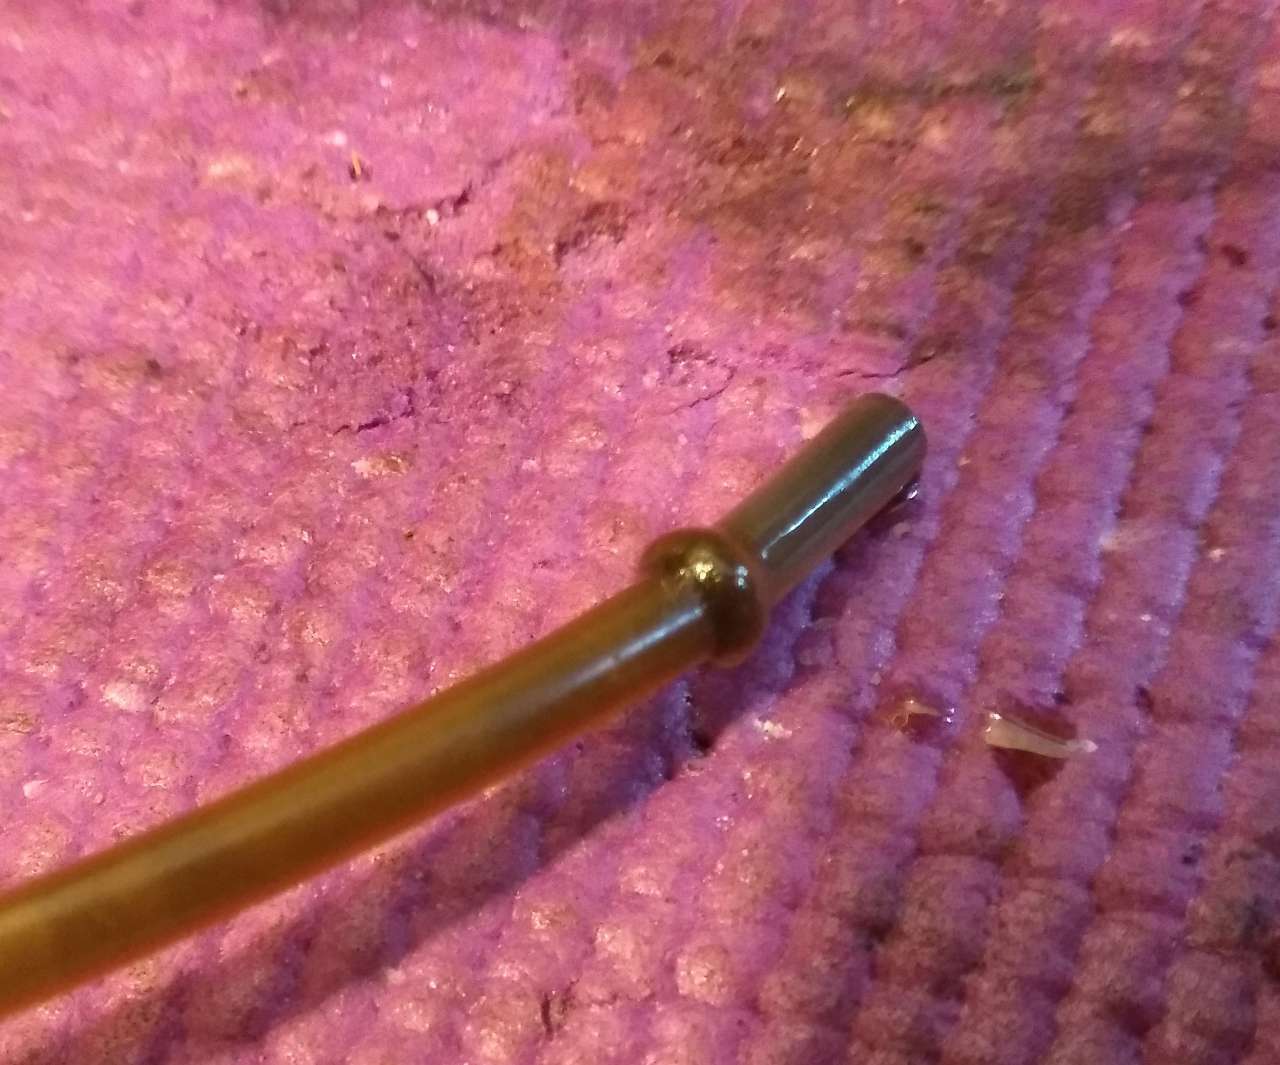
This allowed the tube supplied in the oil pack to be forced over and secured with a tie. The bore was bigger too so sucking was not such a slow process. I cut the end at an angle as I believe this would allow the end to slip in places better than a straight cut end.
Ignore the crap on it, this was taken when I was clearing up!
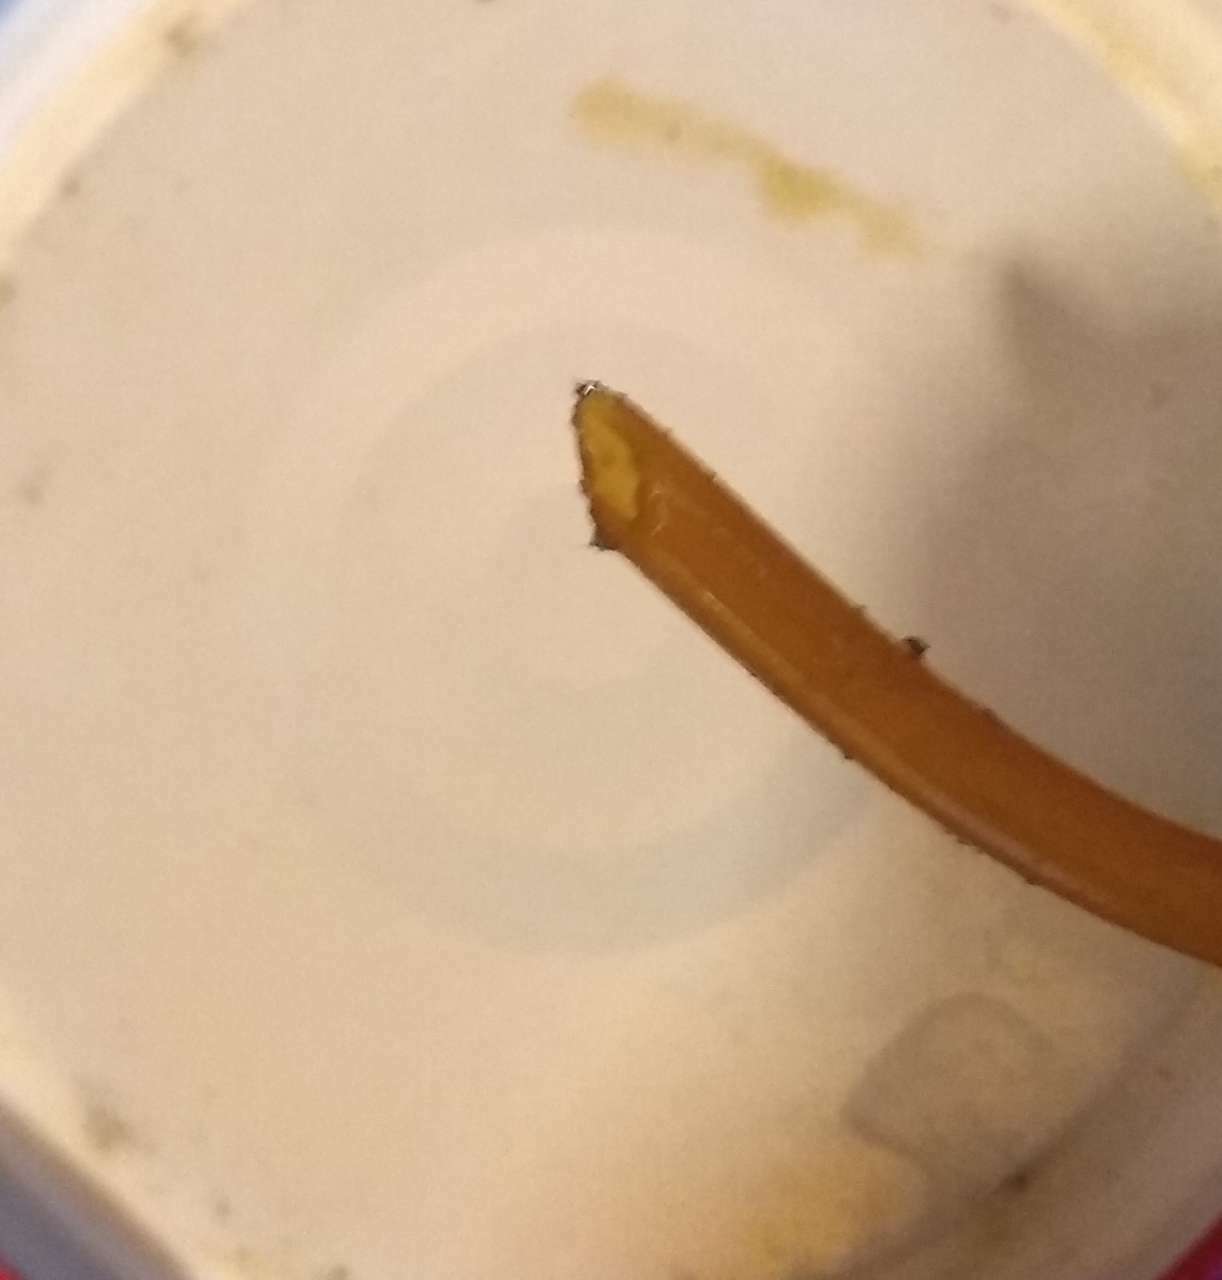
I still messed around trying to get the tube somewhere near any oil, it's a bit like blindly smashing it into a brick wall. I read that going to the left has better results as something was obstructing the entry point. I wondered what this was so got the endoscope out.
Top of hole...
Bottom left of hole...
So there is a giant bit of metal in the way but also a little passage but I only had a 5mm gap between the cog and the casing.
Shooting the tube over to the left and massaging it downwards saw success. The rear of the car was jacked up a little and I removed a total of 127ml from the supercharger.
They aren't joking when they say the old fluid looks like a black coffee. The smell wasn't too bad, I can describe it as 'synthetic fish', and you can taste it in the air. It tastes exactly like it smells... which is weird.
Getting the car level, I removed the makeshift oil sucker pipework and just used what came in the kit. I got 150ml of new oil in with it dribbling out. Getting the plug back in was fiddly, verging on frustrating, and this is where the rammed in tissue comes into play... but it got there in the end. It's either loose or tight and I didn't want to hang off it because hopefully, it'll see another change. It took a shade over 2 hours from getting the stuff out and putting it away, so not too bad!
Out on the road, I could now hear the charger where as before it was pretty silent and in the background, that raised a smile!
I still have this exhaust sounding blow to find. It sounds like its coming from bank 1 when I'm in the car but out of the car, I can't hear it at all. I can't see anything obvious and it only does it under load. There is a clear blow under the car from both mid section joints, but this doesn't sound like the location, is the noise travelling up? I dunno... I might live with it until I get the whole exhaust replaced soon. They can find it then.
There are no issues with top ends being starved of oil or anything are there? I was thinking it might be a lifter or something similar?
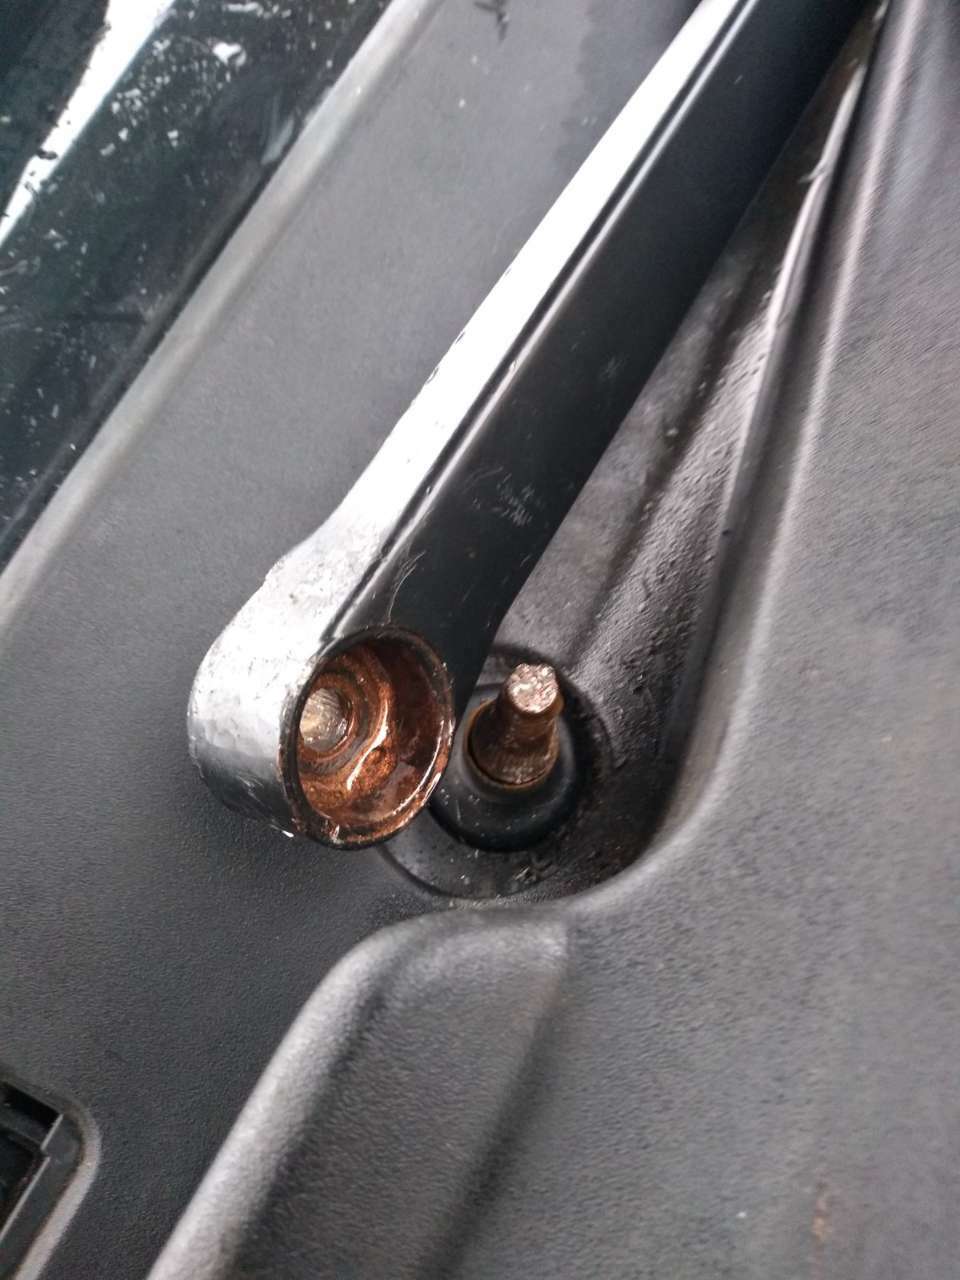
Oh, and the drivers wiper arm base no longer hits the bonnet! So spacing it out and shifting the linkage mechanism as far up as possible has achieved something, despite play in the brass bearing.
The car shifts though, the Traction control is always on standby and getting used on these cold wet roads! Very pleased with the results so far. -
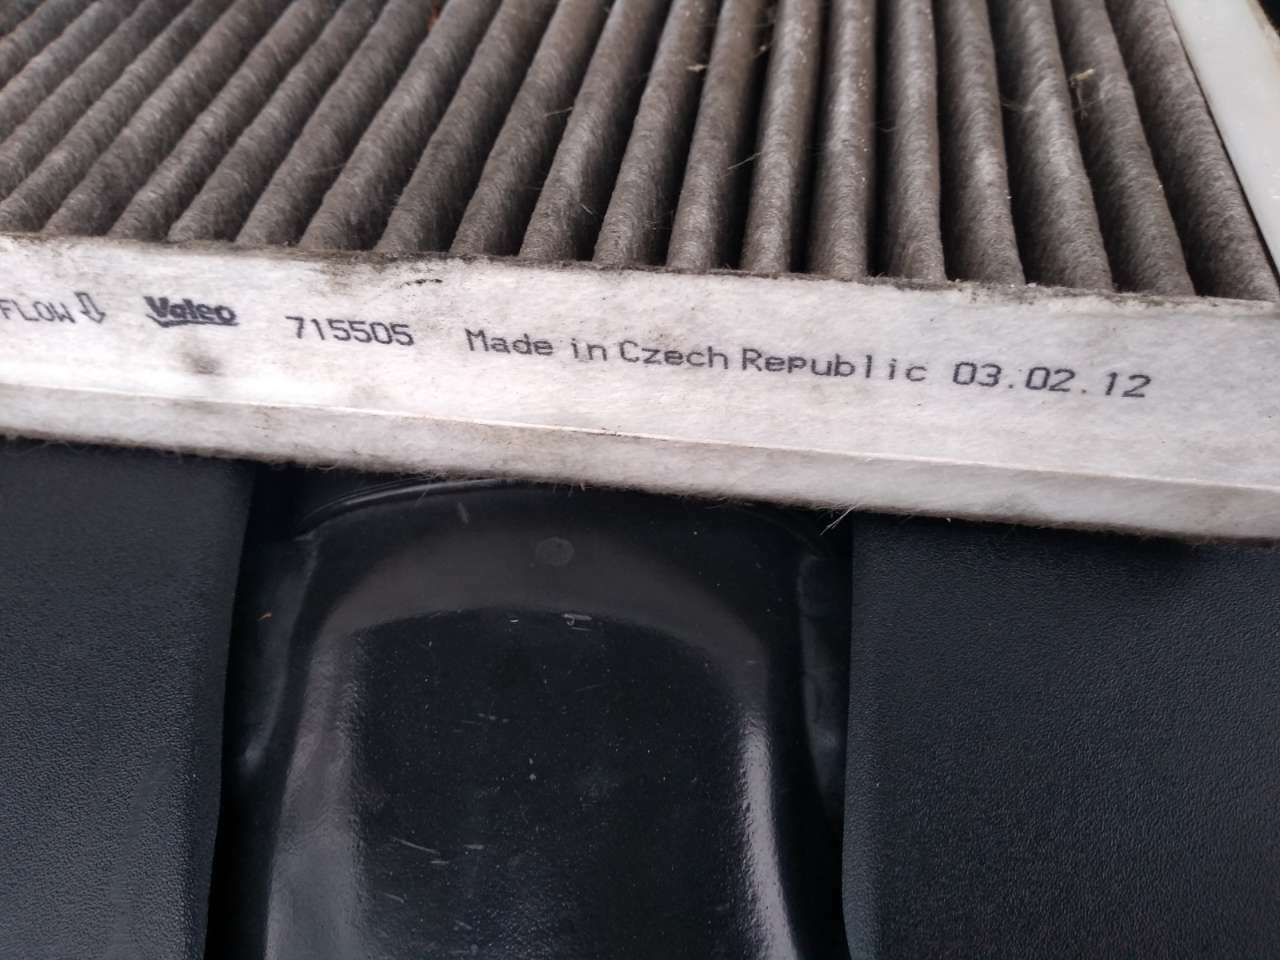
First off, the bit I've been wanting to get at for a while... the pollen filter! This sucker (see what I did there?) had been in there for a while and was quite heavy. Note the date on it.
Then it was a look at the linkage. The actual linkage bit is fine but there is wear on a brass sleeve in the drivers wiper mount. This is causing some movement. The spindle also rises and falls vertically by about 10mm for whatever reason. A washer and retaining circlip have been removed prior to this image being taken.
I ate up this play by temporarily installing a couple of washers to see it's effect.
The whole mechanism was unbolted and those bolts greased and put back in, forcing the mechanism as far up towards the windscreen as possible. I'd like to see if I can replace that brass bushing and also see if the mechanism removes without taking out the servo!
A bit of garden hose was stuck in the vacuum and taped in place, this allowed me to suck out all the debris laying about in the depths. The rubber drain was removed from the drivers side, it was blocked.
There was a fair bit of corrosion there too so it was all cleaned off, as were the wiper arm spindles. Liberal amounts of grease was applied absolutely everywhere. This is something that I done on my black Stype some years ago which was in bad shape, much like this, and it has been trouble free maintenance since then.
The passenger side drain was also blocked, pine needles too, and a lot of them! This image was taken after I had spent too long ramming a small vacuum hose down there and it repeatedly blocking and pulling crap up.
So, to better access this I removed the cabin filter box and the plastic tray surround under that. I couldn't get the tray surround out as it seems the strut bar needs to come out and I've seen all those bolts shear and I'm not ready for that fight yet, so left that in and just moved it over to make access. It cleaned up well with a final wipe over with my oily rag. Then the plastics were cleaned and refitted.
The screen and plastic deflectors to the sides were all cleaned too. There was some remains of insulation but I removed it as it was falling to bits and covering all my cleaned bits with white dust. I shall get some thermal deadening mat to replace it. At least now I can access there with no more bother.
A new filter was bunged in and it was all put back. The drivers wiper now does not contact the bonnet despite the wear, it's close but misses in some weird display of optical illusion.Next is to change the supercharger oil, which is a bit of a laugh*. Never done it, so I'll find out!
-
3 hours ago, DSdriver said:
'kin ada what a faff! would drilling a small pit in the top of the spindle to stop the screwy bit slipping have helped?
Copperslip on reassembly?
Of course as it would have something to seat in, but I try and save drills and hammers on things like this for the 'I have no options left/ die you bastard' scenario. The main issue with this particular element was trying to keep a bite on the underside. She's getting lubed, refit post imminent.
-
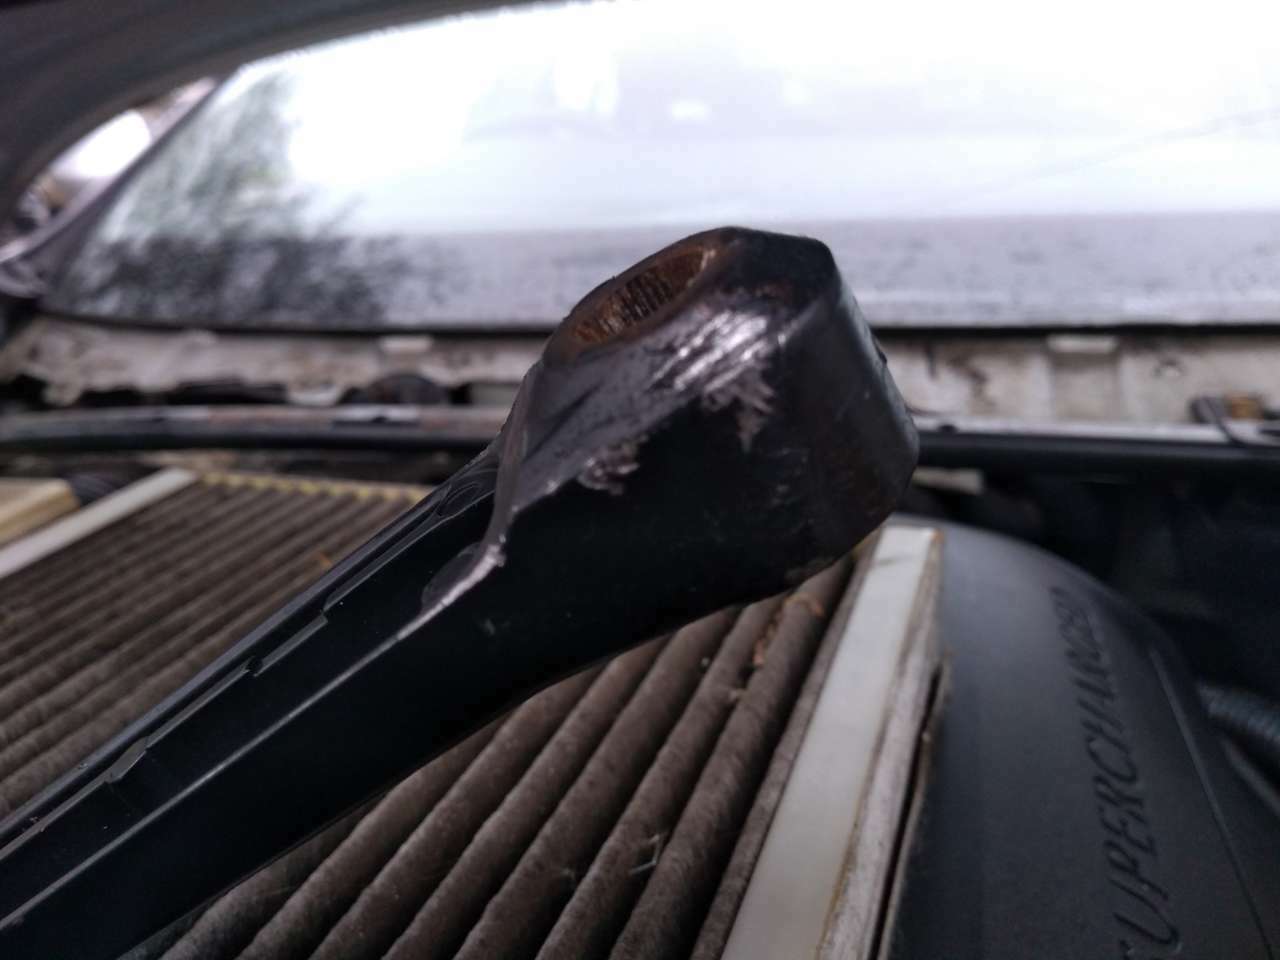
I had plenty of other plans bubbling away. The main issue, of a few, is that the arm sits pretty much up against the scuttle plastic. I was starting to think that I'd have to put the wipers on, and then pull the battery earth/ pull a fuse whilst they were vertical to allow more wiggle room. It has all been assembled now which I will put up in a bit but I think, if this happens again then the set up I invented* is more than capable. You could, if you felt the need, grind flat points into the underside of the arm and paint it although I think that's a bit extreme. Corrosion between the ally arm and steel spindle is what is causing this issue. The actual arm nuts are not supposed to be that tight, 17Nm or something.
-
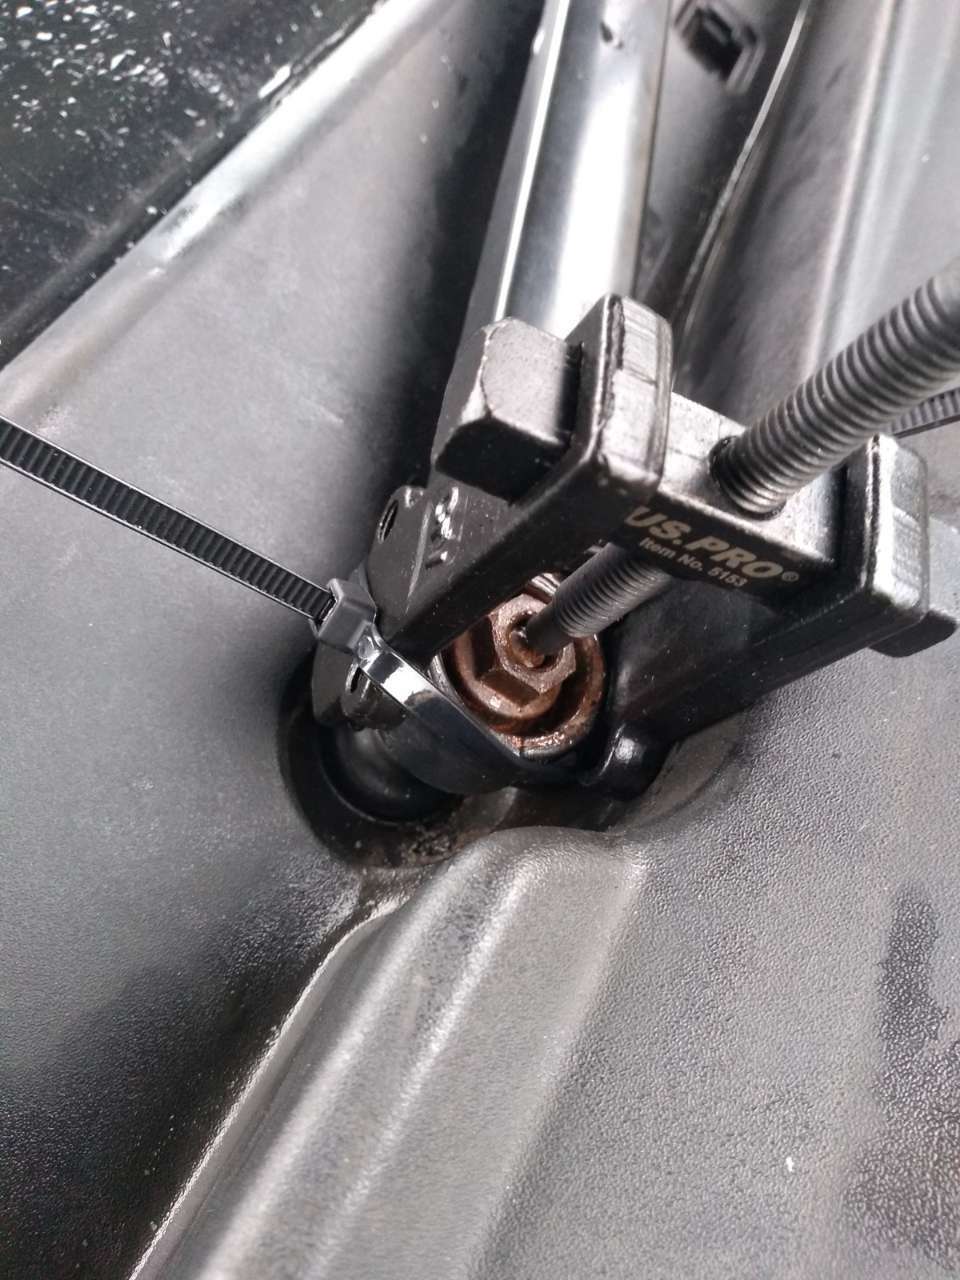
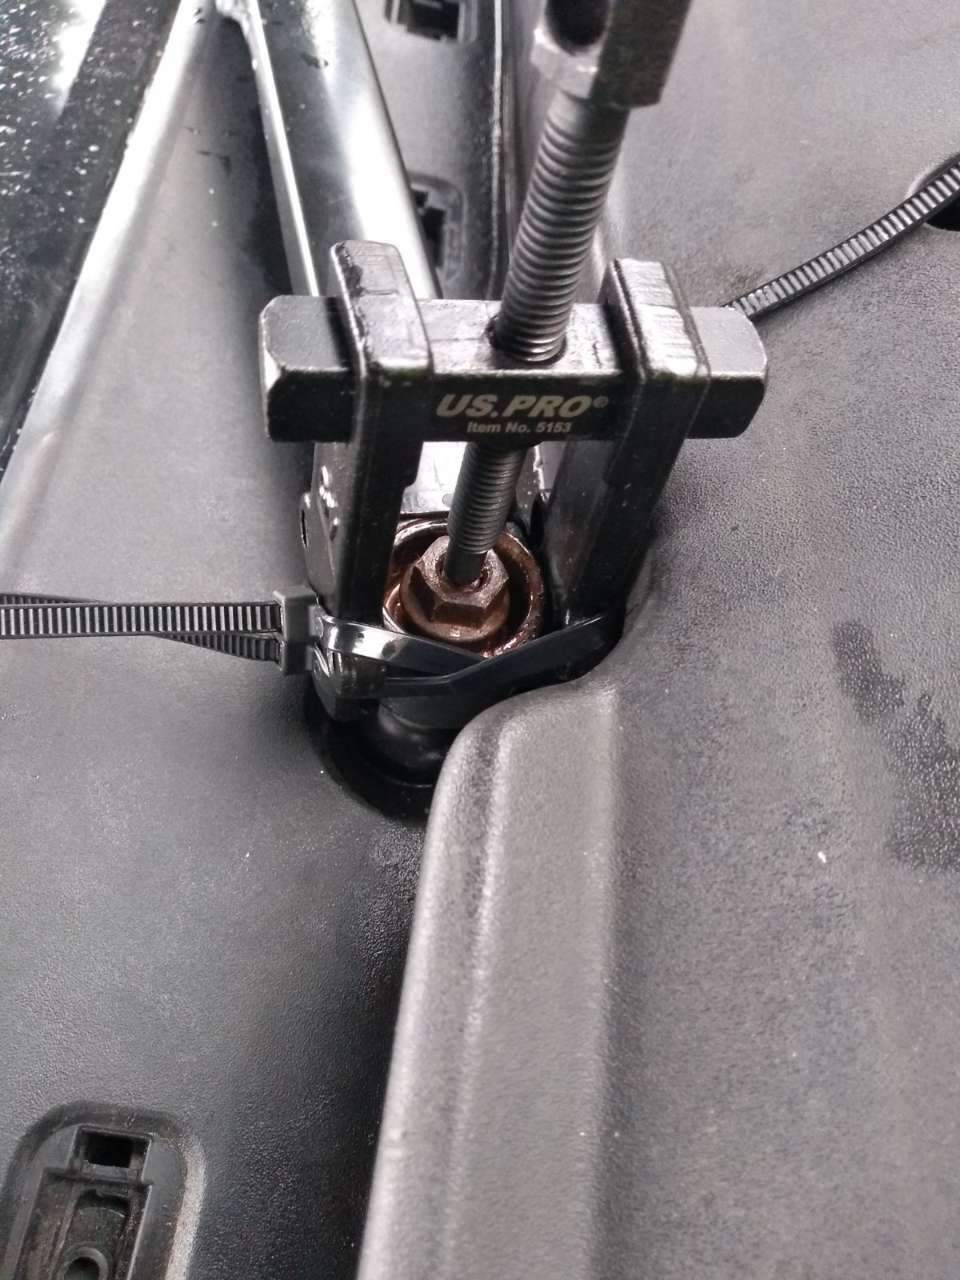
Say, er... that list of works to do today was a bit optimistic. I couldn't get a start on it until lunchtime and then it took another 45 minutes attempting to get the wiper arm off. Brian struggled. I had to disassemble Brian as a fundimental part of it would not work due to the wiper arm being in the way. We are now naming it Bri, as 50% of the tool is missing.
The issue was that I could not fit the bolts which kept the two sides of the puller taught. This meant that it would just clumsily slip over the arm. I had an idea.
PLAN A
The pressure screw just slipped off the spindle. Darn it.
PLAN B
Add more ties and the nut.
The clamp just slipped over the wiper arm. Darn it!
PLAN C
Add tie lower down.
She's biting but still slipping clumsily off. Darn it!
PLAN D
Install a socket at the top to stop the clamps collapsing...
It's tight, is it working? Nope. The clamps are still loosing bite but only on one side. Progress?
PLAN E
Introduce something for the clamp to bite on...
The cable ties are now stretching and it's losing grip, and clumsily falling apart. This isn't working is it?
PLAN F
Moar tougher restraint!
POP!
YAY! (distant round of applause)
That took way longer than it should have. There are a couple of factors here that didn't help. a) there's no room to put a tool in and 2) the bottom of the arm is beveled.
Still, we won. Then the real nasty stuff could commence!
-
I can see at least two brake lines that should have been changed by now 😁
-
And you'd be right. Where you find change in the car in the centre console, this has the old pound coins in there, they went out in 2017. Other history all points to the car being unserviced since 2016, but it was still used in short drives right up until sale, so it would have had a few quids worth of E10 chucked in it since 2021, and it would have sat about.
Fortunately, I only run the petrol jags on E5 in practice, if i get caught out i e. 'no super M8', I'll only stick minimal E10 in and flush it out as soon as possible with a good glug of E5. The cars can sit for weeks, even months at a time sometimes.
-
4 hours ago, Dave_Q said:
I think this thread is great because all of us have punted somewhere between a few hundred and a few thousand on some sexheap pretty much or entirely unseen.
Many of us have gotten away with it by finding that truly, only minor tlc was needed, or it wasn't as bad as it could be.
Statistically someone has to get guts deep in a brokened autobox and send Michelin the GDP of a small country for a pair of rear tyres that happen to be the same size as a McLaren F1 and this time it's you.
So we're with you because we all know how close we've been to SBYPEAGEDDON ourselves.
Chodspeed sir.
Yeah, I knew it was going to be an arsehole so was pretty prepared. The bullshit with the sayle was the worst bit and I didn't expect any of that.
I gotta admit though, it's been coming thick and fast but then I've been looking for it and it just makes me more determined to put it right. But I'll end up with a well sorted motah that I've wanted for a long time and to be honest, thought I'd missed the boat on. Currently hanging off the back of said boat, and trying to clamber on.
- purplebargeken, Dave_Q, Datsuncog and 1 other
-
4
-
4 hours ago, purplebargeken said:
I will have am S one day. My mate put together an S group on fb. John B.
Buy the black one, its got a load of life left in it and I'll sort you a price out! At least you'll know what's wrong with it! 😆
-
God, this cold is tragic. It's not so much the air, it's the ground. I'm layering up my socks, I think I'm on the 27th layer right now. It's a sod to get them all off but man, I'm like 7 inches taller!
- Dick Longbridge, dome, FakeConcern and 4 others
-
7
-
Cor, all my recent orders turned up at once today, except one and I'll get onto that later.
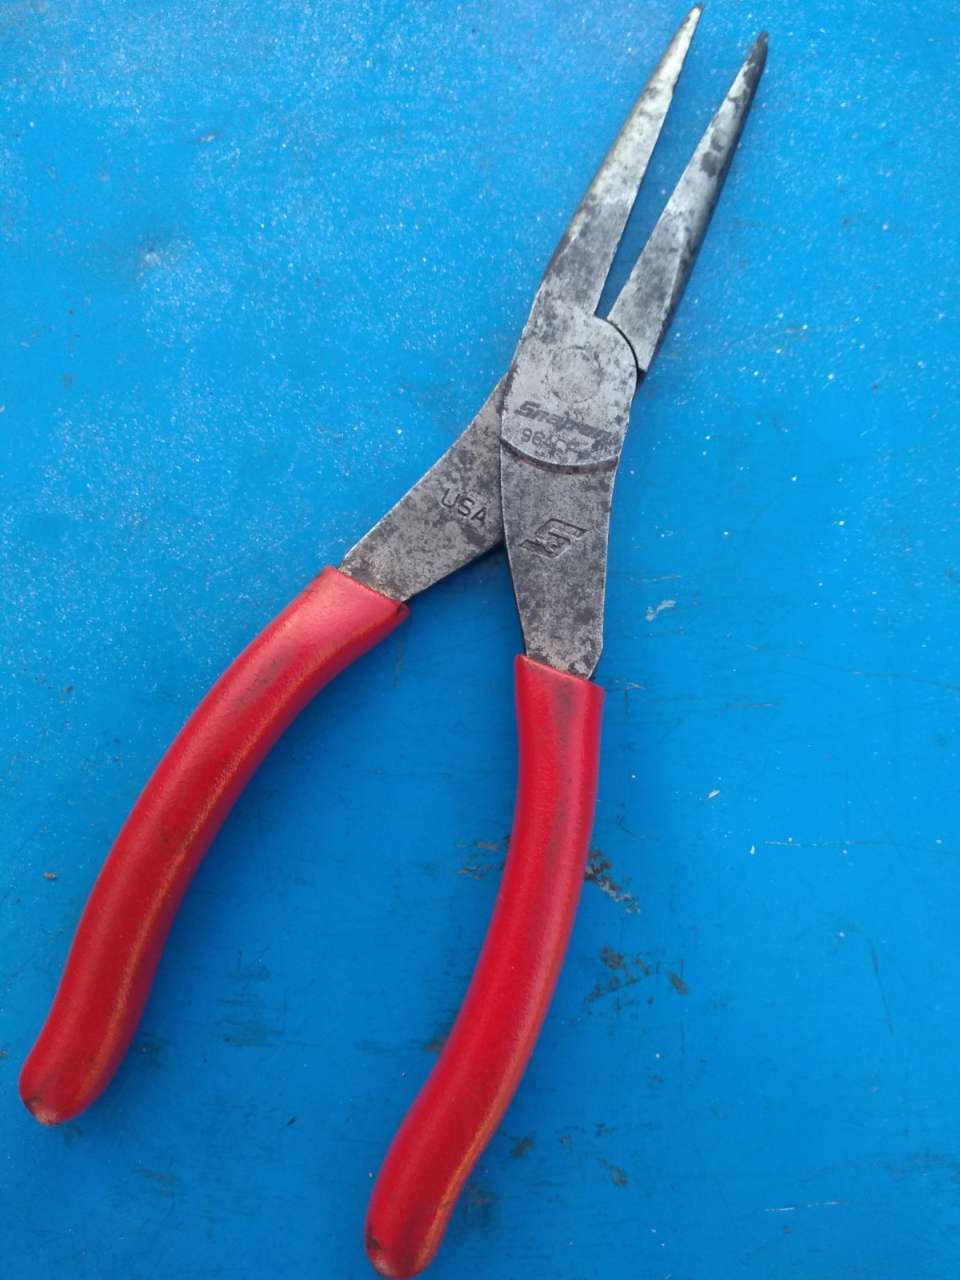
The O2 sensor sockets, the supercharger oil kit and the cutest little puller that I've ever seen, so I've called it Brian. This will get that pesky wiper off.
What didn't turn up was the rear poly bushes and that's because they never ordered them and never told me. So I've been chasing my tail with it. I got notification of a refund today which means once that is in my bottomless pit of a bank account, I will go direct to Powerflex and pay the full price. I took a gamble and lost this time.
GB Enterprises Performance Engine Solutions- get in the sea.
I'm going to have to hit the car hard tomorrow as now I have the:- Fuel supply to look at for debris from the fuel filter that shat itself.
- Supercharger oil to change- recommended at 40,000 miles, not lifetime. This won't have ever been done. Once that's done, it'll grenade itself.
- Bulkhead drains to clear and wiper mounting to 'fix', whatever that issue is, and a pollen filter to stick in.
I may be called back to site, yeah, actual work next week, which on one hand will cut the bush fitment plans really tight but on the other, will allow for gathering cash to give to Michelin.
-
The rears are awkward. To get a set of 4 matching limits the choices. Most make the fronts, not so much on the rears. There are cheaper options, but I don't want to go there.
245/40 18 Fronts
275/35 18 Bastard rears
I need to find the most cost effective way of getting pilots yet and as I understand, the Pilot 4 is out and New Pilot 5 is currently being introduced, so I may end up with a mix of 4's and 5's which is no big deal.
The place I get the 4 wheel alignment done has some nice kit and they persist, and get it right. I used to do this crap so know what their mark up is and they know I know, but they get it done first time, so I stick with that despite it costing £60 more than it should do!
-
Further research points at this car requiring new Catalytic converters, sensors and some repairs to wiring. If I was to 'get by' then I'd take a chance on an upstream sensor replacement and 1 new Cat, but I want to see it done properly so the two options for me to decide is to bin the entire exhaust and get a Powerflow or something similar or install two Magnaflow high flow Cats and all new sensors. I'm looking at pricing but it's not on the priority list, the car is running and the fault is intermittent, plus it's not being used for much at the moment.
What is priority is sorting the rear bushes. The company supplying them failed to deliver and I requested a refund today. It's frustrating as I've a bit of time to spend on the car right now, not so much next month, so fingers crossed that I get refunded soon and buy bushes direct from the supplier for another £30 on top, and get them delivered asap, but it is what it is.
The priority after that is Tyres. It has deathrings on the front and 10 year old pilots on the back which have seen a bit of action with kerbstones. They all need to go and this is around a £750 bill. With an alignment, we're over £800 all in. Once done though, they'll see the best part of 2 years if I avoid all the screws, potholes, old ladies, and other shite laying in the road.
Today I spent a couple of hours sorting the shed out. It gets really untidy and blocked up very quickly. Doing all these little jobs and bits and pieces in the cold and dark usually resulted in me just chucking stuff in there and going in for me tea... until I could bear it no more.
What I did find was the old Mechatronics out of the gearbox still hanging around, so for your interest, this is what it looks like.
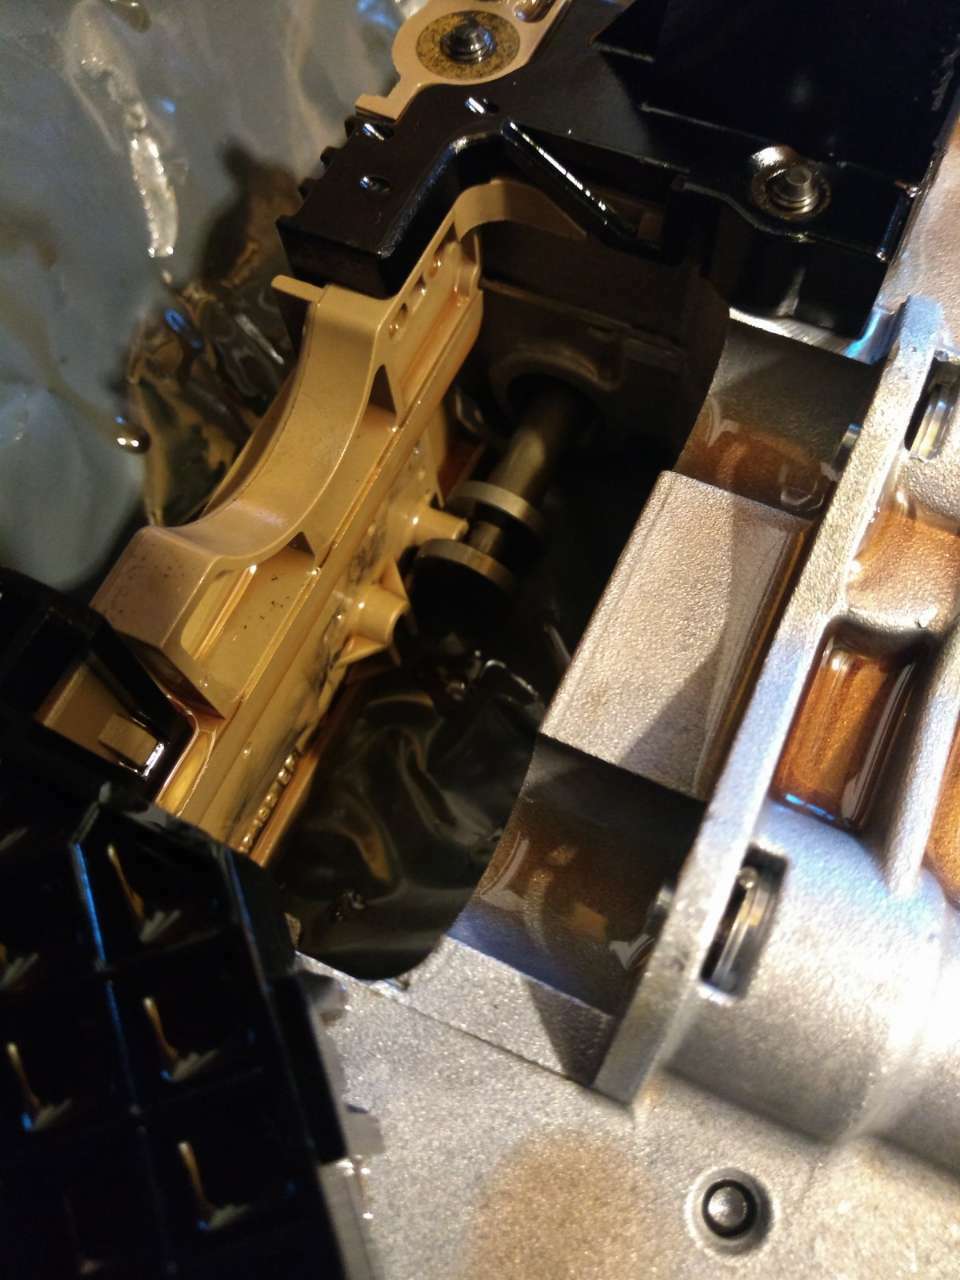
The TCM is pretty much all the black plastic bit which includes two built in turbine speed sensors and the shift sensor, the latter being my issue and is seen being the beige coloured plastic on the left. Here is a closer image of it.
This slidey bit of plastic is moved by the metal rod via the shift linkage which comes from a cable in the car and it tells the TCM what you have selected. This one has a hard time doing that and produced code P0705. They are known to have been swapped out, but it's a bit of messing around drilling rivets, cutting ribbon like connections and soldering in the replacement. It doesn't look or sound like the most reliable way of doing it.
Here is the underside and the bit you see with the sump removed.
Those blue and yellow cylinders are the shift solenoids with can also go bad. As far as diagnostics can tell, these are ok so are kept for spares. There are several bolts to undo to get this out which are slightly larger than those you can see left in. You can only take those out, touch these and you'll split the valve block seal which I can imagine, is not fun.
This thing is thrown in all s type boxes from around 2002 onwards, as well as many other makes.
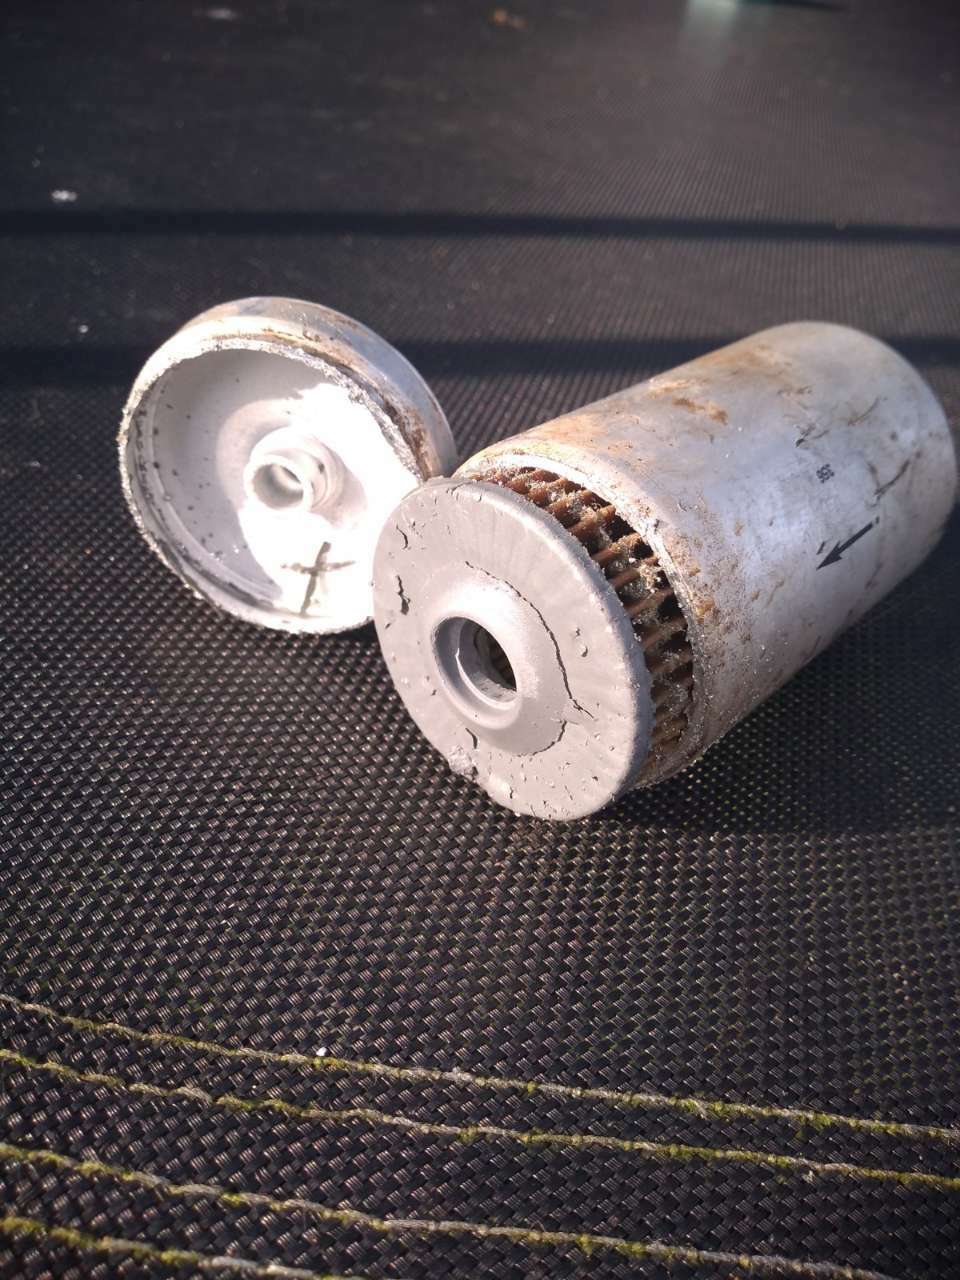
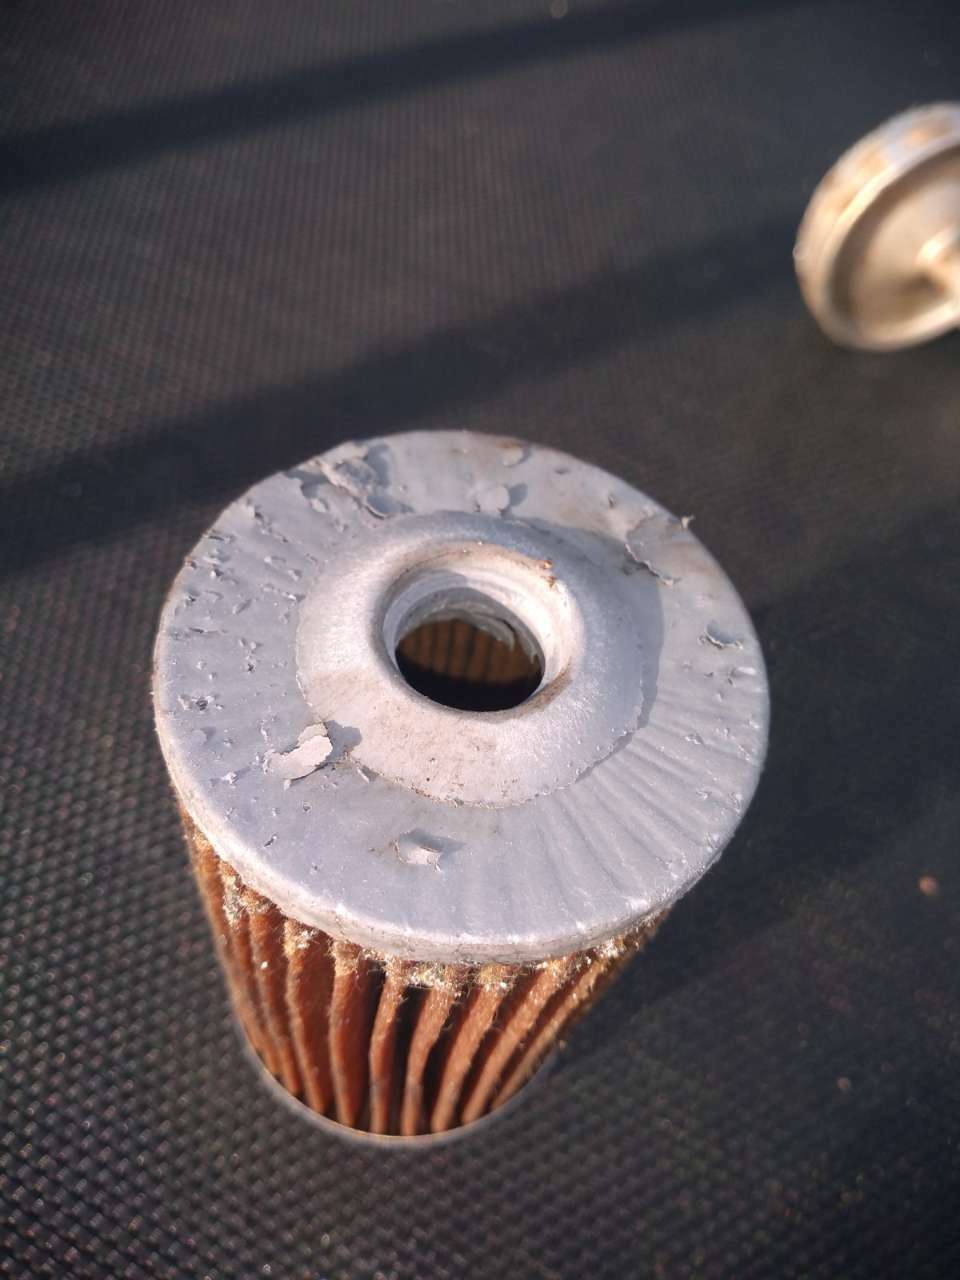
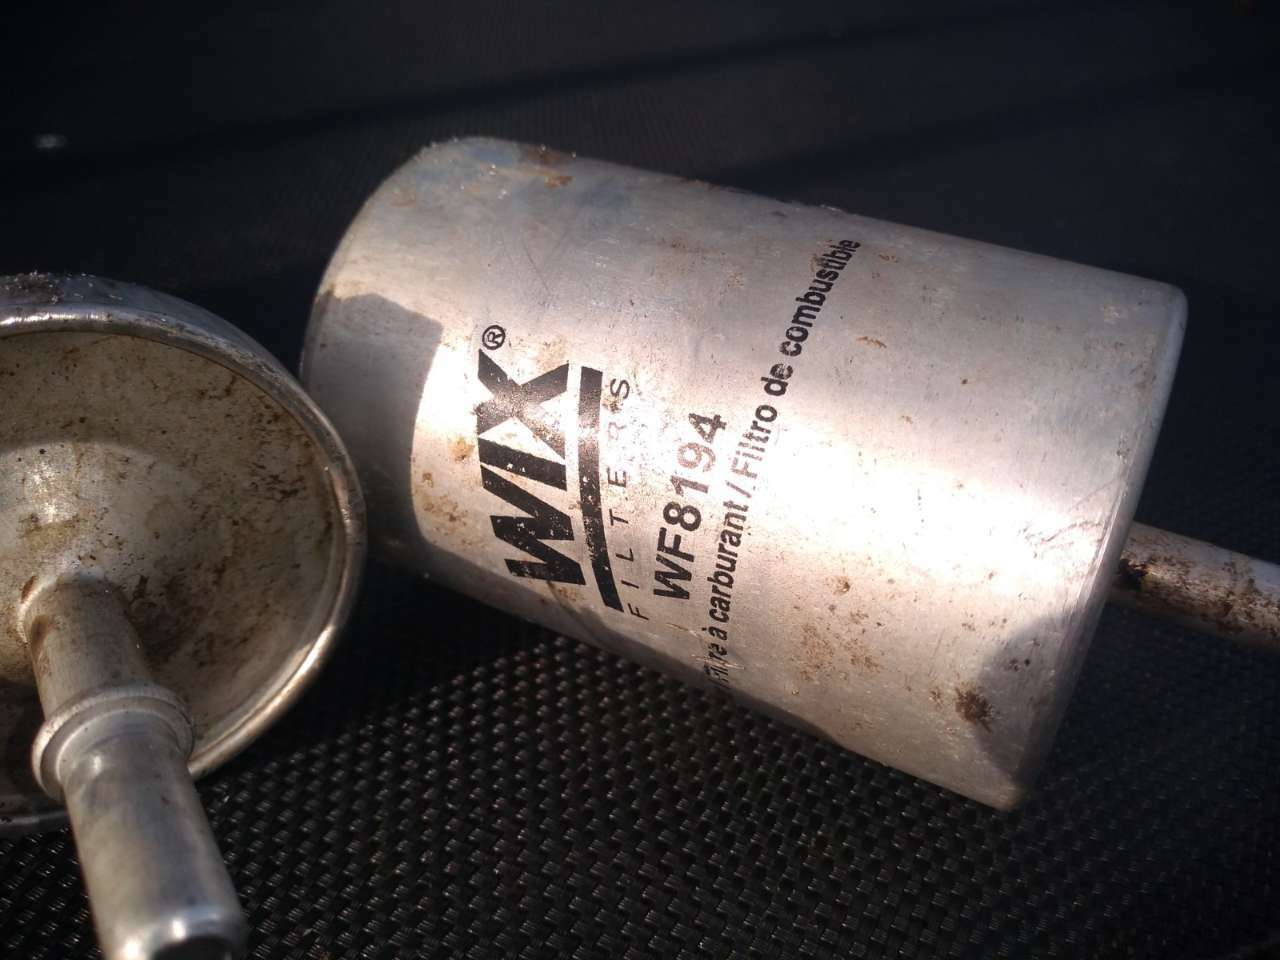
Whist I was at it, I cut open the old engine oil filter to look for crap, and it was dirty but there was no nasty bits. I cut the fuel filter open too. I was a little surprised at what I saw.
Don't mind the metal shavings, I took a saw to it, what surprised me was the way in which the grey rubber had started to break up. Not so bad if the bulk of it was before filtration but I found some after too.
And you can tell that by looking into the hole in the middle. There was actually a fragment in there. This was a Wix filter.
I cannot tell how long it's been in there and have to assume it's longer than 6 years. It's a good reminder to change your filters gents. I now need to have a look at the fuel system after filtration and check none of this rubber crap has made it through. Great.
- stripped fred, Rust Collector, djim and 4 others
-
7
-
Yeah, that was pretty much it. Must have had a fly go past the sensor or something stoopid like that, that the designers never thought about.
-
11 minutes ago, Datsuncog said:
I seem to recall a 'popular' mod recommended for Subaru units where the fault code implicated a dodgy downstream lambda sensor involved fitting a spacer collar to hold the sensor out of the exhaust stream, and so convince the EML light not to come on.
Could be summat similar happening here?
It's definitely been 'spaced' by using all the available crap they could find under their toolboxes.
I imagine spacing it would make it contact the gearbox in the proper position, this could explain the relocation?
The whole wiper mounting is loose or slack, no play in the mechanism... this isn't normal and feels broken.
-
29 minutes ago, colino said:
I've never known an S Type where the drivers side wiper arm didn't hit the bonnet; probably why there is a brisk trade in second hand linkages and motors.
In fairness, my diesel and black ones are fine. I think someone has tried to get these off and broke something whist hanging off them. The arms hit the bonnet when people try to replace the wiper blades as they do not rise up in the traditional sense. It's a shit set up.
-
That distancing auto brake as well, I pulled into a busy roundabout and the thing hit the anchors... jesus. I've had a look and you cannot turn it permanently off on the 2019 Mercedes A200.
A little thread on a similar encounter, if anyone is bored
-
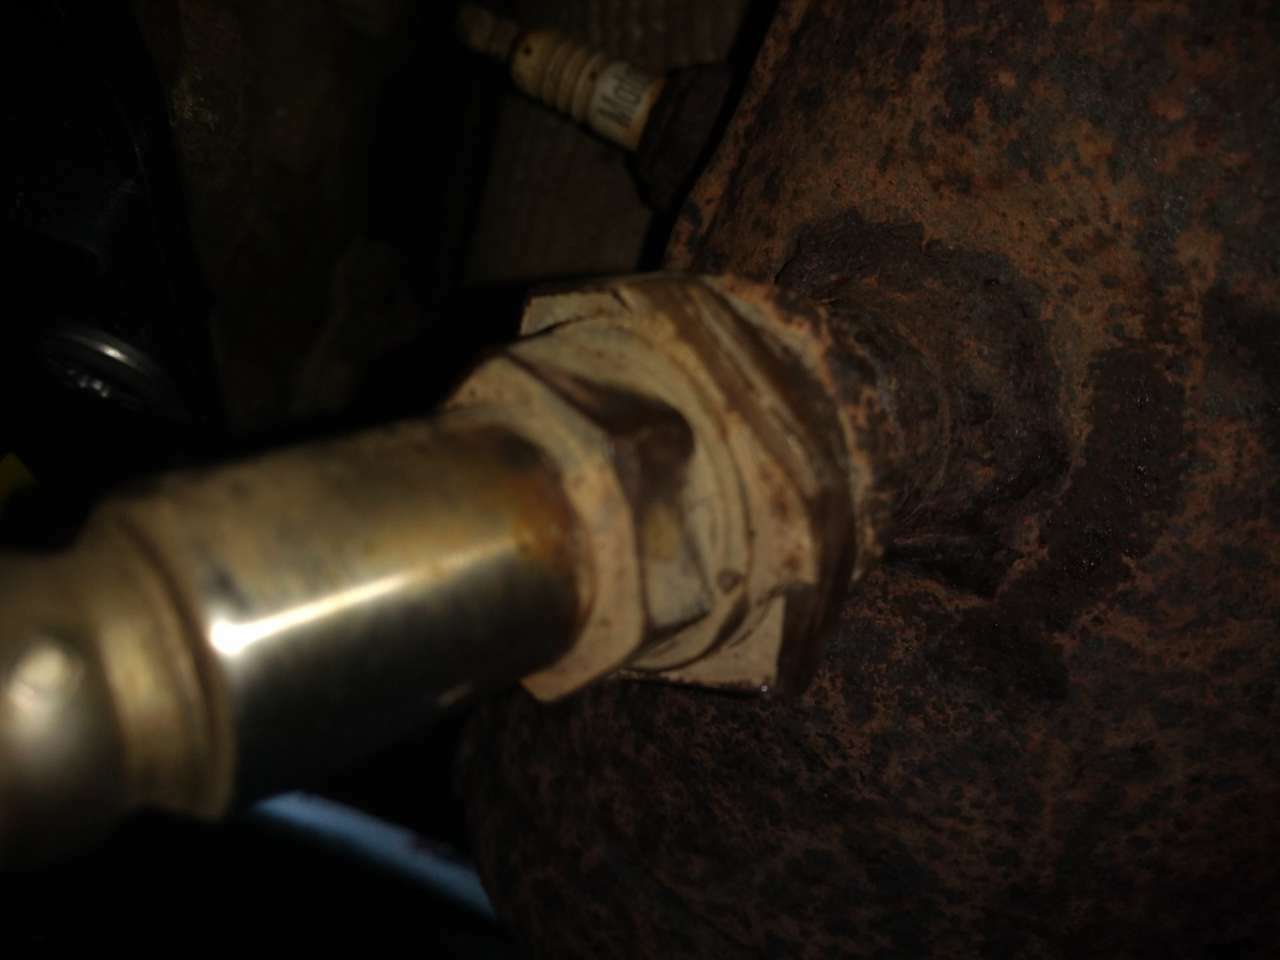
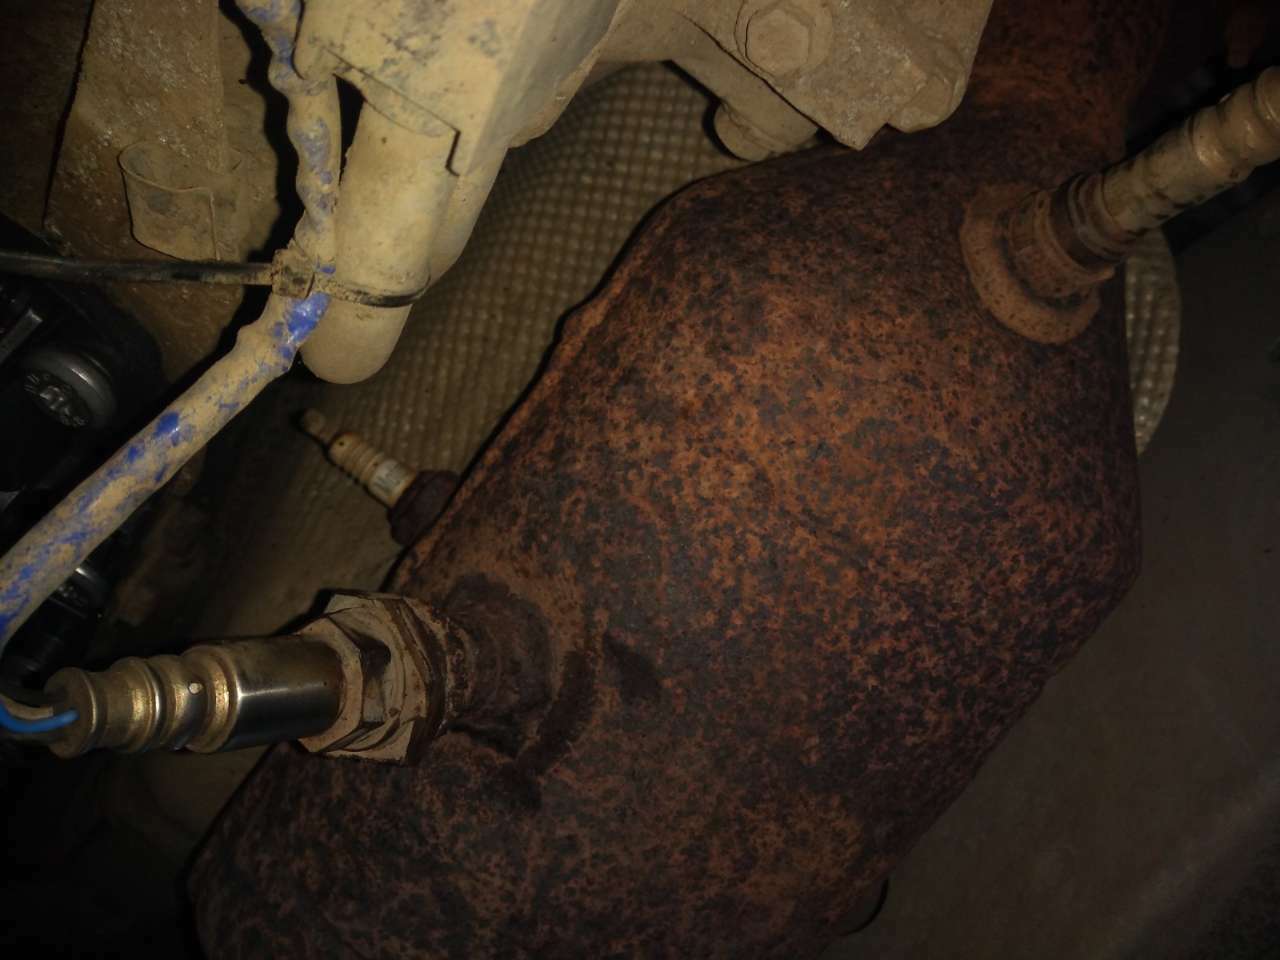
I reluctantly got under the car yesterday because it was freezing but I was around there anyway fitting a missing archliner. I closely looked at the O2 system on both Cats. Bank 2 with the sparkplug was found to have an downstream sensor fitted! This has been modified for some reason by creating an O2 opening underside of the Cat and blanking off the original hole. See exhibit A.
Exhibit A.
What trickery is this?
I would assume that if one couldn't access a bad sensor or the replacement part was too big to fit in the space, then the Cat would be dropped and the sensor removed/ fitted or changed for a different dimension one. It has also been poorly spaced out with bits of metal. Is this to alter the readings somehow? It seems that quite a bit of effort has gone into this bodge and it would be useful to establish the reason to perform it.
As for the wiring, underneath it appears that nothing has been messed with. All the wires correspond to the correct sensors and the plugs for each stream cannot be swapped over because they won't plug in due to the plug guides being different. So I now have to trace this wiring back to the ECU and see if I encounter any 'modifications' along the way. This will be quite expensive to put right so correct diagnosing is essential which is going to take a bit of time.
Luckily, the car is the gift that keeps on giving, and whist shuffling around the broken bits of front air intakes behind the bumper, gold was deposited:
This confirms that the people let loose on the car are all show and no go.
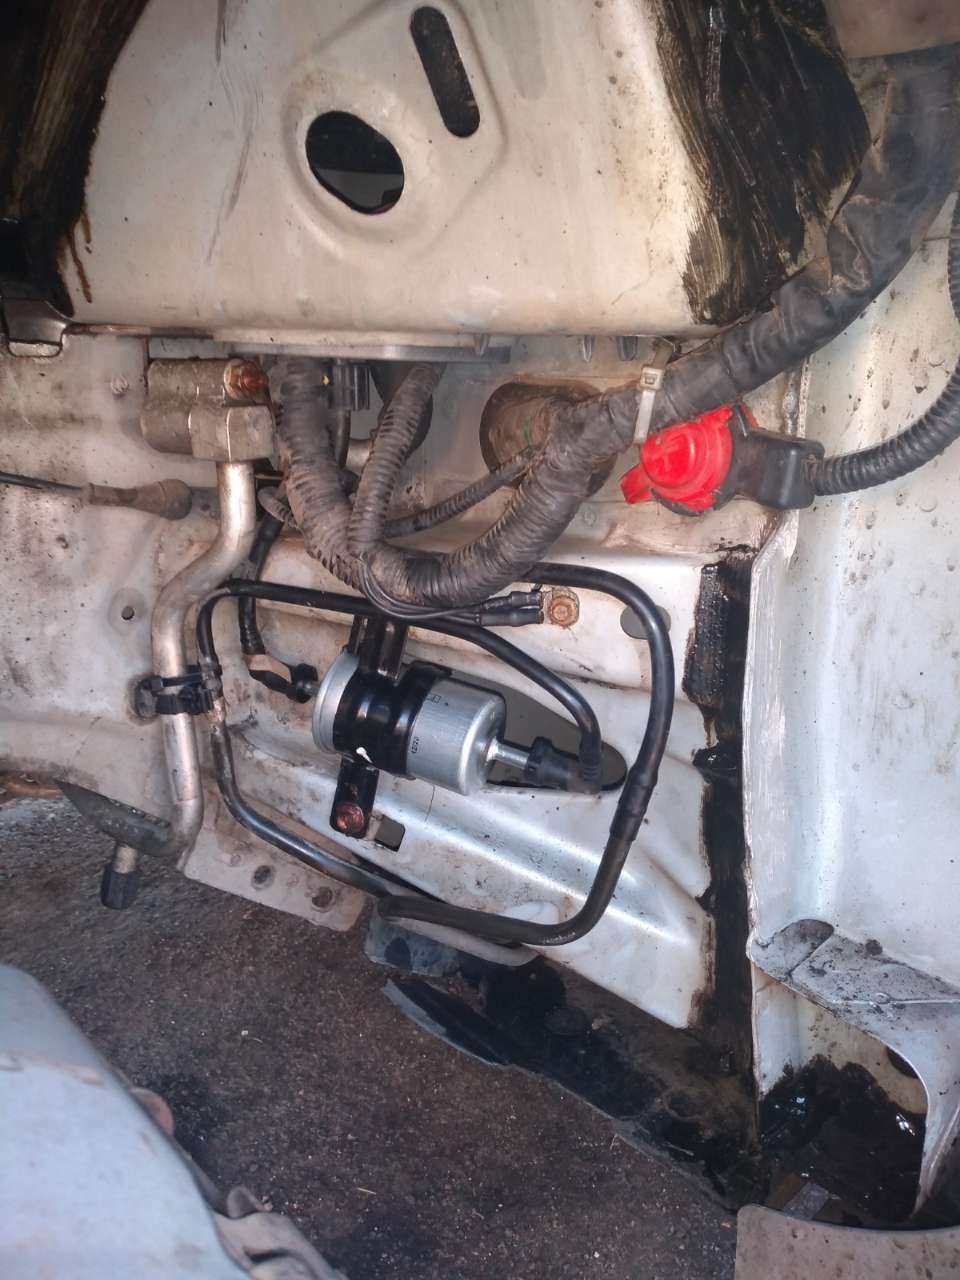
On to better things, the NS front wheel was removed for the first time which revealed fairly recent brakes had been fitted, of course these were checked that they had been installed right and I could change the fuel filter which is located in the inner arch. More cable ties and broken clips were found here allowing fuel pipes to contact each other and rub on other things. This was all sorted out, additionally where the arch liner had been missing, it had caused crap to build up in all the awkward crevices and the panel edges to start to rust.
I dealt with this by using my special formula for keeping rust at bay and cleaning the well up.
I also cleaned and protected any earth points and cleaned up, lubed, and protected any exposed threads which may need to come out in the future. All in all, the front suspension does not appear to be in bad shape despite many of the main parts being original. The back suspension suffers way more on these cars.
Then I beat back any arch lip damage that had been done by whoever forced out the original liner and bent it. The replacement liner could easily be fitted if you know how, and new fixings used to retain it.
I have no idea why the image is black and white, I was using the phone with gloves on so probably hit a setting somewhere. Note that it's jacked up on the bottom arm, don't do this unless like me you are replacing the bush. I do this to get the car up a few inches and then throw another jack under the chassis leg as it's too low to do it any other way.
I'm happy that this corner is complete at least and there's piece of mind that there's nothing untoward going on there now. The car was then put back together and served up on the frosty road, no fault appeared either.
I've ordered a small puller tool to get the passenger wiper arm off, these cars are notorious for sticking arms. They need to come off so that I can check and inevitably unblock all the drains and also change the pollen filter. There's something going on with the wiper linkage as well as it is not that secure, causing the drivers arm to contact the bonnet. I got the drivers wiper off but the passenger one is having none of it. Until I can get the scuttle cover off, i can't do sod all with it.
Onwards and upwards!


Jaguar S Bype R - An Imposter, saving a bird, and that effin supercharger!
in AutoShite
Posted
SHE'S ALIVE!2!!1! (again)
Today was spent focused on an end result of getting it back to rolling around and frequently breaking, in other words, normal. What follows is an epic post containing images of Tarmac and the sky, with shagged and mundane car parts thrown in!
I started on the OSR lower outer bush. I found it way better to remove the calipers and brake disc as I could see what was going on this time plus I needed to ease the forks apart to get washers in tight because this side had bent a bit, but did not snap.
I planned to see what I could get in there, maybe massage the bend back out with a bit of heat and pack out the gap. The washers that I was using for packers are solid lumps with plenty of surface area, they also have been sitting in the shed for 4 years since I bought them home from the end of a building project where they weren't used.
Luckily, I didn't need that many and the aim was to get 2 per side plus any other thing I could ram in there. I got out the heat but the butane was so cold that it wasn't dispersing correctly out of the torch, I left it in the sun for a bit but there was no change and I was in two minds anyway about bending on it and settled to scrap the idea and see how it went as it was.
Well that worked out alright, it needed a slim washer added on the left side just to eat up a couple of mm. Nothing broke and it went up tight.
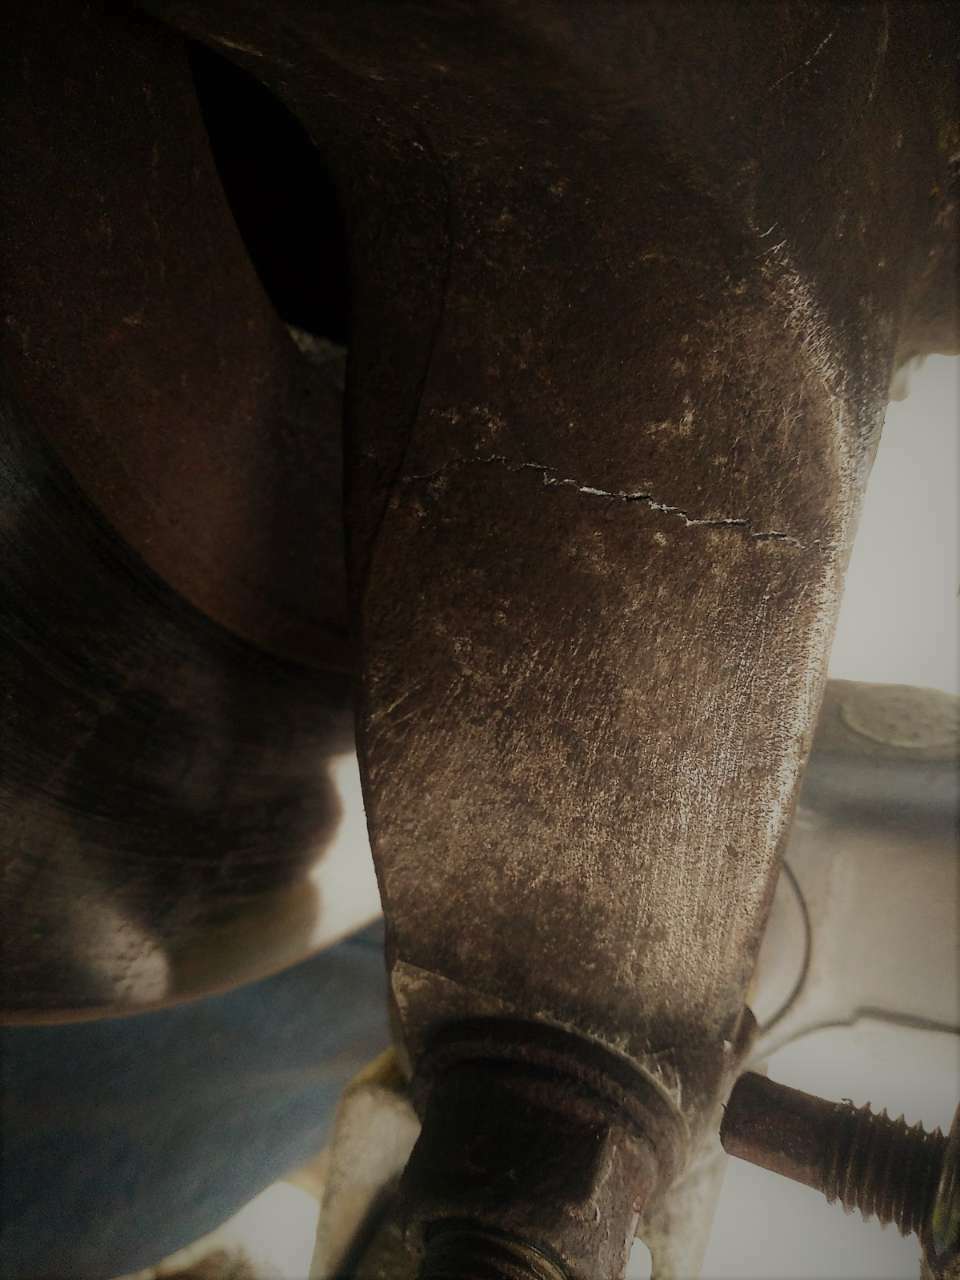
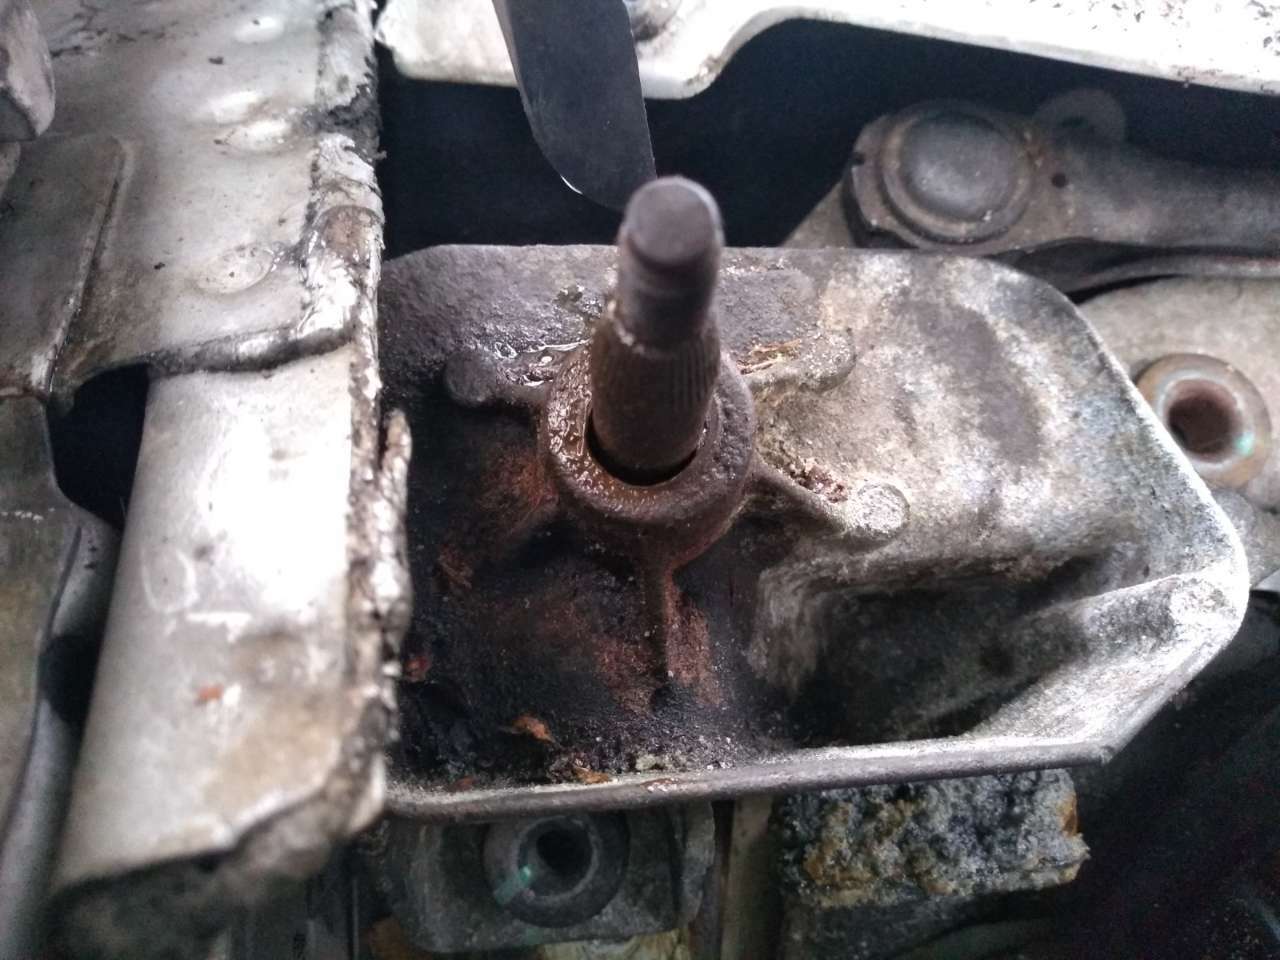
Then the NSR carrier had to be completely removed (because I busted it) and that was pretty straight forward. The top wishbone ball joint was not tight so I checked the OSR and that too was not tight, so then I had to check everything that I hadn't touched. Alarmingly, the NSR hub nut which is supposed to be 300Nm of tightness, wasn't 300Nm and undone really easily! It looks as though a bearing had been done some time ago and had been fitted by Weedy Walter.
Here's a better look at my crack:
Carrier removed:
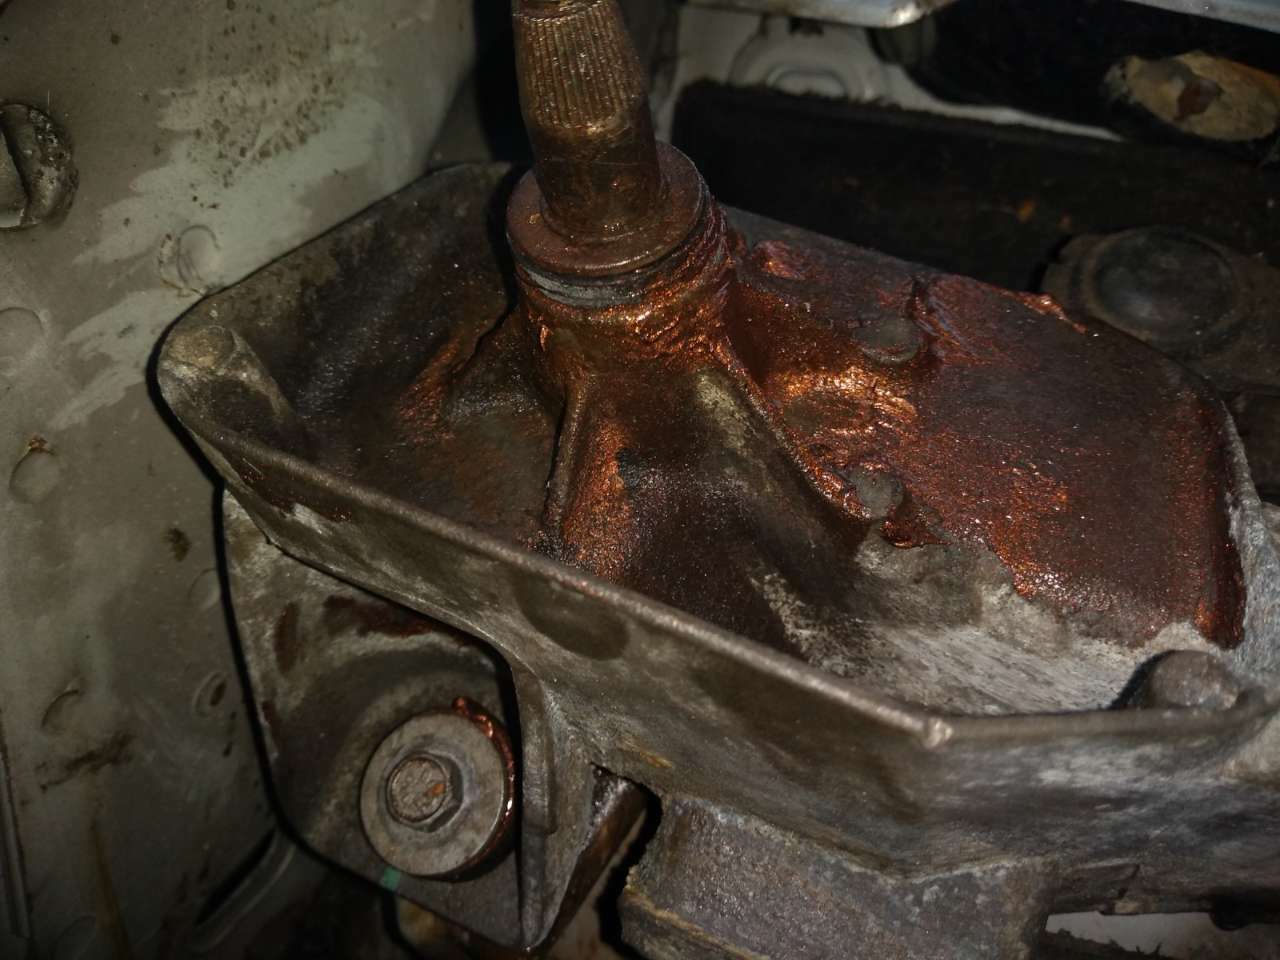
This gave me access to the half shaft which I needed to pull out so that I could change the diff seal because it was making a bit of a mess. Cue potato cam...
I know that if I hadn't broke that carrier, this wouldn't have got done for a long time!
Seal removal was ok, but the exhaust limited access with tools, I thought about removing it but it's been fudged together with a tonne of exhaust paste and is blowing on every joint. I'll be wasting my time, creating problems and it's going in the bin eventually, so I worked around it.
Look... Seals!
It's just worn out... 10 years ago.
But wait, what is this on the Jaguar original part...
FOMOCO Trademark of Ford Motor Company - Registration Number 3645991
Moving on...
It was a bit of a bugger to get in as I couldn't get a good tap around it because exhaust, so I came up with this idea:
That's from the bearing press kit and slots in lovely. It enabled semi half decent thwacks with a hammer and kept the seal parallel to the diff recess with the added bonus that I couldn't miss and thump the rubber seal by accident!
Diff was dried and sort of cleaned and the half shaft was cleaned and bunged back in. No one (that I know) wants an oily rear end!
The fill plug was removed and found to be bone dry with the magnetic end covered in dry, hard, crust. So that was removed to reveal the actual magnet and almost 400mL of the correct oil was put in. I'll let that swirl around for a bit and then change the lot.
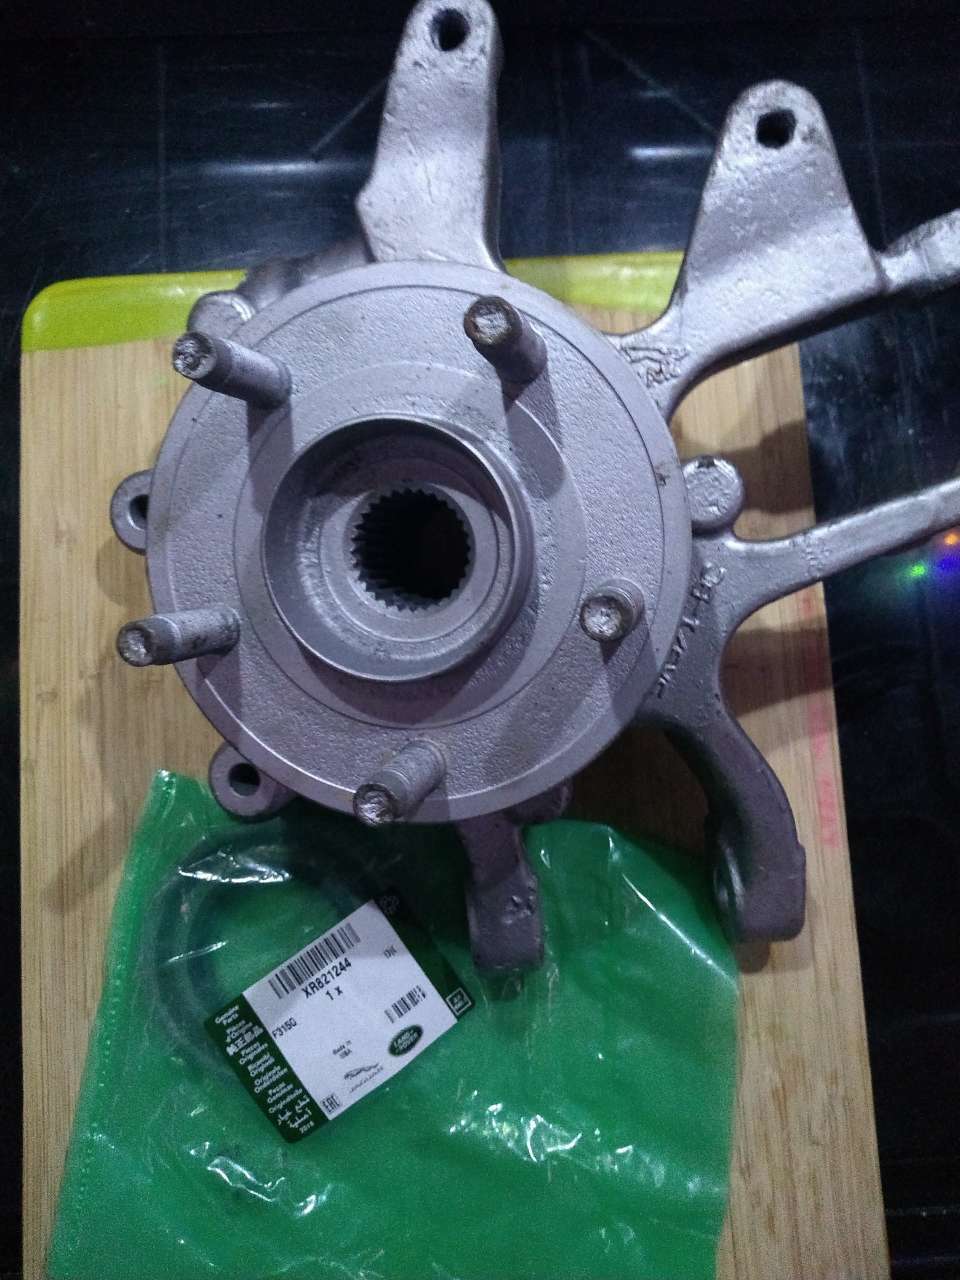
Then I could go back to doing what I was originally meant to be doing- Replacing the carrier!
First off, the replacement carrier had been painted in 'It looks like new M8 silver' and that included all the bolt holes and wheel studs so they all needed to be cleaned off as I don't want to make life hard by binding all this stuff up when I'm putting it back together!
And at long last, it went on...
The temperature by now had started to drop and the light was fading so whilst I was on the high speed train to success, I got it all back together and didn't stop to get images.
The traditional road test to go and get 20 Lambert and Butler went well, of course the car is better, it always is when you change something! If anything, it's a lot better to drive just having confidence that the back end isn't about to explode. The wheels look like they are toeing in a bit, the tie rods haven't been adjusted since it left the factory by the looks of it and I'll be getting original fit Lemforder bits on it for when I get the tyres and alignment. The tyres on it are trash so I'm not bothered how it's tracking right now, I'm just pleased that it's being a car! I Just have to live with the lingering taste of gear oil for a bit, it usually goes after a week.
Hopefully I can ease off the work on this now as I've a few quid to get together for the tyres/ alignment and exhaust which comes to about the price of a small island just off the coast of Brazil! yay!