


Crispian_J_Hotson
-
Posts
2,630 -
Joined
-
Last visited
-
Days Won
2
Reputation Activity
-

 Crispian_J_Hotson got a reaction from Conrad D. Conelrad in Jaguar S Bype R - An Imposter, saving a bird, and that effin supercharger!
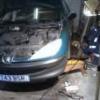
I crashed my pride and joy X200 into an animal. I was sad. It made me re-evaluate the car collection and look at options. The 635 had done zero for a few years, the Doozil Jag was doing school run stuff and now my Jag was also sad.
To put the feelers out, I put the 635 up for sale on Ebay and sold it in a couple of days. I wasn't expecting that. The price I sold it for was pretty much what I wanted because... I had my eye on something.
It was a 2002 Jaguar Green S type R. A car I had wanted for quite a while. As I looked at the images of it, things weren't right. The sills had been done but the covers were badly fitted, there were overspray marks on trim, No engine images, bits were missing and incorrect like the rear badges... It had been messed about with and I wasn't sure. Plus it was miles away. I spent a few days talking to the seller and looking at the pictures but I wasn't convinced enough to get it.
There isn't many STR's available for 4 bags, in the early body and revised interior combo I wanted, so choices were limited to er... 1, the green one. That was until, the silver one turned up.
At the other end of the spectrum, the silver one hadn't been messed with so to speak. It was original, had also had the sills done but was missing some random bits, like for example, the inner arch liner on the front there, in the image above. In fact, it hadn't been touched since 2016 as it had covered 2000 miles in that time and been Motted every year. What's the story there then? I'll tell you, because I bought it sight unseen, and then... found out.
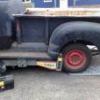
The seller was late delivering the car to his favorite Jaguar/ LR specialist who were going to deliver it, and we'll get onto them a bit later. The specialist rang from the pub on the Friday and said he had family commitments and couldn't deliver it due to it being late. I contacted the specialist on the next available day and he said that they had tried to load it and a Gearbox fault had developed. The specialist, without any permission, decided to read the codes, not tell me the codes, and look for a fix by using a part 'laying about here somewhere M8' I suggested that if he was going to do this 'out of pure generosity and to keep the sale happy for his M8', could he also change the box oil and filter whilst he was 'replacing a sensor' in it. What could go wrong? He's a specialist right? There were no further communications for 4 or 5 days and then after I contact them again, the seller said that he was waiting for parts. About a week later, I was getting a bit pissed off with the comms. The specialist was too busy to get right on it and was waiting for these parts, whatever they were- he never said, the seller had no idea what was going on and playing dumb and I certainly had no idea where my car was that I had paid for. Finally, I managed to re-secure a delivery date. It was to be delivered at my new place of employment, and I'd drive it home because it's a good car right? No. it turned up covered in webs, moss and mould with 4 squidgy tyres. But, it was home! Sort of. She was rough which is weird, because it doesn't look like that in the images. There were clues as to how long this car had been sat, mentioned above and the stale smell inside. Still, it ran ok and appeared to drive, so I taxed it and drove it about 2 miles to another site. I didn't get the excitement and mind blowing journey I had always imagined, no, it was slow and cautious. Something didn't feel right.
Now, I'll give you a few minutes to digest that lot, make hilarious assumptions and I'll return after this break!
-
 Crispian_J_Hotson got a reaction from Dave_Q in Jaguar S Bype R - An Imposter, saving a bird, and that effin supercharger!
I have been dying to see this manifold. Sure, it's just a blow, but the snapped stud and loose stud don't make sense, especially as the heat shield was correctly replaced and the fixings were pretty rotten. I suspect that the specialists would not have bothered with that and whenever someone was there, it was a long time ago.
Here is what we are looking at:
Specifically this bit...
The shiny nut I managed to put on as this stud was loose and the nut behind it rotten and solid and the other stud I could tighten. I got enough grab on them to tighten it a bit more but couldn't get it flat against the head. It did stop the EML from coming on every time I booted it though, and you see that snapped guy there? These things don't snap by themselves... or do they?
Remember that I could not really see or get anything of any worth onto these whilst they were in the car and this was all behind a nicely fitted heat shield box. My first impressions are that I can't see any major blow marks! Don't worry, it's not going to let us down...
That shiny back plate there is part of the gasket structure and it needs to come off now.
Ahh, there she is!
A blow on 3 ports too, it wasn't messing around. It's in a pretty shit state. My aim on this day was to get all the studs out of both heads. First of all we go to the one at the top right with a simple t30 socket, it came out no problem, but I could see why it wouldn't tighten-
The threads are burred over.
Next is the snapped stud. With an Aluminium head you can mig a nut onto the snapped guy and the head won't damage. Clean the snap with some brake cleaner, hold the nut with a shit spanner and mig away!
Note the use of a bit of fire blanket and this is a measure to stop any splatter going down to the valve seats through the exhaust port. Wound right out... this is easy as pie.
Up next, Mr 'I aint moving for toffee'. I really didn't want to snap this guy so tried the double nut technique, no dice. I then welded the nut on to the stud, the heat likely helping to break any corrosion...
We have a succeed!
You see there why I use the shit spanners, don't want to be burning up the good tools here.
All studs out of this head, cleanly and now they are ready to be tapped out later.
Next head...
All hand tight!
The remaining studs came out with no issues but even this manifold looked like it may have been chuffing?
I need answers. Who, what, when, and where? Why is the other manifold in such a state? Why is this one not tight? The last thing I want is to rebuild this and have the same issue so, detective hat on, and Sherlock mode- Engaged...
Evidence. The gasket on the left is date stamped 2005 and the gasket (and cover) on the right are stamped 2004 (the 2002 cover has been reused). This car was built in 2002/3 and sold new in 2003. So it's had manifold gaskets when it was 2 years old and that can only be because it was blowing. What's more, if you have a new car and it develops an issue in a limited time from the date of sale, where do you take it?
Therefore it could be suggested that a main dealer or other authorised repairer themselves carried out work on this component... and fucked it, because you know what, that manifold is warped, a simple straight edge check will show that, and so is the other one, but I bet that they didn't even take the things off to check.
You will not straighten cast iron if it is bent with an M8 stud. I can also conclude that this car has since, very close to it's beginning, had a manifold issue which means that it has been running rich and likely smoked the cats long ago which lead to the moving of the oxygen sensor, smashing out the cats, and all that bollocks they did to it in Coventry.
Luckily, I had already got hold of a replacement for this bank, existing is at the top...
Wait... What? They've changed the design? Is that because they bend? Looks like they have removed material to make it a bit 'less stressed'.
What this means is that I've had to get the other one replaced to this revised design where there are no reported problems of blows.
There are further changes which are an improvement but not as exciting and we'll have a look at this later.
Matey who's outing his early STR needs to read this post!
-
 Crispian_J_Hotson got a reaction from cbowditch in Jaguar S Bype R - An Imposter, saving a bird, and that effin supercharger!
Here, I produced a thing which compares the old exhaust manifold against the revised replacement:
The old is on the left and the new one on the right. Look at those bore sizes! I would go as far to say that this is an upgrade for the old STR!
Moving on...
Today was consumed with moar cleaning, checking, and painting mundane engine parts. There is a few. To give myself some inspiration, I decided to tackle that manky head. There will be no media blasting, chemical dipping or other such nonsense, no, this is all to be done by hand, like in ye olden days.
First we need put on our engineering hat, get that head, and to remove the corrosion, debris and other junk that we don't want. I bought some plastic scrapers for things like this but they've turned out to be just a frilly gimmick, luckily I have thousands of Stanley blades and a chisel. The excessive amount of corrosion here made things slow and the ally was burred up in places, nothing that a big, long, and flat file couldn't sort out. It's effectively been skimmed.
It's clean and it's flat, so it'll do it's job and the stud threads all got a tap run down them to remove corrosion and thread lock. Yes, I was waiting for the tap to shear in one, but it all cleared out lovely.
Next the business bit got a de-scale...
It was quite satisfying chipping away at the carbon build up.
I then turned my attention to the inlet side which was much the same as the exhaust side. After sorting that side out, I got all excited and decided to initiate the decoration sequence. This is where it's going boys...
It's a bit of a shame that once it's all squeezed back in, there won't be much to see, but I know it's there and that's what counts! Besides, when I'm doing this all again next year after bending 2 valves and spitting a head gasket out on my first track day, it'll be a lot more pleasant to take apart.
-
 Crispian_J_Hotson got a reaction from rainagain in Jaguar S Bype R - An Imposter, saving a bird, and that effin supercharger!
They say in the community that supercharger removal is the worst job in the world on this engine but let me re-assure you, it's not. In fact it's probably the easiest thing to do once all the other shite is outta the way. You may read that people are cutting out a rear bolt hole in the super charger casting and making special tools to aid removal in the future. There really is no need at all to do this. If the directions in the workshop guide are followed then removing the throttle body lower casting by it's 4 bolts which can all be accessed easily, makes the fabled hardest bolt in the world, the easiest bolt in the world to get to.
The supercharger is getting rebuilt by me once the kit turns up. It was to be sent away but then I realised that there's two parts to the service, the snout and the body. I was under the impression that the service was £300 but then later found that that was for the snout only! So to get the snout and body serviced, and a 6% pulley (smaller for moar powah) fitted, I'd be looking at a fart over £800. No.
I bought a... let's call it a kit in it's infant stages of testing, for 135£. This includes bearings, coupler and oil. My coupler, the bushy bit that connects the pulley shaft to the main veins, is original and of the spring dampered type. The replacement will be a cushioned oil filled type out of polyurethane. Mine has play but it's not excessive which is gr8, this new coupler will eliminate any sloppiness for instant charge! Downside is that it makes a noise described as marbles in a tin. Some have no noise, so I need to suck it and see really. Two bearings in this M112 supercharger cannot be changed really as they are built in during manufacture and they are submerged in oil, failure is rare.
The 6% pulley was not cheap and it will complete that component. I favoured a 10% reduction pulley but even though the casting of the snout needs to be ground down for clearance with that, this engine is problematic with heat dispersal and a 10% will produce heat that cannot be managed well by the existing cooling system set up. I am modifying the cooling slightly but, I'd rather have easily enough cooling than not enough.
The timing chains and gear needed to go next and in order to do that, the engine should be locked. The 4 cams have cut outs that align for locking bars and the Crank position sensor should be removed where a locking tool is replaced through it's hole in the block casting and into a timing plate on the flywheel at the gearbox side.
'Remove CPS' or something to that effect says the manual. Not so easy after it's been in there for 20 years. The above image was taken after the fact but note the corrosion, especially in the CPS hole. This CPS is plastic and gubbins into a stainless cap which sits a few mm from that plate in the image above. The stainless cap on mine had welded itself to the block casting. I had to destroy the sensor and then spent, and I'm not joking, over 2 hours trying to get the cap out between that plate and the block. I made tools, I swore and I was unhappy to do this.
A replacement used sensor from a very good outlet, Auto reserve, was bought for £18 and this one was sent to it's death... in pain...
The next day and not in a bit of a huff, I had to clean out the corrosion in that hole to fit the locking tool. The engine could be rotated the right way by refitting the crank bolt on spacers as to not wind it right in. I did have it 180 degrees out on the first attempt, as seen by the cams flat side pointing down but it was easy enough to sort out by now. it's a 50/50 chance if your on your own under the car!
Once locked, I had to stick a note on the dash saying it's locked. Habit. I've witnessed the alternative outcome!
Then the cams get locked using the special tools. If the engine is out of position, you can't lock it in these places. Easy peasy job to remove the tensioners which are the ratchet type, guides, and primary/secondary chains and cam chains. They are in great condition but I have new to replace them.
Once that's out of the way, the cams themselves can be removed. The whole lot gets marked up and ordered although the caps have numbers stamped and direction arrows, if I can make things easier at reassembly time, it's worth it.
The head bolts are under the cams and are not extremely tight. The manual states that the head bolts can be used 'only twice' and when refitting they should be punched to denote their second use. Yeah, so I got a set of new bolts anyways. The usual head bolt undoing pattern applies.
Heads released without a fight and were removed. As the exposed block is going to sit for a few days, any coolant was dried up and a liberal squirting of penetration oil was applied. That's all left until I get to cleaning and painting it all.
The combustion side of things showed that it had been overfuelling for a long time with glaze and carbon build up. I know what is causing this, the blow from the manifold (and now added EGR apparently).
The blows will cause a lean reading at Lambda which will cause the ECU to run it rich, when in fact, it just has a blow (or several) and it's missing combustion measures.
The next milestone is afoot, what is going on with the manifold?
-

 Crispian_J_Hotson got a reaction from Coprolalia in Jaguar S Bype R - An Imposter, saving a bird, and that effin supercharger!
Thanks for the input, forum members.
This part is tedious. I am descaling and painting all the bits that I took off and this heat is baking me. I've been at it for a couple of days now and I've thrown the towel in to escape the sun. Good opportunity to catch up as there is a bit to discuss. First off, I have realised that there is what I now call 'the daily spend' and this is for anything that I've found along the way that needs replacing. There is something- every day! This is on top of the stuff that I've already got... none of which I can fit yet.
As an example, when I removed the two tensioners (one for the ancillaries and one for the supercharger belts) and the two idle pulleys, I discovered that all their bearings sounded like someone was dragging a box across a floor.
New replacements were ordered up and only then I realised that I'd ordered a modified idler pulley for the supercharger belt. This revised pulley is for a double sided ribbed belt, not the single which I have! The reason for the modification is to cure the cold start squeal (which I had) so getting the mod wasn't so bad, but I've got a new single sided belt for the old pulley. That means that I had to order a new double sided belt.
This type of scenario was a thing, as I have the early engine and Jag have made changes for improvement along the way.
I suppose I could off set that belt and some of pulleys cost as there is a recent water pump that was loosely bolted in and weeping...
Everything else like the AC pump, alternator (which is also recent), and PS pump were in good shape.
So you see that Crank pulley in the above image? Yeah, getting that off was the next milestone to hit. She's on at 375Nm with thread lock and legend has it that it is frowned upon to a) use a locking pin to hold the engine and 2) rotate the engine backwards.
Something like this:
The main issue I had was that apart from it being effing tight, the special tool that I got was for the V8. Great right? No...
The supercharged has the extended crank pulley so the tool is now not long enough to reach into the pulley, sit flush, and bolt up. That is unless you have a bearing press set like me!
All that was needed was one of the sleeves to go over the business end of the tool and some longer threaded bolts made up, like those shown above. It worked... just...
I've used my bearing press set a lot more for things which aren't bearings.
To add extra challenge, the only 24mm socket I had, split on me a long time ago... something to do with a 3 meter scaffold tube, but it refuses to die and completed this task without fail too.
Around the same time, before or after this job... can't remember... I had to remove the EGR. This bit is one of the scary parts people don't like but I had half a chance as in the vehicle history, this part had been replaced on 2.2.2018 as there is a bill for 1200£ for that and some wiring repairs. Those bolts should come out then?
It's a bit of a terror as you cannot see what you are doing and every tool is too long or too short, however, there is always more than one way to skin a cat, but it's all blind work. Fortunately, I have been in this situation many times ( mainly working for Citroen) and it doesn't really phase me, it just needs to be done.
So the bolts, and studs on the exhaust, did come out but there was a fight. The fight was only because of the fucktards that put them in. Have a look...
The also forgot* to bolt down the throttle body base casting, as seen by the missing bolt in the center of the below image (there's one missing on the other side too):
They wrecked the EGR flexible pipe by bending on it and putting a hole in it...
And that's a 200£ pipe believe it or not. Let's have a look at the wiring repairs whilst we are here eh?
Nice! Let me explain what's going on here, this is the supply and comms to the throttle body control. There is one green factory wire, connected to a big white, different gauge wire, connected to something in a black sleeve, connected to the rest of the original green wire. Along the way, they have torn off an earth connection which is supposed to connect to the head, and that's that fuzzy bit of bare cable just poking out of the sheathing. "Carz fixed sir... £twelve hunnit pls"!
Shockingly*, this was carried out by a Cat specialist in Coventry and that follows along the lines of all the shit work this car has had done to it, and the area from where I got it from. You can't argue with the facts.
That's not all though, it gets much more eye opening later.
-
Crispian_J_Hotson got a reaction from cbowditch in Jaguar S Bype R - An Imposter, saving a bird, and that effin supercharger!
I have been dying to see this manifold. Sure, it's just a blow, but the snapped stud and loose stud don't make sense, especially as the heat shield was correctly replaced and the fixings were pretty rotten. I suspect that the specialists would not have bothered with that and whenever someone was there, it was a long time ago.
Here is what we are looking at:
Specifically this bit...
The shiny nut I managed to put on as this stud was loose and the nut behind it rotten and solid and the other stud I could tighten. I got enough grab on them to tighten it a bit more but couldn't get it flat against the head. It did stop the EML from coming on every time I booted it though, and you see that snapped guy there? These things don't snap by themselves... or do they?
Remember that I could not really see or get anything of any worth onto these whilst they were in the car and this was all behind a nicely fitted heat shield box. My first impressions are that I can't see any major blow marks! Don't worry, it's not going to let us down...
That shiny back plate there is part of the gasket structure and it needs to come off now.
Ahh, there she is!
A blow on 3 ports too, it wasn't messing around. It's in a pretty shit state. My aim on this day was to get all the studs out of both heads. First of all we go to the one at the top right with a simple t30 socket, it came out no problem, but I could see why it wouldn't tighten-
The threads are burred over.
Next is the snapped stud. With an Aluminium head you can mig a nut onto the snapped guy and the head won't damage. Clean the snap with some brake cleaner, hold the nut with a shit spanner and mig away!
Note the use of a bit of fire blanket and this is a measure to stop any splatter going down to the valve seats through the exhaust port. Wound right out... this is easy as pie.
Up next, Mr 'I aint moving for toffee'. I really didn't want to snap this guy so tried the double nut technique, no dice. I then welded the nut on to the stud, the heat likely helping to break any corrosion...
We have a succeed!
You see there why I use the shit spanners, don't want to be burning up the good tools here.
All studs out of this head, cleanly and now they are ready to be tapped out later.
Next head...
All hand tight!
The remaining studs came out with no issues but even this manifold looked like it may have been chuffing?
I need answers. Who, what, when, and where? Why is the other manifold in such a state? Why is this one not tight? The last thing I want is to rebuild this and have the same issue so, detective hat on, and Sherlock mode- Engaged...
Evidence. The gasket on the left is date stamped 2005 and the gasket (and cover) on the right are stamped 2004 (the 2002 cover has been reused). This car was built in 2002/3 and sold new in 2003. So it's had manifold gaskets when it was 2 years old and that can only be because it was blowing. What's more, if you have a new car and it develops an issue in a limited time from the date of sale, where do you take it?
Therefore it could be suggested that a main dealer or other authorised repairer themselves carried out work on this component... and fucked it, because you know what, that manifold is warped, a simple straight edge check will show that, and so is the other one, but I bet that they didn't even take the things off to check.
You will not straighten cast iron if it is bent with an M8 stud. I can also conclude that this car has since, very close to it's beginning, had a manifold issue which means that it has been running rich and likely smoked the cats long ago which lead to the moving of the oxygen sensor, smashing out the cats, and all that bollocks they did to it in Coventry.
Luckily, I had already got hold of a replacement for this bank, existing is at the top...
Wait... What? They've changed the design? Is that because they bend? Looks like they have removed material to make it a bit 'less stressed'.
What this means is that I've had to get the other one replaced to this revised design where there are no reported problems of blows.
There are further changes which are an improvement but not as exciting and we'll have a look at this later.
Matey who's outing his early STR needs to read this post!
-
Crispian_J_Hotson got a reaction from rainagain in Jaguar S Bype R - An Imposter, saving a bird, and that effin supercharger!
Thanks for the input, forum members.
This part is tedious. I am descaling and painting all the bits that I took off and this heat is baking me. I've been at it for a couple of days now and I've thrown the towel in to escape the sun. Good opportunity to catch up as there is a bit to discuss. First off, I have realised that there is what I now call 'the daily spend' and this is for anything that I've found along the way that needs replacing. There is something- every day! This is on top of the stuff that I've already got... none of which I can fit yet.
As an example, when I removed the two tensioners (one for the ancillaries and one for the supercharger belts) and the two idle pulleys, I discovered that all their bearings sounded like someone was dragging a box across a floor.
New replacements were ordered up and only then I realised that I'd ordered a modified idler pulley for the supercharger belt. This revised pulley is for a double sided ribbed belt, not the single which I have! The reason for the modification is to cure the cold start squeal (which I had) so getting the mod wasn't so bad, but I've got a new single sided belt for the old pulley. That means that I had to order a new double sided belt.
This type of scenario was a thing, as I have the early engine and Jag have made changes for improvement along the way.
I suppose I could off set that belt and some of pulleys cost as there is a recent water pump that was loosely bolted in and weeping...
Everything else like the AC pump, alternator (which is also recent), and PS pump were in good shape.
So you see that Crank pulley in the above image? Yeah, getting that off was the next milestone to hit. She's on at 375Nm with thread lock and legend has it that it is frowned upon to a) use a locking pin to hold the engine and 2) rotate the engine backwards.
Something like this:
The main issue I had was that apart from it being effing tight, the special tool that I got was for the V8. Great right? No...
The supercharged has the extended crank pulley so the tool is now not long enough to reach into the pulley, sit flush, and bolt up. That is unless you have a bearing press set like me!
All that was needed was one of the sleeves to go over the business end of the tool and some longer threaded bolts made up, like those shown above. It worked... just...
I've used my bearing press set a lot more for things which aren't bearings.
To add extra challenge, the only 24mm socket I had, split on me a long time ago... something to do with a 3 meter scaffold tube, but it refuses to die and completed this task without fail too.
Around the same time, before or after this job... can't remember... I had to remove the EGR. This bit is one of the scary parts people don't like but I had half a chance as in the vehicle history, this part had been replaced on 2.2.2018 as there is a bill for 1200£ for that and some wiring repairs. Those bolts should come out then?
It's a bit of a terror as you cannot see what you are doing and every tool is too long or too short, however, there is always more than one way to skin a cat, but it's all blind work. Fortunately, I have been in this situation many times ( mainly working for Citroen) and it doesn't really phase me, it just needs to be done.
So the bolts, and studs on the exhaust, did come out but there was a fight. The fight was only because of the fucktards that put them in. Have a look...
The also forgot* to bolt down the throttle body base casting, as seen by the missing bolt in the center of the below image (there's one missing on the other side too):
They wrecked the EGR flexible pipe by bending on it and putting a hole in it...
And that's a 200£ pipe believe it or not. Let's have a look at the wiring repairs whilst we are here eh?
Nice! Let me explain what's going on here, this is the supply and comms to the throttle body control. There is one green factory wire, connected to a big white, different gauge wire, connected to something in a black sleeve, connected to the rest of the original green wire. Along the way, they have torn off an earth connection which is supposed to connect to the head, and that's that fuzzy bit of bare cable just poking out of the sheathing. "Carz fixed sir... £twelve hunnit pls"!
Shockingly*, this was carried out by a Cat specialist in Coventry and that follows along the lines of all the shit work this car has had done to it, and the area from where I got it from. You can't argue with the facts.
That's not all though, it gets much more eye opening later.
-
 Crispian_J_Hotson got a reaction from RichardK in Jaguar S Bype R - An Imposter, saving a bird, and that effin supercharger!
I have been dying to see this manifold. Sure, it's just a blow, but the snapped stud and loose stud don't make sense, especially as the heat shield was correctly replaced and the fixings were pretty rotten. I suspect that the specialists would not have bothered with that and whenever someone was there, it was a long time ago.
Here is what we are looking at:
Specifically this bit...
The shiny nut I managed to put on as this stud was loose and the nut behind it rotten and solid and the other stud I could tighten. I got enough grab on them to tighten it a bit more but couldn't get it flat against the head. It did stop the EML from coming on every time I booted it though, and you see that snapped guy there? These things don't snap by themselves... or do they?
Remember that I could not really see or get anything of any worth onto these whilst they were in the car and this was all behind a nicely fitted heat shield box. My first impressions are that I can't see any major blow marks! Don't worry, it's not going to let us down...
That shiny back plate there is part of the gasket structure and it needs to come off now.
Ahh, there she is!
A blow on 3 ports too, it wasn't messing around. It's in a pretty shit state. My aim on this day was to get all the studs out of both heads. First of all we go to the one at the top right with a simple t30 socket, it came out no problem, but I could see why it wouldn't tighten-
The threads are burred over.
Next is the snapped stud. With an Aluminium head you can mig a nut onto the snapped guy and the head won't damage. Clean the snap with some brake cleaner, hold the nut with a shit spanner and mig away!
Note the use of a bit of fire blanket and this is a measure to stop any splatter going down to the valve seats through the exhaust port. Wound right out... this is easy as pie.
Up next, Mr 'I aint moving for toffee'. I really didn't want to snap this guy so tried the double nut technique, no dice. I then welded the nut on to the stud, the heat likely helping to break any corrosion...
We have a succeed!
You see there why I use the shit spanners, don't want to be burning up the good tools here.
All studs out of this head, cleanly and now they are ready to be tapped out later.
Next head...
All hand tight!
The remaining studs came out with no issues but even this manifold looked like it may have been chuffing?
I need answers. Who, what, when, and where? Why is the other manifold in such a state? Why is this one not tight? The last thing I want is to rebuild this and have the same issue so, detective hat on, and Sherlock mode- Engaged...
Evidence. The gasket on the left is date stamped 2005 and the gasket (and cover) on the right are stamped 2004 (the 2002 cover has been reused). This car was built in 2002/3 and sold new in 2003. So it's had manifold gaskets when it was 2 years old and that can only be because it was blowing. What's more, if you have a new car and it develops an issue in a limited time from the date of sale, where do you take it?
Therefore it could be suggested that a main dealer or other authorised repairer themselves carried out work on this component... and fucked it, because you know what, that manifold is warped, a simple straight edge check will show that, and so is the other one, but I bet that they didn't even take the things off to check.
You will not straighten cast iron if it is bent with an M8 stud. I can also conclude that this car has since, very close to it's beginning, had a manifold issue which means that it has been running rich and likely smoked the cats long ago which lead to the moving of the oxygen sensor, smashing out the cats, and all that bollocks they did to it in Coventry.
Luckily, I had already got hold of a replacement for this bank, existing is at the top...
Wait... What? They've changed the design? Is that because they bend? Looks like they have removed material to make it a bit 'less stressed'.
What this means is that I've had to get the other one replaced to this revised design where there are no reported problems of blows.
There are further changes which are an improvement but not as exciting and we'll have a look at this later.
Matey who's outing his early STR needs to read this post!
-
 Crispian_J_Hotson got a reaction from mercedade in Jaguar S Bype R - An Imposter, saving a bird, and that effin supercharger!
They say in the community that supercharger removal is the worst job in the world on this engine but let me re-assure you, it's not. In fact it's probably the easiest thing to do once all the other shite is outta the way. You may read that people are cutting out a rear bolt hole in the super charger casting and making special tools to aid removal in the future. There really is no need at all to do this. If the directions in the workshop guide are followed then removing the throttle body lower casting by it's 4 bolts which can all be accessed easily, makes the fabled hardest bolt in the world, the easiest bolt in the world to get to.
The supercharger is getting rebuilt by me once the kit turns up. It was to be sent away but then I realised that there's two parts to the service, the snout and the body. I was under the impression that the service was £300 but then later found that that was for the snout only! So to get the snout and body serviced, and a 6% pulley (smaller for moar powah) fitted, I'd be looking at a fart over £800. No.
I bought a... let's call it a kit in it's infant stages of testing, for 135£. This includes bearings, coupler and oil. My coupler, the bushy bit that connects the pulley shaft to the main veins, is original and of the spring dampered type. The replacement will be a cushioned oil filled type out of polyurethane. Mine has play but it's not excessive which is gr8, this new coupler will eliminate any sloppiness for instant charge! Downside is that it makes a noise described as marbles in a tin. Some have no noise, so I need to suck it and see really. Two bearings in this M112 supercharger cannot be changed really as they are built in during manufacture and they are submerged in oil, failure is rare.
The 6% pulley was not cheap and it will complete that component. I favoured a 10% reduction pulley but even though the casting of the snout needs to be ground down for clearance with that, this engine is problematic with heat dispersal and a 10% will produce heat that cannot be managed well by the existing cooling system set up. I am modifying the cooling slightly but, I'd rather have easily enough cooling than not enough.
The timing chains and gear needed to go next and in order to do that, the engine should be locked. The 4 cams have cut outs that align for locking bars and the Crank position sensor should be removed where a locking tool is replaced through it's hole in the block casting and into a timing plate on the flywheel at the gearbox side.
'Remove CPS' or something to that effect says the manual. Not so easy after it's been in there for 20 years. The above image was taken after the fact but note the corrosion, especially in the CPS hole. This CPS is plastic and gubbins into a stainless cap which sits a few mm from that plate in the image above. The stainless cap on mine had welded itself to the block casting. I had to destroy the sensor and then spent, and I'm not joking, over 2 hours trying to get the cap out between that plate and the block. I made tools, I swore and I was unhappy to do this.
A replacement used sensor from a very good outlet, Auto reserve, was bought for £18 and this one was sent to it's death... in pain...
The next day and not in a bit of a huff, I had to clean out the corrosion in that hole to fit the locking tool. The engine could be rotated the right way by refitting the crank bolt on spacers as to not wind it right in. I did have it 180 degrees out on the first attempt, as seen by the cams flat side pointing down but it was easy enough to sort out by now. it's a 50/50 chance if your on your own under the car!
Once locked, I had to stick a note on the dash saying it's locked. Habit. I've witnessed the alternative outcome!
Then the cams get locked using the special tools. If the engine is out of position, you can't lock it in these places. Easy peasy job to remove the tensioners which are the ratchet type, guides, and primary/secondary chains and cam chains. They are in great condition but I have new to replace them.
Once that's out of the way, the cams themselves can be removed. The whole lot gets marked up and ordered although the caps have numbers stamped and direction arrows, if I can make things easier at reassembly time, it's worth it.
The head bolts are under the cams and are not extremely tight. The manual states that the head bolts can be used 'only twice' and when refitting they should be punched to denote their second use. Yeah, so I got a set of new bolts anyways. The usual head bolt undoing pattern applies.
Heads released without a fight and were removed. As the exposed block is going to sit for a few days, any coolant was dried up and a liberal squirting of penetration oil was applied. That's all left until I get to cleaning and painting it all.
The combustion side of things showed that it had been overfuelling for a long time with glaze and carbon build up. I know what is causing this, the blow from the manifold (and now added EGR apparently).
The blows will cause a lean reading at Lambda which will cause the ECU to run it rich, when in fact, it just has a blow (or several) and it's missing combustion measures.
The next milestone is afoot, what is going on with the manifold?
-
 Crispian_J_Hotson got a reaction from Surface Rust in Jaguar S Bype R - An Imposter, saving a bird, and that effin supercharger!
I have been dying to see this manifold. Sure, it's just a blow, but the snapped stud and loose stud don't make sense, especially as the heat shield was correctly replaced and the fixings were pretty rotten. I suspect that the specialists would not have bothered with that and whenever someone was there, it was a long time ago.
Here is what we are looking at:
Specifically this bit...
The shiny nut I managed to put on as this stud was loose and the nut behind it rotten and solid and the other stud I could tighten. I got enough grab on them to tighten it a bit more but couldn't get it flat against the head. It did stop the EML from coming on every time I booted it though, and you see that snapped guy there? These things don't snap by themselves... or do they?
Remember that I could not really see or get anything of any worth onto these whilst they were in the car and this was all behind a nicely fitted heat shield box. My first impressions are that I can't see any major blow marks! Don't worry, it's not going to let us down...
That shiny back plate there is part of the gasket structure and it needs to come off now.
Ahh, there she is!
A blow on 3 ports too, it wasn't messing around. It's in a pretty shit state. My aim on this day was to get all the studs out of both heads. First of all we go to the one at the top right with a simple t30 socket, it came out no problem, but I could see why it wouldn't tighten-
The threads are burred over.
Next is the snapped stud. With an Aluminium head you can mig a nut onto the snapped guy and the head won't damage. Clean the snap with some brake cleaner, hold the nut with a shit spanner and mig away!
Note the use of a bit of fire blanket and this is a measure to stop any splatter going down to the valve seats through the exhaust port. Wound right out... this is easy as pie.
Up next, Mr 'I aint moving for toffee'. I really didn't want to snap this guy so tried the double nut technique, no dice. I then welded the nut on to the stud, the heat likely helping to break any corrosion...
We have a succeed!
You see there why I use the shit spanners, don't want to be burning up the good tools here.
All studs out of this head, cleanly and now they are ready to be tapped out later.
Next head...
All hand tight!
The remaining studs came out with no issues but even this manifold looked like it may have been chuffing?
I need answers. Who, what, when, and where? Why is the other manifold in such a state? Why is this one not tight? The last thing I want is to rebuild this and have the same issue so, detective hat on, and Sherlock mode- Engaged...
Evidence. The gasket on the left is date stamped 2005 and the gasket (and cover) on the right are stamped 2004 (the 2002 cover has been reused). This car was built in 2002/3 and sold new in 2003. So it's had manifold gaskets when it was 2 years old and that can only be because it was blowing. What's more, if you have a new car and it develops an issue in a limited time from the date of sale, where do you take it?
Therefore it could be suggested that a main dealer or other authorised repairer themselves carried out work on this component... and fucked it, because you know what, that manifold is warped, a simple straight edge check will show that, and so is the other one, but I bet that they didn't even take the things off to check.
You will not straighten cast iron if it is bent with an M8 stud. I can also conclude that this car has since, very close to it's beginning, had a manifold issue which means that it has been running rich and likely smoked the cats long ago which lead to the moving of the oxygen sensor, smashing out the cats, and all that bollocks they did to it in Coventry.
Luckily, I had already got hold of a replacement for this bank, existing is at the top...
Wait... What? They've changed the design? Is that because they bend? Looks like they have removed material to make it a bit 'less stressed'.
What this means is that I've had to get the other one replaced to this revised design where there are no reported problems of blows.
There are further changes which are an improvement but not as exciting and we'll have a look at this later.
Matey who's outing his early STR needs to read this post!
-
Crispian_J_Hotson got a reaction from RichardK in Jaguar S Bype R - An Imposter, saving a bird, and that effin supercharger!
Thanks for the input, forum members.
This part is tedious. I am descaling and painting all the bits that I took off and this heat is baking me. I've been at it for a couple of days now and I've thrown the towel in to escape the sun. Good opportunity to catch up as there is a bit to discuss. First off, I have realised that there is what I now call 'the daily spend' and this is for anything that I've found along the way that needs replacing. There is something- every day! This is on top of the stuff that I've already got... none of which I can fit yet.
As an example, when I removed the two tensioners (one for the ancillaries and one for the supercharger belts) and the two idle pulleys, I discovered that all their bearings sounded like someone was dragging a box across a floor.
New replacements were ordered up and only then I realised that I'd ordered a modified idler pulley for the supercharger belt. This revised pulley is for a double sided ribbed belt, not the single which I have! The reason for the modification is to cure the cold start squeal (which I had) so getting the mod wasn't so bad, but I've got a new single sided belt for the old pulley. That means that I had to order a new double sided belt.
This type of scenario was a thing, as I have the early engine and Jag have made changes for improvement along the way.
I suppose I could off set that belt and some of pulleys cost as there is a recent water pump that was loosely bolted in and weeping...
Everything else like the AC pump, alternator (which is also recent), and PS pump were in good shape.
So you see that Crank pulley in the above image? Yeah, getting that off was the next milestone to hit. She's on at 375Nm with thread lock and legend has it that it is frowned upon to a) use a locking pin to hold the engine and 2) rotate the engine backwards.
Something like this:
The main issue I had was that apart from it being effing tight, the special tool that I got was for the V8. Great right? No...
The supercharged has the extended crank pulley so the tool is now not long enough to reach into the pulley, sit flush, and bolt up. That is unless you have a bearing press set like me!
All that was needed was one of the sleeves to go over the business end of the tool and some longer threaded bolts made up, like those shown above. It worked... just...
I've used my bearing press set a lot more for things which aren't bearings.
To add extra challenge, the only 24mm socket I had, split on me a long time ago... something to do with a 3 meter scaffold tube, but it refuses to die and completed this task without fail too.
Around the same time, before or after this job... can't remember... I had to remove the EGR. This bit is one of the scary parts people don't like but I had half a chance as in the vehicle history, this part had been replaced on 2.2.2018 as there is a bill for 1200£ for that and some wiring repairs. Those bolts should come out then?
It's a bit of a terror as you cannot see what you are doing and every tool is too long or too short, however, there is always more than one way to skin a cat, but it's all blind work. Fortunately, I have been in this situation many times ( mainly working for Citroen) and it doesn't really phase me, it just needs to be done.
So the bolts, and studs on the exhaust, did come out but there was a fight. The fight was only because of the fucktards that put them in. Have a look...
The also forgot* to bolt down the throttle body base casting, as seen by the missing bolt in the center of the below image (there's one missing on the other side too):
They wrecked the EGR flexible pipe by bending on it and putting a hole in it...
And that's a 200£ pipe believe it or not. Let's have a look at the wiring repairs whilst we are here eh?
Nice! Let me explain what's going on here, this is the supply and comms to the throttle body control. There is one green factory wire, connected to a big white, different gauge wire, connected to something in a black sleeve, connected to the rest of the original green wire. Along the way, they have torn off an earth connection which is supposed to connect to the head, and that's that fuzzy bit of bare cable just poking out of the sheathing. "Carz fixed sir... £twelve hunnit pls"!
Shockingly*, this was carried out by a Cat specialist in Coventry and that follows along the lines of all the shit work this car has had done to it, and the area from where I got it from. You can't argue with the facts.
That's not all though, it gets much more eye opening later.
-
 Crispian_J_Hotson got a reaction from Datsuncog in Jaguar S Bype R - An Imposter, saving a bird, and that effin supercharger!
I have been dying to see this manifold. Sure, it's just a blow, but the snapped stud and loose stud don't make sense, especially as the heat shield was correctly replaced and the fixings were pretty rotten. I suspect that the specialists would not have bothered with that and whenever someone was there, it was a long time ago.
Here is what we are looking at:
Specifically this bit...
The shiny nut I managed to put on as this stud was loose and the nut behind it rotten and solid and the other stud I could tighten. I got enough grab on them to tighten it a bit more but couldn't get it flat against the head. It did stop the EML from coming on every time I booted it though, and you see that snapped guy there? These things don't snap by themselves... or do they?
Remember that I could not really see or get anything of any worth onto these whilst they were in the car and this was all behind a nicely fitted heat shield box. My first impressions are that I can't see any major blow marks! Don't worry, it's not going to let us down...
That shiny back plate there is part of the gasket structure and it needs to come off now.
Ahh, there she is!
A blow on 3 ports too, it wasn't messing around. It's in a pretty shit state. My aim on this day was to get all the studs out of both heads. First of all we go to the one at the top right with a simple t30 socket, it came out no problem, but I could see why it wouldn't tighten-
The threads are burred over.
Next is the snapped stud. With an Aluminium head you can mig a nut onto the snapped guy and the head won't damage. Clean the snap with some brake cleaner, hold the nut with a shit spanner and mig away!
Note the use of a bit of fire blanket and this is a measure to stop any splatter going down to the valve seats through the exhaust port. Wound right out... this is easy as pie.
Up next, Mr 'I aint moving for toffee'. I really didn't want to snap this guy so tried the double nut technique, no dice. I then welded the nut on to the stud, the heat likely helping to break any corrosion...
We have a succeed!
You see there why I use the shit spanners, don't want to be burning up the good tools here.
All studs out of this head, cleanly and now they are ready to be tapped out later.
Next head...
All hand tight!
The remaining studs came out with no issues but even this manifold looked like it may have been chuffing?
I need answers. Who, what, when, and where? Why is the other manifold in such a state? Why is this one not tight? The last thing I want is to rebuild this and have the same issue so, detective hat on, and Sherlock mode- Engaged...
Evidence. The gasket on the left is date stamped 2005 and the gasket (and cover) on the right are stamped 2004 (the 2002 cover has been reused). This car was built in 2002/3 and sold new in 2003. So it's had manifold gaskets when it was 2 years old and that can only be because it was blowing. What's more, if you have a new car and it develops an issue in a limited time from the date of sale, where do you take it?
Therefore it could be suggested that a main dealer or other authorised repairer themselves carried out work on this component... and fucked it, because you know what, that manifold is warped, a simple straight edge check will show that, and so is the other one, but I bet that they didn't even take the things off to check.
You will not straighten cast iron if it is bent with an M8 stud. I can also conclude that this car has since, very close to it's beginning, had a manifold issue which means that it has been running rich and likely smoked the cats long ago which lead to the moving of the oxygen sensor, smashing out the cats, and all that bollocks they did to it in Coventry.
Luckily, I had already got hold of a replacement for this bank, existing is at the top...
Wait... What? They've changed the design? Is that because they bend? Looks like they have removed material to make it a bit 'less stressed'.
What this means is that I've had to get the other one replaced to this revised design where there are no reported problems of blows.
There are further changes which are an improvement but not as exciting and we'll have a look at this later.
Matey who's outing his early STR needs to read this post!
-
 Crispian_J_Hotson got a reaction from JMotor in Jaguar S Bype R - An Imposter, saving a bird, and that effin supercharger!
I have been dying to see this manifold. Sure, it's just a blow, but the snapped stud and loose stud don't make sense, especially as the heat shield was correctly replaced and the fixings were pretty rotten. I suspect that the specialists would not have bothered with that and whenever someone was there, it was a long time ago.
Here is what we are looking at:
Specifically this bit...
The shiny nut I managed to put on as this stud was loose and the nut behind it rotten and solid and the other stud I could tighten. I got enough grab on them to tighten it a bit more but couldn't get it flat against the head. It did stop the EML from coming on every time I booted it though, and you see that snapped guy there? These things don't snap by themselves... or do they?
Remember that I could not really see or get anything of any worth onto these whilst they were in the car and this was all behind a nicely fitted heat shield box. My first impressions are that I can't see any major blow marks! Don't worry, it's not going to let us down...
That shiny back plate there is part of the gasket structure and it needs to come off now.
Ahh, there she is!
A blow on 3 ports too, it wasn't messing around. It's in a pretty shit state. My aim on this day was to get all the studs out of both heads. First of all we go to the one at the top right with a simple t30 socket, it came out no problem, but I could see why it wouldn't tighten-
The threads are burred over.
Next is the snapped stud. With an Aluminium head you can mig a nut onto the snapped guy and the head won't damage. Clean the snap with some brake cleaner, hold the nut with a shit spanner and mig away!
Note the use of a bit of fire blanket and this is a measure to stop any splatter going down to the valve seats through the exhaust port. Wound right out... this is easy as pie.
Up next, Mr 'I aint moving for toffee'. I really didn't want to snap this guy so tried the double nut technique, no dice. I then welded the nut on to the stud, the heat likely helping to break any corrosion...
We have a succeed!
You see there why I use the shit spanners, don't want to be burning up the good tools here.
All studs out of this head, cleanly and now they are ready to be tapped out later.
Next head...
All hand tight!
The remaining studs came out with no issues but even this manifold looked like it may have been chuffing?
I need answers. Who, what, when, and where? Why is the other manifold in such a state? Why is this one not tight? The last thing I want is to rebuild this and have the same issue so, detective hat on, and Sherlock mode- Engaged...
Evidence. The gasket on the left is date stamped 2005 and the gasket (and cover) on the right are stamped 2004 (the 2002 cover has been reused). This car was built in 2002/3 and sold new in 2003. So it's had manifold gaskets when it was 2 years old and that can only be because it was blowing. What's more, if you have a new car and it develops an issue in a limited time from the date of sale, where do you take it?
Therefore it could be suggested that a main dealer or other authorised repairer themselves carried out work on this component... and fucked it, because you know what, that manifold is warped, a simple straight edge check will show that, and so is the other one, but I bet that they didn't even take the things off to check.
You will not straighten cast iron if it is bent with an M8 stud. I can also conclude that this car has since, very close to it's beginning, had a manifold issue which means that it has been running rich and likely smoked the cats long ago which lead to the moving of the oxygen sensor, smashing out the cats, and all that bollocks they did to it in Coventry.
Luckily, I had already got hold of a replacement for this bank, existing is at the top...
Wait... What? They've changed the design? Is that because they bend? Looks like they have removed material to make it a bit 'less stressed'.
What this means is that I've had to get the other one replaced to this revised design where there are no reported problems of blows.
There are further changes which are an improvement but not as exciting and we'll have a look at this later.
Matey who's outing his early STR needs to read this post!
-
 Crispian_J_Hotson got a reaction from CreepingJesus in Jaguar S Bype R - An Imposter, saving a bird, and that effin supercharger!
They say in the community that supercharger removal is the worst job in the world on this engine but let me re-assure you, it's not. In fact it's probably the easiest thing to do once all the other shite is outta the way. You may read that people are cutting out a rear bolt hole in the super charger casting and making special tools to aid removal in the future. There really is no need at all to do this. If the directions in the workshop guide are followed then removing the throttle body lower casting by it's 4 bolts which can all be accessed easily, makes the fabled hardest bolt in the world, the easiest bolt in the world to get to.
The supercharger is getting rebuilt by me once the kit turns up. It was to be sent away but then I realised that there's two parts to the service, the snout and the body. I was under the impression that the service was £300 but then later found that that was for the snout only! So to get the snout and body serviced, and a 6% pulley (smaller for moar powah) fitted, I'd be looking at a fart over £800. No.
I bought a... let's call it a kit in it's infant stages of testing, for 135£. This includes bearings, coupler and oil. My coupler, the bushy bit that connects the pulley shaft to the main veins, is original and of the spring dampered type. The replacement will be a cushioned oil filled type out of polyurethane. Mine has play but it's not excessive which is gr8, this new coupler will eliminate any sloppiness for instant charge! Downside is that it makes a noise described as marbles in a tin. Some have no noise, so I need to suck it and see really. Two bearings in this M112 supercharger cannot be changed really as they are built in during manufacture and they are submerged in oil, failure is rare.
The 6% pulley was not cheap and it will complete that component. I favoured a 10% reduction pulley but even though the casting of the snout needs to be ground down for clearance with that, this engine is problematic with heat dispersal and a 10% will produce heat that cannot be managed well by the existing cooling system set up. I am modifying the cooling slightly but, I'd rather have easily enough cooling than not enough.
The timing chains and gear needed to go next and in order to do that, the engine should be locked. The 4 cams have cut outs that align for locking bars and the Crank position sensor should be removed where a locking tool is replaced through it's hole in the block casting and into a timing plate on the flywheel at the gearbox side.
'Remove CPS' or something to that effect says the manual. Not so easy after it's been in there for 20 years. The above image was taken after the fact but note the corrosion, especially in the CPS hole. This CPS is plastic and gubbins into a stainless cap which sits a few mm from that plate in the image above. The stainless cap on mine had welded itself to the block casting. I had to destroy the sensor and then spent, and I'm not joking, over 2 hours trying to get the cap out between that plate and the block. I made tools, I swore and I was unhappy to do this.
A replacement used sensor from a very good outlet, Auto reserve, was bought for £18 and this one was sent to it's death... in pain...
The next day and not in a bit of a huff, I had to clean out the corrosion in that hole to fit the locking tool. The engine could be rotated the right way by refitting the crank bolt on spacers as to not wind it right in. I did have it 180 degrees out on the first attempt, as seen by the cams flat side pointing down but it was easy enough to sort out by now. it's a 50/50 chance if your on your own under the car!
Once locked, I had to stick a note on the dash saying it's locked. Habit. I've witnessed the alternative outcome!
Then the cams get locked using the special tools. If the engine is out of position, you can't lock it in these places. Easy peasy job to remove the tensioners which are the ratchet type, guides, and primary/secondary chains and cam chains. They are in great condition but I have new to replace them.
Once that's out of the way, the cams themselves can be removed. The whole lot gets marked up and ordered although the caps have numbers stamped and direction arrows, if I can make things easier at reassembly time, it's worth it.
The head bolts are under the cams and are not extremely tight. The manual states that the head bolts can be used 'only twice' and when refitting they should be punched to denote their second use. Yeah, so I got a set of new bolts anyways. The usual head bolt undoing pattern applies.
Heads released without a fight and were removed. As the exposed block is going to sit for a few days, any coolant was dried up and a liberal squirting of penetration oil was applied. That's all left until I get to cleaning and painting it all.
The combustion side of things showed that it had been overfuelling for a long time with glaze and carbon build up. I know what is causing this, the blow from the manifold (and now added EGR apparently).
The blows will cause a lean reading at Lambda which will cause the ECU to run it rich, when in fact, it just has a blow (or several) and it's missing combustion measures.
The next milestone is afoot, what is going on with the manifold?
-
 Crispian_J_Hotson got a reaction from w00dy in Jaguar S Bype R - An Imposter, saving a bird, and that effin supercharger!
I have been dying to see this manifold. Sure, it's just a blow, but the snapped stud and loose stud don't make sense, especially as the heat shield was correctly replaced and the fixings were pretty rotten. I suspect that the specialists would not have bothered with that and whenever someone was there, it was a long time ago.
Here is what we are looking at:
Specifically this bit...
The shiny nut I managed to put on as this stud was loose and the nut behind it rotten and solid and the other stud I could tighten. I got enough grab on them to tighten it a bit more but couldn't get it flat against the head. It did stop the EML from coming on every time I booted it though, and you see that snapped guy there? These things don't snap by themselves... or do they?
Remember that I could not really see or get anything of any worth onto these whilst they were in the car and this was all behind a nicely fitted heat shield box. My first impressions are that I can't see any major blow marks! Don't worry, it's not going to let us down...
That shiny back plate there is part of the gasket structure and it needs to come off now.
Ahh, there she is!
A blow on 3 ports too, it wasn't messing around. It's in a pretty shit state. My aim on this day was to get all the studs out of both heads. First of all we go to the one at the top right with a simple t30 socket, it came out no problem, but I could see why it wouldn't tighten-
The threads are burred over.
Next is the snapped stud. With an Aluminium head you can mig a nut onto the snapped guy and the head won't damage. Clean the snap with some brake cleaner, hold the nut with a shit spanner and mig away!
Note the use of a bit of fire blanket and this is a measure to stop any splatter going down to the valve seats through the exhaust port. Wound right out... this is easy as pie.
Up next, Mr 'I aint moving for toffee'. I really didn't want to snap this guy so tried the double nut technique, no dice. I then welded the nut on to the stud, the heat likely helping to break any corrosion...
We have a succeed!
You see there why I use the shit spanners, don't want to be burning up the good tools here.
All studs out of this head, cleanly and now they are ready to be tapped out later.
Next head...
All hand tight!
The remaining studs came out with no issues but even this manifold looked like it may have been chuffing?
I need answers. Who, what, when, and where? Why is the other manifold in such a state? Why is this one not tight? The last thing I want is to rebuild this and have the same issue so, detective hat on, and Sherlock mode- Engaged...
Evidence. The gasket on the left is date stamped 2005 and the gasket (and cover) on the right are stamped 2004 (the 2002 cover has been reused). This car was built in 2002/3 and sold new in 2003. So it's had manifold gaskets when it was 2 years old and that can only be because it was blowing. What's more, if you have a new car and it develops an issue in a limited time from the date of sale, where do you take it?
Therefore it could be suggested that a main dealer or other authorised repairer themselves carried out work on this component... and fucked it, because you know what, that manifold is warped, a simple straight edge check will show that, and so is the other one, but I bet that they didn't even take the things off to check.
You will not straighten cast iron if it is bent with an M8 stud. I can also conclude that this car has since, very close to it's beginning, had a manifold issue which means that it has been running rich and likely smoked the cats long ago which lead to the moving of the oxygen sensor, smashing out the cats, and all that bollocks they did to it in Coventry.
Luckily, I had already got hold of a replacement for this bank, existing is at the top...
Wait... What? They've changed the design? Is that because they bend? Looks like they have removed material to make it a bit 'less stressed'.
What this means is that I've had to get the other one replaced to this revised design where there are no reported problems of blows.
There are further changes which are an improvement but not as exciting and we'll have a look at this later.
Matey who's outing his early STR needs to read this post!
-
 Crispian_J_Hotson got a reaction from Tepper in Jaguar S Bype R - An Imposter, saving a bird, and that effin supercharger!
I have been dying to see this manifold. Sure, it's just a blow, but the snapped stud and loose stud don't make sense, especially as the heat shield was correctly replaced and the fixings were pretty rotten. I suspect that the specialists would not have bothered with that and whenever someone was there, it was a long time ago.
Here is what we are looking at:
Specifically this bit...
The shiny nut I managed to put on as this stud was loose and the nut behind it rotten and solid and the other stud I could tighten. I got enough grab on them to tighten it a bit more but couldn't get it flat against the head. It did stop the EML from coming on every time I booted it though, and you see that snapped guy there? These things don't snap by themselves... or do they?
Remember that I could not really see or get anything of any worth onto these whilst they were in the car and this was all behind a nicely fitted heat shield box. My first impressions are that I can't see any major blow marks! Don't worry, it's not going to let us down...
That shiny back plate there is part of the gasket structure and it needs to come off now.
Ahh, there she is!
A blow on 3 ports too, it wasn't messing around. It's in a pretty shit state. My aim on this day was to get all the studs out of both heads. First of all we go to the one at the top right with a simple t30 socket, it came out no problem, but I could see why it wouldn't tighten-
The threads are burred over.
Next is the snapped stud. With an Aluminium head you can mig a nut onto the snapped guy and the head won't damage. Clean the snap with some brake cleaner, hold the nut with a shit spanner and mig away!
Note the use of a bit of fire blanket and this is a measure to stop any splatter going down to the valve seats through the exhaust port. Wound right out... this is easy as pie.
Up next, Mr 'I aint moving for toffee'. I really didn't want to snap this guy so tried the double nut technique, no dice. I then welded the nut on to the stud, the heat likely helping to break any corrosion...
We have a succeed!
You see there why I use the shit spanners, don't want to be burning up the good tools here.
All studs out of this head, cleanly and now they are ready to be tapped out later.
Next head...
All hand tight!
The remaining studs came out with no issues but even this manifold looked like it may have been chuffing?
I need answers. Who, what, when, and where? Why is the other manifold in such a state? Why is this one not tight? The last thing I want is to rebuild this and have the same issue so, detective hat on, and Sherlock mode- Engaged...
Evidence. The gasket on the left is date stamped 2005 and the gasket (and cover) on the right are stamped 2004 (the 2002 cover has been reused). This car was built in 2002/3 and sold new in 2003. So it's had manifold gaskets when it was 2 years old and that can only be because it was blowing. What's more, if you have a new car and it develops an issue in a limited time from the date of sale, where do you take it?
Therefore it could be suggested that a main dealer or other authorised repairer themselves carried out work on this component... and fucked it, because you know what, that manifold is warped, a simple straight edge check will show that, and so is the other one, but I bet that they didn't even take the things off to check.
You will not straighten cast iron if it is bent with an M8 stud. I can also conclude that this car has since, very close to it's beginning, had a manifold issue which means that it has been running rich and likely smoked the cats long ago which lead to the moving of the oxygen sensor, smashing out the cats, and all that bollocks they did to it in Coventry.
Luckily, I had already got hold of a replacement for this bank, existing is at the top...
Wait... What? They've changed the design? Is that because they bend? Looks like they have removed material to make it a bit 'less stressed'.
What this means is that I've had to get the other one replaced to this revised design where there are no reported problems of blows.
There are further changes which are an improvement but not as exciting and we'll have a look at this later.
Matey who's outing his early STR needs to read this post!
-
 Crispian_J_Hotson got a reaction from djim in Jaguar S Bype R - An Imposter, saving a bird, and that effin supercharger!
I have been dying to see this manifold. Sure, it's just a blow, but the snapped stud and loose stud don't make sense, especially as the heat shield was correctly replaced and the fixings were pretty rotten. I suspect that the specialists would not have bothered with that and whenever someone was there, it was a long time ago.
Here is what we are looking at:
Specifically this bit...
The shiny nut I managed to put on as this stud was loose and the nut behind it rotten and solid and the other stud I could tighten. I got enough grab on them to tighten it a bit more but couldn't get it flat against the head. It did stop the EML from coming on every time I booted it though, and you see that snapped guy there? These things don't snap by themselves... or do they?
Remember that I could not really see or get anything of any worth onto these whilst they were in the car and this was all behind a nicely fitted heat shield box. My first impressions are that I can't see any major blow marks! Don't worry, it's not going to let us down...
That shiny back plate there is part of the gasket structure and it needs to come off now.
Ahh, there she is!
A blow on 3 ports too, it wasn't messing around. It's in a pretty shit state. My aim on this day was to get all the studs out of both heads. First of all we go to the one at the top right with a simple t30 socket, it came out no problem, but I could see why it wouldn't tighten-
The threads are burred over.
Next is the snapped stud. With an Aluminium head you can mig a nut onto the snapped guy and the head won't damage. Clean the snap with some brake cleaner, hold the nut with a shit spanner and mig away!
Note the use of a bit of fire blanket and this is a measure to stop any splatter going down to the valve seats through the exhaust port. Wound right out... this is easy as pie.
Up next, Mr 'I aint moving for toffee'. I really didn't want to snap this guy so tried the double nut technique, no dice. I then welded the nut on to the stud, the heat likely helping to break any corrosion...
We have a succeed!
You see there why I use the shit spanners, don't want to be burning up the good tools here.
All studs out of this head, cleanly and now they are ready to be tapped out later.
Next head...
All hand tight!
The remaining studs came out with no issues but even this manifold looked like it may have been chuffing?
I need answers. Who, what, when, and where? Why is the other manifold in such a state? Why is this one not tight? The last thing I want is to rebuild this and have the same issue so, detective hat on, and Sherlock mode- Engaged...
Evidence. The gasket on the left is date stamped 2005 and the gasket (and cover) on the right are stamped 2004 (the 2002 cover has been reused). This car was built in 2002/3 and sold new in 2003. So it's had manifold gaskets when it was 2 years old and that can only be because it was blowing. What's more, if you have a new car and it develops an issue in a limited time from the date of sale, where do you take it?
Therefore it could be suggested that a main dealer or other authorised repairer themselves carried out work on this component... and fucked it, because you know what, that manifold is warped, a simple straight edge check will show that, and so is the other one, but I bet that they didn't even take the things off to check.
You will not straighten cast iron if it is bent with an M8 stud. I can also conclude that this car has since, very close to it's beginning, had a manifold issue which means that it has been running rich and likely smoked the cats long ago which lead to the moving of the oxygen sensor, smashing out the cats, and all that bollocks they did to it in Coventry.
Luckily, I had already got hold of a replacement for this bank, existing is at the top...
Wait... What? They've changed the design? Is that because they bend? Looks like they have removed material to make it a bit 'less stressed'.
What this means is that I've had to get the other one replaced to this revised design where there are no reported problems of blows.
There are further changes which are an improvement but not as exciting and we'll have a look at this later.
Matey who's outing his early STR needs to read this post!
-
 Crispian_J_Hotson got a reaction from rob88h in Jaguar S Bype R - An Imposter, saving a bird, and that effin supercharger!
I have been dying to see this manifold. Sure, it's just a blow, but the snapped stud and loose stud don't make sense, especially as the heat shield was correctly replaced and the fixings were pretty rotten. I suspect that the specialists would not have bothered with that and whenever someone was there, it was a long time ago.
Here is what we are looking at:
Specifically this bit...
The shiny nut I managed to put on as this stud was loose and the nut behind it rotten and solid and the other stud I could tighten. I got enough grab on them to tighten it a bit more but couldn't get it flat against the head. It did stop the EML from coming on every time I booted it though, and you see that snapped guy there? These things don't snap by themselves... or do they?
Remember that I could not really see or get anything of any worth onto these whilst they were in the car and this was all behind a nicely fitted heat shield box. My first impressions are that I can't see any major blow marks! Don't worry, it's not going to let us down...
That shiny back plate there is part of the gasket structure and it needs to come off now.
Ahh, there she is!
A blow on 3 ports too, it wasn't messing around. It's in a pretty shit state. My aim on this day was to get all the studs out of both heads. First of all we go to the one at the top right with a simple t30 socket, it came out no problem, but I could see why it wouldn't tighten-
The threads are burred over.
Next is the snapped stud. With an Aluminium head you can mig a nut onto the snapped guy and the head won't damage. Clean the snap with some brake cleaner, hold the nut with a shit spanner and mig away!
Note the use of a bit of fire blanket and this is a measure to stop any splatter going down to the valve seats through the exhaust port. Wound right out... this is easy as pie.
Up next, Mr 'I aint moving for toffee'. I really didn't want to snap this guy so tried the double nut technique, no dice. I then welded the nut on to the stud, the heat likely helping to break any corrosion...
We have a succeed!
You see there why I use the shit spanners, don't want to be burning up the good tools here.
All studs out of this head, cleanly and now they are ready to be tapped out later.
Next head...
All hand tight!
The remaining studs came out with no issues but even this manifold looked like it may have been chuffing?
I need answers. Who, what, when, and where? Why is the other manifold in such a state? Why is this one not tight? The last thing I want is to rebuild this and have the same issue so, detective hat on, and Sherlock mode- Engaged...
Evidence. The gasket on the left is date stamped 2005 and the gasket (and cover) on the right are stamped 2004 (the 2002 cover has been reused). This car was built in 2002/3 and sold new in 2003. So it's had manifold gaskets when it was 2 years old and that can only be because it was blowing. What's more, if you have a new car and it develops an issue in a limited time from the date of sale, where do you take it?
Therefore it could be suggested that a main dealer or other authorised repairer themselves carried out work on this component... and fucked it, because you know what, that manifold is warped, a simple straight edge check will show that, and so is the other one, but I bet that they didn't even take the things off to check.
You will not straighten cast iron if it is bent with an M8 stud. I can also conclude that this car has since, very close to it's beginning, had a manifold issue which means that it has been running rich and likely smoked the cats long ago which lead to the moving of the oxygen sensor, smashing out the cats, and all that bollocks they did to it in Coventry.
Luckily, I had already got hold of a replacement for this bank, existing is at the top...
Wait... What? They've changed the design? Is that because they bend? Looks like they have removed material to make it a bit 'less stressed'.
What this means is that I've had to get the other one replaced to this revised design where there are no reported problems of blows.
There are further changes which are an improvement but not as exciting and we'll have a look at this later.
Matey who's outing his early STR needs to read this post!
-
 Crispian_J_Hotson got a reaction from Twiggy in Jaguar S Bype R - An Imposter, saving a bird, and that effin supercharger!
They say in the community that supercharger removal is the worst job in the world on this engine but let me re-assure you, it's not. In fact it's probably the easiest thing to do once all the other shite is outta the way. You may read that people are cutting out a rear bolt hole in the super charger casting and making special tools to aid removal in the future. There really is no need at all to do this. If the directions in the workshop guide are followed then removing the throttle body lower casting by it's 4 bolts which can all be accessed easily, makes the fabled hardest bolt in the world, the easiest bolt in the world to get to.
The supercharger is getting rebuilt by me once the kit turns up. It was to be sent away but then I realised that there's two parts to the service, the snout and the body. I was under the impression that the service was £300 but then later found that that was for the snout only! So to get the snout and body serviced, and a 6% pulley (smaller for moar powah) fitted, I'd be looking at a fart over £800. No.
I bought a... let's call it a kit in it's infant stages of testing, for 135£. This includes bearings, coupler and oil. My coupler, the bushy bit that connects the pulley shaft to the main veins, is original and of the spring dampered type. The replacement will be a cushioned oil filled type out of polyurethane. Mine has play but it's not excessive which is gr8, this new coupler will eliminate any sloppiness for instant charge! Downside is that it makes a noise described as marbles in a tin. Some have no noise, so I need to suck it and see really. Two bearings in this M112 supercharger cannot be changed really as they are built in during manufacture and they are submerged in oil, failure is rare.
The 6% pulley was not cheap and it will complete that component. I favoured a 10% reduction pulley but even though the casting of the snout needs to be ground down for clearance with that, this engine is problematic with heat dispersal and a 10% will produce heat that cannot be managed well by the existing cooling system set up. I am modifying the cooling slightly but, I'd rather have easily enough cooling than not enough.
The timing chains and gear needed to go next and in order to do that, the engine should be locked. The 4 cams have cut outs that align for locking bars and the Crank position sensor should be removed where a locking tool is replaced through it's hole in the block casting and into a timing plate on the flywheel at the gearbox side.
'Remove CPS' or something to that effect says the manual. Not so easy after it's been in there for 20 years. The above image was taken after the fact but note the corrosion, especially in the CPS hole. This CPS is plastic and gubbins into a stainless cap which sits a few mm from that plate in the image above. The stainless cap on mine had welded itself to the block casting. I had to destroy the sensor and then spent, and I'm not joking, over 2 hours trying to get the cap out between that plate and the block. I made tools, I swore and I was unhappy to do this.
A replacement used sensor from a very good outlet, Auto reserve, was bought for £18 and this one was sent to it's death... in pain...
The next day and not in a bit of a huff, I had to clean out the corrosion in that hole to fit the locking tool. The engine could be rotated the right way by refitting the crank bolt on spacers as to not wind it right in. I did have it 180 degrees out on the first attempt, as seen by the cams flat side pointing down but it was easy enough to sort out by now. it's a 50/50 chance if your on your own under the car!
Once locked, I had to stick a note on the dash saying it's locked. Habit. I've witnessed the alternative outcome!
Then the cams get locked using the special tools. If the engine is out of position, you can't lock it in these places. Easy peasy job to remove the tensioners which are the ratchet type, guides, and primary/secondary chains and cam chains. They are in great condition but I have new to replace them.
Once that's out of the way, the cams themselves can be removed. The whole lot gets marked up and ordered although the caps have numbers stamped and direction arrows, if I can make things easier at reassembly time, it's worth it.
The head bolts are under the cams and are not extremely tight. The manual states that the head bolts can be used 'only twice' and when refitting they should be punched to denote their second use. Yeah, so I got a set of new bolts anyways. The usual head bolt undoing pattern applies.
Heads released without a fight and were removed. As the exposed block is going to sit for a few days, any coolant was dried up and a liberal squirting of penetration oil was applied. That's all left until I get to cleaning and painting it all.
The combustion side of things showed that it had been overfuelling for a long time with glaze and carbon build up. I know what is causing this, the blow from the manifold (and now added EGR apparently).
The blows will cause a lean reading at Lambda which will cause the ECU to run it rich, when in fact, it just has a blow (or several) and it's missing combustion measures.
The next milestone is afoot, what is going on with the manifold?
-
Crispian_J_Hotson got a reaction from djim in Jaguar S Bype R - An Imposter, saving a bird, and that effin supercharger!
Thanks for the input, forum members.
This part is tedious. I am descaling and painting all the bits that I took off and this heat is baking me. I've been at it for a couple of days now and I've thrown the towel in to escape the sun. Good opportunity to catch up as there is a bit to discuss. First off, I have realised that there is what I now call 'the daily spend' and this is for anything that I've found along the way that needs replacing. There is something- every day! This is on top of the stuff that I've already got... none of which I can fit yet.
As an example, when I removed the two tensioners (one for the ancillaries and one for the supercharger belts) and the two idle pulleys, I discovered that all their bearings sounded like someone was dragging a box across a floor.
New replacements were ordered up and only then I realised that I'd ordered a modified idler pulley for the supercharger belt. This revised pulley is for a double sided ribbed belt, not the single which I have! The reason for the modification is to cure the cold start squeal (which I had) so getting the mod wasn't so bad, but I've got a new single sided belt for the old pulley. That means that I had to order a new double sided belt.
This type of scenario was a thing, as I have the early engine and Jag have made changes for improvement along the way.
I suppose I could off set that belt and some of pulleys cost as there is a recent water pump that was loosely bolted in and weeping...
Everything else like the AC pump, alternator (which is also recent), and PS pump were in good shape.
So you see that Crank pulley in the above image? Yeah, getting that off was the next milestone to hit. She's on at 375Nm with thread lock and legend has it that it is frowned upon to a) use a locking pin to hold the engine and 2) rotate the engine backwards.
Something like this:
The main issue I had was that apart from it being effing tight, the special tool that I got was for the V8. Great right? No...
The supercharged has the extended crank pulley so the tool is now not long enough to reach into the pulley, sit flush, and bolt up. That is unless you have a bearing press set like me!
All that was needed was one of the sleeves to go over the business end of the tool and some longer threaded bolts made up, like those shown above. It worked... just...
I've used my bearing press set a lot more for things which aren't bearings.
To add extra challenge, the only 24mm socket I had, split on me a long time ago... something to do with a 3 meter scaffold tube, but it refuses to die and completed this task without fail too.
Around the same time, before or after this job... can't remember... I had to remove the EGR. This bit is one of the scary parts people don't like but I had half a chance as in the vehicle history, this part had been replaced on 2.2.2018 as there is a bill for 1200£ for that and some wiring repairs. Those bolts should come out then?
It's a bit of a terror as you cannot see what you are doing and every tool is too long or too short, however, there is always more than one way to skin a cat, but it's all blind work. Fortunately, I have been in this situation many times ( mainly working for Citroen) and it doesn't really phase me, it just needs to be done.
So the bolts, and studs on the exhaust, did come out but there was a fight. The fight was only because of the fucktards that put them in. Have a look...
The also forgot* to bolt down the throttle body base casting, as seen by the missing bolt in the center of the below image (there's one missing on the other side too):
They wrecked the EGR flexible pipe by bending on it and putting a hole in it...
And that's a 200£ pipe believe it or not. Let's have a look at the wiring repairs whilst we are here eh?
Nice! Let me explain what's going on here, this is the supply and comms to the throttle body control. There is one green factory wire, connected to a big white, different gauge wire, connected to something in a black sleeve, connected to the rest of the original green wire. Along the way, they have torn off an earth connection which is supposed to connect to the head, and that's that fuzzy bit of bare cable just poking out of the sheathing. "Carz fixed sir... £twelve hunnit pls"!
Shockingly*, this was carried out by a Cat specialist in Coventry and that follows along the lines of all the shit work this car has had done to it, and the area from where I got it from. You can't argue with the facts.
That's not all though, it gets much more eye opening later.
-
 Crispian_J_Hotson got a reaction from Honey Badger in Jaguar S Bype R - An Imposter, saving a bird, and that effin supercharger!
I have been dying to see this manifold. Sure, it's just a blow, but the snapped stud and loose stud don't make sense, especially as the heat shield was correctly replaced and the fixings were pretty rotten. I suspect that the specialists would not have bothered with that and whenever someone was there, it was a long time ago.
Here is what we are looking at:
Specifically this bit...
The shiny nut I managed to put on as this stud was loose and the nut behind it rotten and solid and the other stud I could tighten. I got enough grab on them to tighten it a bit more but couldn't get it flat against the head. It did stop the EML from coming on every time I booted it though, and you see that snapped guy there? These things don't snap by themselves... or do they?
Remember that I could not really see or get anything of any worth onto these whilst they were in the car and this was all behind a nicely fitted heat shield box. My first impressions are that I can't see any major blow marks! Don't worry, it's not going to let us down...
That shiny back plate there is part of the gasket structure and it needs to come off now.
Ahh, there she is!
A blow on 3 ports too, it wasn't messing around. It's in a pretty shit state. My aim on this day was to get all the studs out of both heads. First of all we go to the one at the top right with a simple t30 socket, it came out no problem, but I could see why it wouldn't tighten-
The threads are burred over.
Next is the snapped stud. With an Aluminium head you can mig a nut onto the snapped guy and the head won't damage. Clean the snap with some brake cleaner, hold the nut with a shit spanner and mig away!
Note the use of a bit of fire blanket and this is a measure to stop any splatter going down to the valve seats through the exhaust port. Wound right out... this is easy as pie.
Up next, Mr 'I aint moving for toffee'. I really didn't want to snap this guy so tried the double nut technique, no dice. I then welded the nut on to the stud, the heat likely helping to break any corrosion...
We have a succeed!
You see there why I use the shit spanners, don't want to be burning up the good tools here.
All studs out of this head, cleanly and now they are ready to be tapped out later.
Next head...
All hand tight!
The remaining studs came out with no issues but even this manifold looked like it may have been chuffing?
I need answers. Who, what, when, and where? Why is the other manifold in such a state? Why is this one not tight? The last thing I want is to rebuild this and have the same issue so, detective hat on, and Sherlock mode- Engaged...
Evidence. The gasket on the left is date stamped 2005 and the gasket (and cover) on the right are stamped 2004 (the 2002 cover has been reused). This car was built in 2002/3 and sold new in 2003. So it's had manifold gaskets when it was 2 years old and that can only be because it was blowing. What's more, if you have a new car and it develops an issue in a limited time from the date of sale, where do you take it?
Therefore it could be suggested that a main dealer or other authorised repairer themselves carried out work on this component... and fucked it, because you know what, that manifold is warped, a simple straight edge check will show that, and so is the other one, but I bet that they didn't even take the things off to check.
You will not straighten cast iron if it is bent with an M8 stud. I can also conclude that this car has since, very close to it's beginning, had a manifold issue which means that it has been running rich and likely smoked the cats long ago which lead to the moving of the oxygen sensor, smashing out the cats, and all that bollocks they did to it in Coventry.
Luckily, I had already got hold of a replacement for this bank, existing is at the top...
Wait... What? They've changed the design? Is that because they bend? Looks like they have removed material to make it a bit 'less stressed'.
What this means is that I've had to get the other one replaced to this revised design where there are no reported problems of blows.
There are further changes which are an improvement but not as exciting and we'll have a look at this later.
Matey who's outing his early STR needs to read this post!
-
Crispian_J_Hotson got a reaction from Coprolalia in Jaguar S Bype R - An Imposter, saving a bird, and that effin supercharger!
It was due. I had planned to strip down the problematic engine at August end. I was however, very reluctant to do it as it meant the car being immobilised for some time. It wasn't totally broken and worked fairly well, but...
I was motoring along the A14 with the sunroof open and was accompanied by the occasional rancid stench of rich exhaust fumes. A reminder that the emission components on the car had been brutally attacked over the last few years in a bid to keep the light off.
A strip down would mean that parts could be repaired and uprated. So, over the last few months I had been accumulating all the parts to get the engine at a stage where it was better and I know what's going on with it, there were too many unknowns.
This work all came from a blow on the Exhaust manifold and further inspection with a endoscope revealed that there was a snapped stud and bodged fixings. The only problem was that the manifold was pretty much inaccessible and removing a snapped stud impossible. Head off was the only answer.
Join me, as I embark on the journey of unknowns.
I am at a stage where I have completed a lot of the strip down, I think I started it 5 days ago in the rain, with a plan back then to throw everything into it... but the law of sod saw end to that and despite the fortunate weather for once, my partner has fallen ill and is stuck laid up leaving me to single parent 3 kids and do doctor runs. It's a bit of a nightmare as this engine requires a few tools and is filthy, so I'm having about 3 showers a day to go back and fourth doing stuff and I'm losing about 4 hours a day on it. I can't leave the build as I've taken time off to do it and will need the car for when I return. So, it's a bit challenge Anneka. But Challenge is actually my middle name!
As I have images of the various stages of strip down, wouldn't it be fun* to series them? Here we go then in a world first...
Beauty covers, scuttle, and cross brace off...
Intake system, belts and pulleys off...
EGR, remaining throttle body parts, and supercharger off...
Water to air coolers and injection off...
More plugs and mounts off and degreasing...
Crank pulley off...
Timing cover off...
Timing locked and gear off...
Cams out...
Heads off...
BOOM! I AM THE BOSS OF YOU!
It wasn't bad at all and I hope you all know where the bits go because I have no idea. Now I have a shed full, and I mean full, of parts that need cleaning, repairing and painting. I found that asshats had been at the EGR valve and throttle wiring as well as elsewhere, but thankfully no-one has been inside the engine. I will, in my next post display the highlights and lowlights of this operation so far... I need to go boil spaghetti now.
-
 Crispian_J_Hotson got a reaction from Asimo in Jaguar S Bype R - An Imposter, saving a bird, and that effin supercharger!
They say in the community that supercharger removal is the worst job in the world on this engine but let me re-assure you, it's not. In fact it's probably the easiest thing to do once all the other shite is outta the way. You may read that people are cutting out a rear bolt hole in the super charger casting and making special tools to aid removal in the future. There really is no need at all to do this. If the directions in the workshop guide are followed then removing the throttle body lower casting by it's 4 bolts which can all be accessed easily, makes the fabled hardest bolt in the world, the easiest bolt in the world to get to.
The supercharger is getting rebuilt by me once the kit turns up. It was to be sent away but then I realised that there's two parts to the service, the snout and the body. I was under the impression that the service was £300 but then later found that that was for the snout only! So to get the snout and body serviced, and a 6% pulley (smaller for moar powah) fitted, I'd be looking at a fart over £800. No.
I bought a... let's call it a kit in it's infant stages of testing, for 135£. This includes bearings, coupler and oil. My coupler, the bushy bit that connects the pulley shaft to the main veins, is original and of the spring dampered type. The replacement will be a cushioned oil filled type out of polyurethane. Mine has play but it's not excessive which is gr8, this new coupler will eliminate any sloppiness for instant charge! Downside is that it makes a noise described as marbles in a tin. Some have no noise, so I need to suck it and see really. Two bearings in this M112 supercharger cannot be changed really as they are built in during manufacture and they are submerged in oil, failure is rare.
The 6% pulley was not cheap and it will complete that component. I favoured a 10% reduction pulley but even though the casting of the snout needs to be ground down for clearance with that, this engine is problematic with heat dispersal and a 10% will produce heat that cannot be managed well by the existing cooling system set up. I am modifying the cooling slightly but, I'd rather have easily enough cooling than not enough.
The timing chains and gear needed to go next and in order to do that, the engine should be locked. The 4 cams have cut outs that align for locking bars and the Crank position sensor should be removed where a locking tool is replaced through it's hole in the block casting and into a timing plate on the flywheel at the gearbox side.
'Remove CPS' or something to that effect says the manual. Not so easy after it's been in there for 20 years. The above image was taken after the fact but note the corrosion, especially in the CPS hole. This CPS is plastic and gubbins into a stainless cap which sits a few mm from that plate in the image above. The stainless cap on mine had welded itself to the block casting. I had to destroy the sensor and then spent, and I'm not joking, over 2 hours trying to get the cap out between that plate and the block. I made tools, I swore and I was unhappy to do this.
A replacement used sensor from a very good outlet, Auto reserve, was bought for £18 and this one was sent to it's death... in pain...
The next day and not in a bit of a huff, I had to clean out the corrosion in that hole to fit the locking tool. The engine could be rotated the right way by refitting the crank bolt on spacers as to not wind it right in. I did have it 180 degrees out on the first attempt, as seen by the cams flat side pointing down but it was easy enough to sort out by now. it's a 50/50 chance if your on your own under the car!
Once locked, I had to stick a note on the dash saying it's locked. Habit. I've witnessed the alternative outcome!
Then the cams get locked using the special tools. If the engine is out of position, you can't lock it in these places. Easy peasy job to remove the tensioners which are the ratchet type, guides, and primary/secondary chains and cam chains. They are in great condition but I have new to replace them.
Once that's out of the way, the cams themselves can be removed. The whole lot gets marked up and ordered although the caps have numbers stamped and direction arrows, if I can make things easier at reassembly time, it's worth it.
The head bolts are under the cams and are not extremely tight. The manual states that the head bolts can be used 'only twice' and when refitting they should be punched to denote their second use. Yeah, so I got a set of new bolts anyways. The usual head bolt undoing pattern applies.
Heads released without a fight and were removed. As the exposed block is going to sit for a few days, any coolant was dried up and a liberal squirting of penetration oil was applied. That's all left until I get to cleaning and painting it all.
The combustion side of things showed that it had been overfuelling for a long time with glaze and carbon build up. I know what is causing this, the blow from the manifold (and now added EGR apparently).
The blows will cause a lean reading at Lambda which will cause the ECU to run it rich, when in fact, it just has a blow (or several) and it's missing combustion measures.
The next milestone is afoot, what is going on with the manifold?
-
 Crispian_J_Hotson got a reaction from AnnoyingPentium in Jaguar S Bype R - An Imposter, saving a bird, and that effin supercharger!
Thanks for the input, forum members.
This part is tedious. I am descaling and painting all the bits that I took off and this heat is baking me. I've been at it for a couple of days now and I've thrown the towel in to escape the sun. Good opportunity to catch up as there is a bit to discuss. First off, I have realised that there is what I now call 'the daily spend' and this is for anything that I've found along the way that needs replacing. There is something- every day! This is on top of the stuff that I've already got... none of which I can fit yet.
As an example, when I removed the two tensioners (one for the ancillaries and one for the supercharger belts) and the two idle pulleys, I discovered that all their bearings sounded like someone was dragging a box across a floor.
New replacements were ordered up and only then I realised that I'd ordered a modified idler pulley for the supercharger belt. This revised pulley is for a double sided ribbed belt, not the single which I have! The reason for the modification is to cure the cold start squeal (which I had) so getting the mod wasn't so bad, but I've got a new single sided belt for the old pulley. That means that I had to order a new double sided belt.
This type of scenario was a thing, as I have the early engine and Jag have made changes for improvement along the way.
I suppose I could off set that belt and some of pulleys cost as there is a recent water pump that was loosely bolted in and weeping...
Everything else like the AC pump, alternator (which is also recent), and PS pump were in good shape.
So you see that Crank pulley in the above image? Yeah, getting that off was the next milestone to hit. She's on at 375Nm with thread lock and legend has it that it is frowned upon to a) use a locking pin to hold the engine and 2) rotate the engine backwards.
Something like this:
The main issue I had was that apart from it being effing tight, the special tool that I got was for the V8. Great right? No...
The supercharged has the extended crank pulley so the tool is now not long enough to reach into the pulley, sit flush, and bolt up. That is unless you have a bearing press set like me!
All that was needed was one of the sleeves to go over the business end of the tool and some longer threaded bolts made up, like those shown above. It worked... just...
I've used my bearing press set a lot more for things which aren't bearings.
To add extra challenge, the only 24mm socket I had, split on me a long time ago... something to do with a 3 meter scaffold tube, but it refuses to die and completed this task without fail too.
Around the same time, before or after this job... can't remember... I had to remove the EGR. This bit is one of the scary parts people don't like but I had half a chance as in the vehicle history, this part had been replaced on 2.2.2018 as there is a bill for 1200£ for that and some wiring repairs. Those bolts should come out then?
It's a bit of a terror as you cannot see what you are doing and every tool is too long or too short, however, there is always more than one way to skin a cat, but it's all blind work. Fortunately, I have been in this situation many times ( mainly working for Citroen) and it doesn't really phase me, it just needs to be done.
So the bolts, and studs on the exhaust, did come out but there was a fight. The fight was only because of the fucktards that put them in. Have a look...
The also forgot* to bolt down the throttle body base casting, as seen by the missing bolt in the center of the below image (there's one missing on the other side too):
They wrecked the EGR flexible pipe by bending on it and putting a hole in it...
And that's a 200£ pipe believe it or not. Let's have a look at the wiring repairs whilst we are here eh?
Nice! Let me explain what's going on here, this is the supply and comms to the throttle body control. There is one green factory wire, connected to a big white, different gauge wire, connected to something in a black sleeve, connected to the rest of the original green wire. Along the way, they have torn off an earth connection which is supposed to connect to the head, and that's that fuzzy bit of bare cable just poking out of the sheathing. "Carz fixed sir... £twelve hunnit pls"!
Shockingly*, this was carried out by a Cat specialist in Coventry and that follows along the lines of all the shit work this car has had done to it, and the area from where I got it from. You can't argue with the facts.
That's not all though, it gets much more eye opening later.