


Crispian_J_Hotson
-
Posts
2,630 -
Joined
-
Last visited
-
Days Won
2
Reputation Activity
-

 Crispian_J_Hotson got a reaction from Coprolalia in Jaguar S Bype R - An Imposter, saving a bird, and that effin supercharger!
Thanks for the input, forum members.
This part is tedious. I am descaling and painting all the bits that I took off and this heat is baking me. I've been at it for a couple of days now and I've thrown the towel in to escape the sun. Good opportunity to catch up as there is a bit to discuss. First off, I have realised that there is what I now call 'the daily spend' and this is for anything that I've found along the way that needs replacing. There is something- every day! This is on top of the stuff that I've already got... none of which I can fit yet.
As an example, when I removed the two tensioners (one for the ancillaries and one for the supercharger belts) and the two idle pulleys, I discovered that all their bearings sounded like someone was dragging a box across a floor.
New replacements were ordered up and only then I realised that I'd ordered a modified idler pulley for the supercharger belt. This revised pulley is for a double sided ribbed belt, not the single which I have! The reason for the modification is to cure the cold start squeal (which I had) so getting the mod wasn't so bad, but I've got a new single sided belt for the old pulley. That means that I had to order a new double sided belt.
This type of scenario was a thing, as I have the early engine and Jag have made changes for improvement along the way.
I suppose I could off set that belt and some of pulleys cost as there is a recent water pump that was loosely bolted in and weeping...
Everything else like the AC pump, alternator (which is also recent), and PS pump were in good shape.
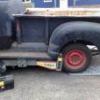
So you see that Crank pulley in the above image? Yeah, getting that off was the next milestone to hit. She's on at 375Nm with thread lock and legend has it that it is frowned upon to a) use a locking pin to hold the engine and 2) rotate the engine backwards.
Something like this:
The main issue I had was that apart from it being effing tight, the special tool that I got was for the V8. Great right? No...
The supercharged has the extended crank pulley so the tool is now not long enough to reach into the pulley, sit flush, and bolt up. That is unless you have a bearing press set like me!
All that was needed was one of the sleeves to go over the business end of the tool and some longer threaded bolts made up, like those shown above. It worked... just...
I've used my bearing press set a lot more for things which aren't bearings.
To add extra challenge, the only 24mm socket I had, split on me a long time ago... something to do with a 3 meter scaffold tube, but it refuses to die and completed this task without fail too.
Around the same time, before or after this job... can't remember... I had to remove the EGR. This bit is one of the scary parts people don't like but I had half a chance as in the vehicle history, this part had been replaced on 2.2.2018 as there is a bill for 1200£ for that and some wiring repairs. Those bolts should come out then?
It's a bit of a terror as you cannot see what you are doing and every tool is too long or too short, however, there is always more than one way to skin a cat, but it's all blind work. Fortunately, I have been in this situation many times ( mainly working for Citroen) and it doesn't really phase me, it just needs to be done.
So the bolts, and studs on the exhaust, did come out but there was a fight. The fight was only because of the fucktards that put them in. Have a look...
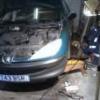
The also forgot* to bolt down the throttle body base casting, as seen by the missing bolt in the center of the below image (there's one missing on the other side too):
They wrecked the EGR flexible pipe by bending on it and putting a hole in it...
And that's a 200£ pipe believe it or not. Let's have a look at the wiring repairs whilst we are here eh?
Nice! Let me explain what's going on here, this is the supply and comms to the throttle body control. There is one green factory wire, connected to a big white, different gauge wire, connected to something in a black sleeve, connected to the rest of the original green wire. Along the way, they have torn off an earth connection which is supposed to connect to the head, and that's that fuzzy bit of bare cable just poking out of the sheathing. "Carz fixed sir... £twelve hunnit pls"!
Shockingly*, this was carried out by a Cat specialist in Coventry and that follows along the lines of all the shit work this car has had done to it, and the area from where I got it from. You can't argue with the facts.
That's not all though, it gets much more eye opening later.
-

 Crispian_J_Hotson got a reaction from Back_For_More in Jaguar S Bype R - An Imposter, saving a bird, and that effin supercharger!
Not losing the will to live or anything but, you know when you wish you hadn't started something...
TEDIOUS!
That is the word of the week kids. I still have a crate of bits to clean and paint but they are all basic castings so not very in depth.
The other head got painted and all the threads tapped out and cleaned. The new studs turned up and both heads got fitted up and a final prep clean ready to be fitted. The supercharger was put back together and got prepped for fitting. Needs oil yet.
Washers... forgot to get some washers for the manifolds. Out of the billion bits of hardware I have stashed, nothing worked well enough so I ordered some thick, stainless jobbies and a 100 normal stainless M8's as I'm out apparently, these are for other things.
What was looming on the Horizon was the pig arse job of cleaning the block, pistons and engine bay in general. I wasn't looking forward to this and just didn't know where to start with it. At the beginning is my usual resolution.
Rust...
Potato cam engaged! This is the bottom of the O/S turret. A great shit trap on all these models. Crap is accumulated in this box section from within the inner arch and sits on the chassis rail FOREVER. Here we can see (sort of) that the grot has seeped down the overlapping panel and destroyed it, marked in the yellow pen. I intended to cut a small section and weld in new plate but decided to cut the whole lot out and weld the panel cut directly to the chassis rail.
Snip...
Then the rust could do one and sparkly stick commences. Note the Gr8* condition of the unfinished paint, thanks Jag, but look below for improvements!
Racecar.
That was shit, so moving on...
Pistolas!
Grim yeah? Watch this...
BOOM!
Then I proceeded to clean 89% of the engine bay with degreaser and a toothbrush!
What a load of bollocks that was, but it's the last worst bit out of the way really. Now it opens up for a bit of painting, wiring repairs, and a general tidy up. In the above image, the bubble wrap is inadvertently covering my latest modification. I decided that in order for this to be a real race car, the AC needs to be ripped out. It doesn't work and I found that it had been bodged which was shocking. One of the Schrader valves must have been leaking and instead of changing the simple valve, clearly the better option was to fill it with JB weld and stick the cap back on. Yeahhhhhh.
Anyhoos, by removing the ridiculous AC pipework and the massive cooler in the rad pack, I have gained an inch of space and extra air flows for the important stuff. I should measure up the compressor mounting and pulley position so that I can eventually bin in and fit an idler pulley or just get a shorter belt if it works, don't know yet. I don't use AC in cars, never have, and it never works!
A day off tomorrow perhaps. I want to get the looms fixed up good next but I'm running the risk that in a car renowned for breaking it's wires, I've had to move these looms a fair bit and I'll get it all done and then have to go tracing seventeen broken wires when it's all done... I guess whatever happens, happens right? 😆
-
 Crispian_J_Hotson got a reaction from mercedade in Jaguar S Bype R - An Imposter, saving a bird, and that effin supercharger!
Not losing the will to live or anything but, you know when you wish you hadn't started something...
TEDIOUS!
That is the word of the week kids. I still have a crate of bits to clean and paint but they are all basic castings so not very in depth.
The other head got painted and all the threads tapped out and cleaned. The new studs turned up and both heads got fitted up and a final prep clean ready to be fitted. The supercharger was put back together and got prepped for fitting. Needs oil yet.
Washers... forgot to get some washers for the manifolds. Out of the billion bits of hardware I have stashed, nothing worked well enough so I ordered some thick, stainless jobbies and a 100 normal stainless M8's as I'm out apparently, these are for other things.
What was looming on the Horizon was the pig arse job of cleaning the block, pistons and engine bay in general. I wasn't looking forward to this and just didn't know where to start with it. At the beginning is my usual resolution.
Rust...
Potato cam engaged! This is the bottom of the O/S turret. A great shit trap on all these models. Crap is accumulated in this box section from within the inner arch and sits on the chassis rail FOREVER. Here we can see (sort of) that the grot has seeped down the overlapping panel and destroyed it, marked in the yellow pen. I intended to cut a small section and weld in new plate but decided to cut the whole lot out and weld the panel cut directly to the chassis rail.
Snip...
Then the rust could do one and sparkly stick commences. Note the Gr8* condition of the unfinished paint, thanks Jag, but look below for improvements!
Racecar.
That was shit, so moving on...
Pistolas!
Grim yeah? Watch this...
BOOM!
Then I proceeded to clean 89% of the engine bay with degreaser and a toothbrush!
What a load of bollocks that was, but it's the last worst bit out of the way really. Now it opens up for a bit of painting, wiring repairs, and a general tidy up. In the above image, the bubble wrap is inadvertently covering my latest modification. I decided that in order for this to be a real race car, the AC needs to be ripped out. It doesn't work and I found that it had been bodged which was shocking. One of the Schrader valves must have been leaking and instead of changing the simple valve, clearly the better option was to fill it with JB weld and stick the cap back on. Yeahhhhhh.
Anyhoos, by removing the ridiculous AC pipework and the massive cooler in the rad pack, I have gained an inch of space and extra air flows for the important stuff. I should measure up the compressor mounting and pulley position so that I can eventually bin in and fit an idler pulley or just get a shorter belt if it works, don't know yet. I don't use AC in cars, never have, and it never works!
A day off tomorrow perhaps. I want to get the looms fixed up good next but I'm running the risk that in a car renowned for breaking it's wires, I've had to move these looms a fair bit and I'll get it all done and then have to go tracing seventeen broken wires when it's all done... I guess whatever happens, happens right? 😆
-
 Crispian_J_Hotson got a reaction from Popsicle in Jaguar S Bype R - An Imposter, saving a bird, and that effin supercharger!
Not losing the will to live or anything but, you know when you wish you hadn't started something...
TEDIOUS!
That is the word of the week kids. I still have a crate of bits to clean and paint but they are all basic castings so not very in depth.
The other head got painted and all the threads tapped out and cleaned. The new studs turned up and both heads got fitted up and a final prep clean ready to be fitted. The supercharger was put back together and got prepped for fitting. Needs oil yet.
Washers... forgot to get some washers for the manifolds. Out of the billion bits of hardware I have stashed, nothing worked well enough so I ordered some thick, stainless jobbies and a 100 normal stainless M8's as I'm out apparently, these are for other things.
What was looming on the Horizon was the pig arse job of cleaning the block, pistons and engine bay in general. I wasn't looking forward to this and just didn't know where to start with it. At the beginning is my usual resolution.
Rust...
Potato cam engaged! This is the bottom of the O/S turret. A great shit trap on all these models. Crap is accumulated in this box section from within the inner arch and sits on the chassis rail FOREVER. Here we can see (sort of) that the grot has seeped down the overlapping panel and destroyed it, marked in the yellow pen. I intended to cut a small section and weld in new plate but decided to cut the whole lot out and weld the panel cut directly to the chassis rail.
Snip...
Then the rust could do one and sparkly stick commences. Note the Gr8* condition of the unfinished paint, thanks Jag, but look below for improvements!
Racecar.
That was shit, so moving on...
Pistolas!
Grim yeah? Watch this...
BOOM!
Then I proceeded to clean 89% of the engine bay with degreaser and a toothbrush!
What a load of bollocks that was, but it's the last worst bit out of the way really. Now it opens up for a bit of painting, wiring repairs, and a general tidy up. In the above image, the bubble wrap is inadvertently covering my latest modification. I decided that in order for this to be a real race car, the AC needs to be ripped out. It doesn't work and I found that it had been bodged which was shocking. One of the Schrader valves must have been leaking and instead of changing the simple valve, clearly the better option was to fill it with JB weld and stick the cap back on. Yeahhhhhh.
Anyhoos, by removing the ridiculous AC pipework and the massive cooler in the rad pack, I have gained an inch of space and extra air flows for the important stuff. I should measure up the compressor mounting and pulley position so that I can eventually bin in and fit an idler pulley or just get a shorter belt if it works, don't know yet. I don't use AC in cars, never have, and it never works!
A day off tomorrow perhaps. I want to get the looms fixed up good next but I'm running the risk that in a car renowned for breaking it's wires, I've had to move these looms a fair bit and I'll get it all done and then have to go tracing seventeen broken wires when it's all done... I guess whatever happens, happens right? 😆
-
 Crispian_J_Hotson got a reaction from CreepingJesus in Jaguar S Bype R - An Imposter, saving a bird, and that effin supercharger!
Yes, these engines can get to 967 degrees centigrade. I was once warned that covering my SC intake pipe with vinyl would destroy most of the UK in a hideous fire ball, bigger than the sun. In reality, it just needed a dusting off now and then and looked pretty cool.
The cylinder head paint is only 20BHP, but with the manifold pack, we're looking at nearer to 3000 at the spare wheel.
So, the last couple of days have been... a total pain in the arse really. I'm not going to sugar coat it. The SC kit didn't come with instructions, the seller didn't respond to my question 'where the shitting heck are the instructions' and the internet is void of anything to work with.
You need a press for the supercharger build. That is a fact. I have one but it was buried at the back of 99000 car parts in the shed. So I got that out. The SC pulley is 'on there' but after my marathon shed clearance, the press breathed on it, and it all fell to bits.
Re-bearing the snout transfer spindle was not straight forward. Once I had built it, the spindle was all bound up and hard to turn. Something wasn't right. I had to take it apart again and the new bearing got destroyed in a fit of anger and frustration. Luckily, the old bearing was fine so I put that in and then the oil seal on and then pressed on the new pulley. This bound up with the casing and the whole thing wouldn't operate. Not only that, the spindle was not pushed through completely as it was too short through the pulley. The pulley, although smaller, has the same central mounting dimensions and it was not the same as it was before. Cut a long story short, it all came apart again so I could work out where it was going wrong.
I engineered* some of the casing off where the pulley was to sit over, and rebuilt the spindle for the third time. SUCCESS!
The cleaning was also a nightmare and tedious and as for the needle bearings in the main casing... after that fucking around, they can stay as they are... they work just fine. It got a lick of paint and will get put back together tomorrow with it's new coupler and then I don't ever want to see it again.
Needless to say, this held me up a bit as well as still single parenting oh and a wanted, knife wielding maniac posing as my step sons football buddy, coming into my home with him after car jacking him and his friend, and removing a grand in cash, whilst my family sat in the lounge. Life is shitting me lemons right now but, as Yaz said, the only way is up! On the plus side, my daughter and I found an injured pigeon a few weeks old on the pavement 2 days ago and we rescued on it. He's made a good recovery and tomorrow we start flying lessons! Chocks away!
-
Crispian_J_Hotson got a reaction from mercedade in Jaguar S Bype R - An Imposter, saving a bird, and that effin supercharger!
Yes, these engines can get to 967 degrees centigrade. I was once warned that covering my SC intake pipe with vinyl would destroy most of the UK in a hideous fire ball, bigger than the sun. In reality, it just needed a dusting off now and then and looked pretty cool.
The cylinder head paint is only 20BHP, but with the manifold pack, we're looking at nearer to 3000 at the spare wheel.
So, the last couple of days have been... a total pain in the arse really. I'm not going to sugar coat it. The SC kit didn't come with instructions, the seller didn't respond to my question 'where the shitting heck are the instructions' and the internet is void of anything to work with.
You need a press for the supercharger build. That is a fact. I have one but it was buried at the back of 99000 car parts in the shed. So I got that out. The SC pulley is 'on there' but after my marathon shed clearance, the press breathed on it, and it all fell to bits.
Re-bearing the snout transfer spindle was not straight forward. Once I had built it, the spindle was all bound up and hard to turn. Something wasn't right. I had to take it apart again and the new bearing got destroyed in a fit of anger and frustration. Luckily, the old bearing was fine so I put that in and then the oil seal on and then pressed on the new pulley. This bound up with the casing and the whole thing wouldn't operate. Not only that, the spindle was not pushed through completely as it was too short through the pulley. The pulley, although smaller, has the same central mounting dimensions and it was not the same as it was before. Cut a long story short, it all came apart again so I could work out where it was going wrong.
I engineered* some of the casing off where the pulley was to sit over, and rebuilt the spindle for the third time. SUCCESS!
The cleaning was also a nightmare and tedious and as for the needle bearings in the main casing... after that fucking around, they can stay as they are... they work just fine. It got a lick of paint and will get put back together tomorrow with it's new coupler and then I don't ever want to see it again.
Needless to say, this held me up a bit as well as still single parenting oh and a wanted, knife wielding maniac posing as my step sons football buddy, coming into my home with him after car jacking him and his friend, and removing a grand in cash, whilst my family sat in the lounge. Life is shitting me lemons right now but, as Yaz said, the only way is up! On the plus side, my daughter and I found an injured pigeon a few weeks old on the pavement 2 days ago and we rescued on it. He's made a good recovery and tomorrow we start flying lessons! Chocks away!
-
 Crispian_J_Hotson got a reaction from HarmonicCheeseburger in Jaguar S Bype R - An Imposter, saving a bird, and that effin supercharger!
Yes, these engines can get to 967 degrees centigrade. I was once warned that covering my SC intake pipe with vinyl would destroy most of the UK in a hideous fire ball, bigger than the sun. In reality, it just needed a dusting off now and then and looked pretty cool.
The cylinder head paint is only 20BHP, but with the manifold pack, we're looking at nearer to 3000 at the spare wheel.
So, the last couple of days have been... a total pain in the arse really. I'm not going to sugar coat it. The SC kit didn't come with instructions, the seller didn't respond to my question 'where the shitting heck are the instructions' and the internet is void of anything to work with.
You need a press for the supercharger build. That is a fact. I have one but it was buried at the back of 99000 car parts in the shed. So I got that out. The SC pulley is 'on there' but after my marathon shed clearance, the press breathed on it, and it all fell to bits.
Re-bearing the snout transfer spindle was not straight forward. Once I had built it, the spindle was all bound up and hard to turn. Something wasn't right. I had to take it apart again and the new bearing got destroyed in a fit of anger and frustration. Luckily, the old bearing was fine so I put that in and then the oil seal on and then pressed on the new pulley. This bound up with the casing and the whole thing wouldn't operate. Not only that, the spindle was not pushed through completely as it was too short through the pulley. The pulley, although smaller, has the same central mounting dimensions and it was not the same as it was before. Cut a long story short, it all came apart again so I could work out where it was going wrong.
I engineered* some of the casing off where the pulley was to sit over, and rebuilt the spindle for the third time. SUCCESS!
The cleaning was also a nightmare and tedious and as for the needle bearings in the main casing... after that fucking around, they can stay as they are... they work just fine. It got a lick of paint and will get put back together tomorrow with it's new coupler and then I don't ever want to see it again.
Needless to say, this held me up a bit as well as still single parenting oh and a wanted, knife wielding maniac posing as my step sons football buddy, coming into my home with him after car jacking him and his friend, and removing a grand in cash, whilst my family sat in the lounge. Life is shitting me lemons right now but, as Yaz said, the only way is up! On the plus side, my daughter and I found an injured pigeon a few weeks old on the pavement 2 days ago and we rescued on it. He's made a good recovery and tomorrow we start flying lessons! Chocks away!
-
Crispian_J_Hotson got a reaction from Back_For_More in Jaguar S Bype R - An Imposter, saving a bird, and that effin supercharger!
Smoll update because this bit is slow and boring.
The other manifold turned up, so now I have a pair of later manifolds, I reckon my ones will just go to scrap as they are problematic. First off with these things is that no one removes the downpipe fixings because they are arsehats to get out half the time, and need a lot of heat... and that takes a while. Then they need to be tapped out to clean the threads up and this is slow and painful X4.
Every bit I've took off this engine is getting checked and painted and that includes these manifolds. Yesterday was spent removing the fixings, cleaning them up and supporting them for painting in such a way that all areas could be accessed and they are not swinging around on a couple of bits of wire. That done, I got the paint, brush, and as I cut the tape sealing the lid on the tin... it started to drop water out of the sky really slowly and annoyingly.
Undeterred, I managed to squish my whole rig into the little space left in the shed and got to painting whilst climbing over car parts and tools.
Today they could have their second coat outside.
Stay with me here, I have artist GCE's.
That didn't take so long so next on the list is the other head which needs total cleaning and the threads cleaned out.
And that is ready for paint tomorrow. Note my special skimming* file.
The collection of painted bits are mounting up:
There are other bits done, but there is still a bin full of stuff to do!
I needed new studs for the down pipes, EGR, and manifolds. The downpipe studs are a bit Jaguar but are not mega money and the EGR are too really as I looked about, but only needed two of those so bit the bullet and got all that from Barratts. The studs for the manifold though, I need 16 and the Jag ones are like just over 3£ each, without nuts! Of course they are weird lengths and proportions but I found VW ones which will do the job just fine as they are pretty close and I got 20 of those, with nuts for 14£ delivered!
The supercharger kit turned up, so I'll probably have that in bits tomorrow after painting the other head in the morning and I'd like to get the timing cover in colour but that's a stretch for the time I have.
I've been thinking about the front pipes and the CATs I've got to weld in. I also will likely need Lambda and O2 sensors as they've been in the hands of complete wronguns on this car, but the budget has been strangled now. Then I had a bright idea... and yes, the sensors are the same as the ones on the black car I'm breaking, and they do all work! In fact, I'm going to go and get the entire exhaust system off of it.
The 200 cell CATs I've got are going to be tough to make work and I need to invent a position for the O2 sensors, Jag put them in the middle of the CAT and I can't do that without damaging the new CATs so I'll have to place them immediately after and hope for the best, but then the pipes are sitting right by the gearbox so I need to see where I can fit sensors in.
This and the rad are keeping me awake at night dang it!
-
 Crispian_J_Hotson got a reaction from Tickman in Jaguar S Bype R - An Imposter, saving a bird, and that effin supercharger!
Never thought about it but I'm on* it's budget limit now, so no is the answer. Having manifolds that work will be the bonus here at the moment, but thanks for the suggestion as it's worth looking into for the future!
*well over
-
 Crispian_J_Hotson got a reaction from cbowditch in Jaguar S Bype R - An Imposter, saving a bird, and that effin supercharger!
Here, I produced a thing which compares the old exhaust manifold against the revised replacement:
The old is on the left and the new one on the right. Look at those bore sizes! I would go as far to say that this is an upgrade for the old STR!
Moving on...
Today was consumed with moar cleaning, checking, and painting mundane engine parts. There is a few. To give myself some inspiration, I decided to tackle that manky head. There will be no media blasting, chemical dipping or other such nonsense, no, this is all to be done by hand, like in ye olden days.
First we need put on our engineering hat, get that head, and to remove the corrosion, debris and other junk that we don't want. I bought some plastic scrapers for things like this but they've turned out to be just a frilly gimmick, luckily I have thousands of Stanley blades and a chisel. The excessive amount of corrosion here made things slow and the ally was burred up in places, nothing that a big, long, and flat file couldn't sort out. It's effectively been skimmed.
It's clean and it's flat, so it'll do it's job and the stud threads all got a tap run down them to remove corrosion and thread lock. Yes, I was waiting for the tap to shear in one, but it all cleared out lovely.
Next the business bit got a de-scale...
It was quite satisfying chipping away at the carbon build up.
I then turned my attention to the inlet side which was much the same as the exhaust side. After sorting that side out, I got all excited and decided to initiate the decoration sequence. This is where it's going boys...
It's a bit of a shame that once it's all squeezed back in, there won't be much to see, but I know it's there and that's what counts! Besides, when I'm doing this all again next year after bending 2 valves and spitting a head gasket out on my first track day, it'll be a lot more pleasant to take apart.
-
Crispian_J_Hotson got a reaction from Tickman in Jaguar S Bype R - An Imposter, saving a bird, and that effin supercharger!
Yes, these engines can get to 967 degrees centigrade. I was once warned that covering my SC intake pipe with vinyl would destroy most of the UK in a hideous fire ball, bigger than the sun. In reality, it just needed a dusting off now and then and looked pretty cool.
The cylinder head paint is only 20BHP, but with the manifold pack, we're looking at nearer to 3000 at the spare wheel.
So, the last couple of days have been... a total pain in the arse really. I'm not going to sugar coat it. The SC kit didn't come with instructions, the seller didn't respond to my question 'where the shitting heck are the instructions' and the internet is void of anything to work with.
You need a press for the supercharger build. That is a fact. I have one but it was buried at the back of 99000 car parts in the shed. So I got that out. The SC pulley is 'on there' but after my marathon shed clearance, the press breathed on it, and it all fell to bits.
Re-bearing the snout transfer spindle was not straight forward. Once I had built it, the spindle was all bound up and hard to turn. Something wasn't right. I had to take it apart again and the new bearing got destroyed in a fit of anger and frustration. Luckily, the old bearing was fine so I put that in and then the oil seal on and then pressed on the new pulley. This bound up with the casing and the whole thing wouldn't operate. Not only that, the spindle was not pushed through completely as it was too short through the pulley. The pulley, although smaller, has the same central mounting dimensions and it was not the same as it was before. Cut a long story short, it all came apart again so I could work out where it was going wrong.
I engineered* some of the casing off where the pulley was to sit over, and rebuilt the spindle for the third time. SUCCESS!
The cleaning was also a nightmare and tedious and as for the needle bearings in the main casing... after that fucking around, they can stay as they are... they work just fine. It got a lick of paint and will get put back together tomorrow with it's new coupler and then I don't ever want to see it again.
Needless to say, this held me up a bit as well as still single parenting oh and a wanted, knife wielding maniac posing as my step sons football buddy, coming into my home with him after car jacking him and his friend, and removing a grand in cash, whilst my family sat in the lounge. Life is shitting me lemons right now but, as Yaz said, the only way is up! On the plus side, my daughter and I found an injured pigeon a few weeks old on the pavement 2 days ago and we rescued on it. He's made a good recovery and tomorrow we start flying lessons! Chocks away!
-
 Crispian_J_Hotson got a reaction from N Dentressangle in Jaguar S Bype R - An Imposter, saving a bird, and that effin supercharger!
Yes, these engines can get to 967 degrees centigrade. I was once warned that covering my SC intake pipe with vinyl would destroy most of the UK in a hideous fire ball, bigger than the sun. In reality, it just needed a dusting off now and then and looked pretty cool.
The cylinder head paint is only 20BHP, but with the manifold pack, we're looking at nearer to 3000 at the spare wheel.
So, the last couple of days have been... a total pain in the arse really. I'm not going to sugar coat it. The SC kit didn't come with instructions, the seller didn't respond to my question 'where the shitting heck are the instructions' and the internet is void of anything to work with.
You need a press for the supercharger build. That is a fact. I have one but it was buried at the back of 99000 car parts in the shed. So I got that out. The SC pulley is 'on there' but after my marathon shed clearance, the press breathed on it, and it all fell to bits.
Re-bearing the snout transfer spindle was not straight forward. Once I had built it, the spindle was all bound up and hard to turn. Something wasn't right. I had to take it apart again and the new bearing got destroyed in a fit of anger and frustration. Luckily, the old bearing was fine so I put that in and then the oil seal on and then pressed on the new pulley. This bound up with the casing and the whole thing wouldn't operate. Not only that, the spindle was not pushed through completely as it was too short through the pulley. The pulley, although smaller, has the same central mounting dimensions and it was not the same as it was before. Cut a long story short, it all came apart again so I could work out where it was going wrong.
I engineered* some of the casing off where the pulley was to sit over, and rebuilt the spindle for the third time. SUCCESS!
The cleaning was also a nightmare and tedious and as for the needle bearings in the main casing... after that fucking around, they can stay as they are... they work just fine. It got a lick of paint and will get put back together tomorrow with it's new coupler and then I don't ever want to see it again.
Needless to say, this held me up a bit as well as still single parenting oh and a wanted, knife wielding maniac posing as my step sons football buddy, coming into my home with him after car jacking him and his friend, and removing a grand in cash, whilst my family sat in the lounge. Life is shitting me lemons right now but, as Yaz said, the only way is up! On the plus side, my daughter and I found an injured pigeon a few weeks old on the pavement 2 days ago and we rescued on it. He's made a good recovery and tomorrow we start flying lessons! Chocks away!
-
Crispian_J_Hotson got a reaction from cbowditch in Jaguar S Bype R - An Imposter, saving a bird, and that effin supercharger!
Smoll update because this bit is slow and boring.
The other manifold turned up, so now I have a pair of later manifolds, I reckon my ones will just go to scrap as they are problematic. First off with these things is that no one removes the downpipe fixings because they are arsehats to get out half the time, and need a lot of heat... and that takes a while. Then they need to be tapped out to clean the threads up and this is slow and painful X4.
Every bit I've took off this engine is getting checked and painted and that includes these manifolds. Yesterday was spent removing the fixings, cleaning them up and supporting them for painting in such a way that all areas could be accessed and they are not swinging around on a couple of bits of wire. That done, I got the paint, brush, and as I cut the tape sealing the lid on the tin... it started to drop water out of the sky really slowly and annoyingly.
Undeterred, I managed to squish my whole rig into the little space left in the shed and got to painting whilst climbing over car parts and tools.
Today they could have their second coat outside.
Stay with me here, I have artist GCE's.
That didn't take so long so next on the list is the other head which needs total cleaning and the threads cleaned out.
And that is ready for paint tomorrow. Note my special skimming* file.
The collection of painted bits are mounting up:
There are other bits done, but there is still a bin full of stuff to do!
I needed new studs for the down pipes, EGR, and manifolds. The downpipe studs are a bit Jaguar but are not mega money and the EGR are too really as I looked about, but only needed two of those so bit the bullet and got all that from Barratts. The studs for the manifold though, I need 16 and the Jag ones are like just over 3£ each, without nuts! Of course they are weird lengths and proportions but I found VW ones which will do the job just fine as they are pretty close and I got 20 of those, with nuts for 14£ delivered!
The supercharger kit turned up, so I'll probably have that in bits tomorrow after painting the other head in the morning and I'd like to get the timing cover in colour but that's a stretch for the time I have.
I've been thinking about the front pipes and the CATs I've got to weld in. I also will likely need Lambda and O2 sensors as they've been in the hands of complete wronguns on this car, but the budget has been strangled now. Then I had a bright idea... and yes, the sensors are the same as the ones on the black car I'm breaking, and they do all work! In fact, I'm going to go and get the entire exhaust system off of it.
The 200 cell CATs I've got are going to be tough to make work and I need to invent a position for the O2 sensors, Jag put them in the middle of the CAT and I can't do that without damaging the new CATs so I'll have to place them immediately after and hope for the best, but then the pipes are sitting right by the gearbox so I need to see where I can fit sensors in.
This and the rad are keeping me awake at night dang it!
-
 Crispian_J_Hotson got a reaction from Rust Collector in Jaguar S Bype R - An Imposter, saving a bird, and that effin supercharger!
Yes, these engines can get to 967 degrees centigrade. I was once warned that covering my SC intake pipe with vinyl would destroy most of the UK in a hideous fire ball, bigger than the sun. In reality, it just needed a dusting off now and then and looked pretty cool.
The cylinder head paint is only 20BHP, but with the manifold pack, we're looking at nearer to 3000 at the spare wheel.
So, the last couple of days have been... a total pain in the arse really. I'm not going to sugar coat it. The SC kit didn't come with instructions, the seller didn't respond to my question 'where the shitting heck are the instructions' and the internet is void of anything to work with.
You need a press for the supercharger build. That is a fact. I have one but it was buried at the back of 99000 car parts in the shed. So I got that out. The SC pulley is 'on there' but after my marathon shed clearance, the press breathed on it, and it all fell to bits.
Re-bearing the snout transfer spindle was not straight forward. Once I had built it, the spindle was all bound up and hard to turn. Something wasn't right. I had to take it apart again and the new bearing got destroyed in a fit of anger and frustration. Luckily, the old bearing was fine so I put that in and then the oil seal on and then pressed on the new pulley. This bound up with the casing and the whole thing wouldn't operate. Not only that, the spindle was not pushed through completely as it was too short through the pulley. The pulley, although smaller, has the same central mounting dimensions and it was not the same as it was before. Cut a long story short, it all came apart again so I could work out where it was going wrong.
I engineered* some of the casing off where the pulley was to sit over, and rebuilt the spindle for the third time. SUCCESS!
The cleaning was also a nightmare and tedious and as for the needle bearings in the main casing... after that fucking around, they can stay as they are... they work just fine. It got a lick of paint and will get put back together tomorrow with it's new coupler and then I don't ever want to see it again.
Needless to say, this held me up a bit as well as still single parenting oh and a wanted, knife wielding maniac posing as my step sons football buddy, coming into my home with him after car jacking him and his friend, and removing a grand in cash, whilst my family sat in the lounge. Life is shitting me lemons right now but, as Yaz said, the only way is up! On the plus side, my daughter and I found an injured pigeon a few weeks old on the pavement 2 days ago and we rescued on it. He's made a good recovery and tomorrow we start flying lessons! Chocks away!
-

 Crispian_J_Hotson got a reaction from beko1987 in Jaguar S Bype R - An Imposter, saving a bird, and that effin supercharger!
Looks BL blue to me. I did look on the shelves but didn't fancy mid sheen satinwood, although it is non yellowing.
-
 Crispian_J_Hotson got a reaction from rainagain in Jaguar S Bype R - An Imposter, saving a bird, and that effin supercharger!
Here, I produced a thing which compares the old exhaust manifold against the revised replacement:
The old is on the left and the new one on the right. Look at those bore sizes! I would go as far to say that this is an upgrade for the old STR!
Moving on...
Today was consumed with moar cleaning, checking, and painting mundane engine parts. There is a few. To give myself some inspiration, I decided to tackle that manky head. There will be no media blasting, chemical dipping or other such nonsense, no, this is all to be done by hand, like in ye olden days.
First we need put on our engineering hat, get that head, and to remove the corrosion, debris and other junk that we don't want. I bought some plastic scrapers for things like this but they've turned out to be just a frilly gimmick, luckily I have thousands of Stanley blades and a chisel. The excessive amount of corrosion here made things slow and the ally was burred up in places, nothing that a big, long, and flat file couldn't sort out. It's effectively been skimmed.
It's clean and it's flat, so it'll do it's job and the stud threads all got a tap run down them to remove corrosion and thread lock. Yes, I was waiting for the tap to shear in one, but it all cleared out lovely.
Next the business bit got a de-scale...
It was quite satisfying chipping away at the carbon build up.
I then turned my attention to the inlet side which was much the same as the exhaust side. After sorting that side out, I got all excited and decided to initiate the decoration sequence. This is where it's going boys...
It's a bit of a shame that once it's all squeezed back in, there won't be much to see, but I know it's there and that's what counts! Besides, when I'm doing this all again next year after bending 2 valves and spitting a head gasket out on my first track day, it'll be a lot more pleasant to take apart.
-
Crispian_J_Hotson got a reaction from beko1987 in Jaguar S Bype R - An Imposter, saving a bird, and that effin supercharger!
Yes, these engines can get to 967 degrees centigrade. I was once warned that covering my SC intake pipe with vinyl would destroy most of the UK in a hideous fire ball, bigger than the sun. In reality, it just needed a dusting off now and then and looked pretty cool.
The cylinder head paint is only 20BHP, but with the manifold pack, we're looking at nearer to 3000 at the spare wheel.
So, the last couple of days have been... a total pain in the arse really. I'm not going to sugar coat it. The SC kit didn't come with instructions, the seller didn't respond to my question 'where the shitting heck are the instructions' and the internet is void of anything to work with.
You need a press for the supercharger build. That is a fact. I have one but it was buried at the back of 99000 car parts in the shed. So I got that out. The SC pulley is 'on there' but after my marathon shed clearance, the press breathed on it, and it all fell to bits.
Re-bearing the snout transfer spindle was not straight forward. Once I had built it, the spindle was all bound up and hard to turn. Something wasn't right. I had to take it apart again and the new bearing got destroyed in a fit of anger and frustration. Luckily, the old bearing was fine so I put that in and then the oil seal on and then pressed on the new pulley. This bound up with the casing and the whole thing wouldn't operate. Not only that, the spindle was not pushed through completely as it was too short through the pulley. The pulley, although smaller, has the same central mounting dimensions and it was not the same as it was before. Cut a long story short, it all came apart again so I could work out where it was going wrong.
I engineered* some of the casing off where the pulley was to sit over, and rebuilt the spindle for the third time. SUCCESS!
The cleaning was also a nightmare and tedious and as for the needle bearings in the main casing... after that fucking around, they can stay as they are... they work just fine. It got a lick of paint and will get put back together tomorrow with it's new coupler and then I don't ever want to see it again.
Needless to say, this held me up a bit as well as still single parenting oh and a wanted, knife wielding maniac posing as my step sons football buddy, coming into my home with him after car jacking him and his friend, and removing a grand in cash, whilst my family sat in the lounge. Life is shitting me lemons right now but, as Yaz said, the only way is up! On the plus side, my daughter and I found an injured pigeon a few weeks old on the pavement 2 days ago and we rescued on it. He's made a good recovery and tomorrow we start flying lessons! Chocks away!
-
 Crispian_J_Hotson got a reaction from stuboy in Jaguar S Bype R - An Imposter, saving a bird, and that effin supercharger!
Yes, these engines can get to 967 degrees centigrade. I was once warned that covering my SC intake pipe with vinyl would destroy most of the UK in a hideous fire ball, bigger than the sun. In reality, it just needed a dusting off now and then and looked pretty cool.
The cylinder head paint is only 20BHP, but with the manifold pack, we're looking at nearer to 3000 at the spare wheel.
So, the last couple of days have been... a total pain in the arse really. I'm not going to sugar coat it. The SC kit didn't come with instructions, the seller didn't respond to my question 'where the shitting heck are the instructions' and the internet is void of anything to work with.
You need a press for the supercharger build. That is a fact. I have one but it was buried at the back of 99000 car parts in the shed. So I got that out. The SC pulley is 'on there' but after my marathon shed clearance, the press breathed on it, and it all fell to bits.
Re-bearing the snout transfer spindle was not straight forward. Once I had built it, the spindle was all bound up and hard to turn. Something wasn't right. I had to take it apart again and the new bearing got destroyed in a fit of anger and frustration. Luckily, the old bearing was fine so I put that in and then the oil seal on and then pressed on the new pulley. This bound up with the casing and the whole thing wouldn't operate. Not only that, the spindle was not pushed through completely as it was too short through the pulley. The pulley, although smaller, has the same central mounting dimensions and it was not the same as it was before. Cut a long story short, it all came apart again so I could work out where it was going wrong.
I engineered* some of the casing off where the pulley was to sit over, and rebuilt the spindle for the third time. SUCCESS!
The cleaning was also a nightmare and tedious and as for the needle bearings in the main casing... after that fucking around, they can stay as they are... they work just fine. It got a lick of paint and will get put back together tomorrow with it's new coupler and then I don't ever want to see it again.
Needless to say, this held me up a bit as well as still single parenting oh and a wanted, knife wielding maniac posing as my step sons football buddy, coming into my home with him after car jacking him and his friend, and removing a grand in cash, whilst my family sat in the lounge. Life is shitting me lemons right now but, as Yaz said, the only way is up! On the plus side, my daughter and I found an injured pigeon a few weeks old on the pavement 2 days ago and we rescued on it. He's made a good recovery and tomorrow we start flying lessons! Chocks away!
-
 Crispian_J_Hotson got a reaction from Jenson Velcro in Jaguar S Bype R - An Imposter, saving a bird, and that effin supercharger!
Yes, these engines can get to 967 degrees centigrade. I was once warned that covering my SC intake pipe with vinyl would destroy most of the UK in a hideous fire ball, bigger than the sun. In reality, it just needed a dusting off now and then and looked pretty cool.
The cylinder head paint is only 20BHP, but with the manifold pack, we're looking at nearer to 3000 at the spare wheel.
So, the last couple of days have been... a total pain in the arse really. I'm not going to sugar coat it. The SC kit didn't come with instructions, the seller didn't respond to my question 'where the shitting heck are the instructions' and the internet is void of anything to work with.
You need a press for the supercharger build. That is a fact. I have one but it was buried at the back of 99000 car parts in the shed. So I got that out. The SC pulley is 'on there' but after my marathon shed clearance, the press breathed on it, and it all fell to bits.
Re-bearing the snout transfer spindle was not straight forward. Once I had built it, the spindle was all bound up and hard to turn. Something wasn't right. I had to take it apart again and the new bearing got destroyed in a fit of anger and frustration. Luckily, the old bearing was fine so I put that in and then the oil seal on and then pressed on the new pulley. This bound up with the casing and the whole thing wouldn't operate. Not only that, the spindle was not pushed through completely as it was too short through the pulley. The pulley, although smaller, has the same central mounting dimensions and it was not the same as it was before. Cut a long story short, it all came apart again so I could work out where it was going wrong.
I engineered* some of the casing off where the pulley was to sit over, and rebuilt the spindle for the third time. SUCCESS!
The cleaning was also a nightmare and tedious and as for the needle bearings in the main casing... after that fucking around, they can stay as they are... they work just fine. It got a lick of paint and will get put back together tomorrow with it's new coupler and then I don't ever want to see it again.
Needless to say, this held me up a bit as well as still single parenting oh and a wanted, knife wielding maniac posing as my step sons football buddy, coming into my home with him after car jacking him and his friend, and removing a grand in cash, whilst my family sat in the lounge. Life is shitting me lemons right now but, as Yaz said, the only way is up! On the plus side, my daughter and I found an injured pigeon a few weeks old on the pavement 2 days ago and we rescued on it. He's made a good recovery and tomorrow we start flying lessons! Chocks away!
-
Crispian_J_Hotson got a reaction from Tickman in Jaguar S Bype R - An Imposter, saving a bird, and that effin supercharger!
Smoll update because this bit is slow and boring.
The other manifold turned up, so now I have a pair of later manifolds, I reckon my ones will just go to scrap as they are problematic. First off with these things is that no one removes the downpipe fixings because they are arsehats to get out half the time, and need a lot of heat... and that takes a while. Then they need to be tapped out to clean the threads up and this is slow and painful X4.
Every bit I've took off this engine is getting checked and painted and that includes these manifolds. Yesterday was spent removing the fixings, cleaning them up and supporting them for painting in such a way that all areas could be accessed and they are not swinging around on a couple of bits of wire. That done, I got the paint, brush, and as I cut the tape sealing the lid on the tin... it started to drop water out of the sky really slowly and annoyingly.
Undeterred, I managed to squish my whole rig into the little space left in the shed and got to painting whilst climbing over car parts and tools.
Today they could have their second coat outside.
Stay with me here, I have artist GCE's.
That didn't take so long so next on the list is the other head which needs total cleaning and the threads cleaned out.
And that is ready for paint tomorrow. Note my special skimming* file.
The collection of painted bits are mounting up:
There are other bits done, but there is still a bin full of stuff to do!
I needed new studs for the down pipes, EGR, and manifolds. The downpipe studs are a bit Jaguar but are not mega money and the EGR are too really as I looked about, but only needed two of those so bit the bullet and got all that from Barratts. The studs for the manifold though, I need 16 and the Jag ones are like just over 3£ each, without nuts! Of course they are weird lengths and proportions but I found VW ones which will do the job just fine as they are pretty close and I got 20 of those, with nuts for 14£ delivered!
The supercharger kit turned up, so I'll probably have that in bits tomorrow after painting the other head in the morning and I'd like to get the timing cover in colour but that's a stretch for the time I have.
I've been thinking about the front pipes and the CATs I've got to weld in. I also will likely need Lambda and O2 sensors as they've been in the hands of complete wronguns on this car, but the budget has been strangled now. Then I had a bright idea... and yes, the sensors are the same as the ones on the black car I'm breaking, and they do all work! In fact, I'm going to go and get the entire exhaust system off of it.
The 200 cell CATs I've got are going to be tough to make work and I need to invent a position for the O2 sensors, Jag put them in the middle of the CAT and I can't do that without damaging the new CATs so I'll have to place them immediately after and hope for the best, but then the pipes are sitting right by the gearbox so I need to see where I can fit sensors in.
This and the rad are keeping me awake at night dang it!
-
 Crispian_J_Hotson reacted to grogee in Jaguar S Bype R - An Imposter, saving a bird, and that effin supercharger!
Great painting and pain(t)staking work there. That red paint must be the danglies if it can survive BYPE-R zorst temps.
I've always ignored OEM studs and just bought generic metric ones for exhausts. Then some of those not-nylock locking stainless nuts to go over.
Just imagine how much faster it'll be with painted cylinder heads - that has to be worth +30bhp I reckon.
-
Crispian_J_Hotson reacted to RichardK in Jaguar S Bype R - An Imposter, saving a bird, and that effin supercharger!
I love the forensics on this. Hate the validation of my view that "British garages do shit work, bodge cars and don't give a flying fuck about the customer, the engineering or the actual process and problems" but you're doing an amazing job undoing and improving!
No wonder Jaguar couldn't lose the reputation for shoddy stuff if that's a warranty fix 😕
-
Crispian_J_Hotson got a reaction from Rust Collector in Jaguar S Bype R - An Imposter, saving a bird, and that effin supercharger!
Smoll update because this bit is slow and boring.
The other manifold turned up, so now I have a pair of later manifolds, I reckon my ones will just go to scrap as they are problematic. First off with these things is that no one removes the downpipe fixings because they are arsehats to get out half the time, and need a lot of heat... and that takes a while. Then they need to be tapped out to clean the threads up and this is slow and painful X4.
Every bit I've took off this engine is getting checked and painted and that includes these manifolds. Yesterday was spent removing the fixings, cleaning them up and supporting them for painting in such a way that all areas could be accessed and they are not swinging around on a couple of bits of wire. That done, I got the paint, brush, and as I cut the tape sealing the lid on the tin... it started to drop water out of the sky really slowly and annoyingly.
Undeterred, I managed to squish my whole rig into the little space left in the shed and got to painting whilst climbing over car parts and tools.
Today they could have their second coat outside.
Stay with me here, I have artist GCE's.
That didn't take so long so next on the list is the other head which needs total cleaning and the threads cleaned out.
And that is ready for paint tomorrow. Note my special skimming* file.
The collection of painted bits are mounting up:
There are other bits done, but there is still a bin full of stuff to do!
I needed new studs for the down pipes, EGR, and manifolds. The downpipe studs are a bit Jaguar but are not mega money and the EGR are too really as I looked about, but only needed two of those so bit the bullet and got all that from Barratts. The studs for the manifold though, I need 16 and the Jag ones are like just over 3£ each, without nuts! Of course they are weird lengths and proportions but I found VW ones which will do the job just fine as they are pretty close and I got 20 of those, with nuts for 14£ delivered!
The supercharger kit turned up, so I'll probably have that in bits tomorrow after painting the other head in the morning and I'd like to get the timing cover in colour but that's a stretch for the time I have.
I've been thinking about the front pipes and the CATs I've got to weld in. I also will likely need Lambda and O2 sensors as they've been in the hands of complete wronguns on this car, but the budget has been strangled now. Then I had a bright idea... and yes, the sensors are the same as the ones on the black car I'm breaking, and they do all work! In fact, I'm going to go and get the entire exhaust system off of it.
The 200 cell CATs I've got are going to be tough to make work and I need to invent a position for the O2 sensors, Jag put them in the middle of the CAT and I can't do that without damaging the new CATs so I'll have to place them immediately after and hope for the best, but then the pipes are sitting right by the gearbox so I need to see where I can fit sensors in.
This and the rad are keeping me awake at night dang it!
-
 Crispian_J_Hotson got a reaction from Dave_Q in Jaguar S Bype R - An Imposter, saving a bird, and that effin supercharger!
I have been dying to see this manifold. Sure, it's just a blow, but the snapped stud and loose stud don't make sense, especially as the heat shield was correctly replaced and the fixings were pretty rotten. I suspect that the specialists would not have bothered with that and whenever someone was there, it was a long time ago.
Here is what we are looking at:
Specifically this bit...
The shiny nut I managed to put on as this stud was loose and the nut behind it rotten and solid and the other stud I could tighten. I got enough grab on them to tighten it a bit more but couldn't get it flat against the head. It did stop the EML from coming on every time I booted it though, and you see that snapped guy there? These things don't snap by themselves... or do they?
Remember that I could not really see or get anything of any worth onto these whilst they were in the car and this was all behind a nicely fitted heat shield box. My first impressions are that I can't see any major blow marks! Don't worry, it's not going to let us down...
That shiny back plate there is part of the gasket structure and it needs to come off now.
Ahh, there she is!
A blow on 3 ports too, it wasn't messing around. It's in a pretty shit state. My aim on this day was to get all the studs out of both heads. First of all we go to the one at the top right with a simple t30 socket, it came out no problem, but I could see why it wouldn't tighten-
The threads are burred over.
Next is the snapped stud. With an Aluminium head you can mig a nut onto the snapped guy and the head won't damage. Clean the snap with some brake cleaner, hold the nut with a shit spanner and mig away!
Note the use of a bit of fire blanket and this is a measure to stop any splatter going down to the valve seats through the exhaust port. Wound right out... this is easy as pie.
Up next, Mr 'I aint moving for toffee'. I really didn't want to snap this guy so tried the double nut technique, no dice. I then welded the nut on to the stud, the heat likely helping to break any corrosion...
We have a succeed!
You see there why I use the shit spanners, don't want to be burning up the good tools here.
All studs out of this head, cleanly and now they are ready to be tapped out later.
Next head...
All hand tight!
The remaining studs came out with no issues but even this manifold looked like it may have been chuffing?
I need answers. Who, what, when, and where? Why is the other manifold in such a state? Why is this one not tight? The last thing I want is to rebuild this and have the same issue so, detective hat on, and Sherlock mode- Engaged...
Evidence. The gasket on the left is date stamped 2005 and the gasket (and cover) on the right are stamped 2004 (the 2002 cover has been reused). This car was built in 2002/3 and sold new in 2003. So it's had manifold gaskets when it was 2 years old and that can only be because it was blowing. What's more, if you have a new car and it develops an issue in a limited time from the date of sale, where do you take it?
Therefore it could be suggested that a main dealer or other authorised repairer themselves carried out work on this component... and fucked it, because you know what, that manifold is warped, a simple straight edge check will show that, and so is the other one, but I bet that they didn't even take the things off to check.
You will not straighten cast iron if it is bent with an M8 stud. I can also conclude that this car has since, very close to it's beginning, had a manifold issue which means that it has been running rich and likely smoked the cats long ago which lead to the moving of the oxygen sensor, smashing out the cats, and all that bollocks they did to it in Coventry.
Luckily, I had already got hold of a replacement for this bank, existing is at the top...
Wait... What? They've changed the design? Is that because they bend? Looks like they have removed material to make it a bit 'less stressed'.
What this means is that I've had to get the other one replaced to this revised design where there are no reported problems of blows.
There are further changes which are an improvement but not as exciting and we'll have a look at this later.
Matey who's outing his early STR needs to read this post!
-
Crispian_J_Hotson got a reaction from rainagain in Jaguar S Bype R - An Imposter, saving a bird, and that effin supercharger!
Thanks for the input, forum members.
This part is tedious. I am descaling and painting all the bits that I took off and this heat is baking me. I've been at it for a couple of days now and I've thrown the towel in to escape the sun. Good opportunity to catch up as there is a bit to discuss. First off, I have realised that there is what I now call 'the daily spend' and this is for anything that I've found along the way that needs replacing. There is something- every day! This is on top of the stuff that I've already got... none of which I can fit yet.
As an example, when I removed the two tensioners (one for the ancillaries and one for the supercharger belts) and the two idle pulleys, I discovered that all their bearings sounded like someone was dragging a box across a floor.
New replacements were ordered up and only then I realised that I'd ordered a modified idler pulley for the supercharger belt. This revised pulley is for a double sided ribbed belt, not the single which I have! The reason for the modification is to cure the cold start squeal (which I had) so getting the mod wasn't so bad, but I've got a new single sided belt for the old pulley. That means that I had to order a new double sided belt.
This type of scenario was a thing, as I have the early engine and Jag have made changes for improvement along the way.
I suppose I could off set that belt and some of pulleys cost as there is a recent water pump that was loosely bolted in and weeping...
Everything else like the AC pump, alternator (which is also recent), and PS pump were in good shape.
So you see that Crank pulley in the above image? Yeah, getting that off was the next milestone to hit. She's on at 375Nm with thread lock and legend has it that it is frowned upon to a) use a locking pin to hold the engine and 2) rotate the engine backwards.
Something like this:
The main issue I had was that apart from it being effing tight, the special tool that I got was for the V8. Great right? No...
The supercharged has the extended crank pulley so the tool is now not long enough to reach into the pulley, sit flush, and bolt up. That is unless you have a bearing press set like me!
All that was needed was one of the sleeves to go over the business end of the tool and some longer threaded bolts made up, like those shown above. It worked... just...
I've used my bearing press set a lot more for things which aren't bearings.
To add extra challenge, the only 24mm socket I had, split on me a long time ago... something to do with a 3 meter scaffold tube, but it refuses to die and completed this task without fail too.
Around the same time, before or after this job... can't remember... I had to remove the EGR. This bit is one of the scary parts people don't like but I had half a chance as in the vehicle history, this part had been replaced on 2.2.2018 as there is a bill for 1200£ for that and some wiring repairs. Those bolts should come out then?
It's a bit of a terror as you cannot see what you are doing and every tool is too long or too short, however, there is always more than one way to skin a cat, but it's all blind work. Fortunately, I have been in this situation many times ( mainly working for Citroen) and it doesn't really phase me, it just needs to be done.
So the bolts, and studs on the exhaust, did come out but there was a fight. The fight was only because of the fucktards that put them in. Have a look...
The also forgot* to bolt down the throttle body base casting, as seen by the missing bolt in the center of the below image (there's one missing on the other side too):
They wrecked the EGR flexible pipe by bending on it and putting a hole in it...
And that's a 200£ pipe believe it or not. Let's have a look at the wiring repairs whilst we are here eh?
Nice! Let me explain what's going on here, this is the supply and comms to the throttle body control. There is one green factory wire, connected to a big white, different gauge wire, connected to something in a black sleeve, connected to the rest of the original green wire. Along the way, they have torn off an earth connection which is supposed to connect to the head, and that's that fuzzy bit of bare cable just poking out of the sheathing. "Carz fixed sir... £twelve hunnit pls"!
Shockingly*, this was carried out by a Cat specialist in Coventry and that follows along the lines of all the shit work this car has had done to it, and the area from where I got it from. You can't argue with the facts.
That's not all though, it gets much more eye opening later.