


Bfg
-
Posts
3,025 -
Joined
-
Last visited
Reputation Activity
-

 Bfg got a reaction from mat_the_cat in Trailer Tent for a small car - home build
Evening All, I've been waiting for a dry day to get on with this trailer ..and today fitted the bill nicely. Not too hot, not too cold - a Goldilocks day . .
^ Flat-pack into 3d.. The seat support panel and a scrap off-cut piece of joisting timber set the seat to floor level, as well as their orientation square to each other. Held together with just a few drywall screws into the ends of those temporary battens, this was enough to handle it as a whole.
^ with the first side panel, resting on two end blocks, the floor & seat levels were positioned longitudinally and the little angle brackets used to pull n' hold the side into the shape.
^ weights served as an extra pair of hands to hold the panels. Here you can see I've weighted and fasten one end (top left hand side in this photo) under no load, and the other end is still sprung up, despite the weight of my black tool case on it. Nevertheless from here I could easily bend that end of the panel down and with a screw in the little angle bracket - fasten it. In time the plywood with GRP panel will accept the set. In the meantime the screws are holding it until I can fibreglass into the corner joints.
^ the two sides and the front now in place.
^ Look Mum I'm making a chariot !
^ With the little angle brackets taking the strain, I added a screw (through a penny washer) from the outside, at each end - to pull that last little bit of the curve in.
^ next., I cut the corner moudings to a rough oversize, ready for their final shaping to fit the box.
^ and this is one I prepared earlier.
. . . The Blue Peter badge presentation will be next week.
^ So there we are for today. Albeit looking more like a coracle than a box trailer ..until the wheel arches are cut.
Nothing is glued or fibreglassed in place yet. But it all fitted together as planned ! The shape is defined and its curved sides work really well to pre-tension the structure (..preventing twisting) so it already feels really tough ..And the outlay (cost) presently remains at : zilch.
yippee progress.
Pete.
-
Bfg got a reaction from mat_the_cat in Trailer Tent for a small car - home build
Having fibreglassed the front end of this trailer's box, and now standing up-ended on that - I removed both the (previously just screwed-down) rear panel and the inside seat support ..so that I might have access to laminate inside there.
^ This in turn provided the facility to more easily reach down (rather than contort around inside) to laminate the underside length of the seat to side panels. That went well ..inbetween rain showers on Monday. But again rain stopped play earlier than I might have liked.
Yesterday I was determined to get one with this supposedly quick job, even though that meant I had to stop every 45 minutes to put rain covers over it . . .
^ Rear panel seen refitted ..now onto the bridging-paste adhesive. And the grp corner panels trimmed for final fit. Again a clamped-in-place cross-brace was used to prevent the side's top corners from flaring out, and the weight of a 10ltr paint container positioned to keep the top-corner of the end-panel bowed-in while I bonded that grp corner in place.. By 3:30pm this was done on both left and right hand rear corners inbetween each (four or five) wave of heavy rain shower and the next wave of black cloud was looming overhead.
^ Inside filleting with the fibreglass bridging paste, in preparation for when I glassfibre laminate over it. There's a lot of physical contortion to working inside these corners, But for all the exercise ..I don't feel any the fitter for it !
- - -
"I fought the law ..and the law won" .. but the laws of nature did conspire against me ! with weather fronts blowing in very quickly & without pity swirling all around, and gravity being a fickle helper who at one moment helped hold panels to their curved shape ..and/or the plastic rain covers in place .. to then suddenly swap sides to work with the weather who had cunningly made various shiny surfaces wet n' slippery.
Together they highlighted what a right plonker I can be sometimes ! ..especially in those last minutes as the next wave of rain starts and I'm desperately trying to keep the end-grain of plywood dry . . .
^ (Previously) unopened brilliant white wall and ceiling paint 10L. Barely used masonary paint 5L. Neither lid came off, both cracked open.
And just to spite me the black clouds flew by without unloading a single drip, and the sun came out to dry the paint quickly. I know.. it couldn't have happened to a nicer chap !
And no, since moving to an apartment.. I don't have empty pots which I might have used filled with water, instead of full-of paint ones !
I scooped the paint up as quickly as I could into two waste bins and then rushed off to get the garden hose out. Some of the paint had already started to dry into the concrete slabs, so it wouldn't just brush away with the broom. Just then the heavens now decided to open. It bucketed it down. I donned rain coat, and with garden hose in one hand and cordless drill with wire brush in the other was standing their in the rain trying to clean this mess up.
Three hours of back breaking effort and the patio looks clean again. There was splatter on the walls but I spotted most and its all but gone now. 15L of premium paint..that was a costly learning experience.
This morning. . nicely scrubbed (wire brushed !) patio.
It's not raining ..and now the sun has the audacity to show it's face ! ..but I'm too knackered and feeling somewhat fkd off and with definite inclinations towards having a bonfire - so I'm taking the day off to bang my head against a wall.
Hope your day was better than mine. Hey, it's just part and parcel of any job or ' hobby ' conducted out in the fresh air (fibreglass dust and fumes aside). And I'll be back bright and bushy tailed tomorrow .. you'll see.
Bidding you a good'n
Pete.
-
 Bfg got a reaction from GrumpiusMaximus in Trailer Tent for a small car - home build
Having fibreglassed the front end of this trailer's box, and now standing up-ended on that - I removed both the (previously just screwed-down) rear panel and the inside seat support ..so that I might have access to laminate inside there.
^ This in turn provided the facility to more easily reach down (rather than contort around inside) to laminate the underside length of the seat to side panels. That went well ..inbetween rain showers on Monday. But again rain stopped play earlier than I might have liked.
Yesterday I was determined to get one with this supposedly quick job, even though that meant I had to stop every 45 minutes to put rain covers over it . . .
^ Rear panel seen refitted ..now onto the bridging-paste adhesive. And the grp corner panels trimmed for final fit. Again a clamped-in-place cross-brace was used to prevent the side's top corners from flaring out, and the weight of a 10ltr paint container positioned to keep the top-corner of the end-panel bowed-in while I bonded that grp corner in place.. By 3:30pm this was done on both left and right hand rear corners inbetween each (four or five) wave of heavy rain shower and the next wave of black cloud was looming overhead.
^ Inside filleting with the fibreglass bridging paste, in preparation for when I glassfibre laminate over it. There's a lot of physical contortion to working inside these corners, But for all the exercise ..I don't feel any the fitter for it !
- - -
"I fought the law ..and the law won" .. but the laws of nature did conspire against me ! with weather fronts blowing in very quickly & without pity swirling all around, and gravity being a fickle helper who at one moment helped hold panels to their curved shape ..and/or the plastic rain covers in place .. to then suddenly swap sides to work with the weather who had cunningly made various shiny surfaces wet n' slippery.
Together they highlighted what a right plonker I can be sometimes ! ..especially in those last minutes as the next wave of rain starts and I'm desperately trying to keep the end-grain of plywood dry . . .
^ (Previously) unopened brilliant white wall and ceiling paint 10L. Barely used masonary paint 5L. Neither lid came off, both cracked open.
And just to spite me the black clouds flew by without unloading a single drip, and the sun came out to dry the paint quickly. I know.. it couldn't have happened to a nicer chap !
And no, since moving to an apartment.. I don't have empty pots which I might have used filled with water, instead of full-of paint ones !
I scooped the paint up as quickly as I could into two waste bins and then rushed off to get the garden hose out. Some of the paint had already started to dry into the concrete slabs, so it wouldn't just brush away with the broom. Just then the heavens now decided to open. It bucketed it down. I donned rain coat, and with garden hose in one hand and cordless drill with wire brush in the other was standing their in the rain trying to clean this mess up.
Three hours of back breaking effort and the patio looks clean again. There was splatter on the walls but I spotted most and its all but gone now. 15L of premium paint..that was a costly learning experience.
This morning. . nicely scrubbed (wire brushed !) patio.
It's not raining ..and now the sun has the audacity to show it's face ! ..but I'm too knackered and feeling somewhat fkd off and with definite inclinations towards having a bonfire - so I'm taking the day off to bang my head against a wall.
Hope your day was better than mine. Hey, it's just part and parcel of any job or ' hobby ' conducted out in the fresh air (fibreglass dust and fumes aside). And I'll be back bright and bushy tailed tomorrow .. you'll see.
Bidding you a good'n
Pete.
-
Bfg got a reaction from GrumpiusMaximus in Trailer Tent for a small car - home build
However .. inbetween times I did get a good start on fibreglassing over the joints. . .
^ not at all the neatest of jobs but ...I could cite at least a dozen reasons why.. blah, blah, blah. I'm hoping it'll clean up enough to not be too shabby inside.
Structurally just this front-end of the box is now (mostly) bonded together. I yet need to lay a strip of grp on the underside corners of the plywood panels. The laminate schedule is just two lays of 600g chopped strand mat coming up the panels 40mm. The first strip is actually a little less width than the second so that the edges are feathered out.
- - -
While waiting for the overnight's rain to dry out, and then again when we had a flash downpour I was back onto the computer to change the design ..just a little . . .
^ The top illustration is as it was previously, with the bottom corners, front and back, cut off / mitred to a 45-degree angle. This was done to make the trailer appear visually lighter. However those corners cut through the floor, so either end of that panel would likewise have to be cut and tilted up ..which would take another day or two of work.
The bottom illustration shows those corners revised, curving the side panels up ..to the bottom of the floor panel, and gives the box a much softer look. I think I prefer the deliberately more utilitarian look, as it used to be ..but not enough to make the extra work worthwhile.
Right.., the sun has come out - so back to work.
Pete.
-
Bfg got a reaction from GrumpiusMaximus in Trailer Tent for a small car - home build
Slow progress since Thursday.
It was extremely hot here on Friday and bonding of the panels didn't go at all well. Sometimes things just don't happen right even when you're used to the process and the materials being used.
What happened was obviously my fault (..there's simply no-one else to blame when you work alone ! ) and it started off with my trying to straighten the bowed (recycled remember) floor and seat panels ..after all at some time it'll have to sit onto a chassis. I mostly did this straightening with a couple of length of 1-1/2" square timber, clamped in place. I then set about gluing the first side panel on.
I'm using polyester resin / glass-fibre bridging filler to bond the panels together and the first mix was too hot. It started to cure before I had the panel screwed back in place. I then over compensated with the next mix ..and that obstinately refused to cure .. despite the heat conspiring to dribble sweat into my eyes. This second mix was supposed to squeeze out of the joint ..and then I'd simply run a finger along the inside joint corners to create a fillet. However the extra timber ..to straighten out the floor's bows stopped me getting my hand in to those corners. duh !
I did get the two sides on, which is half the amount I'd hoped to achieve, but hey., life ain't often a summers day with strawberries and cream ..is it.?
Anyways up, the bxxxs-ups weren't irretrievable, just ugly and a bit of a gap where there shouldn't have been. Thankfully most of the gap is where the wheel-arch will be cut ..so i'll just ignore it.
Most of the ugliness cleaned up with an hour of scraping and sanding . . .
^ the green is the bridging filler shaped as a fillet along the joint between the seat and the side panel. As this filler has glass fibres in the mix - it's pretty tough. The fillets, on both sides of the panel will soon be over laid with grp. That will then be a strong joint.
Today, I fitted the front panel and again filleted those joints. It went much better today, and then just as I was setting things up to similarly bond the front corners in place - we had a thunderstorm and everything was quickly dumped into my sitting room.
It was just 4 o'clock, and a little frustrated at the slow progress of this trailer - I wasn't ready to stop . . .
^ yep this inside my home, car wheels, garage rack of bits n' bobs and tools ..and now my fibreglassing a trailer body in the middle of the floor Don't tell Frank ..the landlord.
^ clamps holding things in place while I applied the sticky stuff. The flat panels are pulled in and held there by the screws into the edge of the seat & floor level plywood. However the top edge of the sides had nothing to stop them springing straighter, so the assortment of clamps, battens and wedges are to pull those top corners into line.
^ The box trailer's two front corners have now been bonded and filleted on their inside. I just hope the adhesion is strong enough to not spring / split open again before I manage to get some glass-fibre mat laid over it. Perhaps I'll get that done tomorrow.
So that's it for tonight ..Time for a cuppa and to cook some supper. Chicken and chips I reckon.
Pete.
-
Bfg got a reaction from GrumpiusMaximus in Trailer Tent for a small car - home build
Evening All, I've been waiting for a dry day to get on with this trailer ..and today fitted the bill nicely. Not too hot, not too cold - a Goldilocks day . .
^ Flat-pack into 3d.. The seat support panel and a scrap off-cut piece of joisting timber set the seat to floor level, as well as their orientation square to each other. Held together with just a few drywall screws into the ends of those temporary battens, this was enough to handle it as a whole.
^ with the first side panel, resting on two end blocks, the floor & seat levels were positioned longitudinally and the little angle brackets used to pull n' hold the side into the shape.
^ weights served as an extra pair of hands to hold the panels. Here you can see I've weighted and fasten one end (top left hand side in this photo) under no load, and the other end is still sprung up, despite the weight of my black tool case on it. Nevertheless from here I could easily bend that end of the panel down and with a screw in the little angle bracket - fasten it. In time the plywood with GRP panel will accept the set. In the meantime the screws are holding it until I can fibreglass into the corner joints.
^ the two sides and the front now in place.
^ Look Mum I'm making a chariot !
^ With the little angle brackets taking the strain, I added a screw (through a penny washer) from the outside, at each end - to pull that last little bit of the curve in.
^ next., I cut the corner moudings to a rough oversize, ready for their final shaping to fit the box.
^ and this is one I prepared earlier.
. . . The Blue Peter badge presentation will be next week.
^ So there we are for today. Albeit looking more like a coracle than a box trailer ..until the wheel arches are cut.
Nothing is glued or fibreglassed in place yet. But it all fitted together as planned ! The shape is defined and its curved sides work really well to pre-tension the structure (..preventing twisting) so it already feels really tough ..And the outlay (cost) presently remains at : zilch.
yippee progress.
Pete.
-
 Bfg got a reaction from Dan_ZTT in Trailer Tent for a small car - home build
Having fibreglassed the front end of this trailer's box, and now standing up-ended on that - I removed both the (previously just screwed-down) rear panel and the inside seat support ..so that I might have access to laminate inside there.
^ This in turn provided the facility to more easily reach down (rather than contort around inside) to laminate the underside length of the seat to side panels. That went well ..inbetween rain showers on Monday. But again rain stopped play earlier than I might have liked.
Yesterday I was determined to get one with this supposedly quick job, even though that meant I had to stop every 45 minutes to put rain covers over it . . .
^ Rear panel seen refitted ..now onto the bridging-paste adhesive. And the grp corner panels trimmed for final fit. Again a clamped-in-place cross-brace was used to prevent the side's top corners from flaring out, and the weight of a 10ltr paint container positioned to keep the top-corner of the end-panel bowed-in while I bonded that grp corner in place.. By 3:30pm this was done on both left and right hand rear corners inbetween each (four or five) wave of heavy rain shower and the next wave of black cloud was looming overhead.
^ Inside filleting with the fibreglass bridging paste, in preparation for when I glassfibre laminate over it. There's a lot of physical contortion to working inside these corners, But for all the exercise ..I don't feel any the fitter for it !
- - -
"I fought the law ..and the law won" .. but the laws of nature did conspire against me ! with weather fronts blowing in very quickly & without pity swirling all around, and gravity being a fickle helper who at one moment helped hold panels to their curved shape ..and/or the plastic rain covers in place .. to then suddenly swap sides to work with the weather who had cunningly made various shiny surfaces wet n' slippery.
Together they highlighted what a right plonker I can be sometimes ! ..especially in those last minutes as the next wave of rain starts and I'm desperately trying to keep the end-grain of plywood dry . . .
^ (Previously) unopened brilliant white wall and ceiling paint 10L. Barely used masonary paint 5L. Neither lid came off, both cracked open.
And just to spite me the black clouds flew by without unloading a single drip, and the sun came out to dry the paint quickly. I know.. it couldn't have happened to a nicer chap !
And no, since moving to an apartment.. I don't have empty pots which I might have used filled with water, instead of full-of paint ones !
I scooped the paint up as quickly as I could into two waste bins and then rushed off to get the garden hose out. Some of the paint had already started to dry into the concrete slabs, so it wouldn't just brush away with the broom. Just then the heavens now decided to open. It bucketed it down. I donned rain coat, and with garden hose in one hand and cordless drill with wire brush in the other was standing their in the rain trying to clean this mess up.
Three hours of back breaking effort and the patio looks clean again. There was splatter on the walls but I spotted most and its all but gone now. 15L of premium paint..that was a costly learning experience.
This morning. . nicely scrubbed (wire brushed !) patio.
It's not raining ..and now the sun has the audacity to show it's face ! ..but I'm too knackered and feeling somewhat fkd off and with definite inclinations towards having a bonfire - so I'm taking the day off to bang my head against a wall.
Hope your day was better than mine. Hey, it's just part and parcel of any job or ' hobby ' conducted out in the fresh air (fibreglass dust and fumes aside). And I'll be back bright and bushy tailed tomorrow .. you'll see.
Bidding you a good'n
Pete.
-
 Bfg got a reaction from drum in Trailer Tent for a small car - home build
Evening All, I've been waiting for a dry day to get on with this trailer ..and today fitted the bill nicely. Not too hot, not too cold - a Goldilocks day . .
^ Flat-pack into 3d.. The seat support panel and a scrap off-cut piece of joisting timber set the seat to floor level, as well as their orientation square to each other. Held together with just a few drywall screws into the ends of those temporary battens, this was enough to handle it as a whole.
^ with the first side panel, resting on two end blocks, the floor & seat levels were positioned longitudinally and the little angle brackets used to pull n' hold the side into the shape.
^ weights served as an extra pair of hands to hold the panels. Here you can see I've weighted and fasten one end (top left hand side in this photo) under no load, and the other end is still sprung up, despite the weight of my black tool case on it. Nevertheless from here I could easily bend that end of the panel down and with a screw in the little angle bracket - fasten it. In time the plywood with GRP panel will accept the set. In the meantime the screws are holding it until I can fibreglass into the corner joints.
^ the two sides and the front now in place.
^ Look Mum I'm making a chariot !
^ With the little angle brackets taking the strain, I added a screw (through a penny washer) from the outside, at each end - to pull that last little bit of the curve in.
^ next., I cut the corner moudings to a rough oversize, ready for their final shaping to fit the box.
^ and this is one I prepared earlier.
. . . The Blue Peter badge presentation will be next week.
^ So there we are for today. Albeit looking more like a coracle than a box trailer ..until the wheel arches are cut.
Nothing is glued or fibreglassed in place yet. But it all fitted together as planned ! The shape is defined and its curved sides work really well to pre-tension the structure (..preventing twisting) so it already feels really tough ..And the outlay (cost) presently remains at : zilch.
yippee progress.
Pete.
-
 Bfg got a reaction from mitsisigma01 in Trailer Tent for a small car - home build
However .. inbetween times I did get a good start on fibreglassing over the joints. . .
^ not at all the neatest of jobs but ...I could cite at least a dozen reasons why.. blah, blah, blah. I'm hoping it'll clean up enough to not be too shabby inside.
Structurally just this front-end of the box is now (mostly) bonded together. I yet need to lay a strip of grp on the underside corners of the plywood panels. The laminate schedule is just two lays of 600g chopped strand mat coming up the panels 40mm. The first strip is actually a little less width than the second so that the edges are feathered out.
- - -
While waiting for the overnight's rain to dry out, and then again when we had a flash downpour I was back onto the computer to change the design ..just a little . . .
^ The top illustration is as it was previously, with the bottom corners, front and back, cut off / mitred to a 45-degree angle. This was done to make the trailer appear visually lighter. However those corners cut through the floor, so either end of that panel would likewise have to be cut and tilted up ..which would take another day or two of work.
The bottom illustration shows those corners revised, curving the side panels up ..to the bottom of the floor panel, and gives the box a much softer look. I think I prefer the deliberately more utilitarian look, as it used to be ..but not enough to make the extra work worthwhile.
Right.., the sun has come out - so back to work.
Pete.
-

-
-
 Bfg reacted to Zelandeth in Trailer Tent for a small car - home build
Never bothered doing anything about it really because it only usually does a couple of tens of miles a year back and forth to the local tip...aside from just now as they're not allowing trailers in anyway so it hasn't moved since 2019.
-
 Bfg got a reaction from busmansholiday in Trailer Tent for a small car - home build
Evening All, I've been waiting for a dry day to get on with this trailer ..and today fitted the bill nicely. Not too hot, not too cold - a Goldilocks day . .
^ Flat-pack into 3d.. The seat support panel and a scrap off-cut piece of joisting timber set the seat to floor level, as well as their orientation square to each other. Held together with just a few drywall screws into the ends of those temporary battens, this was enough to handle it as a whole.
^ with the first side panel, resting on two end blocks, the floor & seat levels were positioned longitudinally and the little angle brackets used to pull n' hold the side into the shape.
^ weights served as an extra pair of hands to hold the panels. Here you can see I've weighted and fasten one end (top left hand side in this photo) under no load, and the other end is still sprung up, despite the weight of my black tool case on it. Nevertheless from here I could easily bend that end of the panel down and with a screw in the little angle bracket - fasten it. In time the plywood with GRP panel will accept the set. In the meantime the screws are holding it until I can fibreglass into the corner joints.
^ the two sides and the front now in place.
^ Look Mum I'm making a chariot !
^ With the little angle brackets taking the strain, I added a screw (through a penny washer) from the outside, at each end - to pull that last little bit of the curve in.
^ next., I cut the corner moudings to a rough oversize, ready for their final shaping to fit the box.
^ and this is one I prepared earlier.
. . . The Blue Peter badge presentation will be next week.
^ So there we are for today. Albeit looking more like a coracle than a box trailer ..until the wheel arches are cut.
Nothing is glued or fibreglassed in place yet. But it all fitted together as planned ! The shape is defined and its curved sides work really well to pre-tension the structure (..preventing twisting) so it already feels really tough ..And the outlay (cost) presently remains at : zilch.
yippee progress.
Pete.
-
 Bfg got a reaction from Dick Longbridge in Trailer Tent for a small car - home build
Slow progress since Thursday.
It was extremely hot here on Friday and bonding of the panels didn't go at all well. Sometimes things just don't happen right even when you're used to the process and the materials being used.
What happened was obviously my fault (..there's simply no-one else to blame when you work alone ! ) and it started off with my trying to straighten the bowed (recycled remember) floor and seat panels ..after all at some time it'll have to sit onto a chassis. I mostly did this straightening with a couple of length of 1-1/2" square timber, clamped in place. I then set about gluing the first side panel on.
I'm using polyester resin / glass-fibre bridging filler to bond the panels together and the first mix was too hot. It started to cure before I had the panel screwed back in place. I then over compensated with the next mix ..and that obstinately refused to cure .. despite the heat conspiring to dribble sweat into my eyes. This second mix was supposed to squeeze out of the joint ..and then I'd simply run a finger along the inside joint corners to create a fillet. However the extra timber ..to straighten out the floor's bows stopped me getting my hand in to those corners. duh !
I did get the two sides on, which is half the amount I'd hoped to achieve, but hey., life ain't often a summers day with strawberries and cream ..is it.?
Anyways up, the bxxxs-ups weren't irretrievable, just ugly and a bit of a gap where there shouldn't have been. Thankfully most of the gap is where the wheel-arch will be cut ..so i'll just ignore it.
Most of the ugliness cleaned up with an hour of scraping and sanding . . .
^ the green is the bridging filler shaped as a fillet along the joint between the seat and the side panel. As this filler has glass fibres in the mix - it's pretty tough. The fillets, on both sides of the panel will soon be over laid with grp. That will then be a strong joint.
Today, I fitted the front panel and again filleted those joints. It went much better today, and then just as I was setting things up to similarly bond the front corners in place - we had a thunderstorm and everything was quickly dumped into my sitting room.
It was just 4 o'clock, and a little frustrated at the slow progress of this trailer - I wasn't ready to stop . . .
^ yep this inside my home, car wheels, garage rack of bits n' bobs and tools ..and now my fibreglassing a trailer body in the middle of the floor Don't tell Frank ..the landlord.
^ clamps holding things in place while I applied the sticky stuff. The flat panels are pulled in and held there by the screws into the edge of the seat & floor level plywood. However the top edge of the sides had nothing to stop them springing straighter, so the assortment of clamps, battens and wedges are to pull those top corners into line.
^ The box trailer's two front corners have now been bonded and filleted on their inside. I just hope the adhesion is strong enough to not spring / split open again before I manage to get some glass-fibre mat laid over it. Perhaps I'll get that done tomorrow.
So that's it for tonight ..Time for a cuppa and to cook some supper. Chicken and chips I reckon.
Pete.
-
Bfg got a reaction from GrumpiusMaximus in Trailer Tent for a small car - home build
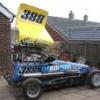
a picture speaks a thousand words . .
-
Bfg reacted to Zelandeth in Trailer Tent for a small car - home build
Funny how different people have different dislikes when driving - if it were me it would have to be slightly wider than the car most likely as I utterly despise towing something I can't see properly.
Keep meaning to stick a couple of those flags you see on things like recumbent trikes on my trailer so I can see where it is.
This thing is completely invisible from in the car aside from the very far corners which you can spot on really tight turns.
Thankfully it behaves itself pretty well as it's ancient and far heavier than it looks.
-
 Bfg got a reaction from Asimo in Triumph - That was a year that was..
Friday update from Mark and his Team . . .
^ drain pipe fitted and led through the front wheel-arch splash closure. x4 wing fitting kits include new bolts, the correct clip-nuts & seals.
^ Door hanging and panel alignment, relative to the sill and each other. The check strap has been replaced and it now clicks to hold the door open. That's a nice bonus
^ Chassis rear legs are sitting evenly level, both relative to datum floor and to the rear valance panel.
I might add that a whole bundle of work has happened ..but was barely noticed or reported on, such as correctly greasing each suspension and steering pivot and their reassembly with new bolts ..fitted with coppaslip. Similarly refitting the whole IRS drive-train and the brakes happened in a blink - even though the cut-short wire-wheel studs were replaced, which necessitated the brake calipers coming off. Those have of course been refitted as have the hydraulic systems. And when did any of those jobs just take five-minutes ! ?
All in all steady progress has, and is constantly being made, but most of that work is in the smaller details. I'm really glad to have a conscientious mechanic, who is experienced with TR's, ensure things are in both good order and done correctly.
Bidding you a good weekend,
Pete.
-
Bfg got a reaction from Dan_ZTT in Trailer Tent for a small car - home build
Slow progress since Thursday.
It was extremely hot here on Friday and bonding of the panels didn't go at all well. Sometimes things just don't happen right even when you're used to the process and the materials being used.
What happened was obviously my fault (..there's simply no-one else to blame when you work alone ! ) and it started off with my trying to straighten the bowed (recycled remember) floor and seat panels ..after all at some time it'll have to sit onto a chassis. I mostly did this straightening with a couple of length of 1-1/2" square timber, clamped in place. I then set about gluing the first side panel on.
I'm using polyester resin / glass-fibre bridging filler to bond the panels together and the first mix was too hot. It started to cure before I had the panel screwed back in place. I then over compensated with the next mix ..and that obstinately refused to cure .. despite the heat conspiring to dribble sweat into my eyes. This second mix was supposed to squeeze out of the joint ..and then I'd simply run a finger along the inside joint corners to create a fillet. However the extra timber ..to straighten out the floor's bows stopped me getting my hand in to those corners. duh !
I did get the two sides on, which is half the amount I'd hoped to achieve, but hey., life ain't often a summers day with strawberries and cream ..is it.?
Anyways up, the bxxxs-ups weren't irretrievable, just ugly and a bit of a gap where there shouldn't have been. Thankfully most of the gap is where the wheel-arch will be cut ..so i'll just ignore it.
Most of the ugliness cleaned up with an hour of scraping and sanding . . .
^ the green is the bridging filler shaped as a fillet along the joint between the seat and the side panel. As this filler has glass fibres in the mix - it's pretty tough. The fillets, on both sides of the panel will soon be over laid with grp. That will then be a strong joint.
Today, I fitted the front panel and again filleted those joints. It went much better today, and then just as I was setting things up to similarly bond the front corners in place - we had a thunderstorm and everything was quickly dumped into my sitting room.
It was just 4 o'clock, and a little frustrated at the slow progress of this trailer - I wasn't ready to stop . . .
^ yep this inside my home, car wheels, garage rack of bits n' bobs and tools ..and now my fibreglassing a trailer body in the middle of the floor Don't tell Frank ..the landlord.
^ clamps holding things in place while I applied the sticky stuff. The flat panels are pulled in and held there by the screws into the edge of the seat & floor level plywood. However the top edge of the sides had nothing to stop them springing straighter, so the assortment of clamps, battens and wedges are to pull those top corners into line.
^ The box trailer's two front corners have now been bonded and filleted on their inside. I just hope the adhesion is strong enough to not spring / split open again before I manage to get some glass-fibre mat laid over it. Perhaps I'll get that done tomorrow.
So that's it for tonight ..Time for a cuppa and to cook some supper. Chicken and chips I reckon.
Pete.
-
 Bfg got a reaction from neil1971 in Triumph - That was a year that was..
Friday update from Mark and his Team . . .
^ drain pipe fitted and led through the front wheel-arch splash closure. x4 wing fitting kits include new bolts, the correct clip-nuts & seals.
^ Door hanging and panel alignment, relative to the sill and each other. The check strap has been replaced and it now clicks to hold the door open. That's a nice bonus
^ Chassis rear legs are sitting evenly level, both relative to datum floor and to the rear valance panel.
I might add that a whole bundle of work has happened ..but was barely noticed or reported on, such as correctly greasing each suspension and steering pivot and their reassembly with new bolts ..fitted with coppaslip. Similarly refitting the whole IRS drive-train and the brakes happened in a blink - even though the cut-short wire-wheel studs were replaced, which necessitated the brake calipers coming off. Those have of course been refitted as have the hydraulic systems. And when did any of those jobs just take five-minutes ! ?
All in all steady progress has, and is constantly being made, but most of that work is in the smaller details. I'm really glad to have a conscientious mechanic, who is experienced with TR's, ensure things are in both good order and done correctly.
Bidding you a good weekend,
Pete.
-
Bfg got a reaction from Asimo in Triumph - That was a year that was..
Quick update from Mark on Tuesday ..
Body tub back on and I'm told all the body-mount holes lined up beautifully ..and with even shimming its sitting nicely square.
Oh dear, Katie looks to have lost a lot of weight.
^ Doors being fitted and carefully aligned.
I'm to give Mark a call this morning, and hopefully he'll share further news of excellent progress.
Pete
-
Bfg got a reaction from Asimo in Triumph - That was a year that was..
Just a few more . . .
.. and now the same on both sides !
Almost all looking good to me.. but the gearbox-damper clamp, on the end of the gearbox by the UJ, is to be turned around.
Pete.
-
 Bfg got a reaction from GMcD in Triumph - That was a year that was..
Friday update from Mark and his Team . . .
^ drain pipe fitted and led through the front wheel-arch splash closure. x4 wing fitting kits include new bolts, the correct clip-nuts & seals.
^ Door hanging and panel alignment, relative to the sill and each other. The check strap has been replaced and it now clicks to hold the door open. That's a nice bonus
^ Chassis rear legs are sitting evenly level, both relative to datum floor and to the rear valance panel.
I might add that a whole bundle of work has happened ..but was barely noticed or reported on, such as correctly greasing each suspension and steering pivot and their reassembly with new bolts ..fitted with coppaslip. Similarly refitting the whole IRS drive-train and the brakes happened in a blink - even though the cut-short wire-wheel studs were replaced, which necessitated the brake calipers coming off. Those have of course been refitted as have the hydraulic systems. And when did any of those jobs just take five-minutes ! ?
All in all steady progress has, and is constantly being made, but most of that work is in the smaller details. I'm really glad to have a conscientious mechanic, who is experienced with TR's, ensure things are in both good order and done correctly.
Bidding you a good weekend,
Pete.
-
Bfg got a reaction from busmansholiday in Trailer Tent for a small car - home build
Slow progress since Thursday.
It was extremely hot here on Friday and bonding of the panels didn't go at all well. Sometimes things just don't happen right even when you're used to the process and the materials being used.
What happened was obviously my fault (..there's simply no-one else to blame when you work alone ! ) and it started off with my trying to straighten the bowed (recycled remember) floor and seat panels ..after all at some time it'll have to sit onto a chassis. I mostly did this straightening with a couple of length of 1-1/2" square timber, clamped in place. I then set about gluing the first side panel on.
I'm using polyester resin / glass-fibre bridging filler to bond the panels together and the first mix was too hot. It started to cure before I had the panel screwed back in place. I then over compensated with the next mix ..and that obstinately refused to cure .. despite the heat conspiring to dribble sweat into my eyes. This second mix was supposed to squeeze out of the joint ..and then I'd simply run a finger along the inside joint corners to create a fillet. However the extra timber ..to straighten out the floor's bows stopped me getting my hand in to those corners. duh !
I did get the two sides on, which is half the amount I'd hoped to achieve, but hey., life ain't often a summers day with strawberries and cream ..is it.?
Anyways up, the bxxxs-ups weren't irretrievable, just ugly and a bit of a gap where there shouldn't have been. Thankfully most of the gap is where the wheel-arch will be cut ..so i'll just ignore it.
Most of the ugliness cleaned up with an hour of scraping and sanding . . .
^ the green is the bridging filler shaped as a fillet along the joint between the seat and the side panel. As this filler has glass fibres in the mix - it's pretty tough. The fillets, on both sides of the panel will soon be over laid with grp. That will then be a strong joint.
Today, I fitted the front panel and again filleted those joints. It went much better today, and then just as I was setting things up to similarly bond the front corners in place - we had a thunderstorm and everything was quickly dumped into my sitting room.
It was just 4 o'clock, and a little frustrated at the slow progress of this trailer - I wasn't ready to stop . . .
^ yep this inside my home, car wheels, garage rack of bits n' bobs and tools ..and now my fibreglassing a trailer body in the middle of the floor Don't tell Frank ..the landlord.
^ clamps holding things in place while I applied the sticky stuff. The flat panels are pulled in and held there by the screws into the edge of the seat & floor level plywood. However the top edge of the sides had nothing to stop them springing straighter, so the assortment of clamps, battens and wedges are to pull those top corners into line.
^ The box trailer's two front corners have now been bonded and filleted on their inside. I just hope the adhesion is strong enough to not spring / split open again before I manage to get some glass-fibre mat laid over it. Perhaps I'll get that done tomorrow.
So that's it for tonight ..Time for a cuppa and to cook some supper. Chicken and chips I reckon.
Pete.
-
 Bfg got a reaction from Mally in Trailer Tent for a small car - home build
Evening All, I've been waiting for a dry day to get on with this trailer ..and today fitted the bill nicely. Not too hot, not too cold - a Goldilocks day . .
^ Flat-pack into 3d.. The seat support panel and a scrap off-cut piece of joisting timber set the seat to floor level, as well as their orientation square to each other. Held together with just a few drywall screws into the ends of those temporary battens, this was enough to handle it as a whole.
^ with the first side panel, resting on two end blocks, the floor & seat levels were positioned longitudinally and the little angle brackets used to pull n' hold the side into the shape.
^ weights served as an extra pair of hands to hold the panels. Here you can see I've weighted and fasten one end (top left hand side in this photo) under no load, and the other end is still sprung up, despite the weight of my black tool case on it. Nevertheless from here I could easily bend that end of the panel down and with a screw in the little angle bracket - fasten it. In time the plywood with GRP panel will accept the set. In the meantime the screws are holding it until I can fibreglass into the corner joints.
^ the two sides and the front now in place.
^ Look Mum I'm making a chariot !
^ With the little angle brackets taking the strain, I added a screw (through a penny washer) from the outside, at each end - to pull that last little bit of the curve in.
^ next., I cut the corner moudings to a rough oversize, ready for their final shaping to fit the box.
^ and this is one I prepared earlier.
. . . The Blue Peter badge presentation will be next week.
^ So there we are for today. Albeit looking more like a coracle than a box trailer ..until the wheel arches are cut.
Nothing is glued or fibreglassed in place yet. But it all fitted together as planned ! The shape is defined and its curved sides work really well to pre-tension the structure (..preventing twisting) so it already feels really tough ..And the outlay (cost) presently remains at : zilch.
yippee progress.
Pete.
-
 Bfg got a reaction from Rab in Trailer Tent for a small car - home build
Don't look now but the silly old codger is making curvy things and cutting wood. . .
^ using the cut-lengthways drainage pipe as a quick n' dirty mould, the trailer's fibreglass corners released fine.
^ rain had stopped play for the past week ..but this afternoon was glorious weather, to get out and recycle some old (marine grade 7-ply 1/2" thick) plywood
Having odd shapes, and in two pieces just made marking-out a little long-winded. this is for the first piece which I'll then use as a template for the next. Even if I had actually gone out and bought new sheets of plywood ; the size of two pieces to be cut is 1325 x 1097mm ..so there would have been a lot of waste from 8ft x 4ft (2440 x 1220mm) sheets.
^ Marking out a tapering shape with four gently-curved edges took me half of a sunny afternoon. Cutting it was pretty quick though.
^ this will be the floor of the box trailer, sitting on the chassis rails, which thankfully are to be both straight and parallel.
^ the edges of this and its sister piece (which is to have a large hatch in it) will be the formers for the sides and ends. Getting the curves fair was done by planer, belt sander, and then long-board.
Not a lot to show for an afternoon's "work" ..but as this will next be used to mark out the next piece things ought to pick up a little in pace.
Hope you also had a pleasant day.
Pete.