fatharris
-
Posts
2,408 -
Joined
-
Last visited
-
Days Won
6
Content Type
Profiles
Forums
Events
Everything posted by fatharris
-
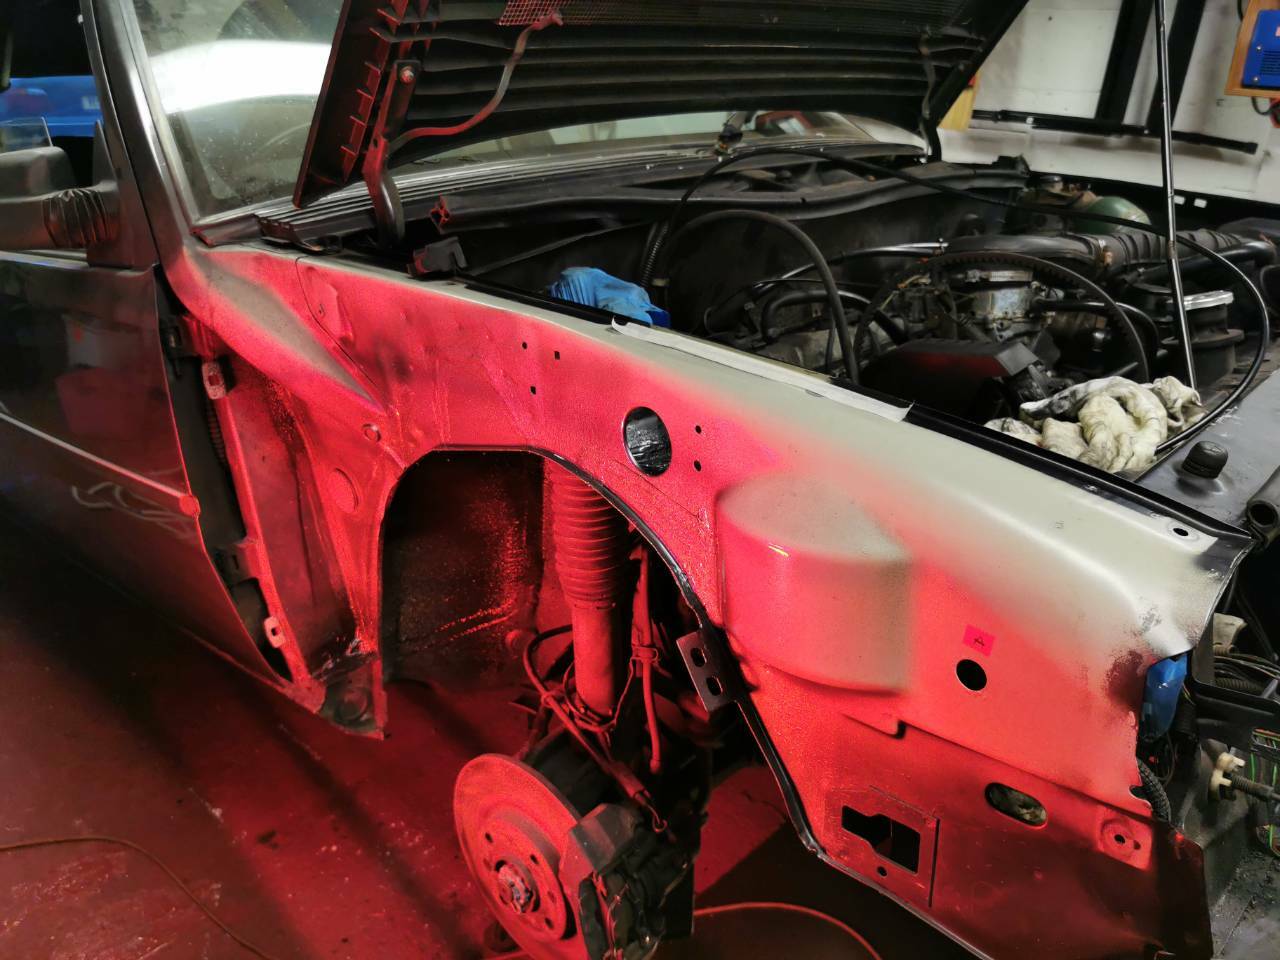
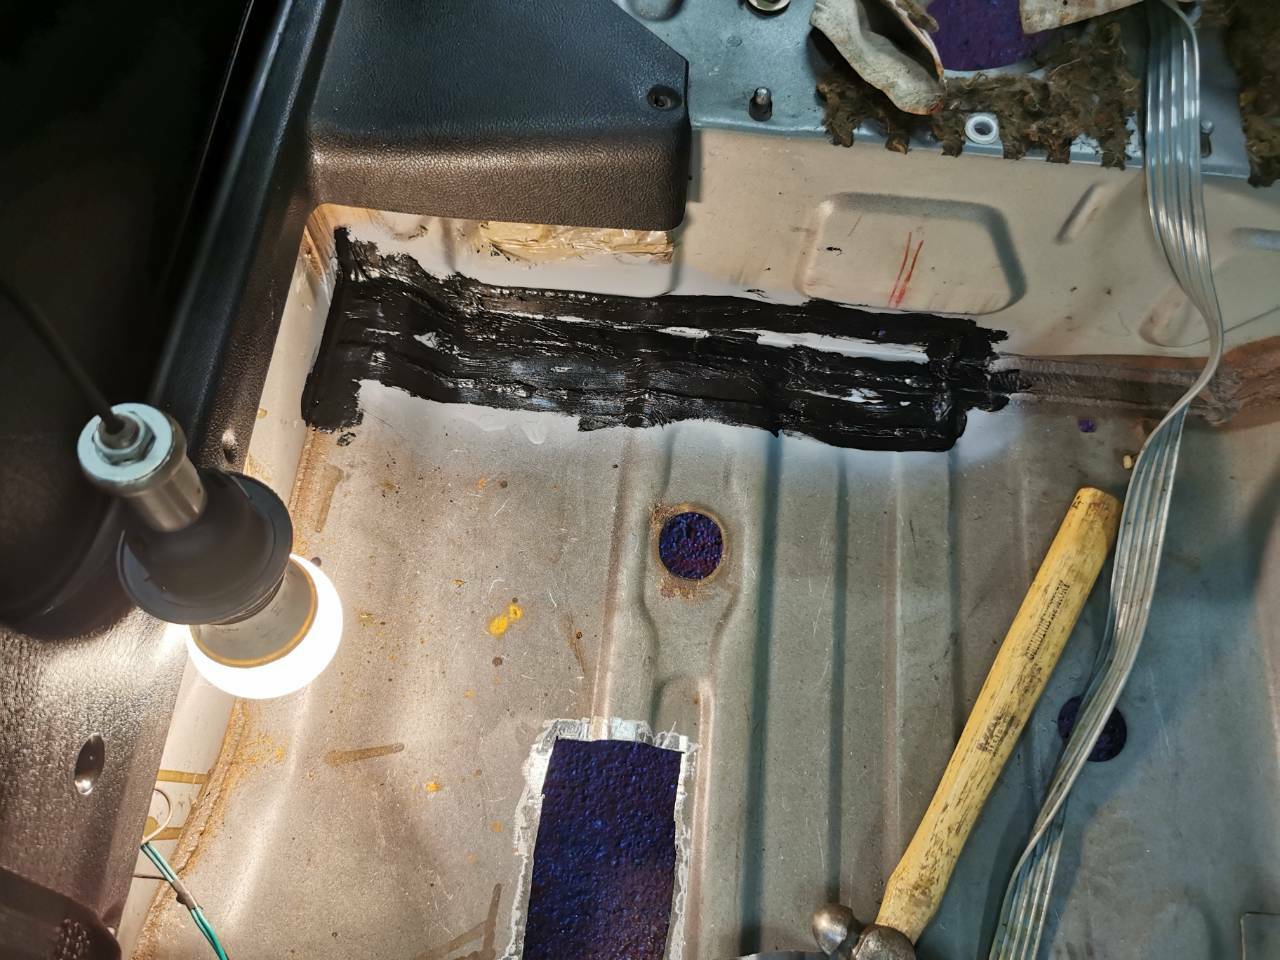
Early start before work this morning, as I popped into the garage before I set off and laid a coat of primer onto the Puraflex layer - think this was a contributory issue with the Schultz and lanoguard not properly setting last time. Drove to work with a wonderful sunrise backdrop: Yes, I still need to wash it, but it has been an absolutely fantastic car over the winter. When I finished from work, I felt rough as arseholes, so I only popped into the garage to lay down some protective finishes in the OSF arch, courtesy of these two products: Fertan as a brand is highly rated as a rust converter so I'm hoping the stone chip follows in the same vein. Masked the important bits: And cracked on -Fertan on the underside, paint on the inner wing and the arch. Ended up doing two coats of each. Popped the IR light on to help speed up the curing time between coats, but it'll dry naturally now till tomorrow.

- 366 replies
-
- 14
-

-
Looking forward to seeing the progress on this, the photos alone were giving me the shivers!
-
Quiet evening today, I laid down a coat of red primer to all worked-on areas. Finally had a chance to use the IR heater! Helped dry the primer super quick. Added a layer of Puraflex on the seams and joins of wherever I was working, and left it to dry overnight. Working a small job on the sofa tonight - the VIN plate is pretty pitted and grotty, so a bit of time with a spare electric toothbrush and some metal polish might yield some results. It's not the fastest process, but there is a slight improvement. I'll keep working on it when I'm not in the garage. Still waiting on loads of bits to arrive in the post.
-
Currently £15.69 for 600g CO2, I think I'm on my fifth or sixth bottle now, so almost tipping into 'should have bought the big bottle' territory.
-
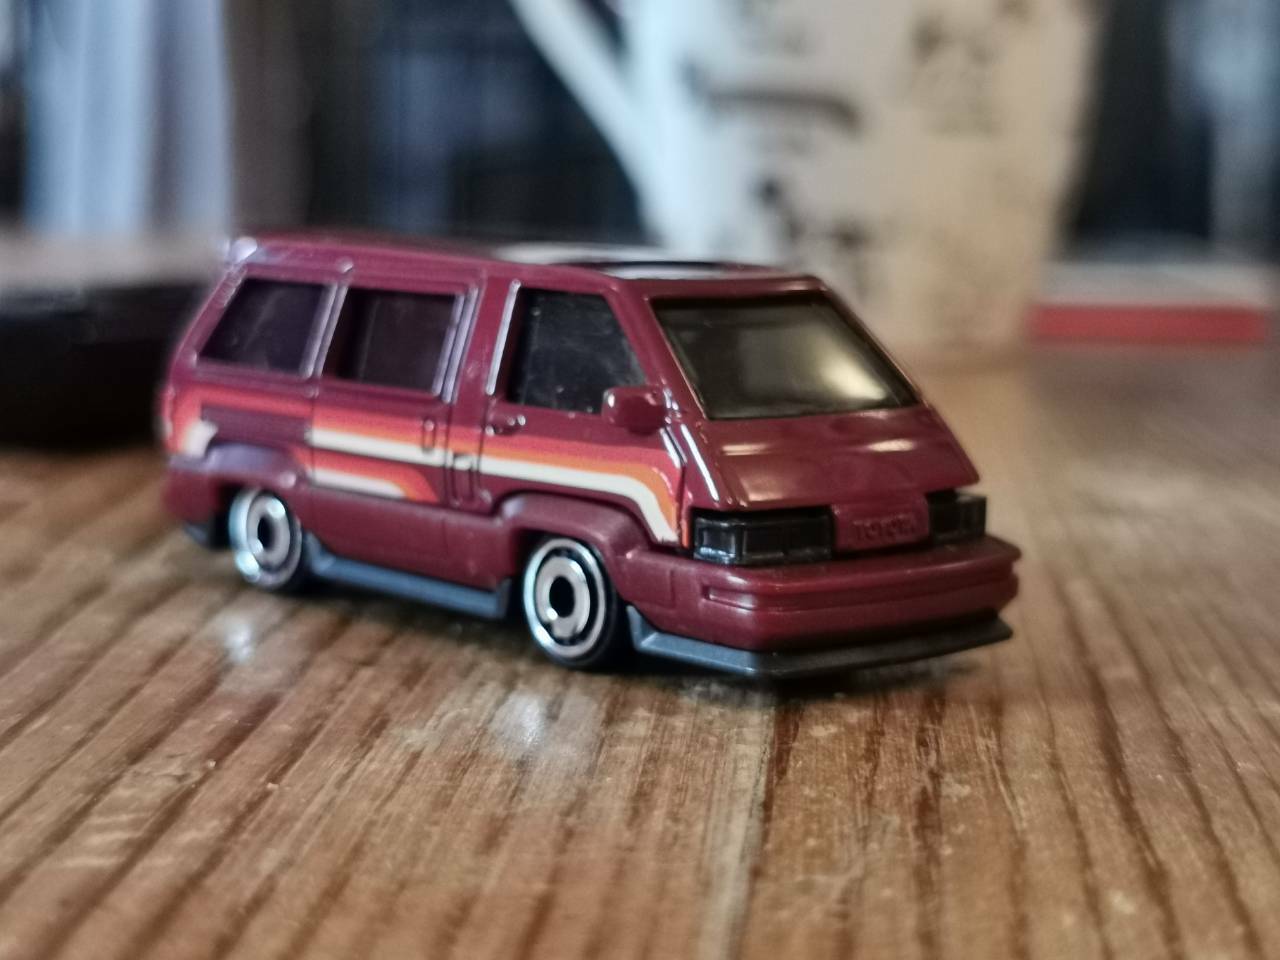
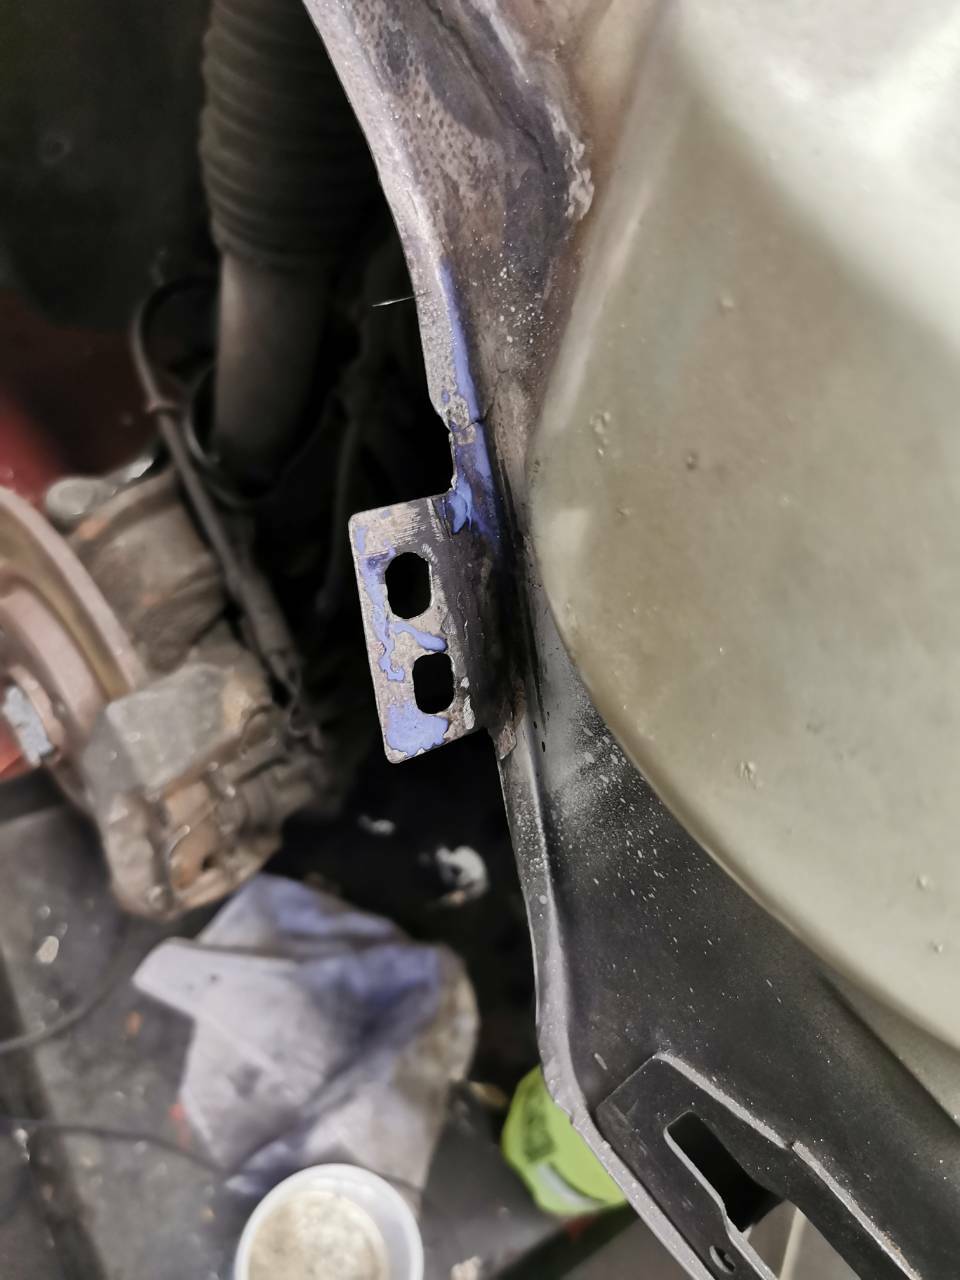
Saturday ended up being a write-off, work was busy and I was up till gone 2am, and back up at 6am, so I was shattered. Today, I popped out to buy some LHM and some engine oil, and got these hot wheels for the kids: With that done, it was time to weld the two new patches in. First one went well, so it was time to line up the big one. Decided to use a self-tapper through the plug weld hole for a bit of assistance. I got about a third of the way through and naturally, I ran out of gas 🤦♂️ luckily, the local hardware shop is open on a Sunday and I bought two bottles for peace of mind. Definitely at the point where buying a big bottle would have made more sense, but oh well. With the new gas plumbed in, the rest of the patch was done. Forgot to get a photo of before the grinding though. I'm a little unsure about where I would stand MOT wise with this repair - it's been plug welded in the original spot weld positions, but the MOT manual says it needs to be a continuous weld if it's a patch. Can anyone give some advice for that? After that, I replaced a crumbling tiny bracket on the inner wing edge. And I repaired the damaged bracket that I jacked on and bent - it transpired it had pulled a couple of spot welds, so I ratchet strapped it to the opposite bracket, straightened it back out with a lump hammer, cleaned up the metal and re-welded the spot welds. It's a lot better than it was. Thankfully, this brings an end to the welding repairs required in the OSF arch - not much left to go now! Cheers.
- 366 replies
-
- 11
-
-
Big fan of the BX, and fair play, that welding is practically invisible on the arch!
-
Jim Bell collection threads are my favourite collection threads.
-
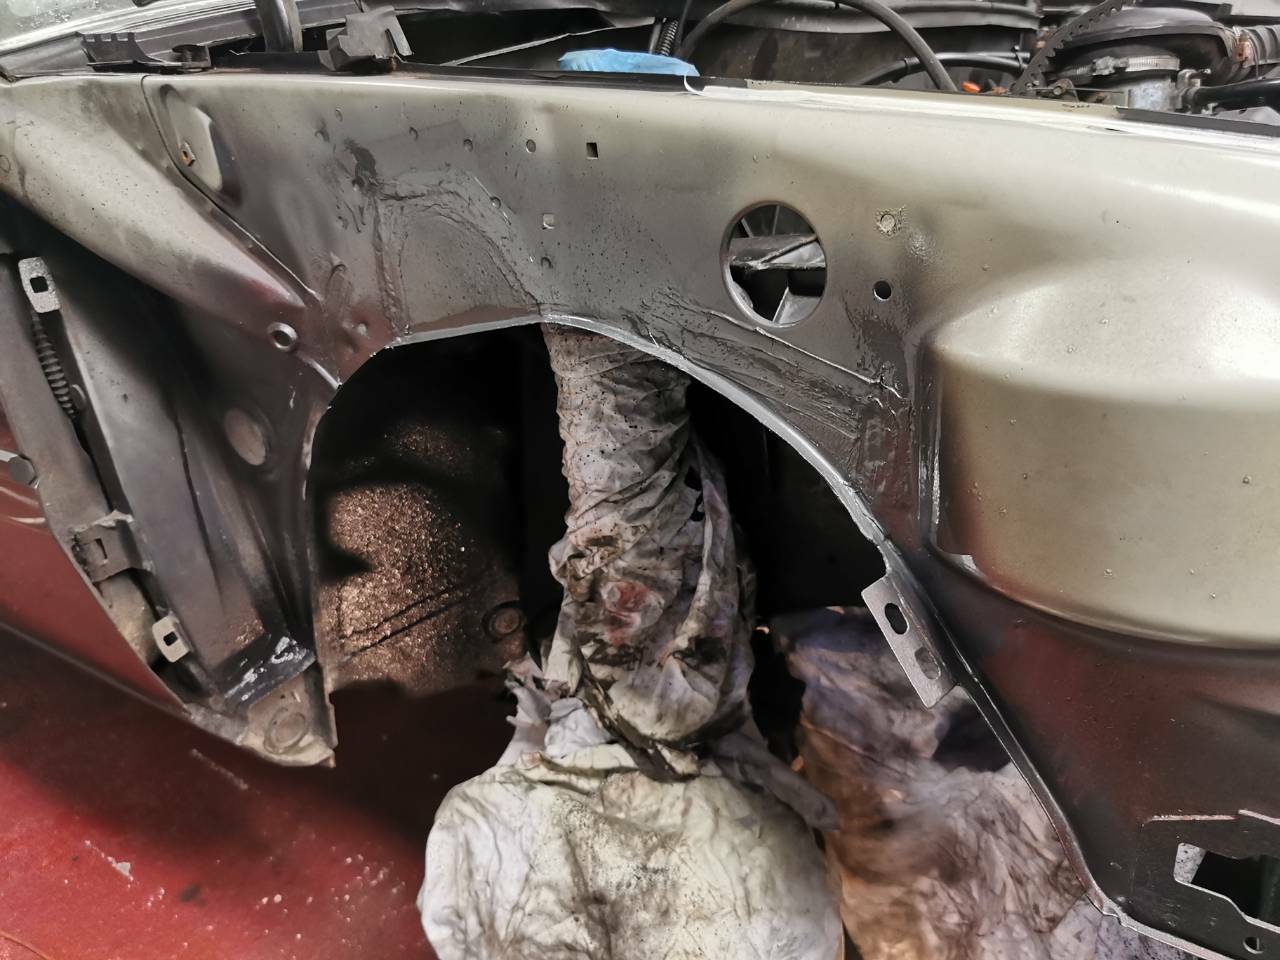
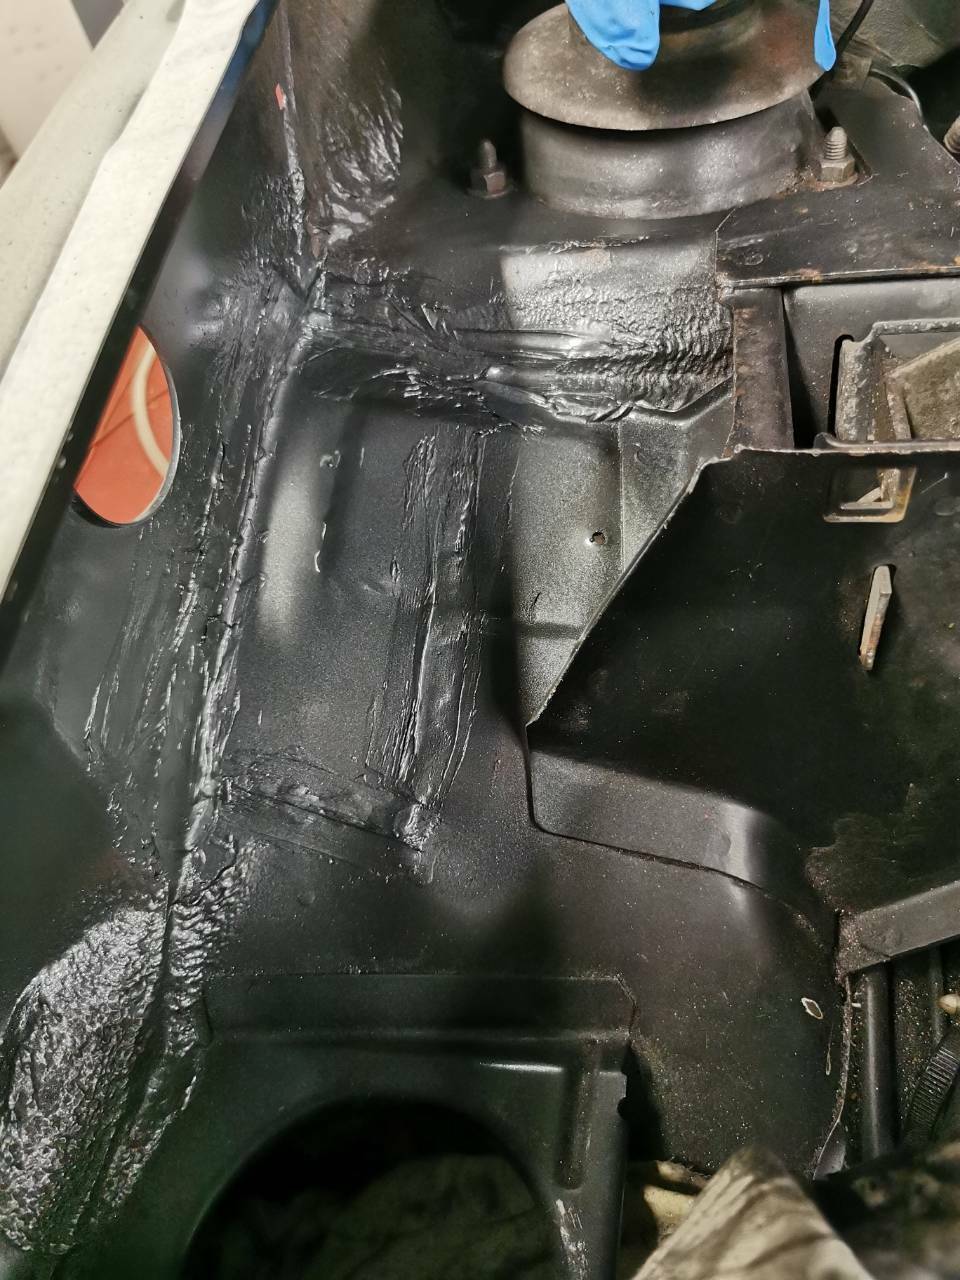
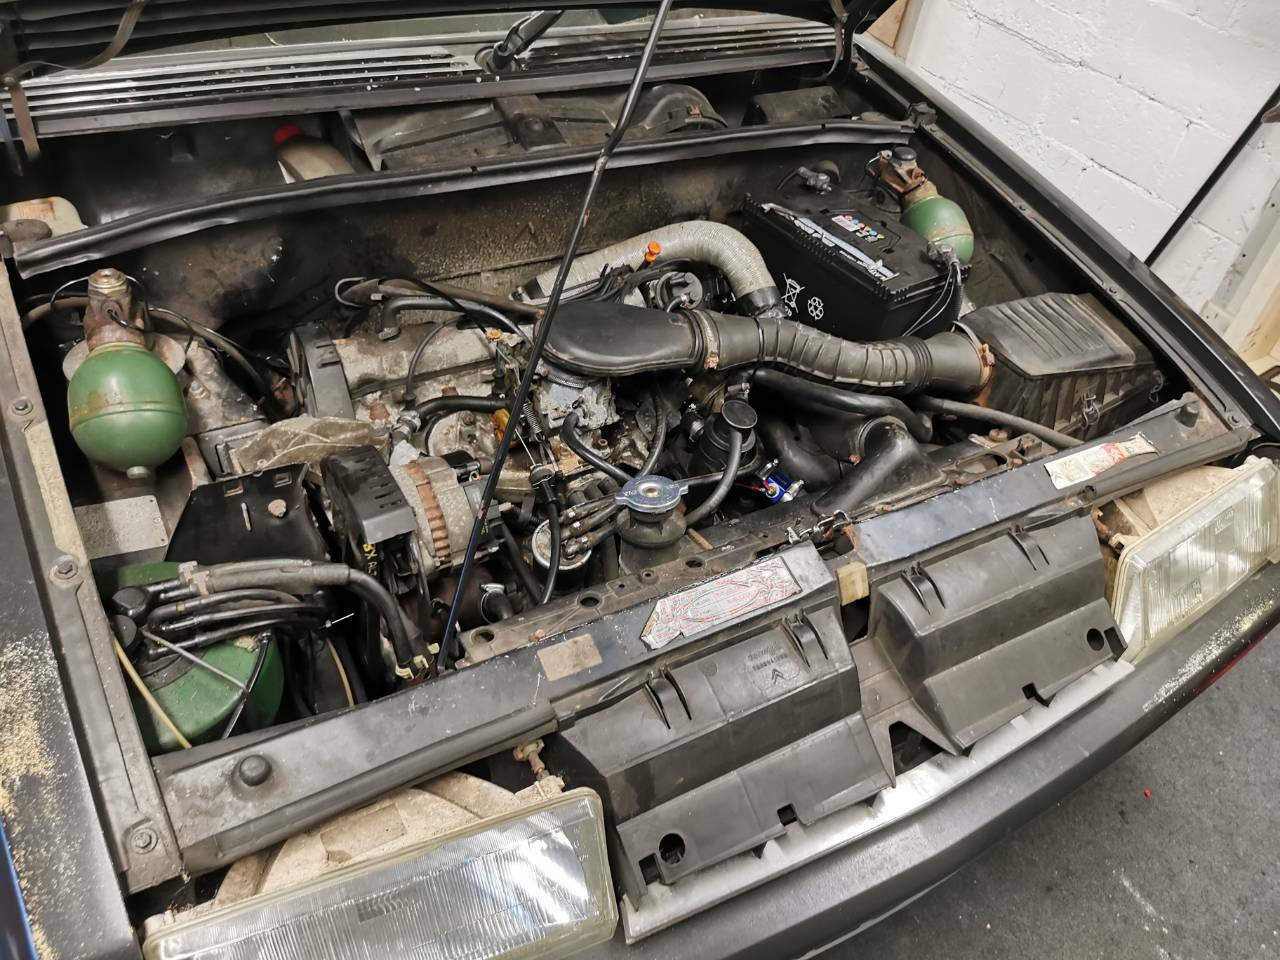
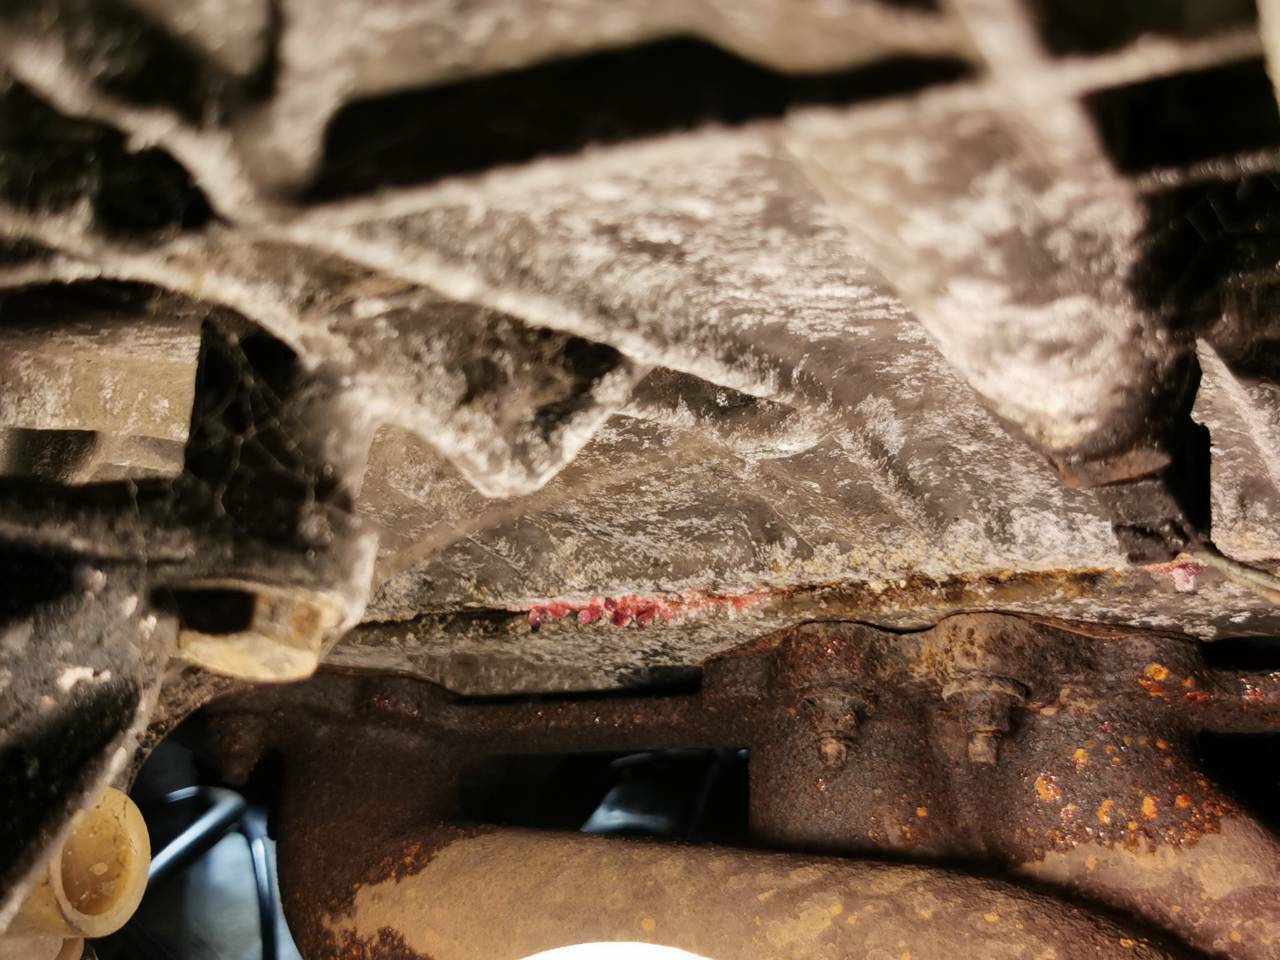
18th - 22nd *SIGH* Shall we get into it? One Two Three Annoyingly, there is a bracket at the front that I use to lift the car a bit before I can get a jack up in the proper place. This bit me on the arse rather spectacularly, as the spot welds in an adjacent area let go, and the bracket folded in half. That'll need some remedial work. First thig I did was check the rear of the engine. Didn't like what I saw, those are coolant crystals, so the head gasket has probably deteriorated to the point where it requires replacement. Found no shortage of rotty, grotty bits that require attention. Some that can get away with a stiff wire brush and reprotection - And some that can't. All in all, there are several repairs needed, but a lot of areas will recover nicely with a good wirebrush and reprotect. Also found a perished LHM strut return line, so one is on order. Whilst not bothered with cameras etc, the fuel lines were rigged to a jerry can for a test run of the engine, which highlighted several issues, namely thin, fuel-smelling oil (probably a byproduct of short running times with choke, changing the oil may actually help with the engine smoking issue too) and the temperature gauge not reading a temperature, despite the heaters being toasty. The top rad hose was stone cold which is pointing at the thermostat being stuck, which would explain the brief forays into overheating when it was on the road. The following morning, I whipped off a very old thermostat. In fact, this may even be the original one. Popped it in a pan and set it to boil: I ended up taking it to 99c and it didn't open so that's an easy win, it was very stiff and notchy to operate so a Gates thermostat has been ordered to replace it. The OSF area seemed like a good place to start, so the LHM sphere was removed, the VIN plate rivets drilled out, and the LHM tank removed. This was due a fresh change of LHM so it make sense to clean the tank out properly. First repair up - an almost insignificant panel covering a cavity. Chopped. Measured: Welded: Primed: Annoyed with myself afterwards because I chose to do a straight edge instead of curving it - doesn't make a real difference in the grand scheme of things though. Next bit was chopping out a rotten section of arch and adjoining vertical section - you can see the tiny holes peppering through the metalwork! To do a curved panel with a lip was a bit of a challenge, but I think I've cracked it: This was then bent into shape and the lines re-welded. The vertical section had a curved lip and I wanted to see if it could be recreated with my limited tooling. Turns out it could! Quick test fit to make sure it all goes together okay: And I'll look to weld that in tomorrow. And that me all caught up! Cheers if you made it this far I've got loads of parts coming via the post so hopefully, I'll be making more significant steps forward in short order.
- 366 replies
-
- 20
-
-
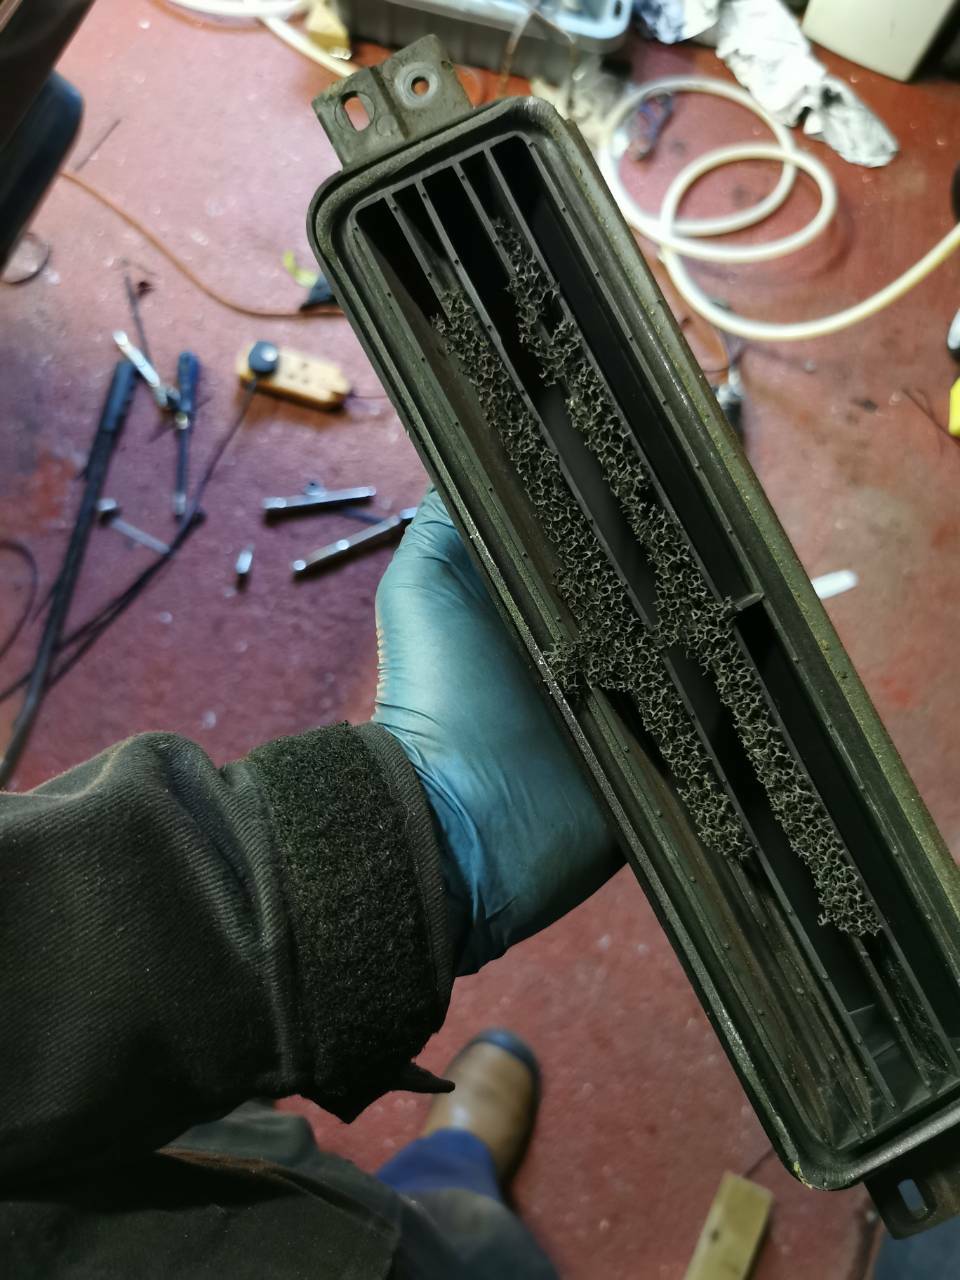
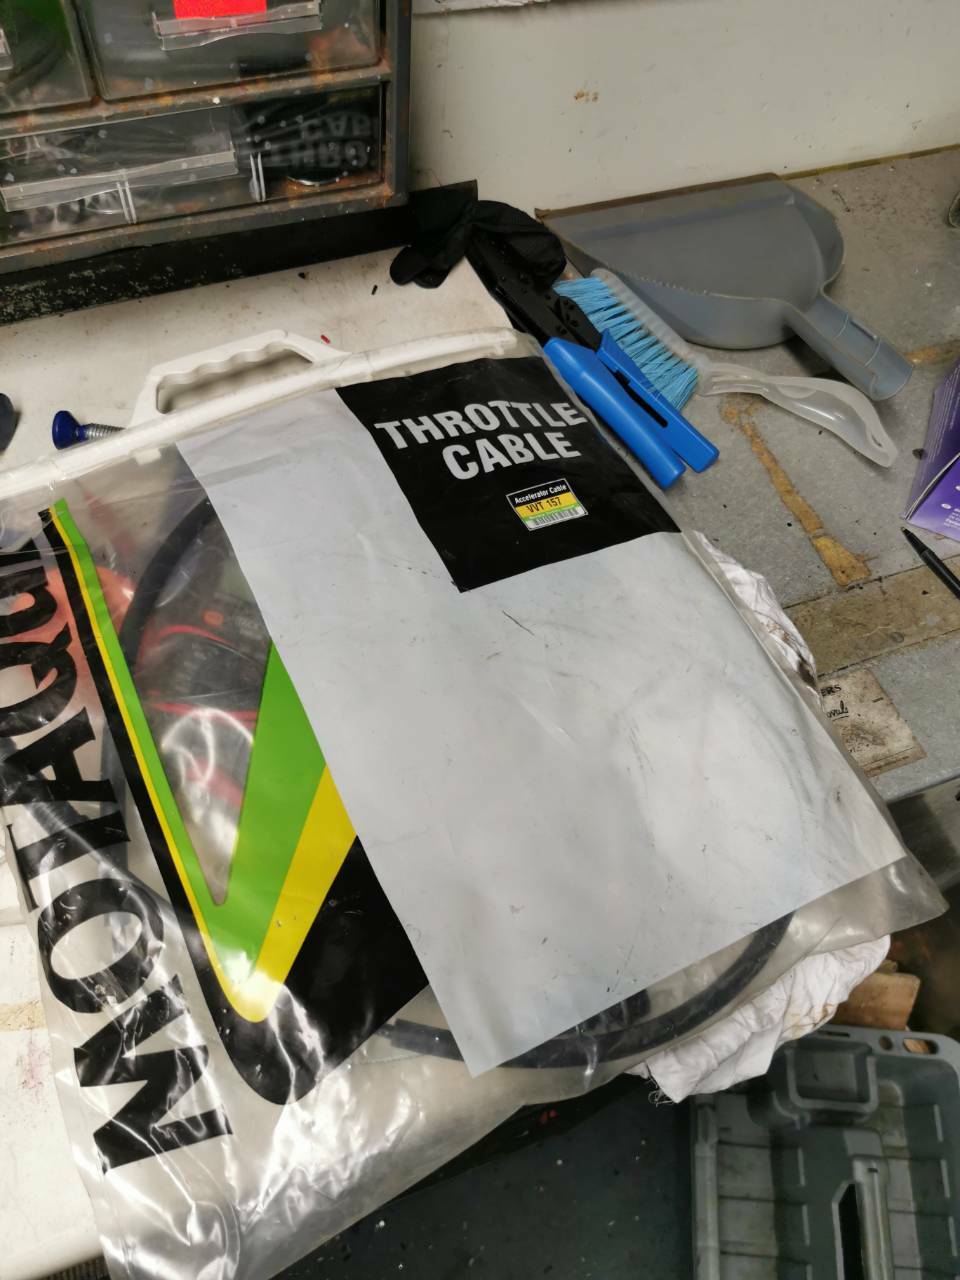
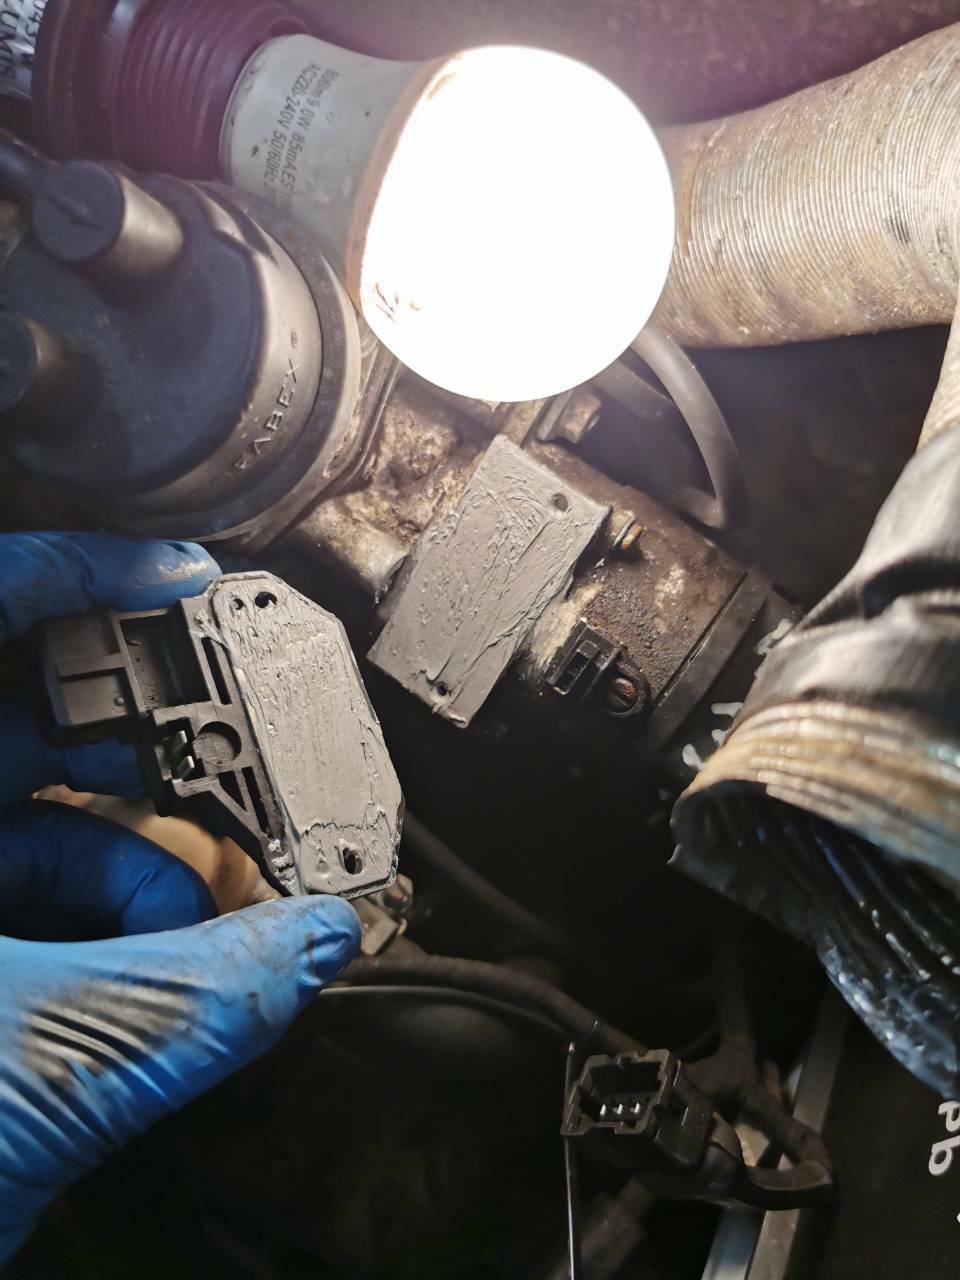
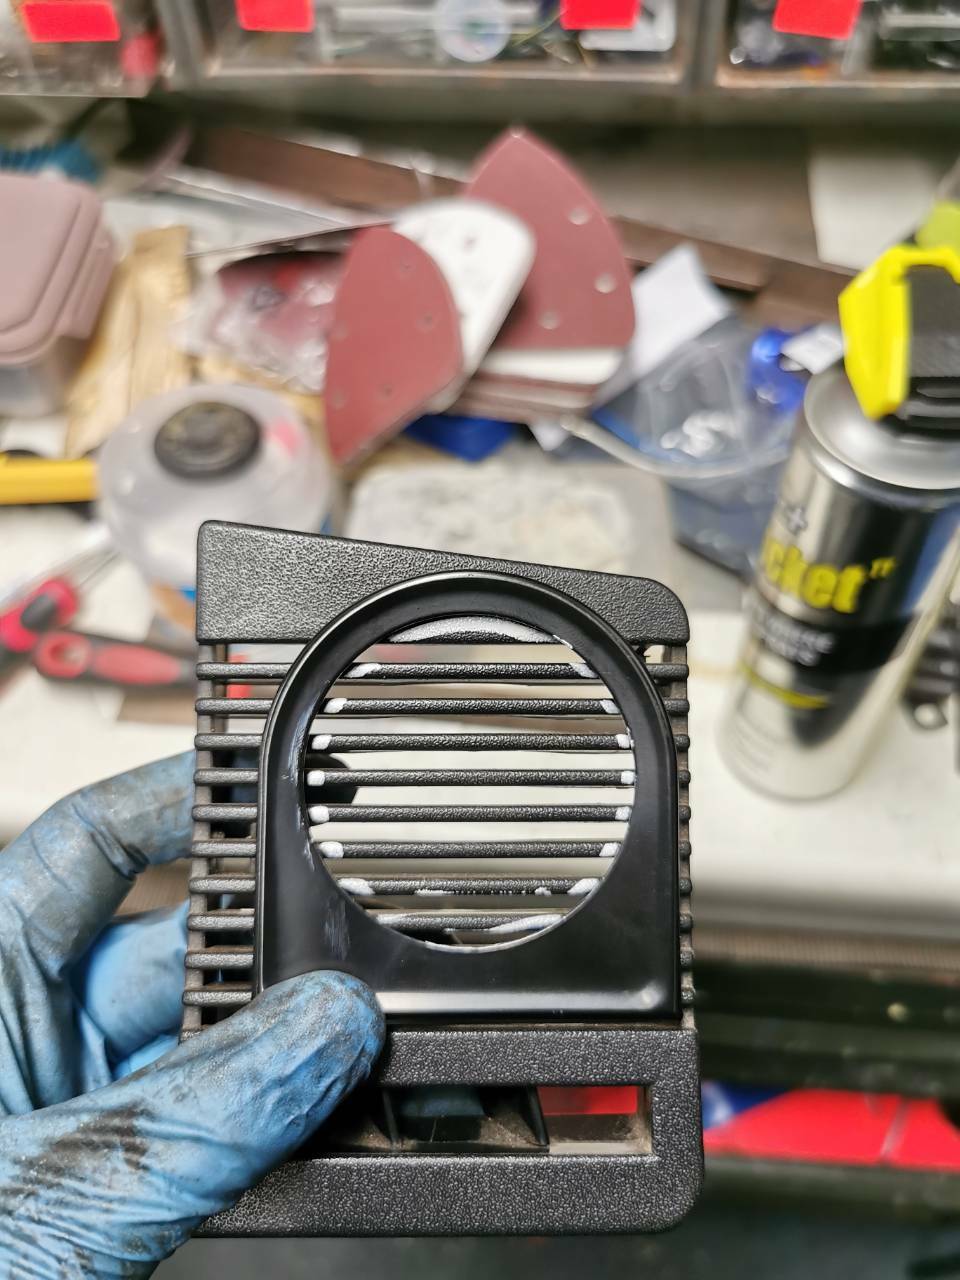
17th (On its own because it was a busy day) Remember all that lovely work I did the day before? Fitted the tank, and height corrector rod? Well, it was all for nowt, because the tank had to come out AGAIN, as I forgot to connect the tank vent line. Superstar. Luckily, it is now a one-man job! With that back in, it was time to crack on with the rebuild of the rear end. Starting with the fuel filler pipe: And the exhaust, rear lights and rear bumper. The rear lights were tested for correct operation and found to be fine, although the brake light switch wasn't working very occasionally - this has been cleaned up and I'll keep an eye on it, testing it again closer to the time. With the exterior done, it was time to tidy up the interior with a few jobs during the rebuild. Starting with these rear vents. The sponge-like material was over 30 years old and was suffering terribly. Luckily, fish tank bio-foam is an inexpensive alternative. Typically forgot to get a photo, but you get the idea. The boot floor carpet was fitted, and side carpet panels re-secured, followed by the side plastic trims. The previously split c-pillar plastic trims were repaired with some repair tape from the rear, and the repair is pretty hard to spot. Handily, the snap occurred between two fasteners, which helped matters. The parcel shelf was next, but had some faults, mainly the rod that runs along the forward edge wasn't securing the parcel shelf properly, and allowing it to flex. It was obvious to see what happened, the plastic had snapped around the rivet. Easy enough to sort with some stainless steel wire! Forgot how much I liked the in-built sunshades on these. Bit of trim has clearly been snapped for years - small hole and wire pulled that tight! Rear carpet, rear trims and rear seat bases went back in. When this car was in proper use, we fitted a new throttle cable to ensure it had a smooth cable run etc. This worked for all of three days, before the plastic tab snapped and it had to be cable tied in afterwards. Luckily, eBay came up trumps for this: Feels a little bit more substantial than the old one. Fitted. Whilst in the engine bay, I whipped off the distributor pickup sensor, to replace the thermal grease that had gone very dry and crumbly. This sensor was the cause of our random unexplained cutting out problems years ago, and I'm keen not to re-live that experience. With that done, the wheels were refitted, and the car lowered back onto the ground: And the front seats/steering wheel were refitted, completing the rebuild of the car. It was actually quite refreshing to see the car complete once again, but it was to be very short-lived, as I knew I was going to start working on the front end next. It just made more sense to fully rebuild the car and start from square one once again instead of having shelves full of parts that could easily go back on. Cheers.
- 366 replies
-
- 19
-
-
13th - 16th This period had a bit of a lull for a while for several reasons: Firstly, the Lanoguard had reacted with the schultz coating and took several days to dry. On the Pureflex, it hadn't dried at all. Lessons have been learned. This pushed back the refitting of the fuel tank by several days. Secondly, my boy needed a small operation to remove an extra tooth, which required general anaesthetic. Fine in itself, but both parents were required to be in attendance. Still, I noticed during some lighting tests etc, that the parking brake warning light failed to operate. Switch was checked for correct operation (working) and the plug was checked for voltage - no voltage, which led to the bulb itself being a prime target. Luckily, I already wanted to take off the steering wheel and surrounding trim to re-fit it more securely to stop the creaking and rattling. A couple of days later, with the majority of the schultz/Lanoguard blend finally dry, I turned my attention to the fuel tank, which was given a quick brushing to remove all the compacted dirt. When the tank was removed, the steel fuel supply and return lines that ran under the floorpan had long since been crispy, with one pipe shearing when disturbed! There was no point in replacing it with another steel pipe to corrode in the future, so following on from Phill (twosmoke)'s lead, I ordered some nylon hose with the intention of replacing the entire run with it. The most awkward part of this job was fitting the 90 degree bends - they required the pipe to be submerged in hot water to soften it, then the strength of a thousand men to get them on! Once the first 90 degree bends were fitted, the fuel tank was then hung in place, the 10mm floorpan hole drilled out to 12mm, and the vertical pipe heights measured. The tank was then removed and the second set of 90 degree bends was fitted, and the tank reattached to the car. With that part done, the height corrector rod was lubricated thoroughly and mounted to the floorpan, and eventually to the rear corrector. This was a proper faff as I couldn't remember which orientation that the cockpit height control handle was in - the arrow on the handle pointed in the opposite direction to where I thought it would logically go! Then it was time to take the lad to hospital, and spotted this impressive bodywork specimen on the way in: Cheers.
-
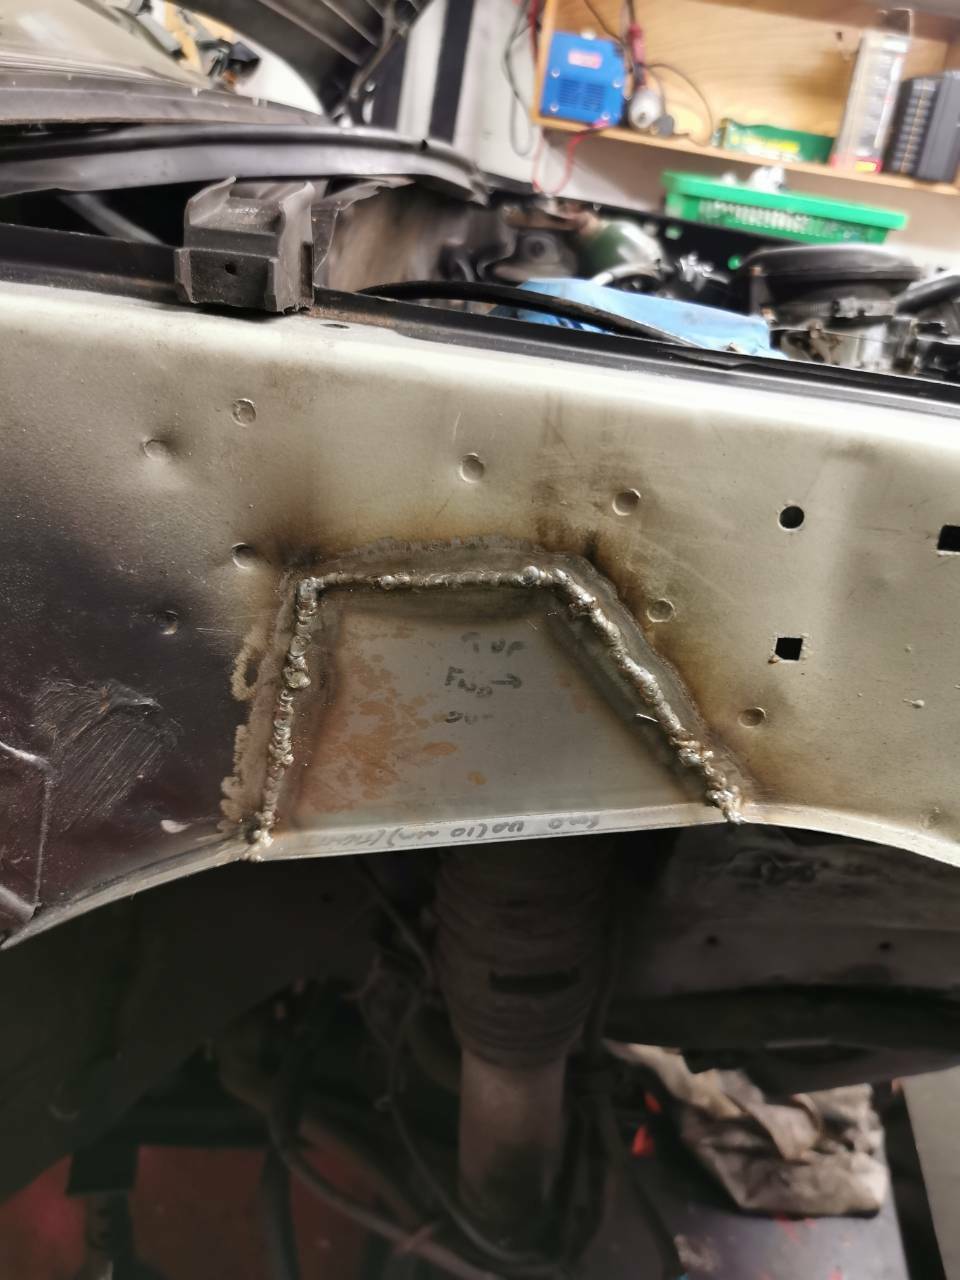
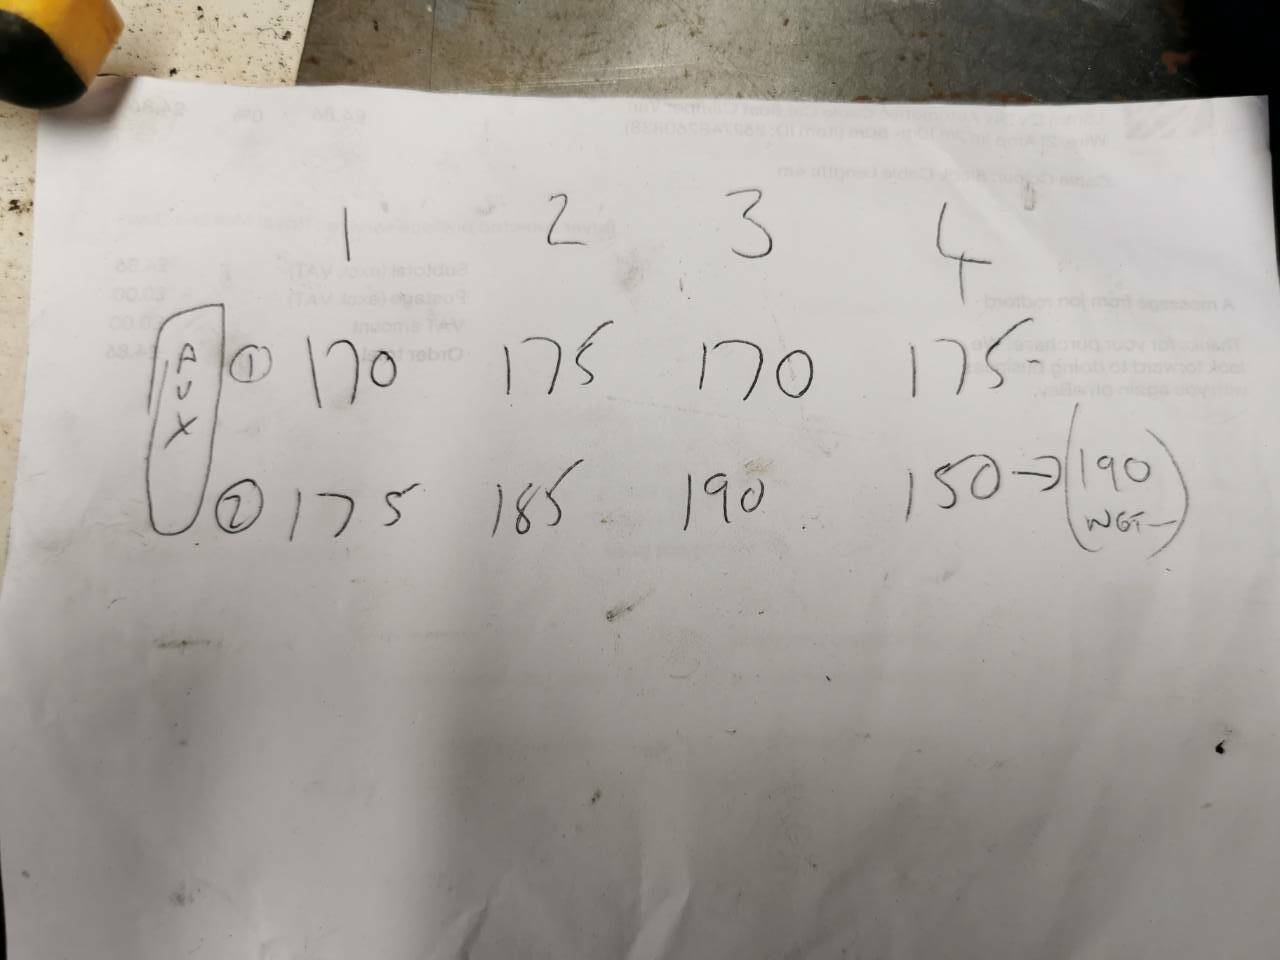
10th - 12th So, after a little bit more fettling, filing and sanding, the first tacks went down for the first bit of the floorpan. Can't remember why I took this photo, but the car was a bit of a mess everywhere, with parts surrounding me and getting in the way. Luckily, I had just the thing to keep me motivated! Eventually, both repair sections of the floorpan went in without any real fuss. A 10mm hole was drilled into the vertical section - this was a mounting bolt hole for the fuel tank. It was 12mm on the original, and would get drilled out to the correct size when the fuel tank is hung in, to ensure it's drilled in the correct place. With that done, the welds were ground down a tad, the bare metalwork was etch-primed up top, red primed underneath, and a coat of Polyflex was applied on the seams. Whilst that dried, I jumped onto the patch in the middle of the floorpan. This then got the same treatment as the other patch repairs - coat of primer, and some Polyflex. Next up, the welds on the OSR outer sill patch were ground down, a (poor) skim of filler was added, before getting a coat of red primer. Decided to take a break from metalwork, welding and painting etc, in order to plod on with a new job. One of the biggest bugbears I have with this cart is the total absence of a temperature gauge - Citroen instead opting for a pair of 'too late lights' which typically tell you when the damage has already been done. This wasn't good enough for me, and I wanted a gauge. Various items were sourced from the internet to allow this to happen, coming to a total cost of about £45. Next dilemma was the mounting location. I looked on the internet for various sources of inspiration, including this solution by one BX owner: Having the gauge down there was a no-go idea, as I am sure that would clatter my knee every five minutes. I didn't want a gauge sticking out anywhere like an additional appendage, I wanted it to look a bit more discreet. Eventually, I stumbled across this location. Typically, I guess a tweeter from a higher-spec BX would live in this aperture. I wasn't bothered about that though, so I started measuring the hole I would need to accommodate this, and got chopping: The angle isn't perfect, but it's subtle, and I can clearly see the centre section of the gauge from my seat - the needle not being visible will be alarm bells to me when out on a drive! I decided to call it a day on that project to have a think about how and where to power it etc. I gave the welded repair areas a coat of schultz to make it all one colour and not make it stand out like a sore thumb. After that, I went head-first down this rabbit hole... Yep, I decided to give the engine a compression test - perfect time to do so as the tank was out, the carb was empty, and there was no way to start it. Because the internet loves arguing about everything, I ran two sets of tests - first with one spark plug removed at a time, second with all plugs removed. First plug out, very sooted up. Probably because it was only running in and out of the garage very occasionally. They were all like this. The results were....erm, okay? The final test revealed one cylinder was a tad low which bumped up with a spoon of oil down the bores. Bit strange that the second test wouldn't get as high as the first, but I've want to try a bit of snake oil first. More on that later. Then it was time for a monentous occasion - time to apply the lanoguard to the rear end and floorpan! The brake discs were protected, and a tarp laid down, and off I went! Also sprayed the rear subframe mounting areas, inside the boot rails, and inside the sills. Whilst that dried, it was time to crack on with the gauge install. There were two power feeds required - one for the LED backlighting bulb, and one for the gauge itself. I decided to utilise a switched supply from the fusebox - the rear window motors circuit was a perfect fit for this, as I have keep-fit windows in the rear. A piggy-back fuse (popular with dash-cam installs) was used to get a powered fly lead from a switched supply. Whilst it was routed behind the dashboard, I added an extra line and fed it into the stereo, as it has only ever had a permanent live and so never turned off with the key. Does now though, so that's a nice easy win Finally, I got the last of the power supply rigged up, demonstrated by the backlight here: The LED is quite intensely bright - I've already added a couple of layers of masking tape to the LED to dim and yellow it a bit, but I'll need to revisit that at some point, as I imagine it'll be quite distracting at night. So, onto the engine bay then. I decided to order an in-line sensor mount that fits in the middle of the top radiator hose. It was properly nerve-wracking to chop the hose in half, particularly because I got the measurement wrong at the first instance! Thankfully, a quick re-think and a second chop saved the day. I forgot to get more photos of this, but I then fed in the wires from the gauge to the temperature sensor in the engine bay, trying to keep it running with existing looms, utilising an earth lead that was found under the battery tray. With it all wired up, the kettle was boiled and the sensor was plopped into a mug of hot water (it was cold in the garage and the mug had cooled considerably in my transit from the kitchen to garage!): Now deemed to be working, the sensor was fitted into the pipe adapter, and I called it a night. That was a busy three days, thankfully the pace of work slowed down a tad after that! More to follow...
- 366 replies
-
- 11
-
-
Oh christ, I've seen myself off again, haven't I? Typically, it's been a very busy fortnight and I've not updated this thread in ages. I'll try and break it down into 3-day chunks, because I'm pretty sure the site would have a shitfit if I uploaded 96 photos in one post :lol:
-
Citroen really must be up there for the best wheel trim designs, eh?
-
I'm trying to work out if these 308s were peak-malaise era of Peugeot, but I hope it does you a turn!
-
Been an age since I've seen one of these, good on you for keeping it going! Can't imagine a '98 would have a carb though?
-
That's properly lovely - hope you get to the bottom of the running issues! Always wanted an 80s/90s slab-sided yank, like an 80s Crown Vic.
-
Honestly? No clue - in the three years this has been sat on the driveway, I never actually got on with checking the car over - there's at least one more repair to do, possibly two. Still got about six million mechanical jobs to look at too, which I'm sure will go without a hitch
-
It's been a bit of a tin-bashing day this evening. Did some more seam sealing too. Think I've got the hang of making these humps in the metalwork now. Just got to trim the third one down to size tomorrow. Three patches, ready to go in. Just need to prep the metalwork.
- 366 replies
-
- 16
-
-
It's been fairly quiet this week, coming down with a shitey cold once again is doing wonders for my enthusiasm. Got the last repair panel welded on (the vertical section) and welded it to the new section of floorpan: Dressed back the random split in the floorpan - this was later welded up but I forgot to get photos: And then given a thick coat of etch primer - the underside got a coat of red oxide primer and has also now been seam sealed. So, whilst that dries, it's onto the other side. Spotted a lot of flaky paint along the inner sills, but no serious corrosion issues. Ran my hands around the underseal on the floorpan and heard some crispy noises under a bubble of underseal. Cut away the detached underseal and found some rather thin metal, underneath - looked absolutely fine from up top, but the screwdriver doesn't discriminate! And obviously the rear of the floorpan was due replacement (you can see the thin but under the bubble slightly forward of this): Luckily, beyond the first 40-ish mm it just appears to be surface grot so it should be fine with a wire brush and a reprotect. So, angle grinder came out, and the grotty bits chopped out: I was good to have a good look around in this area, as it highlighted that whilst I had put the R-clip back on the suspension unit rod, I had missed the rod completely, which was flopping around under the mounting point! Resecured that properly this time. Should be in the garage making the repair patches tonight, with the plan to get them welded in on Friday. We shall see.
- 366 replies
-
- 12
-
-
Oh yeah, forgot to do these ones: The replacement y piece for the low pressure LHM line was around £25, so £3 seemed much preferred for an air line fitting (5mm pipe diameter). Hoping this works as for some reason it doesn't appear to release the pipe once it's inserted. I also fitted the boot clip for the suspension unit - this was £13 from a specialist, or £3.70 if you did some googling and found an equivalent: With that all done, the suspension unit rod was reconnected and the sphere refitted. Hopefully getting closer to testing it!
- 366 replies
-
- 15
-
-
Oooft, been a while. Not many photos, so I'll be brief. Went for a bike ride and spotted this en route. Noted the location just in case, there was a Xantia too! Dan came round and gave me a hand, so we removed the centre section of the exhaust, the hydraulic linkage and eventually the fuel tank, in preparation for replacing the nylon lines. Proved to be the right call, upon disturbing the steel supply and return fuel lines that run the length of the floorpan, they crumbled and split in half. Some grot on the rear of the floorpan was observed, so the seats came out, the rear carpet was removed, and my day got ruined. The bit in the middle was the bit I was expecting to rectify - the gaping hole in the corner was a fun surprise. The pipelines seen through the floor are the high pressure hydraulic suspension supply lines. Understandably, I was reluctant to break into this system and risk inducing leaks from disturbed pipeline unions. I decided to mark their positions on the pipeline clips prior to unclipping them. With a roll of tape cable tied to the pipelines to gently weigh/pull them down, I gained enough clearance to safely cut out the affected rusty areas. There is very clear evidence to suggest that someone before us had been driving this around on the lowest setting and hit something on the underside at speed - both rear floorpans are distorted at the very rear bottom - the drivers side rear also has some grot, but nowhere near as far-reaching and brittle as this end. There's also a weird dent and slight split in the middle of the floorpan that should be easy enough to weld back together. So, time to tin-bash. Three patches needed this time. Aaaaaand once again, I caught my bastarding stomach in the tin-snips. Ouch. Once all three patches were offered up to check for fit: The welder was fired up. Only done 2 of 3 so far, I'll get back on the tools tomorrow, had a couple of days off for my lads birthday. Hoping to get the other side done and primed/painted by Saturday evening, so the tank can go back in.
- 366 replies
-
- 20
-
-
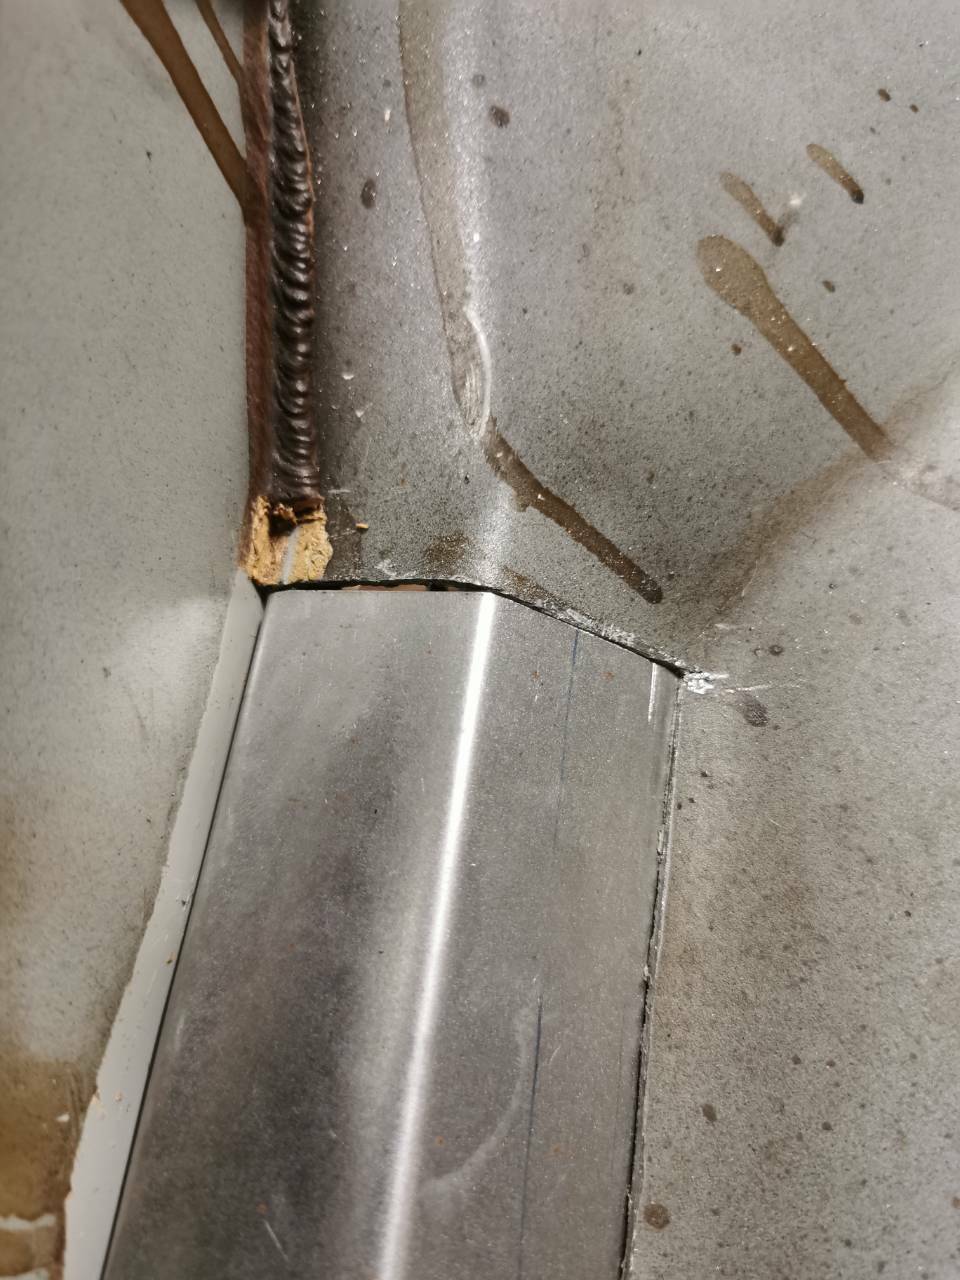
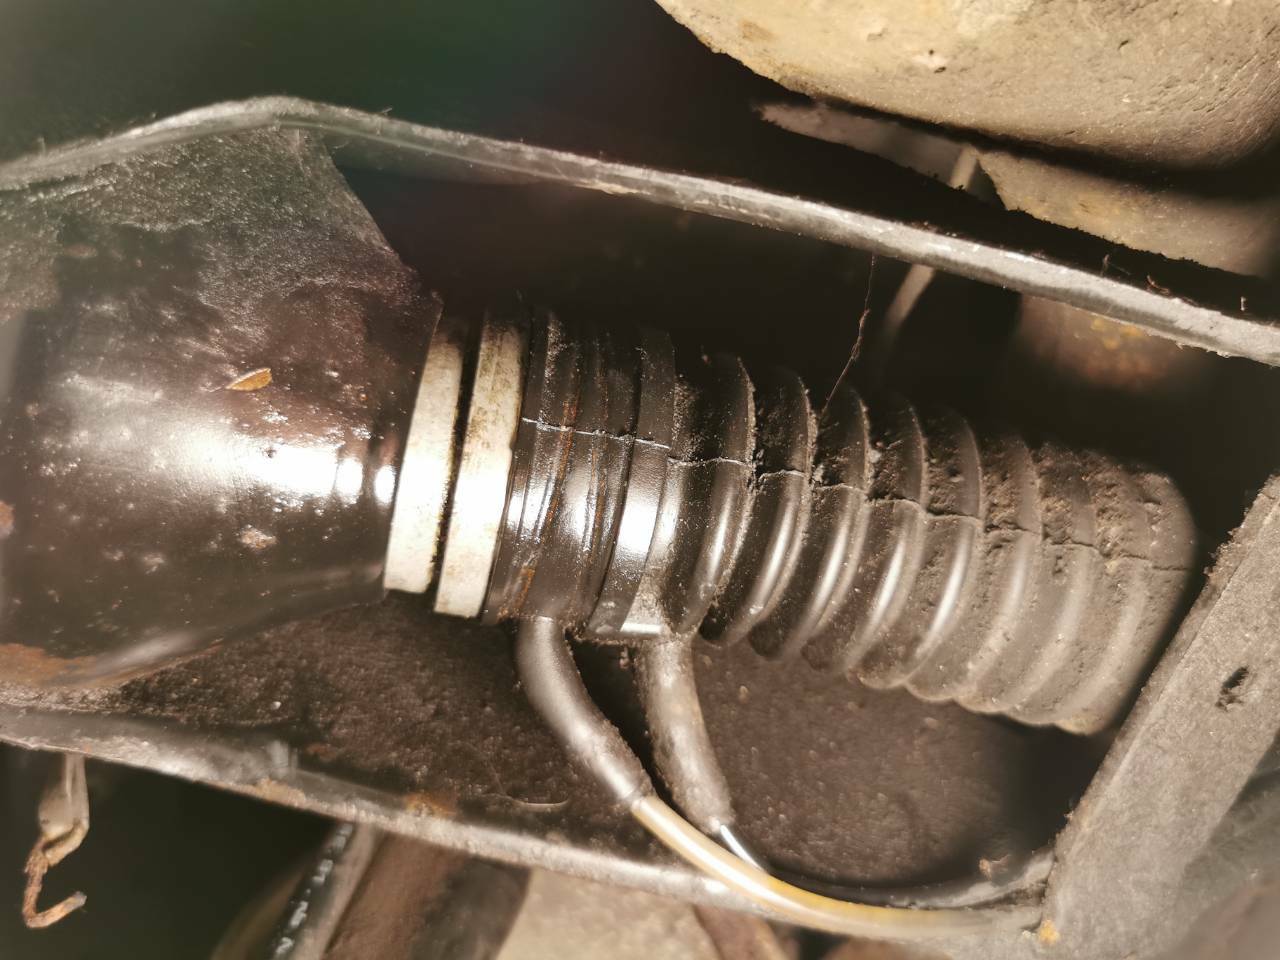
First coat of stone chip is on. I'll get another can today and put another one down. Did a coat of stone chip on the interior welding repairs too. With that drying and some helpful advice from @twosmoke300 and the BX FB group, I re-investigated the LHM leak. The leak was manifesting itself as a slow drip from the subframe in this area: Notice anything missing? Yep, the boot retaining clip isn't there. No idea when that left, but the rust marks show it did have one fitted. The leak itself I believe to be caused by the sphere not being fitted tightly enough - just tapping the sphere removal tool onto the sphere with the mallet was enough for it to start unscrewing freely. I'm going to clean up the seal and mating faces and re-fit. The clip is a bit more of a fiddly affair - because I can't remove the unit itself (that pipeline union is NOT budging) I have to disconnect the suspension unit rod from the suspension arm, disconnect the vent and return pipes, and slide it up and over the boot to fit. I /did/ have a clip on the donor unit which would have worked perfectly. Except, well... Arses. I've got a clip on order so hopefully it'll arrive some point next week and I can focus on rebuilding the rear end over the weekend 😁
-
Typically, I use medium point, non-permanent OHP pens - they're relatively fast-drying, and clean off with water. If I make a mistake, I usually use a cotton bud dipped in water to prevent smudging the rest. I prefer the medium points (like a felt tip) - any finer and it struggles to lay the ink down properly, plus the thickness of the medium point line gives you a bit of leeway for the thickness of the angle grinder disc Honestly, that Tetrosyl is worth firing straight into the bin if you've not kept the receipt. Absolute garbage stuff. Got a brand new tube with the receipt here that I'll be taking back and swapping for more stone chip
-
So, the following afternoon, I cracked on with making the fuel capsule bracket. It didn't come out too badly, and it turned out to be all for nothing. One of the tangs on the fuel capsule had snapped, and a replacement item was £24. Weighing up the options of whether I even wanted/needed to re-introduce a moisture and dirt trap against the inner arch, I elected to remove the capsule entirely and connect the line into the fuel filler neck directly. There's no one way valve fitted now, but the pros outweigh the cons in this regard. Instead, I opened the LHM depressurisation screw, jacked up the OSR arm and worked on the OSR unit replacement. Aaand immediately shitcanned it as the supply pipeline union was heavily rounded off. Without a replacement supply pipe, there is no way in hell that I'm chopping into pipework. Oddly, I'm not sure where the leak is - it's not flowing out of the boot and there's a pool of LHM at the bottom of the 'cup' the unit sits in. Could possibly be an LHM sphere seal that's gone bad. With that work on hiatus, I went with an LHM pump change - the old one was functional, but the pulley had some distortion and the wobble was hilarious. Alternator was removed for access. With no further welding repairs required at the rear end, it was time to start seam sealing. Initially, I went with Tetrosyl rubberised seam sealer in a mastic gun, then Tetrosyl brushable seam sealer. This was a total disaster as despite giving them at least 24 hours between applications, it cracked in several places when I checked on it a couple of days later. Reading a few forums etc kept pointing to using a PU adhesive as a seam sealer and recommended Pureaflex40, which was less than £8 a tube from Toolstation. Fuck it, let's find out. Buuuuut on the way out, I remembered it IS an adhesive, and one of the rubber trim bits has been flapping for many years. In for a penny. Now that's clamped and secured (it did stay out when I removed the clamp!), it was time to give the affected areas a couple of coats of red oxide primer. Stone chip hopefully going on tonight.
- 366 replies
-
- 13
-
-
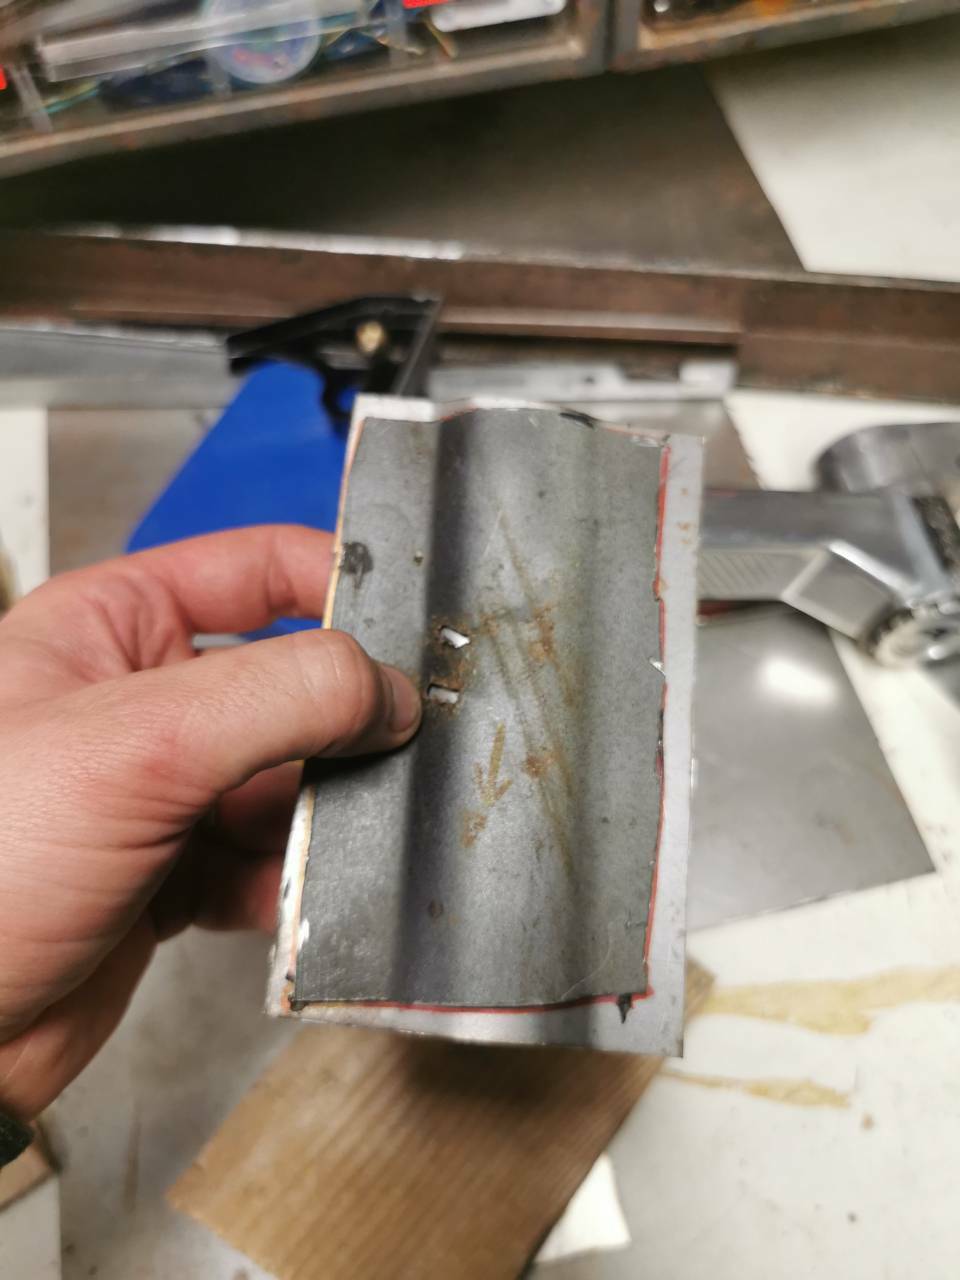
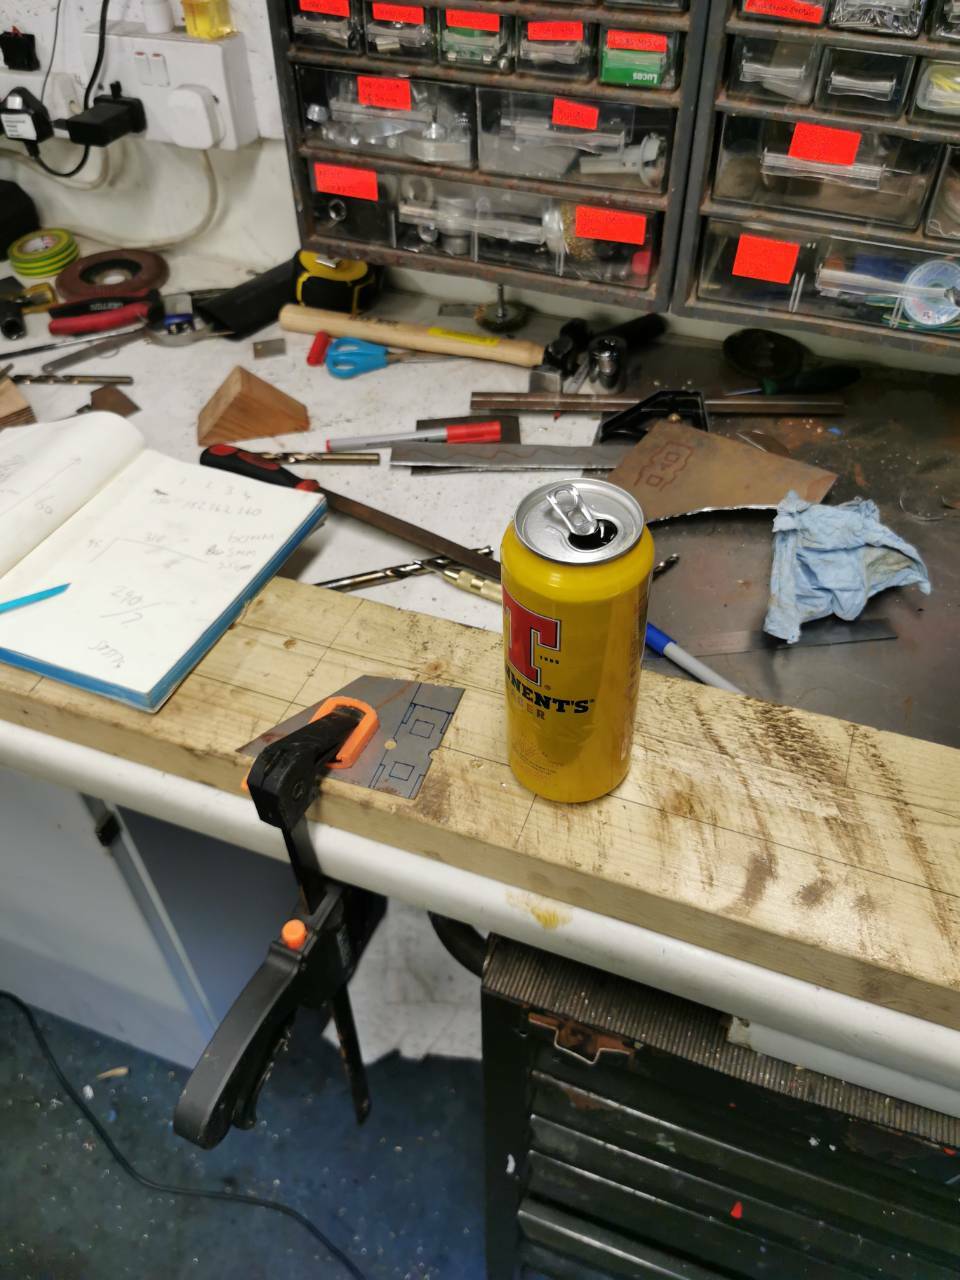
Had a couple of hours in the garage, so I cracked on and welded in the sill end repair panel - I'll be bloody glad to get to weld somewhere else with access, that hub and swing arm proved my downfall on the tighter sections again. I've got an entire afternoon/evening in the garage tomorrow, so I made a head start with the next part - this bracket holds the fuel capsule to the inner arch. Annoyingly, the actual bracket had gone missing from the workbench which was not ideal, but luckily I had penned the outline of what remained on a scrap bit of metal when I took it off: Using that as a template, I took a fresh set of measurements off and sketched a fresh template: Which I then carefully drew back onto a clean bit of metal. That'll do for today - I'll cut it out, mark the position on the inner arch and weld it in tomorrow, and that'll bring the welding repairs to the OSR arch to a close. Still need to find the metal bung on the sill end panel, but having it open will allow me to protect the inner skin of the sill in the meantime. Cheers 😁
- 366 replies
-
- 10
-