Stanky
-
Posts
7,130 -
Joined
-
Last visited
-
Days Won
2
4 Followers


Stanky's Achievements
-
 PicantoJon reacted to a post in a topic:
Stanky's Car Fixing Thread - Exhaust Surgery 23/4
PicantoJon reacted to a post in a topic:
Stanky's Car Fixing Thread - Exhaust Surgery 23/4
-
 PicantoJon reacted to a post in a topic:
Stanky's Car Fixing Thread - Exhaust Surgery 23/4
PicantoJon reacted to a post in a topic:
Stanky's Car Fixing Thread - Exhaust Surgery 23/4
-
Stanky reacted to a post in a topic:
Dave's shonkers - bye bye S3 (sadface.jpg)
-
Stanky reacted to a post in a topic:
Dave's shonkers - bye bye S3 (sadface.jpg)
-
JMotor reacted to a post in a topic:
FatHarris - tales of a motoring moron ***Non-BX related content 17/4***
-
Tickman reacted to a post in a topic:
Stanky's Car Fixing Thread - Exhaust Surgery 23/4
-
SiC reacted to a post in a topic:
2004 BMW Z4 2.2 - De-snagging
-
I've seen it done (on youtube) with just one slice but then getting the plate back onto the hub risks making it go pringle-shaped I reckoned. making two cuts gives you more room and shouldn't compromise the backplate integrity I don't think. Might be worth putting a dab of paint onto the cut ends if you can be bothered I suppose?
-
SiC reacted to a post in a topic:
2004 BMW Z4 2.2 - De-snagging
-
I had exactly the same issue with my old W203 re the handbrake shoes, the retaining spring pulled out of the backplate and the shoe flopped about making weird noises and dragging a bit. I think a few others have had similar and resorted to your fix with the backplate too. Good work on getting it fixed up!
-
Talbot reacted to a post in a topic:
Stanky's Car Fixing Thread - Exhaust Surgery 23/4
-
Stanky reacted to a post in a topic:
2004 BMW Z4 2.2 - De-snagging
-
Tubbo reacted to a post in a topic:
Stanky's Car Fixing Thread - Exhaust Surgery 23/4
-
Stanky reacted to a post in a topic:
Shitting in the shallow end. *Bile Hatred* improvements*
-
rob88h reacted to a post in a topic:
FatHarris - tales of a motoring moron ***Non-BX related content 17/4***
-
rob88h reacted to a post in a topic:
FatHarris - tales of a motoring moron ***Non-BX related content 17/4***
-
Stanky reacted to a post in a topic:
FatHarris - tales of a motoring moron ***Non-BX related content 17/4***
-
Just to add, Amayama is a legit website, I've bought various things for my Sirion from there and while its not cheap, it is available and ships quite fast. Some stuff comes from Japan and some stuff from the UAE (bizarrely?) but expect it to be with you ~1 week after ordering. Its excellent for JDM stuff, or just Japanese cars generally. If nothing else, the exploded diagrams give you the part numbers which can sometimes turn up results on ebay or aliexpress if all else fails.
-
Ooof, what about? https://www.amayama.com/en/part/honda/45216sc2003 Not cheap cheap, but £23 each + £9 shipping for pistons and another tenner for the 2x seals (#7 and #5 in the exploded diagram)?
-
Stanky reacted to a post in a topic:
FatHarris - tales of a motoring moron ***Non-BX related content 17/4***
-
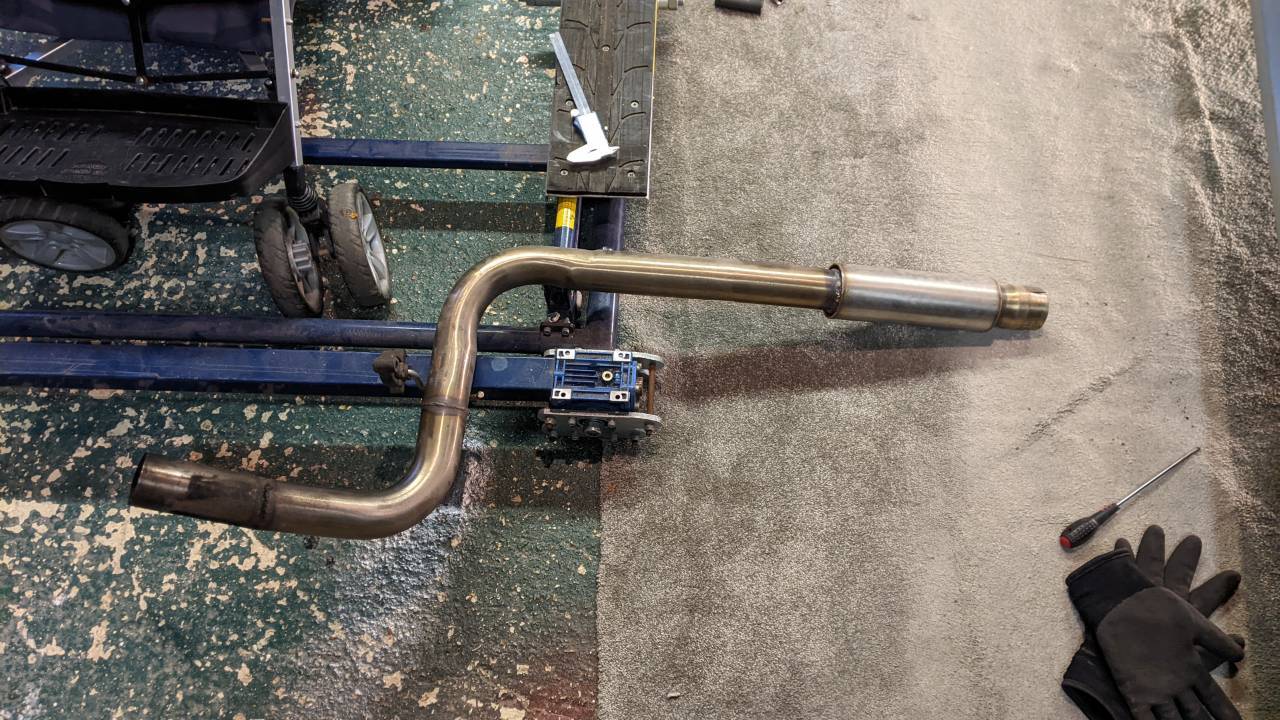
This is going to be a bit drawn out, warning! About 18 months ago I had a custom stainless exhaust made for the Sirion which is well made, but a little bit loud. The first iteration had no silencing whatsoever and while it sounded amazing, it was also audible from Spain so it went back and they grafted a silencer in, which did quieten it down. A bit. Since the car likes to rev, the new exhaust has been a bit of an issue, its fairly normal up to about 3000rpm, but then gets quite loud. I've fitted a bung to the tailpipe which helps quieten it down but seems to stifle the power a bit. The car has passed MOTs like this so its not horrific, but isn't quite how I want it. I've pontificated on this for about a year when I really ought to have grabbed the bull by the horns ages ago. So I've gotten a grip and decided to DIYMFS. I got the car up on some blocks so I can get underneath so I can see what I'm working with The exhaust fabricators have saved me a world of pain by making the exhaust in three sections, flared and clamped together. The system is made from 2.25" stainless pipe and has a 9" long x 3" diameter silencer grafted in about level with the gearstick. I was able to undo the clamp visible in this pic, and the one further back, level with the fuel tank, and the pull the rearmost part of exhaust back and wiggle the centre bit out TA-DAH! I've purchased a much bigger silencer - 18" x 5" with flared, clamp-on ends, plus some clamps and assembly paste. This should be here by the weekend. I plan to measure it all about 800 times, then cut the existing pipe about 10" rearwards of the existing silencer. Then I can clamp the new, bigger silencer into the system - connecting the the front pipe at the front, and into the existing centre section about 4" forwards of the first 90 degree bend. In theory* the new silncer will just slip over the existing pipework and clamp on, meaning the exhaust will be composed of 4 sections rather than 3. Assuming I do it right, and only cut it once, if I make a total hash of it then I can just re-join the cut section with one of those pipe joiner things and pretend like it never happened. I've had a really good look and there seem to be plenty of space in the transmission tunnel. The Sirions came with one body pressing for both the 2WD (like mine) and 4WD variants, so the transmission tunnel is pretty massive and empty on mine where the propshaft would go on the 4WD variants so I have a fairly good amount of space to play with. So now we wait for the exhaust bits to arrive, then loosely fit them up to make sure it all fits as its supposed to, then measure a hundred times before cutting the pipe read to join to the bigger silencer. Hopefully with this fitted I can remove the rear bung and have a fruity, but not deafening exhaust!

-
Have you tried Brakes international as a plan B? They don't seem to list the Beat on their website dropdown, but might be able to help if you emailed them potentially? Sorry if I'm being silly but are they shared with anything else? They have some fairly obscure Honda models in the dropdown so might be able to help potentially via email/phone?
-
Stanky reacted to a post in a topic:
FatHarris - tales of a motoring moron ***Non-BX related content 17/4***
-
Abandon hope, all ye who enter here!
-
<trollface> Have you tried removing and refitting the front bumper? </trollface>
-
Have you looked at Lexuses at all? Plenty of petrol ones of those in 2-3L modes.
-
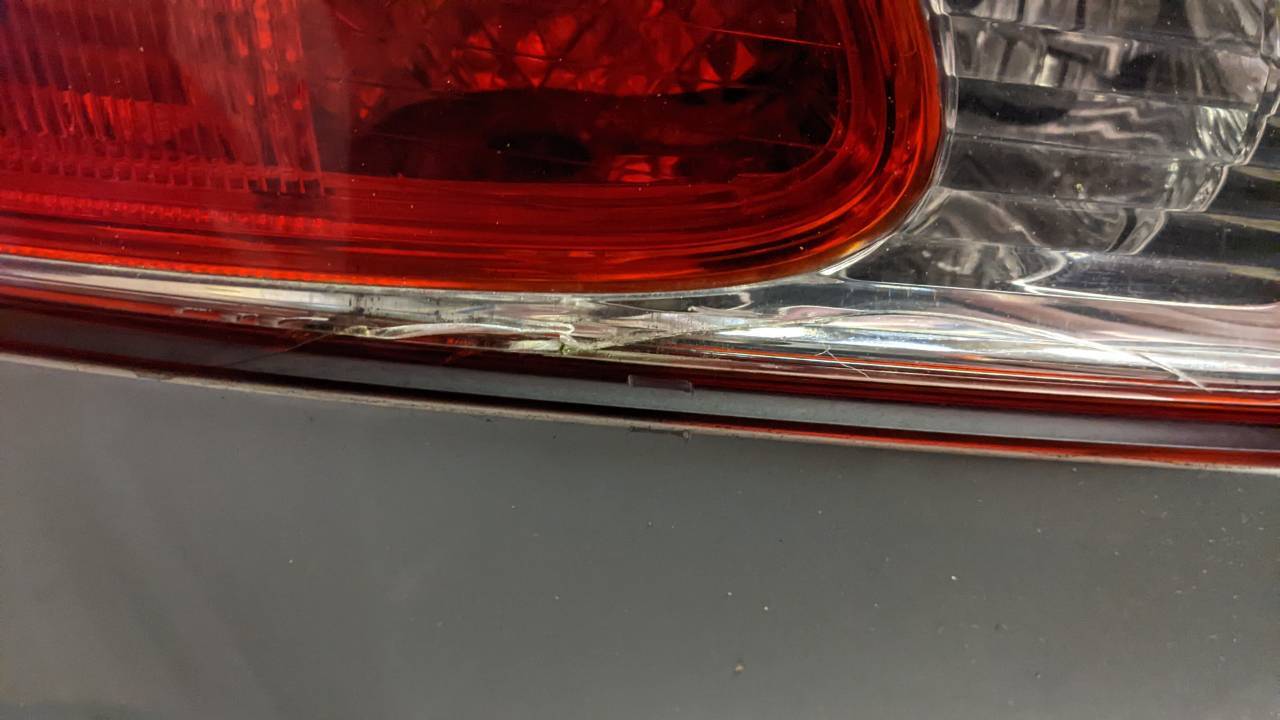
I had a day off work today so made use of some tinkering time. First job was replacing the rear inner light lens. One of the previous owners has reversed into something I think, there is some scuffing on the bumper, a very small ding in the metal quarter panel, and a crack in the rear light lens which is hard to see, harder to photograph but easy to replace. Its not too bad, but water has got in and its going green in the cracks, and is only a matter of time before it mists up and makes the car look tatty and uncared for. I bagged a replacement unit for £16 on ebay which arrived earlier in the week. Easy enough to do, open the boot and remove the sound deadening felt undo 3x 10mm nuts through the access holes and gently lift it out I took the opportunity to clean the muck out of the stamped recess in the panel before reassembling it all with the new unit. Much better. Then onto some other jobs. The Laser 4880 oil filter tool had arrived earlier in the week too so I lifted the front end up and had another go at getting the oil filter housing to release. I followed @RoverFolkUs advice and used a 24mm socket on it, rather than fitting the cup tool direct to the 12" breaker bar. I used the Power of Grayskull and amazingly it undid - I was sure I'd trashed the cup wrench again, but astonishingly it survived. I drained the oil out of the filter housing (maybe 1/2" litre?) into a washing up bowl and then replaced the filter and o-ring, making sure I cleaned up all the threads and mating surfaces with a rag, put a tiny bit of copper grease on the mating surfaces on the not-threads side of the o-ring, then refitted it. I did it up hand tight, then a tiny bit more on the ratchet. Hopefully next time I need to undo it it will come off without a fuss. I got given a BIN offer on a caliper and carrier so I took the lazy route and just bought it, and swapped the whole shebang. It was £150 which I could have done without, but the old one was basically fucked - I could have spent a significant amount of time heating it up, hammering it and getting it to free off, then replacing the slider and reassembling it all, but I'd probably have broken something in the process and immobilised the car so just took the easy route and assembled the whole caliper and carrier on the workbench, removed the old one and swapped the brake flexi over, refitted the pads, pins and wire retainers and then enlisted my eldest daughter to do the pedals end while I did the caliper end and bled it through. All sorted out and working fine - so thats another issue off the list. I think the next thing is to get some tyres, it has 4 mismatched budgets on currently, and they're all at, or close to the 3mm wear markers. it looks like I can get a full matching set of Kumho Ecsta tyres for £300, or Uniroyal Rainexperts for £340. I know and trust the uniroyals, the Kumho's are supposed to be just as good in the rain as the Uniroyals, so might be worth taking a punt on, thats something for next month though I think. I had to go up to Manchester for work last week and the Lexus handled it all beautifully. 550 miles there and back via Telford, it behaved impeccably and delivered 38mpg, and 35mpg over a combined 20 gallons of 70% motorways and 30% crawling round local roads.
-
Set to on the rear calipers tonight, these are a known weak point, with poorly-sealing slider boots resulting in seized sliders. The recommendation is that these are removed, greased and refitted annually to prevent this from happening. I though that the passenger side one moved ok from a bit of a wiggle when I had the wheels off the other week, but that the drivers side wasn't awfully compliant. Turns out I was about on the money. I started with the passenger side, the wheel came off fine, caliper top bolt undid, removed the pads and pins and things and the caliper hinged down beautifully on the bottom slider. I removed it, cleaned up the slider,greased it, fitted new rubber boots and reassembled it, other that getting the new bottom slider boot to seal over the barbs - which was a bit of a fiddle - all was fine. Next up was the driver side. Wheel off, top caliper bolt undone, removed pads and pins and the caliper wouldn't budge. The caliper is pretty much seized to the slider. I can see that the boot isn't correctly seated and so its a bit b0rked. Using a big screwdriver I was able to get about 40 degrees of rotation so I squirted some penetrating oil under the boot and tried to work the caliper back and forth, but didn't really have much luck. It moves, but not much, and needs a lot of leverage so I decided to call it a day, reassembled it all, cleaned down the disc and caliper with brake cleaner and refitted the wheel. The wheel moves freely so its not dragging, but it obviously needs looking at. With this and the oil filter malarkey I'm probably going to phone the lexus specialist that @MrBiscuits recommended upthread, and ask them to have a look at both the rear drivers side caliper and the oil filter in one hit. I'll also get them to check my homework on the passenger side rear caliper to make sure I've not made a dogs dinner of that inadvertently. mildly annoying, but the only real alternative would be a new caliper and carrier kit for the rear drivers side (£160) and bin this one - which maybe isn't too bad? I'll discuss with the lexus specialist what they think, because if they just say 'seen it all before, its new caliper and carrier time' then I'll just do the job myself, if they reckon it can be freed up and rebuilt in <1h (possible?) then its probably cheaper to go down that route.
-
Possibly, other than the flutes bit and the two tabs that the cup teeth grip onto it's quite smooth, so not a lot to grip onto. I'll try with the new improved cup tool and then go from there. Best case it's been like this for about 5k miles, worst case it's been using the same filter since 2013 or something!
-
Thanks, I've ordered a Laser 4880 which should be here next week and I'll have another crack at it, even if I can just loosen it off a bit this time I'll call that a result, and change the filter the next time I do an oil change. I'll use a big hex socket on the outer instead, I ended up like this using the inner square (not my pic, but had the same thing happen) I'll see how I get on, and if this fails again then it'll be garage time I think.
-
Thanks, some googling has also come up suggesting the Laser 4880 is the best tool for the job so I will have to swallow the £18 for a new one I think. The one I got previously wasn't as expensive as that, somewhere under £10. By the looks of it, its not a bad design per se, but seems vulnerable to having been done up ultra tight previously, or the threads not lubricated which might be what we have here. Out of interest, do you use the inner square head bit, or put a 27mm socket on the outside of the hex? I see you can do either, earlier on I broke the cup adapter by using the inner square drive bit with a 3/8" ratchet, should I have put a hexagonal impact socket over the outer instead?
-
I had thought the same thought! It might be a bit old. The entire housing bolts to the block, and is available 2nd hand, I was thinking that if I go down to the MOT garage in person a week or two in advance and talk to them about it, and offer to buy a replacement threaded end bit like this: in case they totally wreck it getting it off, then they have a spare part to hand (assuming they are able to separate the spin-on threaded bit from the housing). I think there are a couple of options - knock it round using the tabs that the 'teeth' engage with, or use a 14-sided cup thing ONLY, possibly in a combo with an impact gun and/or freeze spray to try and loosen it. Obviously heat isn't an option.