Tadhg Tiogar Posted January 7, 2018 Share Posted January 7, 2018 ...manager at work has I think he said the last carbed Cooper, 30 miles on the clock and never registered. It lives in a Carcoon.I've seen pictures of it, very new. £numerous has already been turned down, a few times. That will most likely be his pension plan. Link to comment Share on other sites More sharing options...
overrun Posted January 7, 2018 Share Posted January 7, 2018 That will most likely be his pension plan. Yeah. He has fingers in a few pies. tooSavvy 1 Link to comment Share on other sites More sharing options...
Ben_O Posted January 7, 2018 Author Share Posted January 7, 2018 IS IT MONDAY YET I'm a little concerned that Monday's update may disappoint..I need to get it stripped yet so there will be quite a few updates of just stripping it down before the nitty gritty can begin overrun and DeeJay 2 Link to comment Share on other sites More sharing options...
tooSavvy Posted January 7, 2018 Share Posted January 7, 2018 Yeah. He has fingers in a few pies..... Sweeney Todd's undoing, that TS DeeJay, overrun and brandersnatch 3 Link to comment Share on other sites More sharing options...
jonny69 Posted January 7, 2018 Share Posted January 7, 2018 Stripping is fine. Lots of us like stripping. Datsuncog, DeeJay and Slartibartfast 3 Link to comment Share on other sites More sharing options...
Ben_O Posted January 8, 2018 Author Share Posted January 8, 2018 Right, today the strip down has commenced.Everything went smoothly and even the most crusty bolts unscrewed with no difficulty which bodes well. A couple of things are broken or damaged so ill have to try and find replacements as they are bits that seem to be NLA new. First job was to remove the wiring harness so bonnet off screen out, airbox off and remaining headlamp out Then start unplugging everything in the engine bay. I removed the alternator and ECU at this point to give better access. And then the radiator came out to give me better access to some low down plugs And that's the engine loom out A nest fell out too Next thing to remove is the inlet manifold And then the expansion tank bracket, charcoal canister, solenoid and wiper motor. The crossmember is looking quite nasty That's as far as ill go with the engine bay for now So onto the body loom. The dash needs to come out for that And then the top dash rail and sound proofing comes out Then the main body loom can come out as well as the heater The pile is growing Then the lower dash rail That just leaves the rear loom and SRS loom SRS loom out after disconnecting the module and pretensioners And then some rear end stripping to release the rear loom. Bootlid and lamps off Speakers and parcel shelf out Then the fuel tank And that's the looms out Seatbelts, quarter windows and various other small parts out and that's the inside stripped Here are the floor holes. Here is the main bootfloor rot So this is what I managed to get off it today And day over More next Monday Ben vulgalour, Conrad D. Conelrad, Sigmund Fraud and 18 others 21 Link to comment Share on other sites More sharing options...
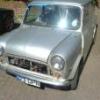
Dick Longbridge Posted January 8, 2018 Share Posted January 8, 2018 That’s pretty tidy for a classic Mini, isn’t it? Someone was pretty committed at some point, making the effort to remove all the glass ready for a pink repaint. I assumed it would have been a quick blow job at some point in it's recent history, but I’d now guess it was done years back? Link to comment Share on other sites More sharing options...
SiC Posted January 8, 2018 Share Posted January 8, 2018 Airbags?! Why did they even bother?? Even light crunch, the occupants are (sadly) going the get squished. Link to comment Share on other sites More sharing options...
Parky Posted January 8, 2018 Share Posted January 8, 2018 Flip, that's good going. I was expecting you to maybe have got a headlight out as that's about as far as I would have got! I can see you have done this once or twice before.... Craig the Princess 1 Link to comment Share on other sites More sharing options...
Ben_O Posted January 8, 2018 Author Share Posted January 8, 2018 Flip, that's good going. I was expecting you to maybe have got a headlight out as that's about as far as I would have got! I can see you have done this once or twice before....yep, this isn't my first rodeo DeeJay, Sigmund Fraud and Talbot 3 Link to comment Share on other sites More sharing options...
Ben_O Posted January 8, 2018 Author Share Posted January 8, 2018 Airbags?! Why did they even bother?? Even light crunch, the occupants are (sadly) going the get squished.You would be surprised.There is a vid on youtube of fifth gear or someone rolling a Mini down a steep hill into some big vehicle of some sort and it just bounced off with fairly minimal damage, I can't imaging what it would do to your bones though...I have seen a few rolled too and they hold up well Link to comment Share on other sites More sharing options...
Ben_O Posted January 8, 2018 Author Share Posted January 8, 2018 That’s pretty tidy for a classic Mini, isn’t it? Someone was pretty committed at some point, making the effort to remove all the glass ready for a pink repaint. I assumed it would have been a quick blow job at some point in it's recent history, but I’d now guess it was done years back?It really isn't that bad.It will still end up being extensive though.I'm thinking replace:Inner wingsbulkheadscuttlewingsfront panelentire passenger compartment floorboth quarter panelsboth steps/a postsA panelsRear panelboot floordoor skins plus frame repairsas well as the other bits like rear valance/closing panels and some repairs to the roof. egg and Dick Longbridge 2 Link to comment Share on other sites More sharing options...
Mike D Posted January 8, 2018 Share Posted January 8, 2018 Looking forward to seeing how this progresses, I had a mini itch that really needed scratching again so this came to live with me at the end of last year.. It wants a good mopping and I'm not keen on the W&P arches, I've got some group 2's in the garage but I'm really loathe to drill the body.. If I can stomach the soul crushing postage and import costs it'll be getting some Aussie spec cooper S flares. Mike Ben_O 1 Link to comment Share on other sites More sharing options...
Mr Laurence Posted January 8, 2018 Share Posted January 8, 2018 You would be surprised.There is a vid on youtube of fifth gear or someone rolling a Mini down a steep hill into some big vehicle of some sort and it just bounced off with fairly minimal damage, I can't imaging what it would do to your bones though...I have seen a few rolled too and they hold up wellI remember watching that. It was a Lexus LS400 they bashed it into iirc. You could tell they definitely weren't expecting it to hold up nearly as well as it did. Still seemed a massive waste of both cars Great progress with yours so far, too Ben_O 1 Link to comment Share on other sites More sharing options...
Tadhg Tiogar Posted January 8, 2018 Share Posted January 8, 2018 .... I assumed it would have been a quick blow job ....I think my sides have split. Link to comment Share on other sites More sharing options...
Ben_O Posted January 15, 2018 Author Share Posted January 15, 2018 Well it's Monday again.I hoped to finish stripping the car today but had a very busy morning doing other stuff so not as much done as planned. Now where was I? I decided to strip the doors out. One side was already partially stripped and the other untouched so I started with the fully assembled door.Here it is with the card and moisture barrier removed And then after removing all of the components I don't think this door has ever been apart which was nice because everything was there all present and most importantly correct. The other side started off like this And ended up the same as the other Next, I dropped the headlining out And removed the small carpet trims from the inside of the C pillars I also removed some other small bits like the foam strips they wedge in everywhere and some rubber grommets. Next, out came the master cylinders and brake servo This ended up being an absolute pain. One of the servo bracket nuts that holds the servo bracket through the crossmember to the top of the pedal box was rusted solid and no longer resembled a nut. I was keen to get this out without shearing it or causing any damage but after wasting time trying to achieve this it was clear that it wasn't going to have it and being in a tight spot where you can't get in to cut or split the nut, I had to resort to a nut extractor which ended up shearing it off.Never mind, Ill repair the pedal box by welding in a new captive bolt when the time comes. Anyway, pedal box now out as well as the steering column Then the handbrake lever Then the gear selector box, shaft and lever Now I can think about removing the engine. All pretty standard stuff so first I need to remove the drive shafts from the pot joints which involves removing the hubs First side came apart without any nonsense despite components and fixings that looked like they had been discovered on the remains of the Titanic All good!Then things took a downward turn. The other side didn't want to come apart. Every nut and bolt fought me to the bitter end The castellated nut on the end of the CV joint where it fixes to the hub refused to budge so I ended up having to cut my losses and remove the hub and drive shaft as one unit which made me unhappy. This is going to be a massive pain trying to get that nut undone on the bench but ill cross that bridge when I eventually reach it. Then continuing on with the misfortune, all but one of the engine mount fixings refused to budge. Again the heads of the bolts resembled a crusty blob so I had to resort to unbolting the mounts from the gearbox one side and the clutch cover the other. This was tricky because of access and would mean that the engine would be a pain to lift out past them especially as I couldn't undo the downpipe from the manifold due to some more impressively rusty nuts. The engine mounts were eventually undone as well as the steady bars top and bottom and I was ready to lift it out. I wheeled the crane into place, started lifting and noticed hydraulic fluid leaking from the ram on the crane and as a result, it wouldn't lift the engine high enough.This is the first time I have used the crane since lending it out so that won't be happening again. With not enough time to waste fixing the crane, I made the decision to cut the slam panel off to allow me to slide the engine out and there we are The front subframe absolutely will not go again. It's well past the point of saving. This is going to cause me more grief getting it out as every mount is again fixed with fixings that don't resemble fixings so they will have to be cut I recon. Subframes, fuel lines and front to back brake line to go and we will have a bare shell! More next week Ben Tickman, The Moog, vulgalour and 15 others 18 Link to comment Share on other sites More sharing options...
320touring Posted January 15, 2018 Share Posted January 15, 2018 You don't happen to have any spare Morris Oxford one piece floor pans in stock? I remember a mate and I lifting a bare shell into the back of a LWB van - so light! Ben_O 1 Link to comment Share on other sites More sharing options...
tooSavvy Posted January 15, 2018 Share Posted January 15, 2018 I have had IMPs in the air, totally stripped down. I took the rear g.box x-member off c/w arms and a neighbour (working on hard standing behind my house [no drive/no garage!] one sunny day) was looking out of their back yard.."Its gone past saving now then?"The 998 went back in & "it was past CATCHING, m8" Never had a garage TS theshadow, Sigmund Fraud and Ben_O 3 Link to comment Share on other sites More sharing options...
mat_the_cat Posted January 15, 2018 Share Posted January 15, 2018 The castellated nut on the end of the CV joint where it fixes to the hub refused to budge so I ended up having to cut my losses and remove the hub and drive shaft as one unit which made me unhappy. At least now you will be able to immerse the hub in a rust removing solution (I use Deox C) and given enough time it will penetrate the threads and get back to shiny steel. If the threads are badly corroded it may remove too much of them to reuse, but I guess that's no big issue. Make sure there are no aluminium parts, as it will dissolve them completely (as well as removing any zinc plating)! Ben_O 1 Link to comment Share on other sites More sharing options...
Slartibartfast Posted January 15, 2018 Share Posted January 15, 2018 Ace work. Ben_O 1 Link to comment Share on other sites More sharing options...
Ben_O Posted January 17, 2018 Author Share Posted January 17, 2018 I was getting another Mini ready for a paint job today so had lots of 5 minutes here and there so pulled some more bits off of this one. Sub frame out That was fun. The tower bolts undid without any problem as did the tow eyes through the teardrop mounts on the bottom of the front panel but the rear toe board mounts were screwed.I couldn't unbolt the mounts from the body as the captive fittings inside were just spinning and I couldn't unbolt the mounts from the frame as they were seized solid so I just dropped the frame without unbolting any of them and one of the mounts broke apart which was brilliant. Unfortunately, the other didn't go so I had to grind the tops off of the captive fitting inside the car and punch them out.I'm not keen doing it like that but needs must. Next steering rack out er, that was it.. danthecapriman, Skizzer, vulgalour and 7 others 10 Link to comment Share on other sites More sharing options...
Noel Tidybeard Posted January 17, 2018 Share Posted January 17, 2018 not a big fan of red minis, but amaranth, tahiti & volcano thats a different matterand i did rather like aconite when i had one- 1973 ('74 my*) mini 1000 hrw became std that year! Ben_O 1 Link to comment Share on other sites More sharing options...
vulgalour Posted January 18, 2018 Share Posted January 18, 2018 It'll be sad to see the pink go but looking at the state of some of the paintwork on this one, entirely sensible to go back to red on it. It's amazing how much of it's left really. mk2_craig and Ben_O 2 Link to comment Share on other sites More sharing options...
Ben_O Posted January 18, 2018 Author Share Posted January 18, 2018 I had a little time here and there again today whilst I was waiting for paint to dry on another Mini so I took the rest of this one apart There is only really the rear subframe to come out no and then the fuel lines and brake line. To my surprise, this happened! And that was without heat or penetration fluid. The rear mounting bolts didn't want to play whatsoever so I had to cut the heads off of all but one of the bolts.Finally, after removing the bolts and letting the shock tops go, it started coming down And out Like the front one, this is SCRAP Never mind. there we go then One bare shell! Cheers Ben danthecapriman, holbeck, MarvinsMom and 9 others 12 Link to comment Share on other sites More sharing options...
danthecapriman Posted January 18, 2018 Share Posted January 18, 2018 Love the big pile of rust and old paint around where you've been working! Link to comment Share on other sites More sharing options...
Ben_O Posted January 18, 2018 Author Share Posted January 18, 2018 Love the big pile of rust and old paint around where you've been working!ha ha, yeah.That was what i swept up after I moved the shell. There was much more that I swept up after removing the subframe partly mostly caused by the rear valance falling off Found some more pics from today too Dirk Diggler, danthecapriman, MarvinsMom and 3 others 6 Link to comment Share on other sites More sharing options...
tooSavvy Posted January 18, 2018 Share Posted January 18, 2018 This is GR9, m8 ..... In the history of 'the MiNi', then, owners/garages/bodgers have been plating over + lashing-up the shell/subs/h.brake [i know that one = drill quadrants to be loose on pivot!] etc... I wouldn't advocate this as a 'pre-MOT' mantra, but, taking the car to pieces first MIGHT highlight issues/facilitate a proper repair Maaaaaagic TS Ben_O 1 Link to comment Share on other sites More sharing options...
Ben_O Posted January 19, 2018 Author Share Posted January 19, 2018 I had another spare hour today so I got the shell on the spit Frames on and up in the air The the A frames and spine Now, I can do this! And reveal the true beauty.... ooooooo ahhhhhh geeeeeee woooooooo She's a gem. Ill just slide it out of the way and forget about it for the weekend Tickman, matt27, LabRat and 7 others 10 Link to comment Share on other sites More sharing options...
Fabergé Greggs Posted January 19, 2018 Share Posted January 19, 2018 You achieve more in spare hours than I do in a lifetime. Great to see this progressing- how I wish it could have been me with the skill, workshop and patience required.. Craig the Princess and Ben_O 2 Link to comment Share on other sites More sharing options...
Ben_O Posted January 19, 2018 Author Share Posted January 19, 2018 You achieve more in spare hours than I do in a lifetime. Great to see this progressing- how I wish it could have been me with the skill, workshop and patience required..I'm hoping that it won't take too long to get it finished. I might start ordering panels next week. Wanna meet up when it's done and have a drive? Link to comment Share on other sites More sharing options...

Recommended Posts
Create an account or sign in to comment
You need to be a member in order to leave a comment
Create an account
Sign up for a new account in our community. It's easy!
Register a new accountSign in
Already have an account? Sign in here.
Sign In Now