phil_lihp Posted October 3, 2016 Author Share Posted October 3, 2016 I did wonder whether it might have cracked the cylinder head and maybe compression is forcing air into the cooling system - this is a wild guess as I am no mechanic. I have a day off Thursday so if the weather's nice I might start pulling some bits off it to investigate. Depends on how much else I need to do that day, trouble is once I have the engine in bits it's stuck on the sloped driveway and therefore blocking access to my garage. Link to comment Share on other sites More sharing options...
Dave_Q Posted October 3, 2016 Share Posted October 3, 2016 Heads do crack but I don't think the K is particularly prone? Whip it off and have a look, if the gasket is blown it should be fairly apparent, if not send the head for testing at an recon/engineering place, should only cost £30-40 and at least then you know if it can be used again. It would be a pain to redo it with new gaskets etc and find the head is toast. Link to comment Share on other sites More sharing options...
Mr_Bo11ox Posted October 3, 2016 Share Posted October 3, 2016 I bet a quid that getting properly hot (and therefore high pressure) after a long period of doing nowt very much, plus the fact that its probably on its original HG (i.e. non-MLS gasket with the they-don't-last-forever brown rubber sealing beads), has just pulled one of the rubber perimeter seals off the HG somewhere. I feel properly sick about this as I genuinely thought it was OK otherwise I would have done the bastard HG myself before punting it on. Phil I will PM you about it. Link to comment Share on other sites More sharing options...
phil_lihp Posted October 3, 2016 Author Share Posted October 3, 2016 Honestly, please don't worry about it, if I expected a warranty with a car I'd go down to my local Kia dealer! I bought a dirt-cheap car with the full knowledge that it hadn't been used on the road for years and has a known weak point in the engine with no evidence it had ever been attended to. Sometimes optimism wins out, sometimes it doesn't. I don't expect you to hold any responsibility for the car once it was out of your sight. I'm a little less fractious about it today and in hindsight was a bit hasty, in reality it would be good for me to have a crack at the head gasket, it doesn't look too hard and it would be good experience as I've never done one. I'll limp the car onto the road so it's not blocking my driveway and have a crack at it, I can only usually get an hour here or there so it'll take a while to get it done but it won't cost a fortune and will be a good learning experience. What's the current recommended gasket for these then? I've seen various brands mentioned in the past but would appreciate advice from those in the know. DeeJay, The Moog, SiC and 1 other 4 Link to comment Share on other sites More sharing options...
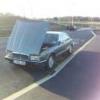
castros_bro Posted October 3, 2016 Share Posted October 3, 2016 Do you like that colour? Do you want another as it may be available free next week? Not kettle powered . Registration number: M624FRG Vehicle make ROVERVehicle model 218Date first used 1 August 1994Fuel type DieselColour Green MOT history of this vehicleTest date 12 October 2015Expiry date 13 October 2016Test Result PassOdometer reading 199,130 milesMOT test number 3690 2314 7984Advisory notice item(s)nearside Anti-roll bar linkage rubber bush deteriorated but not resulting in excessive movement (2.4.G.2)Test date 6 October 2015Test Result FailOdometer reading 99,111 milesMOT test number 8329 5209 5744Reason(s) for failureSteering system has excessive free play detected at the steering wheel (steering rack fitted) (2.2.A.1b)offside Steering rack gaiter split (2.2.D.2d)offside Headlamp aim too low (1. nearside Side repeater not working (1.4.A.2c)Front passenger door cannot be opened from outside the vehicle (6.2.B.1b)Advisory notice item(s)play in both inner tie rod endsnearside Anti-roll bar linkage rubber bush deteriorated but not resulting in excessive movement (2.4.G.2)Test date 2 October 2014Expiry date 13 October 2015Test Result PassOdometer reading 188,518 milesMOT test number 3157 8587 4273Advisory notice item(s)Play in steering rack inner joint(s)Test date 24 September 2014Test Result FailOdometer reading 188,515 milesMOT test number 2155 5776 4262Reason(s) for failureNearside Front Front suspension has excessive play in a lower suspension ball joint (2.5.B.1a)Nearside Outer Vehicle structure has excessive corrosion, seriously affecting its strength within 30cm of the body mountings (6.1.B.2)Offside Outer Vehicle structure has excessive corrosion, seriously affecting its strength within 30cm of the body mountings (6.1.B.2)Advisory notice item(s)Play in steering rack inner joint(s)Test date 11 October 2013Expiry date 13 October 2014Test Result PassOdometer reading 173,742 milesMOT test number 3262 1428 3296Advisory notice item(s)Rear registration plate faded but not likely to be misread (6.3.1d)Nearside Front Anti-roll bar has slight play in a pin/bush (2.4.G.2)Offside Front Anti-roll bar has slight play in a pin/bush (2.4.G.2)Offside Front Track rod end ball joint has slight play (2.2.B.1f)Coolant leakTest date 9 October 2013Test Result FailOdometer reading 173,718 milesMOT test number 2672 4208 3208Reason(s) for failureNearside Front Steering rack gaiter split (2.2.D.2d)Nearside Front Suspension arm insecure (2.4.G.1)Nearside Windscreen washer provides insufficient washer liquid (8.2.3)Parking brake: efficiency below requirements (3.7.B.7)Advisory notice item(s)Rear registration plate faded but not likely to be misread (6.3.1d)Nearside Front Anti-roll bar has slight play in a pin/bush (2.4.G.2)Offside Front Anti-roll bar has slight play in a pin/bush (2.4.G.2)Offside Front Track rod end ball joint has slight play (2.2.B.1f)Coolant leakTest date 9 October 2012Expiry date 13 October 2013Test Result PassOdometer reading 161,570 milesMOT test number 2664 4398 2220Advisory notice item(s)Steering system has slight free play detected at steering wheel (2.2.A.1b)Test date 14 October 2011Expiry date 13 October 2012Test Result PassOdometer reading 15,192 milesMOT test number 4961 8798 1227Advisory notice item(s)Nearside Rear Direction indicator slightly discoloured (1.4.A.2f)Offside Rear Direction indicator slightly discoloured (1.4.A.2f)Steering system has slight free play detected at steering wheel (2.2.A.1b)Test date 8 October 2010Expiry date 7 October 2011Test Result PassOdometer reading 142,200 milesMOT test number 4412 0108 0204Advisory notice item(s)Windscreen has damage to an area less than a 40mm circle outside zone 'A' (8.3.1d)Test date 5 October 2009Expiry date 6 October 2010Test Result PassOdometer reading 134,604 milesMOT test number 2526 1897 9269Advisory notice item(s)Nearside Rear Direction indicator slightly discoloured (1.4.A.2f)Offside Rear Direction indicator slightly discoloured (1.4.A.2f)Exhaust has part of the system slightly deteriorated (7.1.1a)Exhaust has a minor leak of exhaust gases (7.1.2)Nearside Rear Seat belt anchorage prescribed area is corroded but not considered excessive (5.2.6)Offside Rear Seat belt anchorage prescribed area is corroded but not considered excessive (5.2.6)Nearside Rear Trailing arm rubber bush deteriorated but not resulting in excessive movement (2.4.G.2)Test date 5 October 2009Test Result FailOdometer reading 134,604 milesMOT test number 1610 5897 9235Reason(s) for failureNearside Rear Tyre tread depth below requirements of 1.6mm (4.1.E.1)Advisory notice item(s)Nearside Rear Direction indicator slightly discoloured (1.4.A.2f)Offside Rear Direction indicator slightly discoloured (1.4.A.2f)Exhaust has part of the system slightly deteriorated (7.1.1a)Exhaust has a minor leak of exhaust gases (7.1.2)Nearside Rear Seat belt anchorage prescribed area is corroded but not considered excessive (5.2.6)Offside Rear Seat belt anchorage prescribed area is corroded but not considered excessive (5.2.6)Nearside Rear Trailing arm rubber bush deteriorated but not resulting in excessive movement (2.4.G.2)Test date 7 October 2008Expiry date 6 October 2009Test Result PassOdometer reading 128,760 milesMOT test number 3527 0198 8472Advisory notice item(s)Steering system has slight free play detected at steering wheel (2.2.A.1b)Nearside Rear Tyre worn close to the legal limit (4.1.E.1)Test date 4 October 2007Test Result FailOdometer reading 120,384 milesMOT test number 7216 3797 7267Reason(s) for failureNearside Front Tyre tread depth below requirements of 1.6mm (4.1.E.1)Offside Front Tyre tread depth below requirements of 1.6mm (4.1.E.1)Advisory notice item(s)Nearside Rear Tyre worn close to the legal limit (4.1.E.1)Test date 4 October 2007Expiry date 4 October 2008Test Result PassOdometer reading 120,384 milesMOT test number 1544 7787 7213Advisory notice item(s)Nearside Rear Tyre worn close to the legal limit (4.1.E.1)Test date 5 October 2006Expiry date 4 October 2007Test Result PassOdometer reading 107,249 milesMOT test number 6435 1837 6221Test date 5 August 2006Test Result FailOdometer reading 107,207 milesMOT test number 5518 2781 6209Reason(s) for failureSteering system excessively tight (2.2.D.1)Steering column shaft has excessive end float (2.1.3)Steering system has excessive free play detected at the steering wheel (steering rack fitted) (2.2.A.1b)Power steering malfunctioning (2.3.3a)Advisory notice item(s)with wheels lifted can not turn steering. Link to comment Share on other sites More sharing options...
phil_lihp Posted October 4, 2016 Author Share Posted October 4, 2016 No thanks, kind offer but one broken one is enough! My cup overfloweth with jobs to do on cars so the current fleet is more than enough to be getting on with, no doubt someone on here would take it off your hands though! Link to comment Share on other sites More sharing options...
phil_lihp Posted October 13, 2016 Author Share Posted October 13, 2016 I came home from a week away to discover the Rover had not fixed itself in my absence. Putting this disturbing turn of events to one side, I fired it up (after many short runs, the battery's going flat), hobbled it off the driveway into the road so I can get into my garage and then set to work. It's now vying with a dusty Nissan van with 4 increasingly flat tyres a few metres away for 'most abandoned thing on the road' as the perished tyre has given up completely and one of the new fronts on the same side is looking decidedly saggy as well. My puny footpump is in the Puma's boot which is away on loan for a few days at the moment so it'll just have to be appreciated by the neighbours the way it is for now. In a mere hour I'd got this far. This far, in fact, and no further as I don't have an E12 socket for the head bolts - I am very new to this level of spannering though so it's no shock that this was enough to stop me in my tracks. That, plus the exhaust manifold bolts might as well be welded on, they won't shift for love nor money so a breaker bar will be needed. I'm not surprised the rocker cover was leaking, all of the central bolts down the middle were finger-tight at best and one was only half screwed in - someone's been here before obviously. Next step, something beefier to crack off the manifold bolts and the purchase of an E12 socket, then hopefully some more thrilling progress can be made. Link to comment Share on other sites More sharing options...
dollywobbler Posted October 13, 2016 Share Posted October 13, 2016 Warning. Manifold nuts can be a sod. I'd soak them in proper penetrating oil for at least a day. Even then, only gently apply pressure. If they want to undo, then great! A breaker bar might just encourage the studs to snap off. Heat may help. EDIT - no, heat WILL help. I've found cold engines are best for sheared bolts and studs. inconsistant and phil_lihp 2 Link to comment Share on other sites More sharing options...
phil_lihp Posted October 13, 2016 Author Share Posted October 13, 2016 Fair point, I should have given them a good soaking at the time to be honest but didn't think about it until I'd cleared up my tools and gone in for lunch. I certainly don't want the hassle of one or more snapping off in the head! Link to comment Share on other sites More sharing options...
dollywobbler Posted October 13, 2016 Share Posted October 13, 2016 It's amazing what good penetrating oil and a wire brush session can achieve. I have slowly learnt that patience and the right application of tools can yield a result, whereas attacking things with brute force just results in more swearing. My ultimate result was unseizing a bleed nipple in a BX caliper. Those things are an absolute sod! Seem to recall I put the spanner on, and gently tapped the sides of the spanner, doused it in oil and then gently applied pressure one way, then the other, at no point giving it a good shove. I was amazed when it actually came undone rather just snapping off (as most of them do). phil_lihp 1 Link to comment Share on other sites More sharing options...
phil_lihp Posted October 13, 2016 Author Share Posted October 13, 2016 Indeed, I had similar joy with the bleed nipples on my old Nova's rear drums, despite the car having sat in a field for 5 years (and goodness knows how many years before that since the drums had been touched) regular dosing with GT85 over several hours meant they both came off quite easily with no real force needed. I'm quite keen to get this fixed and out of the door now, plans have changed somewhat and funds are needed but I don't want to wreck it for the sake of a bit of patience with the bolts.. dollywobbler 1 Link to comment Share on other sites More sharing options...
fraser.innes.3 Posted October 13, 2016 Share Posted October 13, 2016 It's amazing what good penetrating oil and a wire brush session can achieve. I have slowly learnt that patience and the right application of tools can yield a result, whereas attacking things with brute force just results in more swearing. My ultimate result was unseizing a bleed nipple in a BX caliper. Those things are an absolute sod! Seem to recall I put the spanner on, and gently tapped the sides of the spanner, doused it in oil and then gently applied pressure one way, then the other, at no point giving it a good shove. I was amazed when it actually came undone rather just snapping off (as most of them do).I have always found that bleed nipples respond to a copper wire brush then penetrating fluid a day before attempted removal. No point in spraying penetrating fluid everywhere, when it is still covered in gunk. Sent from my EVA-L09 using Tapatalk fraser.innes.3 1 Link to comment Share on other sites More sharing options...
phil_lihp Posted November 5, 2016 Author Share Posted November 5, 2016 Well, soaking the manifold nuts in Plusgas over the last week yielded results - all but one came off with minimal struggle. Unfortunately, one of them is very chewed up and won't shift. I've tried hammering a slightly undersized imperial socket onto it but that's just chewed it up even more, trouble is there isn't much room to swing a hammer between the radiator and exhaust manifold. The head bolts are all cracked off and the timing cover's off (what an absolute bastard that last bottom bolt is! - no room for hands, sockets or more than 2mm of movement on a rachet spanner. Fortunately, after 24,388 turns it came off). That leaves just that one manifold bolt which I'll have to keep working on, plus the timing belt. Now, my thinking here is (and I have very little experience of this, so I'm prepared to be told I'm a muppet) I need to mark the positions of the two cam sprockets with tipex plus matching marks on the belt, then loosen off the tensioner, slip the belt off the cam sprockets, then it can just slip back on again when the head goes back on. However, having read this... https://awj99.wordpress.com/rover-k-series-the-ultimate-head-gasket-replacement/ I think I might be over-simplifying this drastically! The car has a brand-new timing belt so I don't need to change it, I'm guessing the instructions here are assuming you would change the belt while all this is being done, which isn't necessary in this particular case. Is it as involved as that blog suggests? If so, I'm concerned I'm going to be getting out of my depth fairly soon. I am having thoughts about just scrapping it as I really could do without the hassle but on the other hand I want to see it fixed, it has a tank full of petrol as I filled it up 9 miles before it died and Mr B put a lot of effort and expense into getting it back on the road - it is in pretty good condition apart from a few dings on the bodywork and it would be a shame, especially with such low mileage. Jim Bell 1 Link to comment Share on other sites More sharing options...
omegod Posted November 5, 2016 Share Posted November 5, 2016 I can heartily recommend Irwin bolt removers, I used them for the first time recently with a rounded downpipe nut, the smallest one in the set from screwfix got a bite on the stud itself rather than the nut and wound the whole thing out DSdriver and phil_lihp 2 Link to comment Share on other sites More sharing options...
phil_lihp Posted November 5, 2016 Author Share Posted November 5, 2016 Good shout, although would they work on these? The problem nut sits at the end of a long exposed thread, it requires a deep socket to reach (my mistake as I didn't have one and used a standard 15mm spanner instead which probably didn't help) - these presumably wouldn't work as they wouldn't reach over the thread? http://www.ebay.co.uk/itm/IRWIN-5-Piece-BASE-Damaged-Bolt-Grip-Nut-Remover-Set-10-16mm-Case-10504634-/361554864809?hash=item542e596aa9:g:4DUAAOSwWntXMmcD I couldn't find any deep ones but perhaps it would take the stud out entirely if it'll grip that instead... Link to comment Share on other sites More sharing options...
Mr_Bo11ox Posted November 5, 2016 Share Posted November 5, 2016 Yo Phil, don't worry about marking owt up, just time the crank then pull it all to bits. There is a mark on the timing belt sprocket but you can only see it with the pulley removed. Get that lined up (if necessary you can rotate the engine by jacking up one front wheel and turning that with it in gear) then you are safe to dismantle it all. When it is time to reassemble, make sure the exhaust cam has the pointer saying 'exhaust' pointing forward and the inlet one has 'inlet' pointing forward. There are dimples on each pulley which will align. Ideally then lock em with the blue £5 locking tool. Then chuck the belt on. That's it! phil_lihp 1 Link to comment Share on other sites More sharing options...
phil_lihp Posted November 5, 2016 Author Share Posted November 5, 2016 Cheers - that makes me feel better about the whole thing...I'm going to ask another stupid question though as I don't understand this bit. There is a mark on the timing belt sprocket but you can only see it with the pulley removed My terminology is going to be hopeless here but what do you mean by sprocket and pulley here - are you referring to the top or bottom of the engine? What do I need to remove? I know I sound thick but this is all new to me. I can see the markings on the exhaust and inlet cam sprockets now the top timing belt cover is off. Link to comment Share on other sites More sharing options...
phil_lihp Posted November 5, 2016 Author Share Posted November 5, 2016 Thanks for the cam locking tool recommendation too - just bought a Draper one off Amazon for £3.99. Link to comment Share on other sites More sharing options...
Dave_Q Posted November 5, 2016 Share Posted November 5, 2016 The sprocket is the toothy bit the timing belt runs on, the pulley is the smoother pulley that drives the aux belt(s) I've not done a rover but normally you have to undo the big boy bolt in the end of the crank (after removing the alt belt etc) this will allow you to remove the pulley.You will then have the crank and sprocket exposed with the timing belt still on, you can turn over the engine with a wheel as described, or pop the bolt back in to turn it over until the newly uncovered mark on the sprocket lines up with the mark on the block. phil_lihp 1 Link to comment Share on other sites More sharing options...
phil_lihp Posted November 5, 2016 Author Share Posted November 5, 2016 Ah, it was pulley vs. sprocket that confused me, I think I understand now. Link to comment Share on other sites More sharing options...
Mr_Bo11ox Posted November 5, 2016 Share Posted November 5, 2016 I'm talking about the bottom of the engine. Get the cam pulley marks more or less in line then get the crank bolt loosened. Then remove the cam belt. With the crank bolt undoneand the belt off, the pulley (for the fan belt etc) will come off but the sprocket for the timing belt can stay in place, allowing you to check and align the crank accurately before pulling the cyl head off. phil_lihp 1 Link to comment Share on other sites More sharing options...
omegod Posted November 5, 2016 Share Posted November 5, 2016 Good shout, although would they work on these? The problem nut sits at the end of a long exposed thread, it requires a deep socket to reach (my mistake as I didn't have one and used a standard 15mm spanner instead which probably didn't help) - these presumably wouldn't work as they wouldn't reach over the thread? http://www.ebay.co.uk/itm/IRWIN-5-Piece-BASE-Damaged-Bolt-Grip-Nut-Remover-Set-10-16mm-Case-10504634-/361554864809?hash=item542e596aa9:g:4DUAAOSwWntXMmcD I couldn't find any deep ones but perhaps it would take the stud out entirely if it'll grip that instead...That's the point I was making, I focused on the nut for an hour or so until the penny dropped and I thought fuck it, the stud's threaded into the block so take the lot out, the fucker was out in 5 seconds, may work in this case if you can lay your hand on a set ( or buy one and be very careful with it so you can get a refund on it ) phil_lihp 1 Link to comment Share on other sites More sharing options...
phil_lihp Posted November 5, 2016 Author Share Posted November 5, 2016 Ideal, thanks both, I'll give it a go when I can (it'll be Christmas at this rate...) - grabbing a few minutes here and there on the odd evening by the light of the nuclear-bright street lamp it's parked under isn't conducive to rapid repairs but I'll get there. Bolt extractors purchased, should be useful to have anyway. Link to comment Share on other sites More sharing options...
SiC Posted November 5, 2016 Share Posted November 5, 2016 Slightly off topic on this thread, but how did the Astra turn out? Reading this thread reminded me you saying about it when you come to pick up the Astra. Link to comment Share on other sites More sharing options...
phil_lihp Posted November 5, 2016 Author Share Posted November 5, 2016 It's doing great, thanks. It's been signwritten and is piling on the miles, hasn't put a foot wrong yet and we're all very impressed with it. SiC 1 Link to comment Share on other sites More sharing options...
phil_lihp Posted November 26, 2016 Author Share Posted November 26, 2016 Three weeks later... The neighbourhood rejoices as the apparently abandoned old Rover sat on two flat tyres in a pile of leaves shows rare signs of activity. It took a while but eventually I managed to pull its head off. Thank you for the Erwin bolt extractor recommendation - that rounded and seized manifold bolt is now finally off. I put a small one onto the thread hoping to pull the whole stud out but it was so corroded it snapped off flush with the bolt - bugger, that now has to come out and be replaced. On the plus side, with the excess thread gone, I could now get a larger extractor onto the rounded bolt and with a bit of force and a loud crack, it came out. Once I'd finally lifted off the head, the cause of the engine's problems become pretty obvious. The rubber bead on the gasket was barely attached and it looks like it's been on its way out for a while. The head's in a box in the van ready to be skimmed on Monday, it looks pretty much OK in my inexpert opinion anyway but will probably need some work as the engine did get rather toasty on a number of occasions. I'll get the new MLS gasket and stretch bolts ordered ready so in theory (and this is highly subject to change) it might be back up and running next weekend. Once it is, assuming I'm capable of putting it all back together correctly, it needs a new manifold stud and a rear tyre, plus the brand new NS front one re-sealing as it's got a slow puncture, then a damn good scrubbing and it'll be up for sale. I might even raffle it, but I am determined to at least use up the tank of petrol that I put in it back in September before it goes. beko1987, Bucketeer, Dave_Q and 10 others 13 Link to comment Share on other sites More sharing options...
phil_lihp Posted November 28, 2016 Author Share Posted November 28, 2016 The head's now with a local engineer, £40 for the skim and £40 for pressure testing and new cam seals...more than I was expecting to pay but at least I'll know the head is sound. Supposed to be ready tomorrow so will get it boshed back in ASAP once the head gasket and bolts arrive. CGSB 1 Link to comment Share on other sites More sharing options...
Dave_Q Posted November 28, 2016 Share Posted November 28, 2016 I've had them done cheaper in the past but £80 all in is still less than a second hand head would be I imagine, plus of course a second hand head could be no better than what you had. Link to comment Share on other sites More sharing options...
phil_lihp Posted December 16, 2016 Author Share Posted December 16, 2016 Well, I'm £90 lighter (it was £45 per job, not £40) but I finally have my skimmed and sealed cylinder head back. He did it within 24 hours and confirmed it wasn't too bent (unsurprisingly, he sees a lot of these and said some are much, much worse so I got away with it). It's taken me over 2 weeks to actually find time to get over to him and pick it up but I now have all the bits necessary to fling it all back together tomorrow and see if it runs, assuming I can do it correctly and in a reasonable time frame. Watch this space... DeeJay, catsinthewelder, Dave_Q and 5 others 8 Link to comment Share on other sites More sharing options...
Split_Pin Posted December 16, 2016 Share Posted December 16, 2016 Brilliant stuff Phil_lip, the fact that you confirm that you are an amateur gives me inspiration to actually attempt this sort of thing one day ( when I have l the inclination!). Looking forward to seeing further updates in this one. phil_lihp 1 Link to comment Share on other sites More sharing options...

Recommended Posts
Create an account or sign in to comment
You need to be a member in order to leave a comment
Create an account
Sign up for a new account in our community. It's easy!
Register a new accountSign in
Already have an account? Sign in here.
Sign In Now