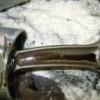
tommotech Posted May 10, 2015 Share Posted May 10, 2015 Colected this on Friday, lack of collection photo's as it was on a trailer and it was raining hard. Any educated guesses; Link to comment Share on other sites More sharing options...
Cavcraft Posted May 10, 2015 Share Posted May 10, 2015 Burlington Arrow? Link to comment Share on other sites More sharing options...
tommotech Posted May 10, 2015 Author Share Posted May 10, 2015 Nope Link to comment Share on other sites More sharing options...
Mr_Bo11ox Posted May 10, 2015 Share Posted May 10, 2015 Panther Kallista Link to comment Share on other sites More sharing options...
HMC Posted May 10, 2015 Share Posted May 10, 2015 Re engined mercedes 540K alf892 1 Link to comment Share on other sites More sharing options...
Noel Tidybeard Posted May 10, 2015 Share Posted May 10, 2015 spartan Link to comment Share on other sites More sharing options...
tommotech Posted May 10, 2015 Author Share Posted May 10, 2015 Panther Kallista, 1983 Y plate and has stood since the last MOT in 1994. Here are some more pics, well done Mr_Bo11ox! Managed to get this for just over a grand, it needs welding and door repairs (lower hinges have fractured). Engine has not started yet but i plan to drop some diesel down the bores before attempting to start it. Full history file, including original build docs and bill-of-sale. Looking forward to getting stuck into this one! Steviemillar, barefoot, alf892 and 10 others 13 Link to comment Share on other sites More sharing options...
HMC Posted May 10, 2015 Share Posted May 10, 2015 Looks great! Having just done the cambelt in my CVH escort the north south installation in the panther looks a lot easier to get around. tommotech 1 Link to comment Share on other sites More sharing options...
Mr_Bo11ox Posted May 10, 2015 Share Posted May 10, 2015 £1000 is a fuppin MEGABARG for one of these, you should be quids in. Think they look like a Lima but are completely different under the skin, are they a tubular steel chassis? The Limas had a Vauxhall Viva floorpan I think. tommotech 1 Link to comment Share on other sites More sharing options...
tommotech Posted May 10, 2015 Author Share Posted May 10, 2015 Chassis is steel-box space frame type, with tub and outer panels attached. Ford running gear and many other recognisable parts. Front doors are stretched Midget as is the screen frame.I'd never really taken much notice of these, but this was too good to turn down. Lima used Vauxhall 2.3 engine i believe, not sure about the floorpan. Link to comment Share on other sites More sharing options...
fred Posted May 10, 2015 Share Posted May 10, 2015 Blimey proper bargain - need to grow your chest hair and start wearing Brut! tommotech 1 Link to comment Share on other sites More sharing options...
trigger Posted May 10, 2015 Share Posted May 10, 2015 That CVH looks totally wrong in that! Proper bargain though. Seeing the photos reminds me that i worked on a white one many years ago, I think i may have even driven it on the road, It must be something I've tried to block out of my memory. tommotech 1 Link to comment Share on other sites More sharing options...
Bren Posted May 10, 2015 Share Posted May 10, 2015 I had a PE teacher at school that had one of these with the V6 in it. tommotech 1 Link to comment Share on other sites More sharing options...
PiperCub Posted May 10, 2015 Share Posted May 10, 2015 Would throw a new cambelt in it before trying to fire it up as it's been dormant for so long. The CVH is one of the easiest to do especially as it's mounted conventionally. tommotech and Uncle Jimmy 2 Link to comment Share on other sites More sharing options...
tommotech Posted May 11, 2015 Author Share Posted May 11, 2015 A cambelt definitely and I'm expecting to strip the carb too, that 20 year old fuel tends to turn to powder and block things up. Link to comment Share on other sites More sharing options...
dave21478 Posted May 11, 2015 Share Posted May 11, 2015 Nice. I would be wanting to change those wheels for something that stick out a bit further.I would also want to be dressed up as Cruella DeVille every time I drove it. Uncle Jimmy, tommotech and cort1977 3 Link to comment Share on other sites More sharing options...
tommotech Posted January 3, 2017 Author Share Posted January 3, 2017 Work on this project has progressed at varying rates recently and I apologise for neglecting this thread, lacking updates. The chassis has been welded, door skins repaired (two MG Midget panels per door) and a nice paint job added in Ford Panther Black metallic. The photos are self explanatory, Engine is in pieces now and in the washer at work, pics of that to follow. As you were...... garethj, CreepingJesus, holbeck and 15 others 18 Link to comment Share on other sites More sharing options...
panhard65 Posted January 3, 2017 Share Posted January 3, 2017 Haven't seen one of these in ages, they were quite popular for a Panther and were built in Harlow I think as I went for a job there back in the 80's when I left college. tommotech 1 Link to comment Share on other sites More sharing options...
320touring Posted January 3, 2017 Share Posted January 3, 2017 Superb chap- paint finish looks ace. What is happening engine wise? Are you keeping it standard? tommotech 1 Link to comment Share on other sites More sharing options...
dollywobbler Posted January 3, 2017 Share Posted January 3, 2017 How did I miss this first time around? I love Kallistas. I'm going to say it - the ONLY attractive Panther ever built. Also, Jim Bowen used to own one. Uncle Jimmy and tommotech 2 Link to comment Share on other sites More sharing options...
Jim Bell Posted January 3, 2017 Share Posted January 3, 2017 Sex panther. tommotech 1 Link to comment Share on other sites More sharing options...
Guest Hooli Posted January 3, 2017 Share Posted January 3, 2017 Somewhere I've got the tool for doing the valve stem seals without removing the head. Tip if you don't know - use the RST stem seals, they are one piece with the washer under the spring so don't ride up & leak. tommotech 1 Link to comment Share on other sites More sharing options...
tommotech Posted January 3, 2017 Author Share Posted January 3, 2017 Superb chap- paint finish looks ace.What is happening engine wise? Are you keeping it standard?It has the XR3 CVH 1.6 with a DFT Weber. Head will be ported, polished on the exhausts and matched to the manifolds for optimum flow. A fast road cam and vernier pulley will also be fitted with a branch manifold. I've overhauled the carb and polished the barrels, again improving air flow. I will get the pistons out this week, bores look ok but I'm thinking boring out a couple of sizes will help. It won't set the world on fire but it should be good for an additional 20hp. CreepingJesus, 320touring and Coprolalia 3 Link to comment Share on other sites More sharing options...
Guest Hooli Posted January 3, 2017 Share Posted January 3, 2017 Those are a much better engine that everyone seems to remember. Trouble was they were one of the first to use modern thin oils & everyone just stuck thick stuff in. That made the hydraulic tappets collapse & then you had a rattly engine with no power. I had a 1.6 onion with the early XR3 square carb, which was bigger than the round webers used later. It was as quick as a 1.6i once I swapped to the injection exhaust which had a better manifold. Banger Kenny and tommotech 2 Link to comment Share on other sites More sharing options...
garethj Posted January 4, 2017 Share Posted January 4, 2017 As DW says, how did I miss this first time around? If I was in the position of having more money but didn't need to actually get anywhere I'd have a Panther Solo like a shot. The Lima and Kallista must have sold quite well for Bob Jankel to afford the development of his other stuff tommotech 1 Link to comment Share on other sites More sharing options...
320touring Posted January 4, 2017 Share Posted January 4, 2017 It has the XR3 CVH 1.6 with a DFT Weber. Head will be ported, polished on the exhausts and matched to the manifolds for optimum flow. A fast road cam and vernier pulley will also be fitted with a branch manifold. I've overhauled the carb and polished the barrels, again improving air flow. I will get the pistons out this week, bores look ok but I'm thinking boring out a couple of sizes will help. It won't set the world on fire but it should be good for an additional 20hp.That sounds like a peppy, revvy raspy delight:) tommotech 1 Link to comment Share on other sites More sharing options...
nigel bickle Posted January 4, 2017 Share Posted January 4, 2017 I've a spare set of original alloys for one of those. Lord knows why..... DeeJay and tommotech 2 Link to comment Share on other sites More sharing options...
inconsistant Posted January 4, 2017 Share Posted January 4, 2017 Also missed this first time around. There's some quality threads bubbling up to the surface on here at the moment. alf892 and tommotech 2 Link to comment Share on other sites More sharing options...
tommotech Posted January 4, 2017 Author Share Posted January 4, 2017 I've a spare set of original alloys for one of those.Lord knows why.....Are they of the type fitted to this car or the later type, 13" I assume. Link to comment Share on other sites More sharing options...
nigel bickle Posted January 4, 2017 Share Posted January 4, 2017 Same as yours,from memory. I can ask one of the kids to take a pic,if it helps? Link to comment Share on other sites More sharing options...

Recommended Posts
Create an account or sign in to comment
You need to be a member in order to leave a comment
Create an account
Sign up for a new account in our community. It's easy!
Register a new accountSign in
Already have an account? Sign in here.
Sign In Now