Jump to content

What has two seats, a mid-mounted 6 cylinder engine, and a turbo? Time for windscreen number 5!


mat_the_cat

Recommended Posts

This.


post-5223-0-85619500-1418425075_thumb.jpg


By popular* demand* here is a thread about the least popular VW van around.


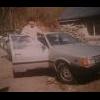
The photo is as bought, back in 2006. Purchased with a year's MOT, 6 months tax, and a caravan all for £600. To his credit, the seller had received many enquiries from people wanting to buy either the caravan or van, but not both although refused to end the auction early when there were bids already on it. So it failed to go anywhere near what I thought it would sell for.


The combination suited us well, as we could live in the caravan wile we carried out major house work, and use the van for carrying building materials. This we did, enduring a sometimes cosy but often cold winter in the caravan while I used the LT as my only road legal vehicle. It was already carpeted inside, with a simple electrical system as it had been previously used as a motorbike race van. It saw a little bit of use as a 'tent on wheels', seen here in Scotland in 2007:


post-5223-0-27587600-1418425822_thumb.jpg


I'd always wanted to build a campervan, although I kept this quiet when seeking domestic funding for buying it in the first place! So when the bulk of the work was done, I suggested using some fittings from the caravan to convert it. This was met with approval (to my surprise), and we planned to take it to a festival one August.


I waited for a forecast of dry weather, but none came and I was running out of time so ended up booking time off work a week before the festival. The reason for dry weather is that I wanted to tackle some welding...


post-5223-0-78083700-1418426117_thumb.jpg


As it turned out, I had one dry day to work on it! After much searching I'd bought some genuine VW panels (despite forum experts saying there were none remaining), which fitted very nicely :-)


post-5223-0-27280300-1418426452_thumb.jpg


post-5223-0-25538600-1418426463_thumb.jpg


post-5223-0-92683400-1418426477_thumb.jpg


Managed to get that far on Monday, then it was time to tackle the floorpan but I'll leave that tale for another day...


post-5223-0-44868600-1418426620_thumb.jpg


post-5223-0-51404500-1418426636_thumb.jpg

Link to comment
Share on other sites

Yeah despite the fact they are more mobile fishmonger than surf dude, they've gone all "gnarly" on the prices. And as you can see, hanging round Cornwall beaches suits the metalwork well*.


They do sound nice though. Porsche engine, innit. Diesel Porsche. 924D.

Link to comment
Share on other sites

they've gone all "gnarly" on the prices.


Maybe because they were the only cheap ticket to the VW camper scene, coupled with the usual diminishing supply. We weren't especially looking for one; a Mk1 Master was top of the list but the VW seemed a reasonable bet. Wider, so (just) possible to sleep across it and a better soundtrack...

Link to comment
Share on other sites

I drove this at Shitefest. It was comically slow up the 'test hill,' but absolutely awesome. Sounded superb and felt massively robust, in just the way a Fiat Seicento doesn't.


You try it coming out of Aberystwyth loaded with 2.2 tons of trailer!


I didn't know that they are mid mount. Is the engine under the load floor?


Artistic licence, it's just behind the front seats so kind of mid mounted. Ish.

Link to comment
Share on other sites

We weren't especially looking for one; a Mk1 Master was top of the list but the VW seemed a reasonable bet. Wider, so (just) possible to sleep across it and a better soundtrack...

Also a better gearchange (yes, honestly!) and a much, much better turning circle.  A LWB Mk1 Master is the only vehicle I've ever managed to get completely stuck whilst trying to turn round.  I hate to think what trying to reverse a trailer with one would be like.

Link to comment
Share on other sites

They do seem quite 'unloved' by the wanker brigade these, which is no bad thing imho. I've seen the 'finished project' in the flesh and it's very impressive, looking forward to reading more about how you got there.

Link to comment
Share on other sites

 I've seen the 'finished project' in the flesh and it's very impressive, looking forward to reading more about how you got there.

Ah... That explains it - I was getting a distinct feeiling of Deja Vu about the floor repairs.... Its been annoying me all morning whilst doling out the Tramadol.

Link to comment
Share on other sites

One of these in that blue vans were before they all went white is still used by a market trader in Chesterfield and has been for as long as I can remember which means he's likely had it from new.  There can't be many vans as affordable with so much carrying ability and even though it's likely not cheap on the liquid dinosaurs I bet it's still cheaper than finance on a new van.

Link to comment
Share on other sites

This is my new favourite thread on Autoshite.


Much LT love from me... I had a 1982 LT28 minibus in the late 1990s that I (part-) converted into a camper. It could sleep six people at a push, or transport three motorbikes. It drove more like a car than a van, was dead easy to park with its enormous steering lock, and it absolutely flew with the minibus gearing & 2.0 'Porsche' pez engine. I loved it to bits, drove it all over Europe and have regretted selling it ever since. So much so that I'm looking for another one at this very moment.

Link to comment
Share on other sites

Thanks for the comments...now back to the story. I decided to book it in for an MOT on the Wednesday, as that would give me a day to do the welding on the floor, and 2 days (1 for delivery, 1 for fitting) if anything was needed for the test. So Tuesday was mainly spent cutting out patches, cleaning up the edges, and welding them all in place. I didn't take as many photos back then as I do now, but here are a few of work in progress:


post-5223-0-02019700-1418496716_thumb.jpg


post-5223-0-73378100-1418496732_thumb.jpg


post-5223-0-93227600-1418496750_thumb.jpg


I also had an exhaust to fit, which was fortunately a nice and simple job - although damp, as the van was on grass and it rained on and off all week.


post-5223-0-70142200-1418496686_thumb.jpg


Eventually, I managed to put a coat of galvanising paint on the floor late in the evening but I was not at the best of moods by this point.


post-5223-0-14539900-1418496763_thumb.jpg


It was in the middle of this that I heard a car down the track at our gate. We'd recently had a load of rubbish dumped there, as it's off the beaten track and ideal for people to drop off their old fridges and tyres  :mad:  So I stormed off down there to see what was going on. When it came into view I saw a slightly steamed up 106, the driver of which seemed unwilling to stick around, as it started up and sped off. Unfortunately for them, they must have hit their exhaust on a rock, as I heard a bang followed by the sound of it scraping all the way down the main road...


Anyway, the next day was the MOT which fortunately it passed, so that gave me the rest of the week to concentrate on fitting out the interior!

Link to comment
Share on other sites

The next couple of days saw me gutting the caravan, and installing as much of the interior as I could into the van. Before I put the bits in, I insulated the walls with foil bubble insulation, as it seemed to work well in the house. Fitting the cupboards etc was slightly complicated by the sloping walls of the van, so after I trimmed them to fit I had to reinforce the sandwich structure (basically a very thin ply over a batten frame). This is what I ended up with by Friday afternoon:


post-5223-0-45938600-1418504058_thumb.jpg


The table was trimmed to *just* fit between the seats, as a base for the bed. The rear support for the table is removable, to make it easy to use it as a van still. I kept the original ply lining of the van after insulating it, purely for reasons of cost and time.


post-5223-0-61779800-1418504069_thumb.jpg


Gas bottles installed in the cupboard under the sink, powering the fridge and hob. Water not actually plumbed in, but we didn't drink that much of it that weekend...


post-5223-0-45233900-1418504086_thumb.jpg


Very rough and ready, but suitable for purpose, and a basis for improving upon. It got us to the festival fine, and even (with the aid of snow chains) got us out of the sea of mud afterwards!

Link to comment
Share on other sites

Next job was to tidy up the interior a bit and sort out storage. We found that living in a small space for a week or more, it quickly got annoying constantly tripping over stuff!


So I built a wardrobe between the sink and the rear seat/bed unit. Inside this I put a fresh water tank (filled from the outside), to save on lugging the jerry can around.


post-5223-0-55163200-1418678158_thumb.jpg


post-5223-0-88667800-1418678031_thumb.jpg


I also put some extra insulation on the floor, as it felt quite cold around foot level, and put down some cheap laminate flooring in the main part, and an offcut of carpet in the rest of it. The ply lining I covered in textured wallpaper, and gave a lick of paint. For the ceiling I used white coated hardboard, which as you can see wasn't a great success as it quickly sagged. (More on that later).


I wasn't really happy with the gas bottles in the cupboard, as although it was vented, it wasn't sealed from the inside so a leak would have been dangerous. Probably the most expensive part of the build was an underslung gas tank, filled from a petrol station pump like you would an LPG fuelled car.


post-5223-0-41391100-1418678055_thumb.jpg


On the plus side, even paying road duty on the fuel, it works out cheaper than filling the 3.9 kg cylinders and the solenoid I had spare meant I could wire up a switch in the van to isolate it for ferries etc, and automatically cut the gas when the engine is started - ever seen the results of a fridge running on gas in a petrol station?


While I was underneath I fitted a tank for the waste...not a bad price considering the intricate shape around the chassis rails and handbrake rod. I bought it from a company specialising in parts for motorhome converters, and I'm guessing there's not much call for tanks for a 20 year old van!


post-5223-0-83477700-1418678042_thumb.jpg


Back to the roof, and I decided to cover it with tongue and groove cladding. We had a bit left over from a job on the house, so wasn't too much extra to buy and finish the job.


post-5223-0-96248200-1418679683_thumb.jpg


For general lighting I went for an LED strip all around the edge of the roof (more recently changed for a warmer tint than in the photo) operated from either the door switch, or an internal rocker. There's also several spotlights around, converted from 240 v operation to take G4 12 v bulbs. This avoids the premium you pay for anything campervan/caravan related.


More next time on the electrics, my favourite part!

Link to comment
Share on other sites

  • 2 weeks later...

I did a bit of browsing for leisure batteries, and worked out that the best value of Ah per £ were these 100 Ah batteries from a local supplier.


post-5223-0-57457200-1419714965_thumb.jpg


You could pay a lot more for proper deep cycle batteries such as Rolls or Elecsol, but my logic was that by getting 3 of them, I'd never deeply discharge the bank and hence it would last longer. Time will tell...


Lana bought me a Christmas present of a decent charger which I installed underneath the passenger seat:


post-5223-0-06906400-1419715171_thumb.jpg


This can keep the battery bank on float charge indefinitely, but has a 25 amp output if for example we needed to replenish charge in a hurry. It also has a separate output for the starter battery making it ideal for keeping everything topped up when we're not using the van. It came with a handy panel to mount remotely, which I mounted next to its isolator switch which takes its supply straight from the mains inlet on the side of the van.


post-5223-0-70675400-1419716755_thumb.jpg


The mains inlet also feeds a DPDT 240 volt relay (with a 12 volt coil) before a consumer unit plus RCD. You can just make it out the relay on the rear left of this photo:


post-5223-0-61960700-1419714996_thumb.jpg


This is operated by a switch on the front of the panel, which also turns on a large inverter - so I can switch the mains between external and battery power, at the same time as turning the inverter on so it's not continually draining the batteries. Alternator charging is through a hefty relay and thick cables, as 3 flat batteries would draw quite a bit of current, more than a 30 amp relay could cope with. The leisure batteries are only charged once the starter battery has been replenished.


There's also the option to switch to the starter battery in an emergency, which we've only had to do once... Also visible is the gauge for the LPG tank, and the wiring for its solenoid. I've wired it so that you can't have the gas turned on with the engine running, and a buzzer to warn you if you try. The solenoid will hold open with a little as 5 volts (using less than a quarter of the current) but needs more than this to actually open. So a simple circuit gives it a quick burst to open, then reduces the voltage to minimise battery drain.


All this electrickery is probably overkill, but it's something I enjoy planning and wiring up!

Link to comment
Share on other sites

Create an account or sign in to comment

You need to be a member in order to leave a comment

Create an account

Sign up for a new account in our community. It's easy!

Register a new account

Sign in

Already have an account? Sign in here.

Sign In Now
×
×
  • Create New...